
If you’re building an online store with WordPress and WooCommerce, one of the most important decisions you’ll make is how to accept payments.
And when it comes to payment gateways, Stripe is one of the most popular choices on the web. That too for good reason.
WooCommerce is a powerful and flexible eCommerce plugin for WordPress that lets you sell physical products, digital downloads, subscriptions, and more. But to actually get paid, you need to integrate a secure, reliable payment solution. And Stripe fits that bill perfectly.
Trusted by millions of businesses across 40+ countries, Stripe supports 135+ currencies, major credit cards, and digital wallets like Apple Pay and Google Pay. The best part is that setting it up with WooCommerce is quick, secure, and doesn’t require any third-party plugins because it’s built right in.
With this in mind, in this guide, we’ll walk you through:
- Why Stripe is a great choice for your WooCommerce store
- How to connect and configure Stripe step-by-step
- How to test payments and troubleshoot issues
- Best practices to keep your Stripe setup running smoothly
Table of Contents
Why Use Stripe for WooCommerce?
Stripe is one of the most trusted names in online payments, and it integrates seamlessly with WooCommerce. But beyond easy setup, there are plenty of reasons store owners and customers prefer Stripe.

For store owners, Stripe offers competitive, transparent fees with no hidden costs or monthly charges. It supports global payments, allowing you to sell internationally and accept payments in over 135 currencies. Stripe lets you cater to customers who prefer to use credit cards, Apple Pay, Google Pay, or other digital wallets to make payments.
Integrating Stripe with WooCommerce can also help you boost conversions and reduce cart abandonment. Shoppers trust Stripe’s branded checkout flow, and the payment process is fast and mobile-friendly. Plus, with built-in support in WooCommerce, you won’t need to install or manage an extra plugin. You can just connect your account and go.
Security is another big win. Stripe is PCI-compliant, uses advanced encryption, and offers features like Stripe Radar for fraud detection.
For customers, Stripe provides a smooth, convenient checkout experience. It’s fast, works on all devices, and remembers customer details for quicker future purchases. This makes it easy for them to buy, and even easier for you to sell.
How to Set Up Stripe for WooCommerce
Getting started with Stripe in WooCommerce is easier than you might think. In just a few steps, you can start accepting secure payments directly through your store – no coding required.
Here’s what you’ll need to get started:
- A WordPress website with WooCommerce installed and activated
- An active SSL certificate (required for secure transactions)
- A Stripe account (you can create one for free at stripe.com)
Let’s walk through the setup process step by step:
Step #1: Connect Your Stripe Account to WooCommerce
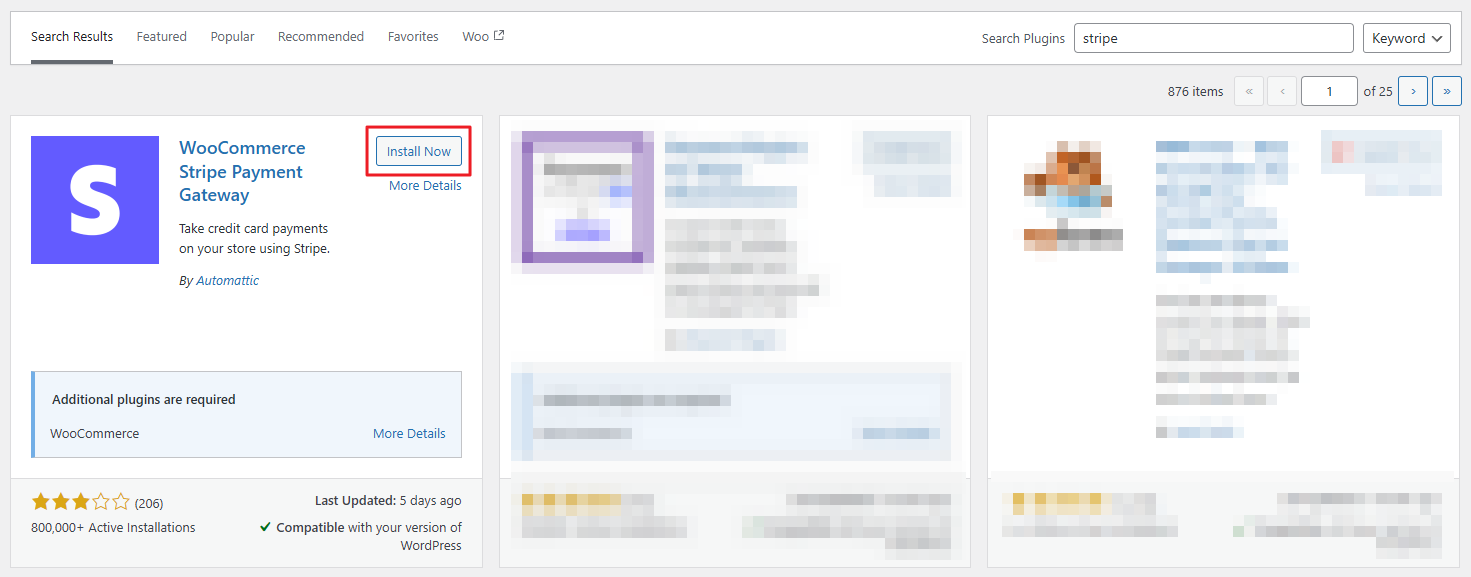
Install the free WooCommerce Stripe Payment Gateway plugin on your WordPress site if you haven’t done so already.
From your WordPress dashboard, navigate to WooCommerce → Settings, then click the Payments tab.
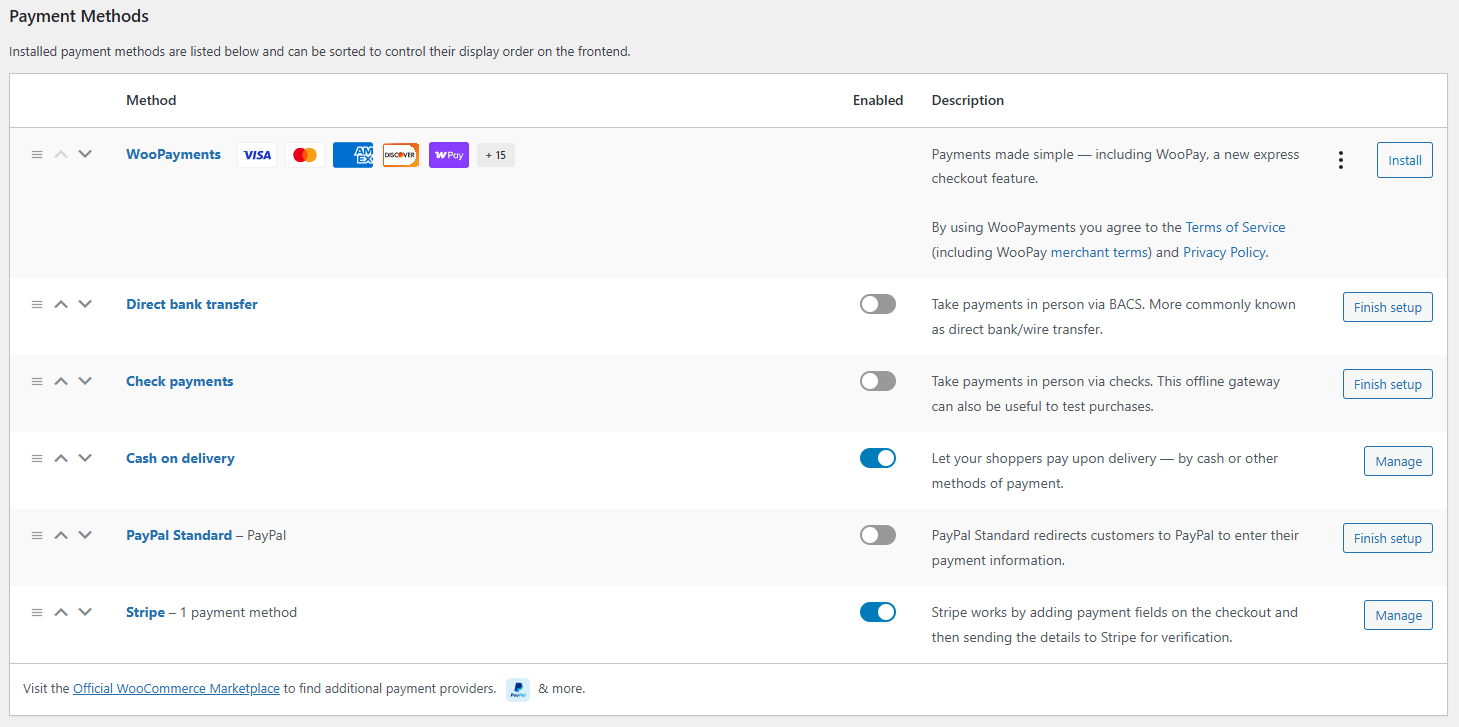
Look for Stripe in the list of available payment methods. Toggle it on, then click Manage.
On the Stripe settings page, you’ll see a Connect with Stripe button. Click it to begin the integration.
You’ll be redirected to Stripe. Log in with your credentials or create a new account if you don’t have one yet.
Next, follow the prompts to authorize WooCommerce to connect with your Stripe account. Once completed, you’ll be redirected back to your WordPress dashboard.
That’s it! Your WooCommerce store is now linked with your Stripe account.
Step #2: Configure Stripe Payment Settings
Now that your Stripe account is connected, it’s time to customize your Stripe settings in WooCommerce to match how you want to accept payments.
From your WordPress dashboard, navigate back to WooCommerce → Settings → Payments, then click Manage next to Stripe.
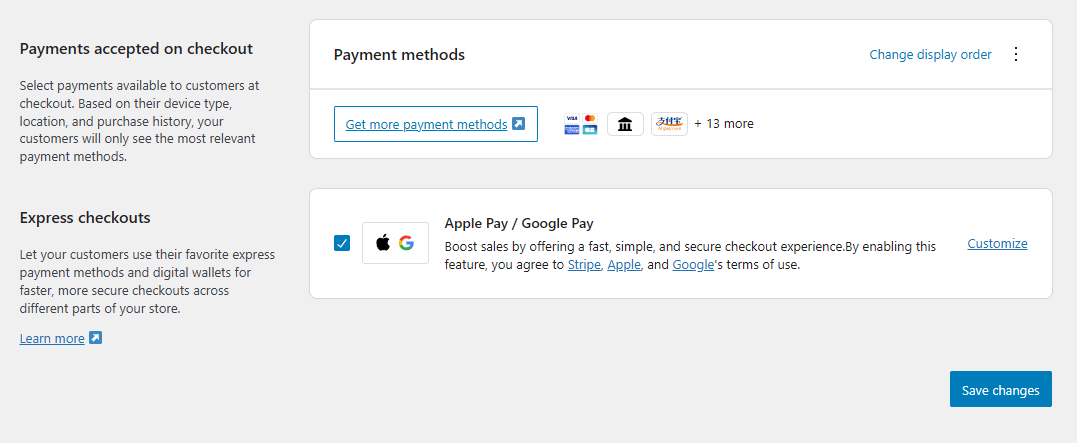
In the Payment Methods tab, you’ll see a Payments accepted on checkout option. You can see the payment methods that customers will see at checkout. You can change the display order, if you’d like.
You can also tick the Express checkouts box to enable Apple Pay and Google Pay. Click the Save changes button to proceed.
Next, head over to the Settings tab. If you want to simulate transactions before going live, check the Enable test mode box next to the General setting.

You’ll need test API keys from Stripe, which are available in your Stripe dashboard.
Once your settings are configured, click the Save changes button at the bottom of the page.
Step #3: Test Stripe Payments
Before accepting real payments, it’s a good idea to run a few test transactions. WooCommerce and Stripe make this easy with test mode.
If you haven’t done so already, go to WooCommerce → Settings → Payments → Stripe → Manage → Settings, and check the box labeled Enable Test Mode.
Head to your Stripe dashboard (dashboard.stripe.com), switch to Test Mode using the toggle at the top-right, and go to Developers → API Keys. Copy your Publishable key and Secret key, then paste them into the appropriate fields in WooCommerce.
After entering your keys, scroll down and click the Save changes button.
Once that’s done, go to your store, add a product to your cart, and proceed to checkout. Use one of Stripe’s test card numbers – like 4242 4242 4242 4242 – with any valid future expiration date, 3-digit CVC (e.g. 123), and ZIP code (e.g. 12345).
After completing checkout, go back to your Stripe dashboard and confirm that the test payment shows up.
Testing ensures everything works smoothly before you switch to live payments.
Troubleshooting Common Stripe Integration Issues
Even with a smooth setup, Stripe integration can occasionally run into minor issues. Here are some common issues WooCommerce store owners face and our best tips on how to fix them.
Common Stripe issue #1: Stripe not showing up at checkout
Issue: Stripe doesn’t appear as a payment option on the checkout page.
Solution: First, ensure Stripe is enabled under WooCommerce → Settings → Payments. Next, verify that your site has an active SSL certificate, which is required for Stripe to work. Also, check that your Stripe account is properly connected and verified.
Common Stripe issue #2: Payment declined error
Issue: Customers receive a generic “payment declined” message.
Solution: This usually happens if Stripe is in test mode and a real card is used or if the card details are incorrect. Double-check whether you’re in test or live mode, and confirm that your Stripe account is fully activated with all necessary business and bank details.
Common Stripe issue #3: Sync issues
Issue: Payments don’t appear in Stripe or orders don’t update in WooCommerce.
Solution: Make sure your webhooks are properly configured in your Stripe dashboard under Developers → Webhooks. Webhooks allow Stripe to communicate order status and payment updates back to your store.
If you’re still stuck, you can check WooCommerce and Stripe logs to pinpoint the problem quickly.
Stripe for WooCommerce Best Practices
To ensure a secure, reliable, and high-converting payment experience, it’s important to follow a few best practices when using Stripe with WooCommerce. These tips help you stay ahead of technical issues and fraud while giving your customers a smooth checkout process.
Stripe best practice #1: Keep both plugins updated
Always keep WooCommerce and the Stripe payment gateway plugin up to date. Updates often include critical security patches, bug fixes, and new features.
Stripe best practice #2: Monitor transactions regularly
Log in to your Stripe dashboard frequently to monitor transactions, issue refunds, and catch any unusual activity. WooCommerce also offers built-in order reports that can help you track payment performance over time.
Stripe best practice #3: Enable 3D Secure Payments and Stripe Radar
3D Secure adds an extra layer of security by requiring customers to verify their identity during checkout. It’s especially useful for reducing fraud on high-ticket purchases. You can also enable Stripe Radar (Stripe’s machine-learning fraud detection tool) to automatically flag or block suspicious activity.

By following these best practices, you ensure your store stays secure and your customers feel confident when making purchases.
Conclusion
Setting up Stripe for WooCommerce is a smart move for any store owner looking to offer fast, secure, and user-friendly payments. With just a few steps, you can start accepting credit cards, digital wallets, and even mobile payments while keeping checkout friction low.
We explained why Stripe is a great fit for WooCommerce, how to set it up, and what to do if things go wrong. You also learned key best practices to keep your payments running smoothly and securely.
Have any questions about connecting Stripe or optimizing your checkout? Drop them in the comments below!
FAQs
Q: Is Stripe free to use with WooCommerce?
A: Yes, the official Stripe extension for WooCommerce is free to install and use. However, Stripe charges a transaction fee which is typically 2.9% + 30¢ per successful card charge in the U.S. Fees may vary depending on your location and payment method.
Q: Can I accept Apple Pay and Google Pay with Stripe on WooCommerce?
A: Yes, Stripe supports Apple Pay and Google Pay out of the box. You can enable these options in the Stripe plugin settings under Payment Request Buttons for a faster, mobile-friendly checkout experience.
Q: Do I need a business license to use Stripe with WooCommerce?
A: Not necessarily. Stripe allows individuals and sole proprietors to create accounts. However, you may need to provide some personal and tax information depending on your country’s regulations.
Q: Can I offer subscription payments using Stripe and WooCommerce?
A: Yes, but you’ll need the WooCommerce Subscriptions plugin. Once installed, Stripe can handle recurring payments reliably and securely.
Q: Can I accept international payments with Stripe on WooCommerce?
A: Absolutely. Stripe supports payments in over 135 currencies and from customers worldwide, making it ideal for international stores.


A useful guide.
THE CUSTOMER EXPERIENCE:
I’d like to see what the customer sees during check out, e.g. any Stripe branding etc. Consequently:
1. Do you have any Blocksy examples – perhaps a Blocksy starter site running woocommerce – where Stripe is integrated? (allbeit without payment). Would like to see what the customer sees, e.g. any Stripe branding etc.
2. Do you have any Blocksy examples where Stripe is integrated WITHOUT woocmmerce? – i.e. on a product by product basis for sites with few products? (allbeit without payment).
HOW STRIPE WORKS:
1. Does Stripe accept American Express – and what is the rate?
2. Does Stripe accept corporate credit cards?
Hello Brian,
We don’t have a Blocksy starter site with Stripe integration out of the box. Our starter sites are intended purely for demo purposes, so they don’t come with payment gateways connected. Integrating Stripe requires a fully verified and validated WooCommerce store, which isn’t feasible in a demo environment.
However, once you set up a WooCommerce store using any of our starter sites, you can easily integrate Stripe using the official WooCommerce Stripe plugin. Stripe’s branding (like payment methods, Apple Pay buttons, etc.) will appear during checkout depending on your account setup and enabled features.
For more information I would suggest you to read the official documentation from here – https://woocommerce.com/document/stripe/