Are you looking for WooCommerce wishlist plugins for your eCommerce store? Wishlists are a key feature in most eCommerce stores—they help shoppers track favorite items, wait for deals, and share gift ideas.
It allows customers to:
- Save products that interest you but can’t be bought immediately.
- Share product preferences with friends and family as gift ideas.
- Wait for sale seasons to purchase products at discounts.
- Get personalized product recommendations based on wishlist items, etc.
And, it allows store owners to:
- Acquire data on popular wishlist items to create promotional strategies.
- Remind customers about their wishlist items to encourage return visits.
- Encourage social sharing, potentially attracting new customers.
- Create urgency with notifications when wishlist items are low in stock or on sale.
- Improve the overall user experience potentially boosting customer loyalty, etc.
Despite the many benefits of having wishlists, WooCommerce does not offer the feature out of the box. You need a third-party plugin to add wishlists to your store.
In this article, we have listed the best WooCommerce wishlist third-party plugins that will immediately add the wishlist feature to your store. We have also covered a guided tutorial on how to add a wishlist using one of the listed plugins, namely Blocksy Companion Pro.
Key Takeaways:
- WooCommerce lacks native wishlist functionality, but multiple third-party plugins fill this gap efficiently.
- Blocksy Companion Pro offers the most integrated wishlist experience, with variation support and header/button customization, but it’s paid.
- Premmerce and WishSuite provide free, beginner-friendly options, with admin insights and shortcode flexibility.
- MoreConvert and WPFactory bring advanced features like multiple wishlists, PDF export, and user analytics at low costs.
- Implementing a wishlist improves UX, increases return visits, and helps store owners personalize marketing strategies using wishlist data.
Let’s get started.
Table of Contents
The Top 5 WooCommerce Wishlist Plugins
1. Blocksy Companion Pro
The premium Blocksy version is designed to maximize your WooCommerce store’s conversion rates. It allows you to add wishlist buttons to your website’s header, shop archive and single product pages. You can also access advanced single product layouts, add quick view pop-ups to products on the shop archive page, display a sticky floating add-to-cart button on your product single page and let visitors search through the base of your entire product by SKU (stock-keeping unit), add off-canvas filters and a cart to mobile devices and much more.
Highlights
- Add a Wishlist button to single products as well as archive or Shop pages
- Allow logged-out store users to add their favorite products to a wishlist
- Allow specific variation products to be added to the wishlist
Price
The Blocksy Pro version is a plugin (Blocksy Companion Pro) that works in tandem with the Blocksy Theme.
The base Blocksy theme is free of cost. Blocksy Companion Pro has three premium plans. To use the Wishlist feature, you need the Business Plan which comes at an annual cost of $99. You can get a lifetime license for the Business Plan at $299.
It’s worth mentioning that there is a free Blocksy Companion plugin, which provides a range of useful features but does not offer the ability to add wishlists to your WooCommerce store.
Pros:
- Seamless integration with the Blocksy theme for a cohesive design.
- Highly customizable wishlist button placement (header, archive, and product pages).
- Allows guest users to add products to wishlists without logging in.
- Supports product variations within the wishlist.
- Offers additional WooCommerce-enhancing features like quick view pop-ups and sticky add-to-cart buttons.
- Regular updates and dedicated support.
Cons:
- Requires the Blocksy theme to function properly.
- Wishlist feature available only in the Business plan ($99/year).
- Might have a steeper learning curve for beginners unfamiliar with Blocksy.
2. Premmerce Wishlist for WooCommerce
Premmerce is a simple user-friendly WooCommerce wishlist.
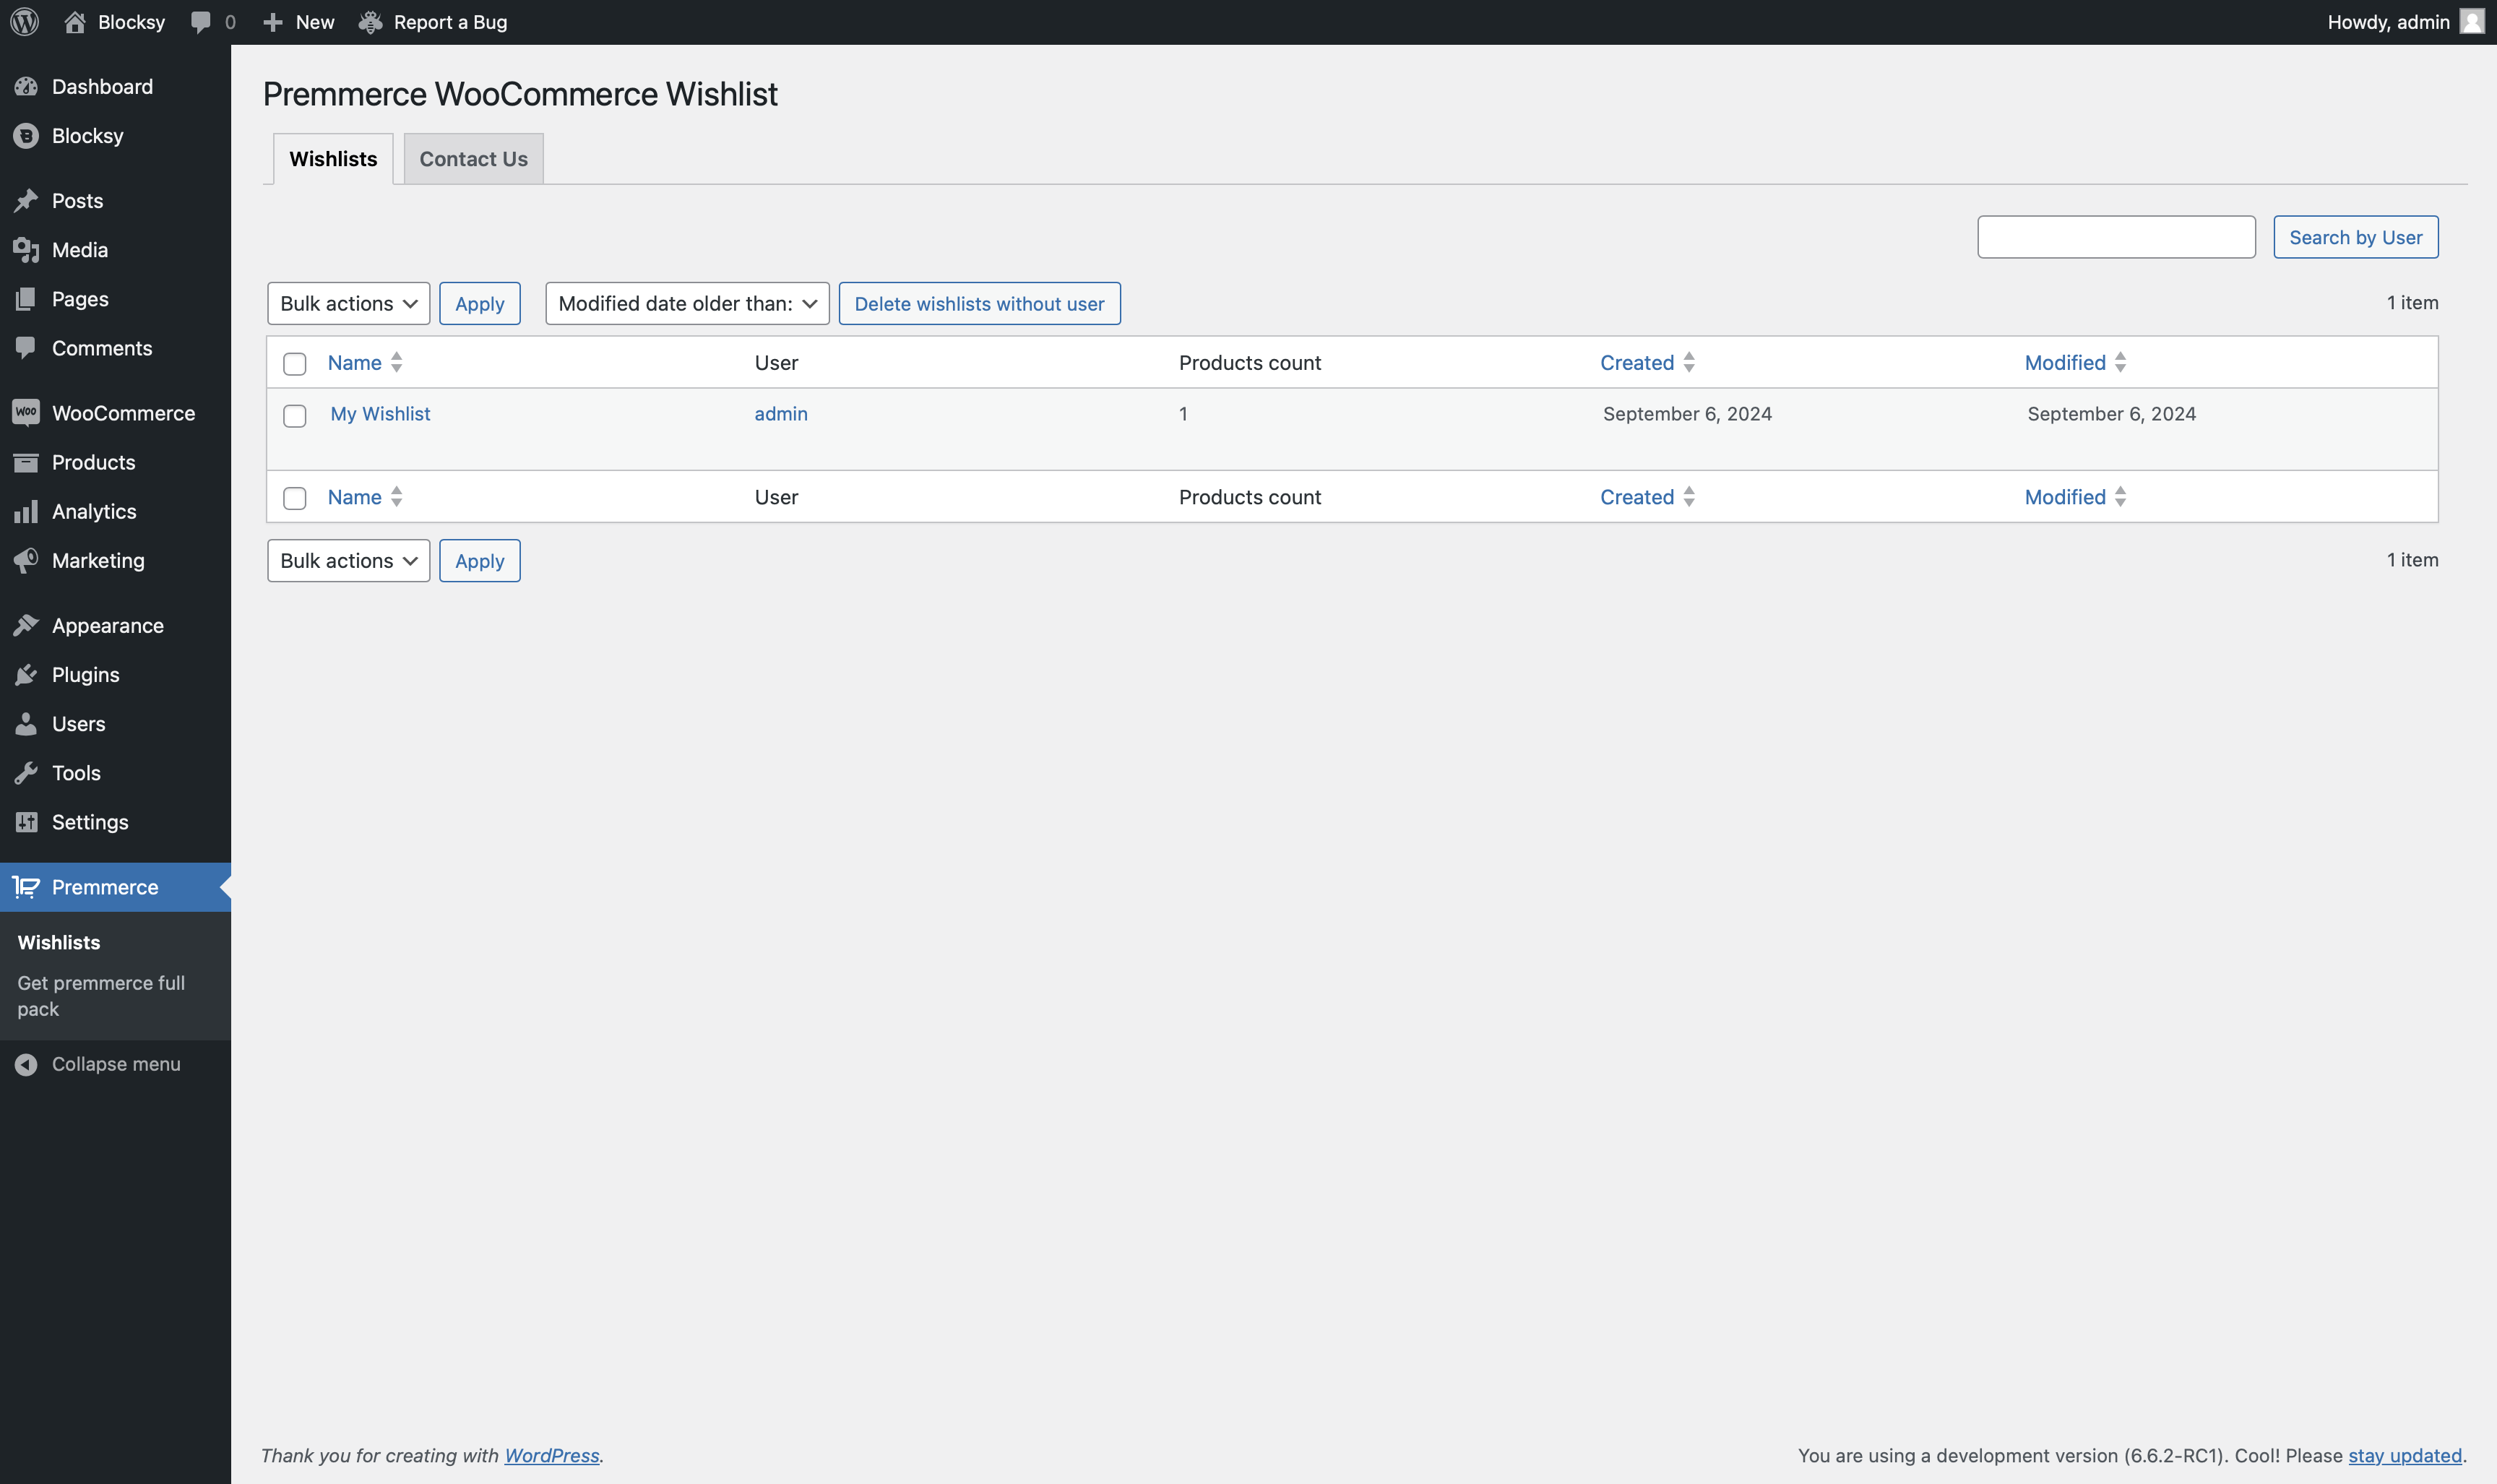
What sets it apart from other plugins is that it offers backend wishlist management where store owners admin can view wishlists created by users. This can help admins gain valuable insights into customer preferences. Admins can filter wishlists based on days, weeks, months, and years and leverage gathered information to create winning marketing strategies.
The plugin also adds wishlists to user profile pages, allowing insights into the most loyal customers and helping foster stronger customer relationships, enabling store owners to provide personalized recommendations, offer targeted promotions, and create tailored loyalty programs.
Highlights
- Remove wishlists abandoned by users with the click of a button
- Allow users to generate unique wishlist page URLs to share their wishlist with others
- Display user wishlist in a widget in various parts of the store
Price
Premmerce Wishlist is a free plugin.
Pros:
- Free plugin with powerful wishlist management features.
- Store admins can analyze customer wishlists to tailor marketing strategies.
- Customers can share wishlists via unique page URLs.
- Simple user interface that integrates seamlessly with WooCommerce.
- Ability to remove abandoned wishlists with a single click.
Cons:
- Limited customization options for wishlist button design.
- No advanced styling or additional UI elements.
- Lacks social sharing options compared to other plugins.
3. WishSuite

WishSuite adds a wishlist to your WooCommerce store immediately after activation of the plugin.
By default, it allows all users, including those who are logged out or don’t have an account with your store, to add products to their wishlist. Of course, you can limit the wishlist feature to only logged-in users or even delete abandoned wishlists by logged-out users from your WordPress dashboard.
You can add the wishlist button to single products and product archive pages, change the button location, text, and design, set the number of products to display on a wishlist page, and add a social sharing button, among other things.
Highlights
- The wishlist appears in a table format
- Add the wishlist button anywhere on a page using shortcodes
- Users are notified when products already exist in their wishlists
Price
WishSuite WooCommerce Wishlist is a free plugin.
Pros:
- Completely free and easy to set up, with a one-click activation.
- Wishlist button placement options (single product and archive pages).
- Allows logged-in and guest users to create wishlists.
- Provides shortcode support for adding wishlist buttons anywhere on the website.
- Table format display for wishlists enhances readability.
- Users receive notifications when a product is already in their wishlist.
Cons:
- Basic feature set compared to premium alternatives.
- Limited design and customization flexibility.
- No advanced analytics or marketing integrations.
4. MoreConvert WooCommerce Wishlist
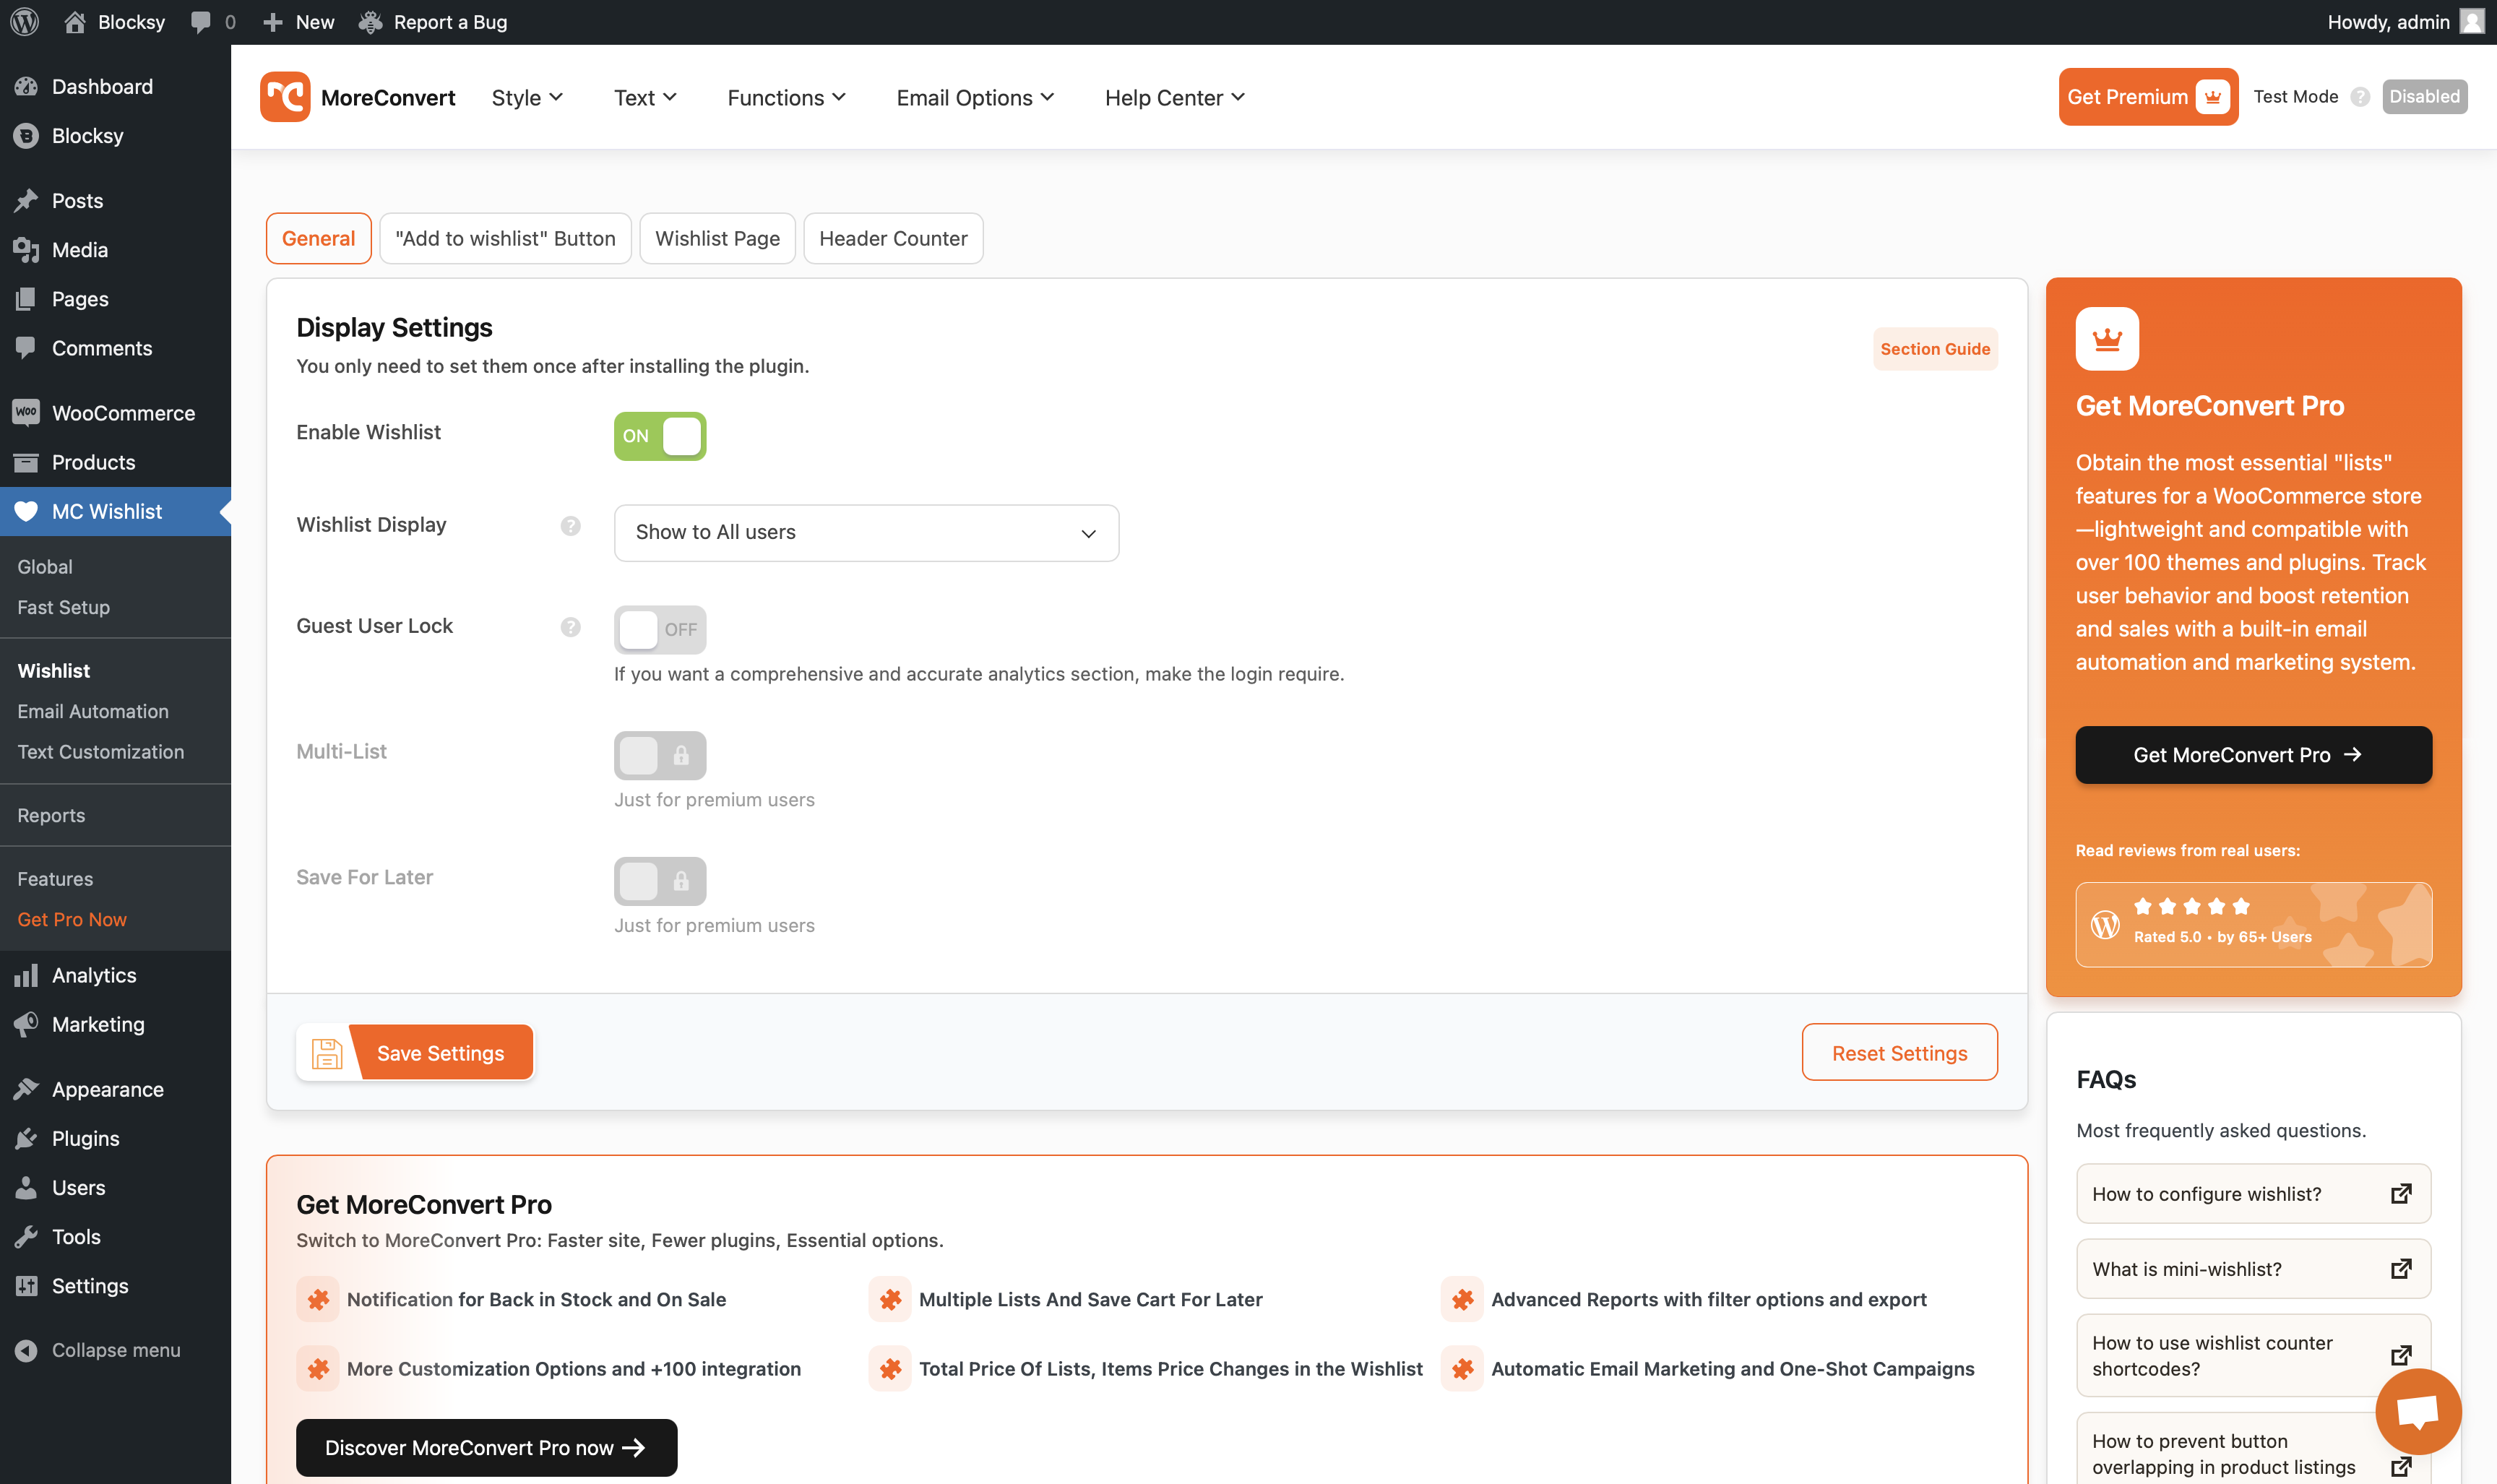
MoreConvert offers standard wishlist features like allowing all users or just logged-in users to access the wishlist pages and alert users when they are trying to add existing products, adding a wishlist icon to the site header, etc.
The plugin’s standout features include sending the users automatically to their wishlist page after adding a product, displaying a wishlist button for out-of-stock products, having complete control over the design of the wishlist page and wishlist button in single products and archive or Shop pages, creating custom wishlist page URL for logged in and logged out users, allowing users to create multiple wishlists and transferring products from one wishlist to another, among other things.
Highlights
- Notify users when products in their wishlist are back in stock
- Share the wishlist on social media, via a link, or export it as a PDF
- Highly customizable wishlist table page
Price
MoreConvert WooCommerce Wishlist is a freemium plugin. While most features are available in the free plugin, you need MoreConvert Pro to access premium features like multiple wishlists, transfer of products between wishlists, etc. The Pro plugin is available at an annual cost of $79 for a single website.
Pros:
- Allows customers to create multiple wishlists and transfer products between them.
- Offers social media sharing and wishlist export in PDF format.
- Sends automatic notifications when wishlist items are back in stock.
- Fully customizable wishlist page and button design.
- Includes analytics to help store owners track wishlist trends.
- Both free and premium versions available, offering flexibility in features.
Cons:
- Advanced features (like multiple wishlists) require the premium plan ($79/year).
- Initial setup can be a bit complex for non-technical users.
- Some users may find the dashboard overwhelming with too many options.
5. WPFactory Wishlist for WooCommerce
Unique features that the WPFactory Wishlist for WooCommerce plugins offer include the ability to create a new wishlist page or add the wishlist to the user’s My Account page, create multiple wishlists, auto remove products when they are purchased, design the wishlist page so that it reflects your store’s branding, export-import data of users & their wishlist products usage, customize the wishlist icon and button style, enlarge or pulsate the wishlist icon on mouse hover, etc.
You can allow customers to add personal notes to products they add to the wishlist, allow users to enable or disable alerts of products when they are back in stock, allow customers to send their wishlists through an email, allow users to export wishlist into CSV file, and much more.
Highlights
- Access to wishlist analytics based on users & products
- Admins have access to user wishlists
- Display the costs of all the products on the wishlist page
Pricing
WPFactory WooCommerce Wishlist is a freemium plugin. Most of the features are available in the free plugin to access features like wishlist export and priority support from the developers, you need the Pro plugin which costs $4.17 per month for a single site.
Pros:
- Allows multiple wishlists per user with easy product categorization.
- Advanced customization options for the wishlist button and icon.
- Enables email sharing of wishlists, helping with lead generation.
- Provides wishlist analytics and insights for store owners.
- Budget-friendly premium version with useful features at $4.17/month.
- Can auto-remove purchased wishlist items to keep lists updated.
Cons:
- The free version has limited functionalities.
- The user interface may not be as intuitive as other plugins.
- Lacks native social media sharing options.
How to Add a Wishlist to WooCommerce Store Using Blocksy Companion Pro
We will show you how to add a wishlist to your store using Blocksy Companion Pro – our highly popular and powerful WooCommerce plugin.
Blocksy Companion Pro works in tandem with the free Blocksy theme. You need the theme installed on your website for the plugin to work. It cannot function independently.
Quick Note: You may come across the free Blocksy Companion plugin in the WordPress repository. It provides a range of useful features but does not offer the ability to add wishlists to your WooCommerce store. You need the paid plugin, Blocksy Companion Pro, to do that.
We will show you the exact steps you need to install and activate the Blocksy Companion Pro plugin to add wishlists to your store.
Step 1: Install & Activate Blocksy Companion Pro
Purchase the plugin (specifically, the $99 Business Plan), and download it to your local computer from your Blocksy account or the welcome email.
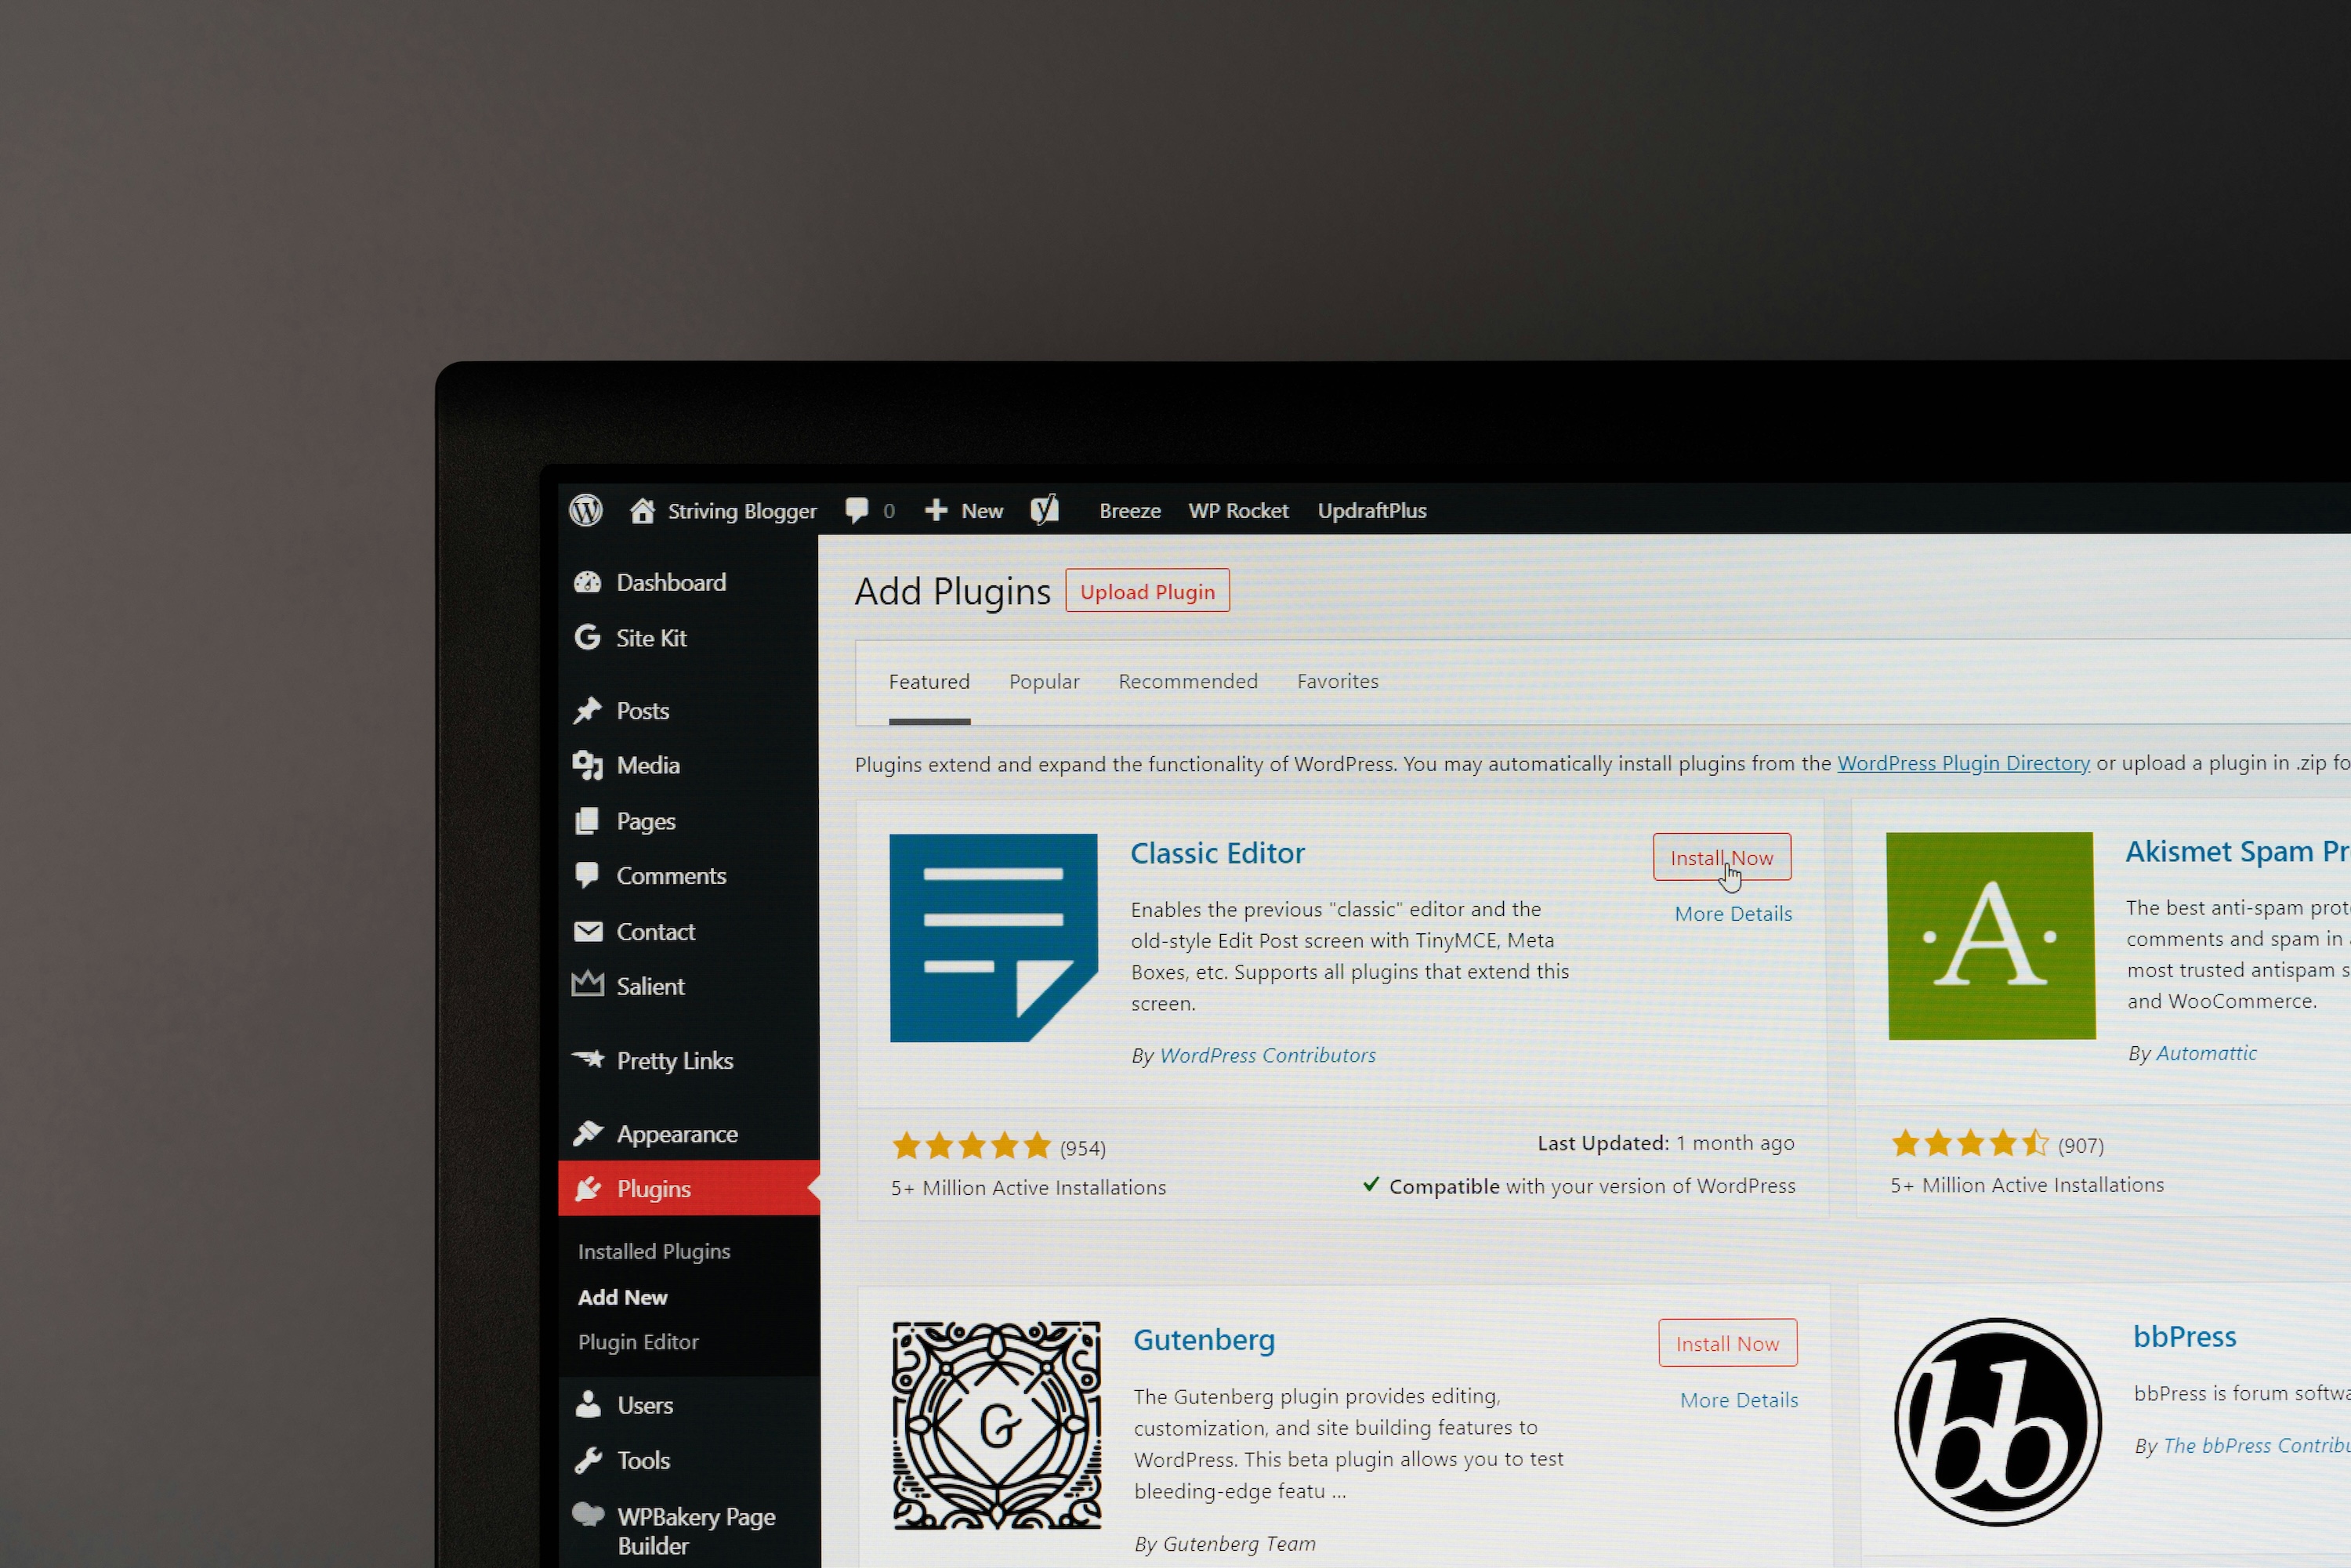
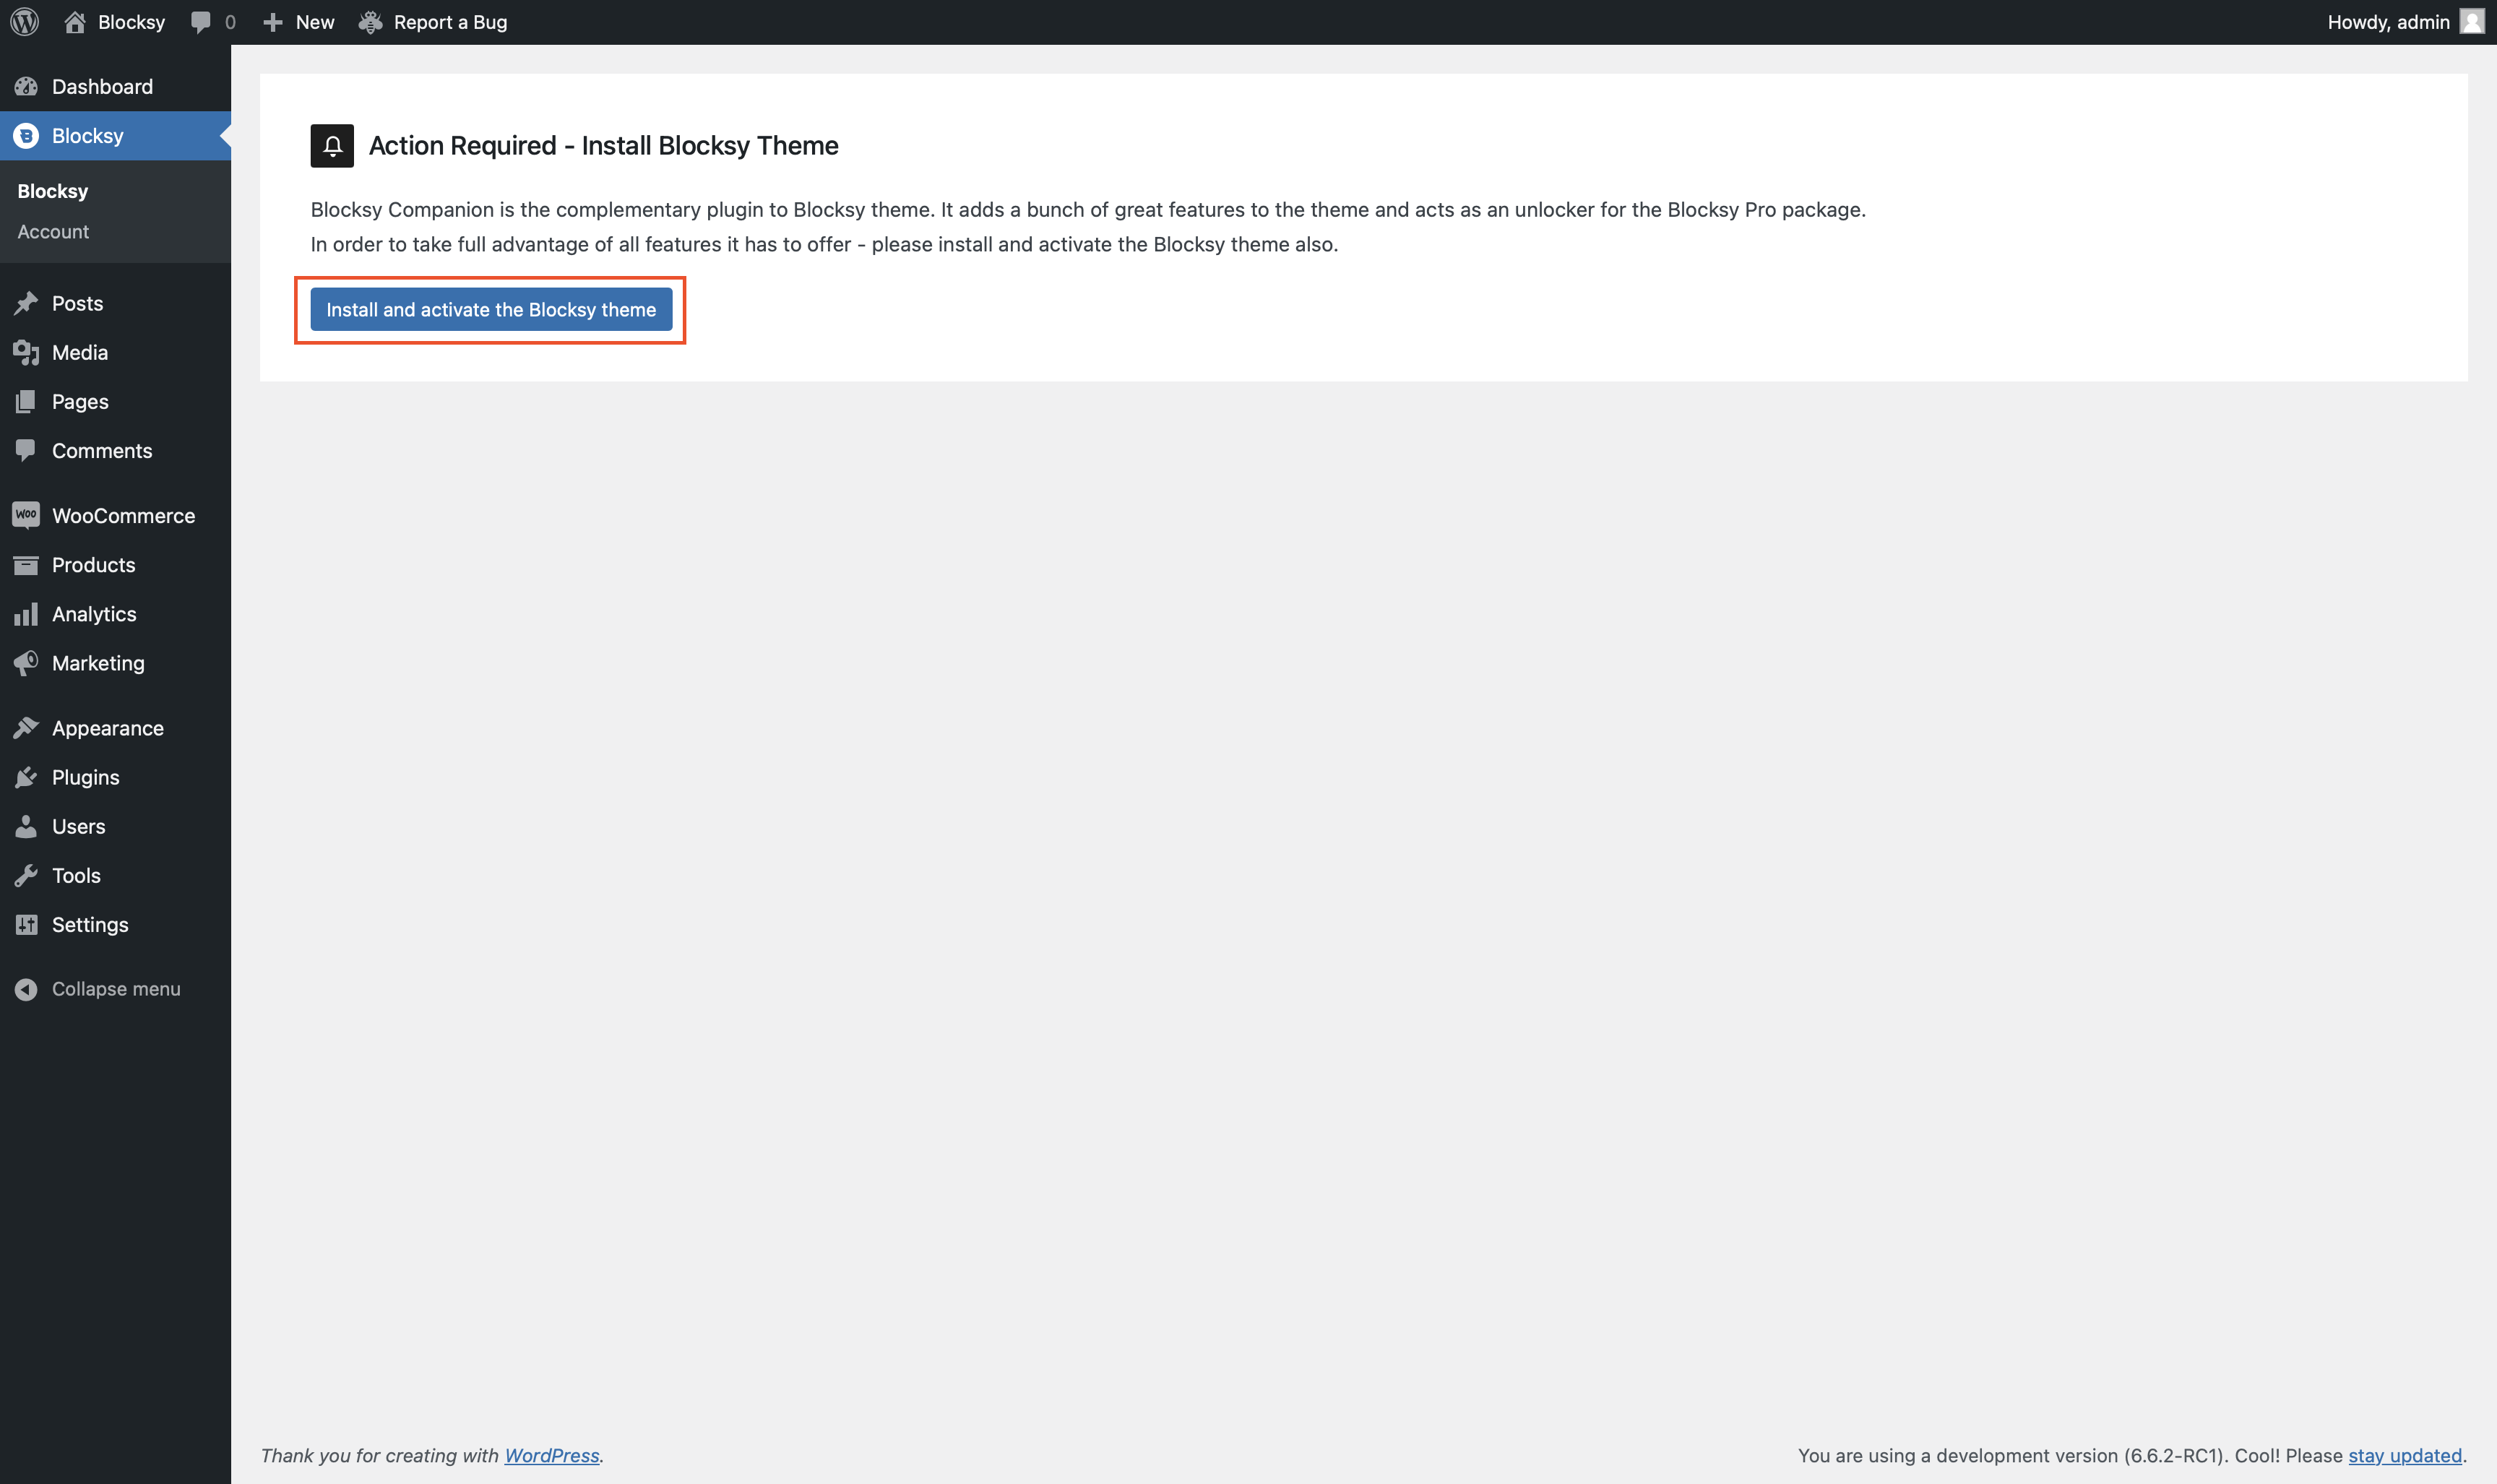
Then, install it in your WooCommerce store by going to Plugins → Installed Plugins → Add New Plugin → Upload Plugin. As soon as you install the plugin, you will be asked to install and activate the Blocksy theme.
We mentioned earlier how the Blocksy Companion Pro plugin cannot work independently without the theme so you need to install the theme in your store. Proceed by hitting the Install & Activate the Blocksy Theme button.
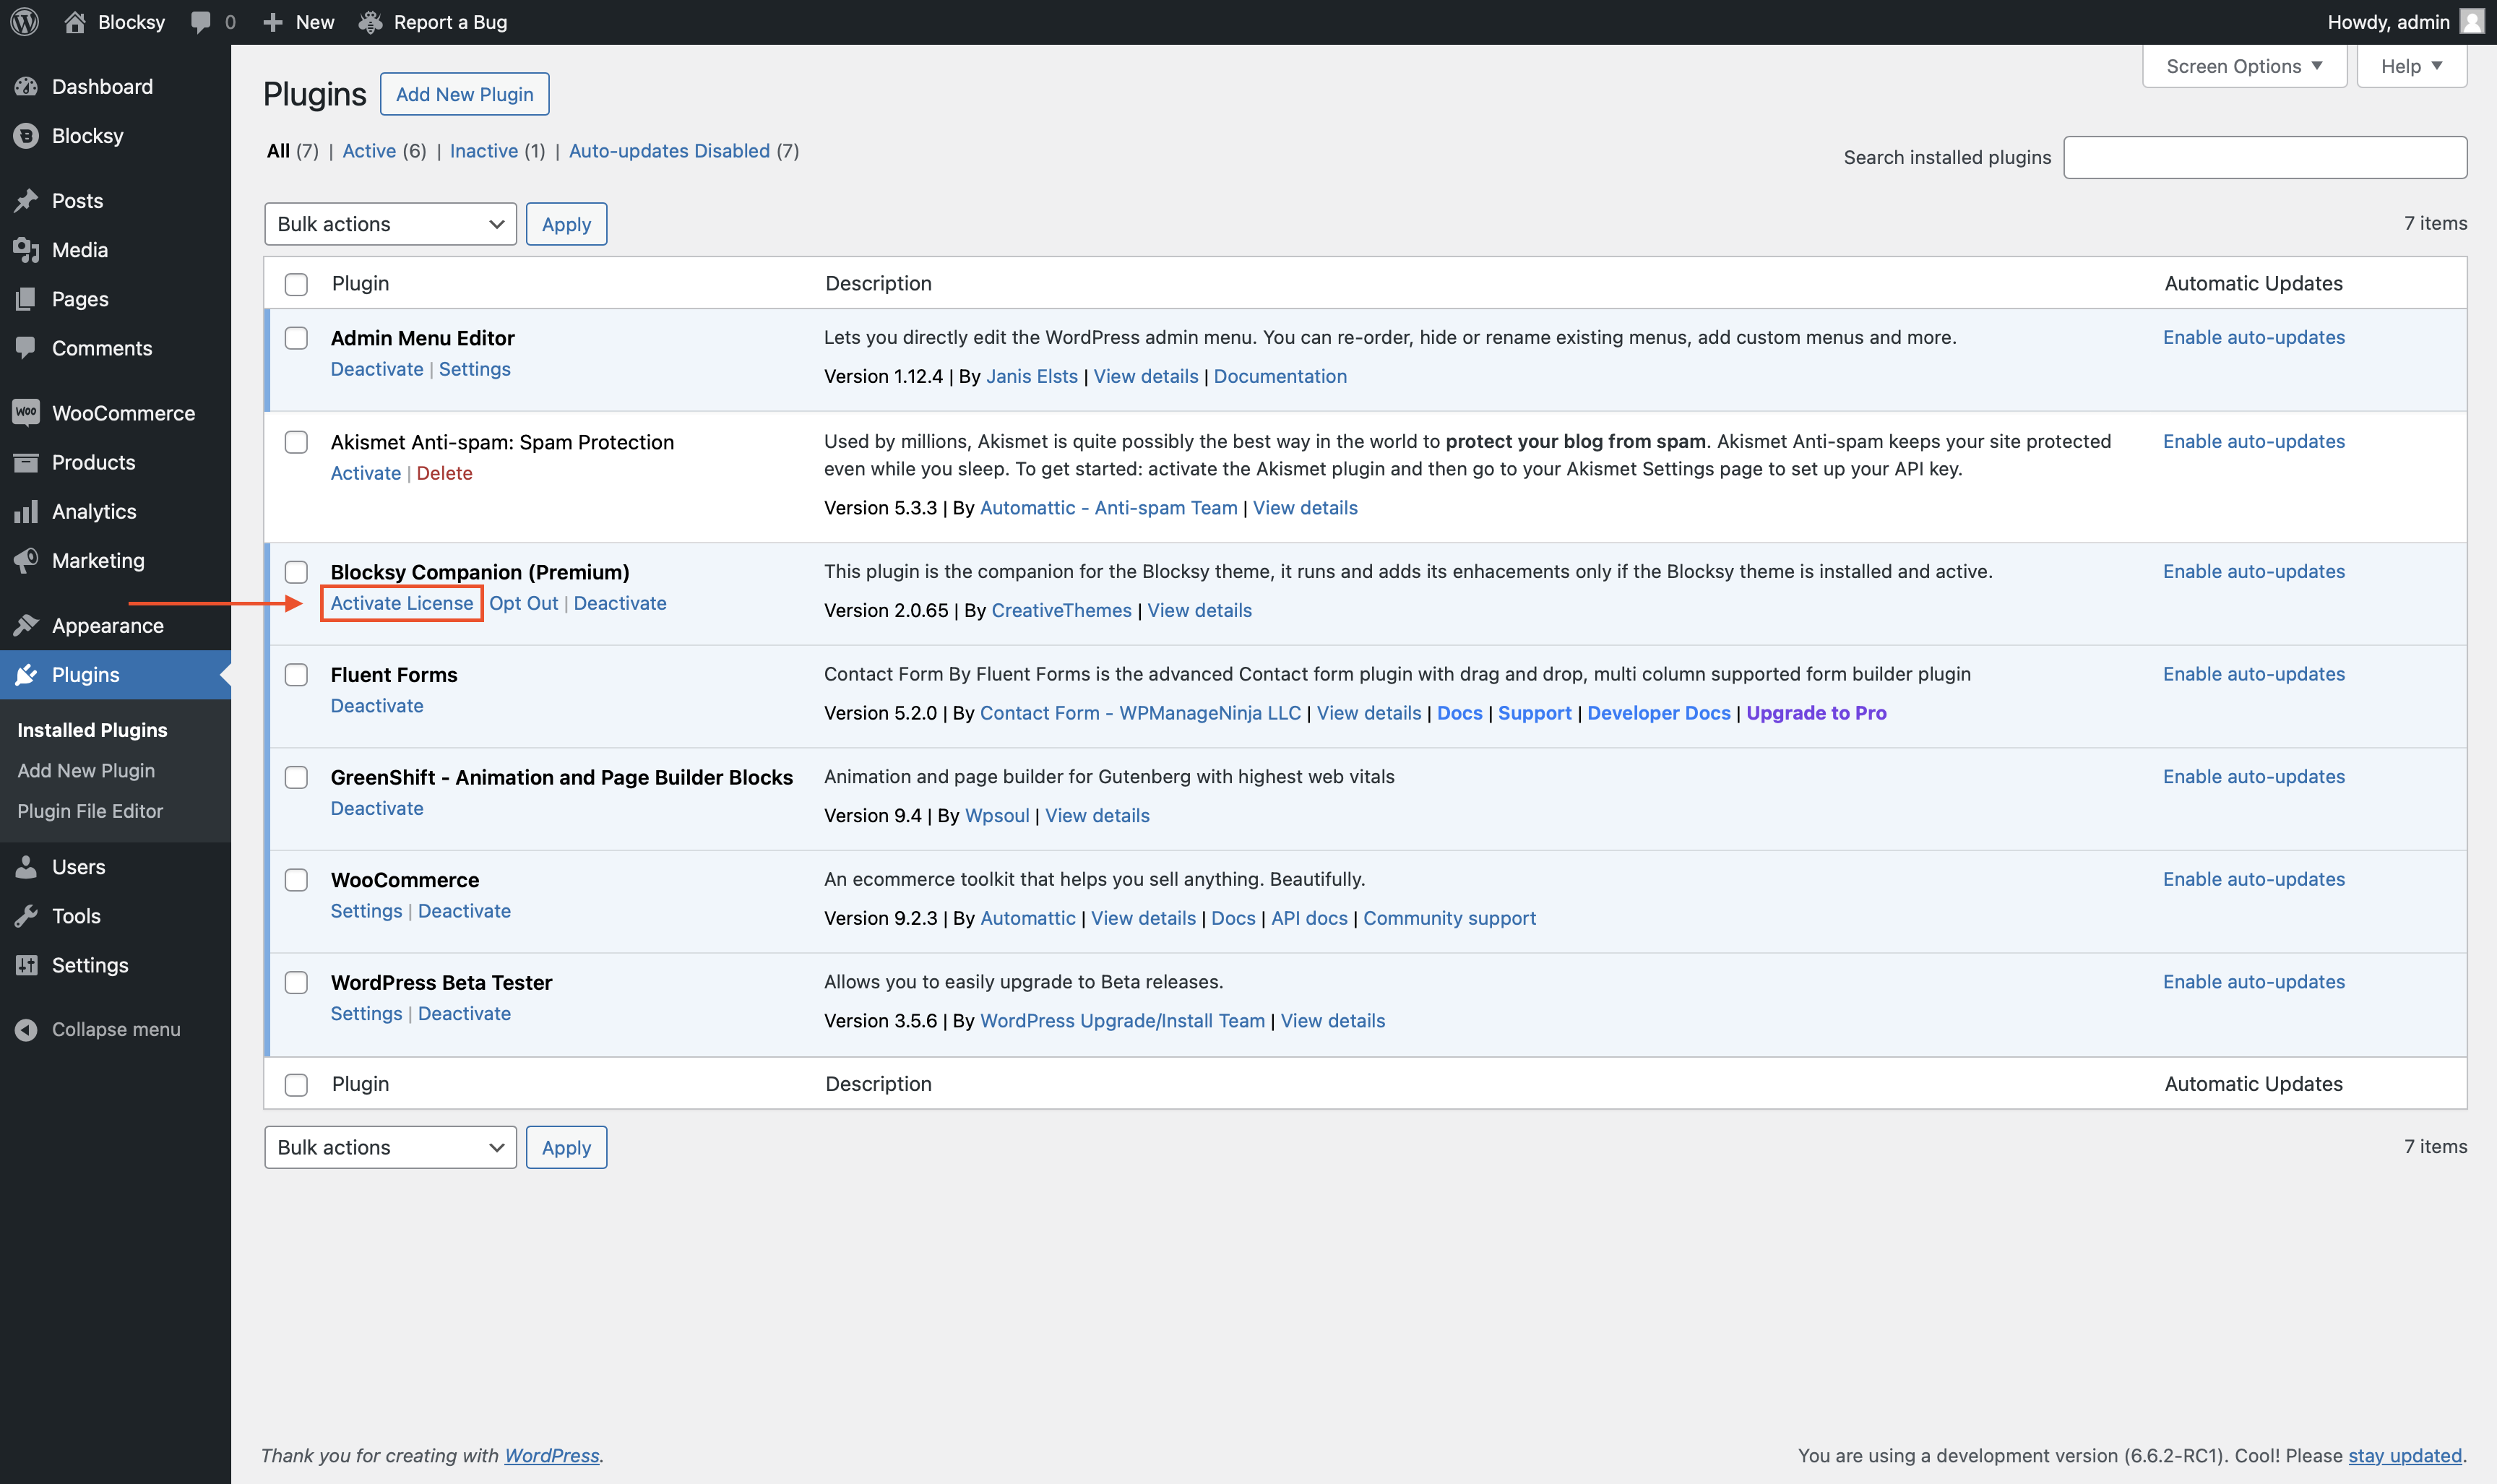
After installing both the plugin and the theme, you need to activate your Blocksy plugin license by going to Plugins → Installed Plugins → Blocksy Companion (Premium) → Add License.
Step 2: Enable the Wishlist Module
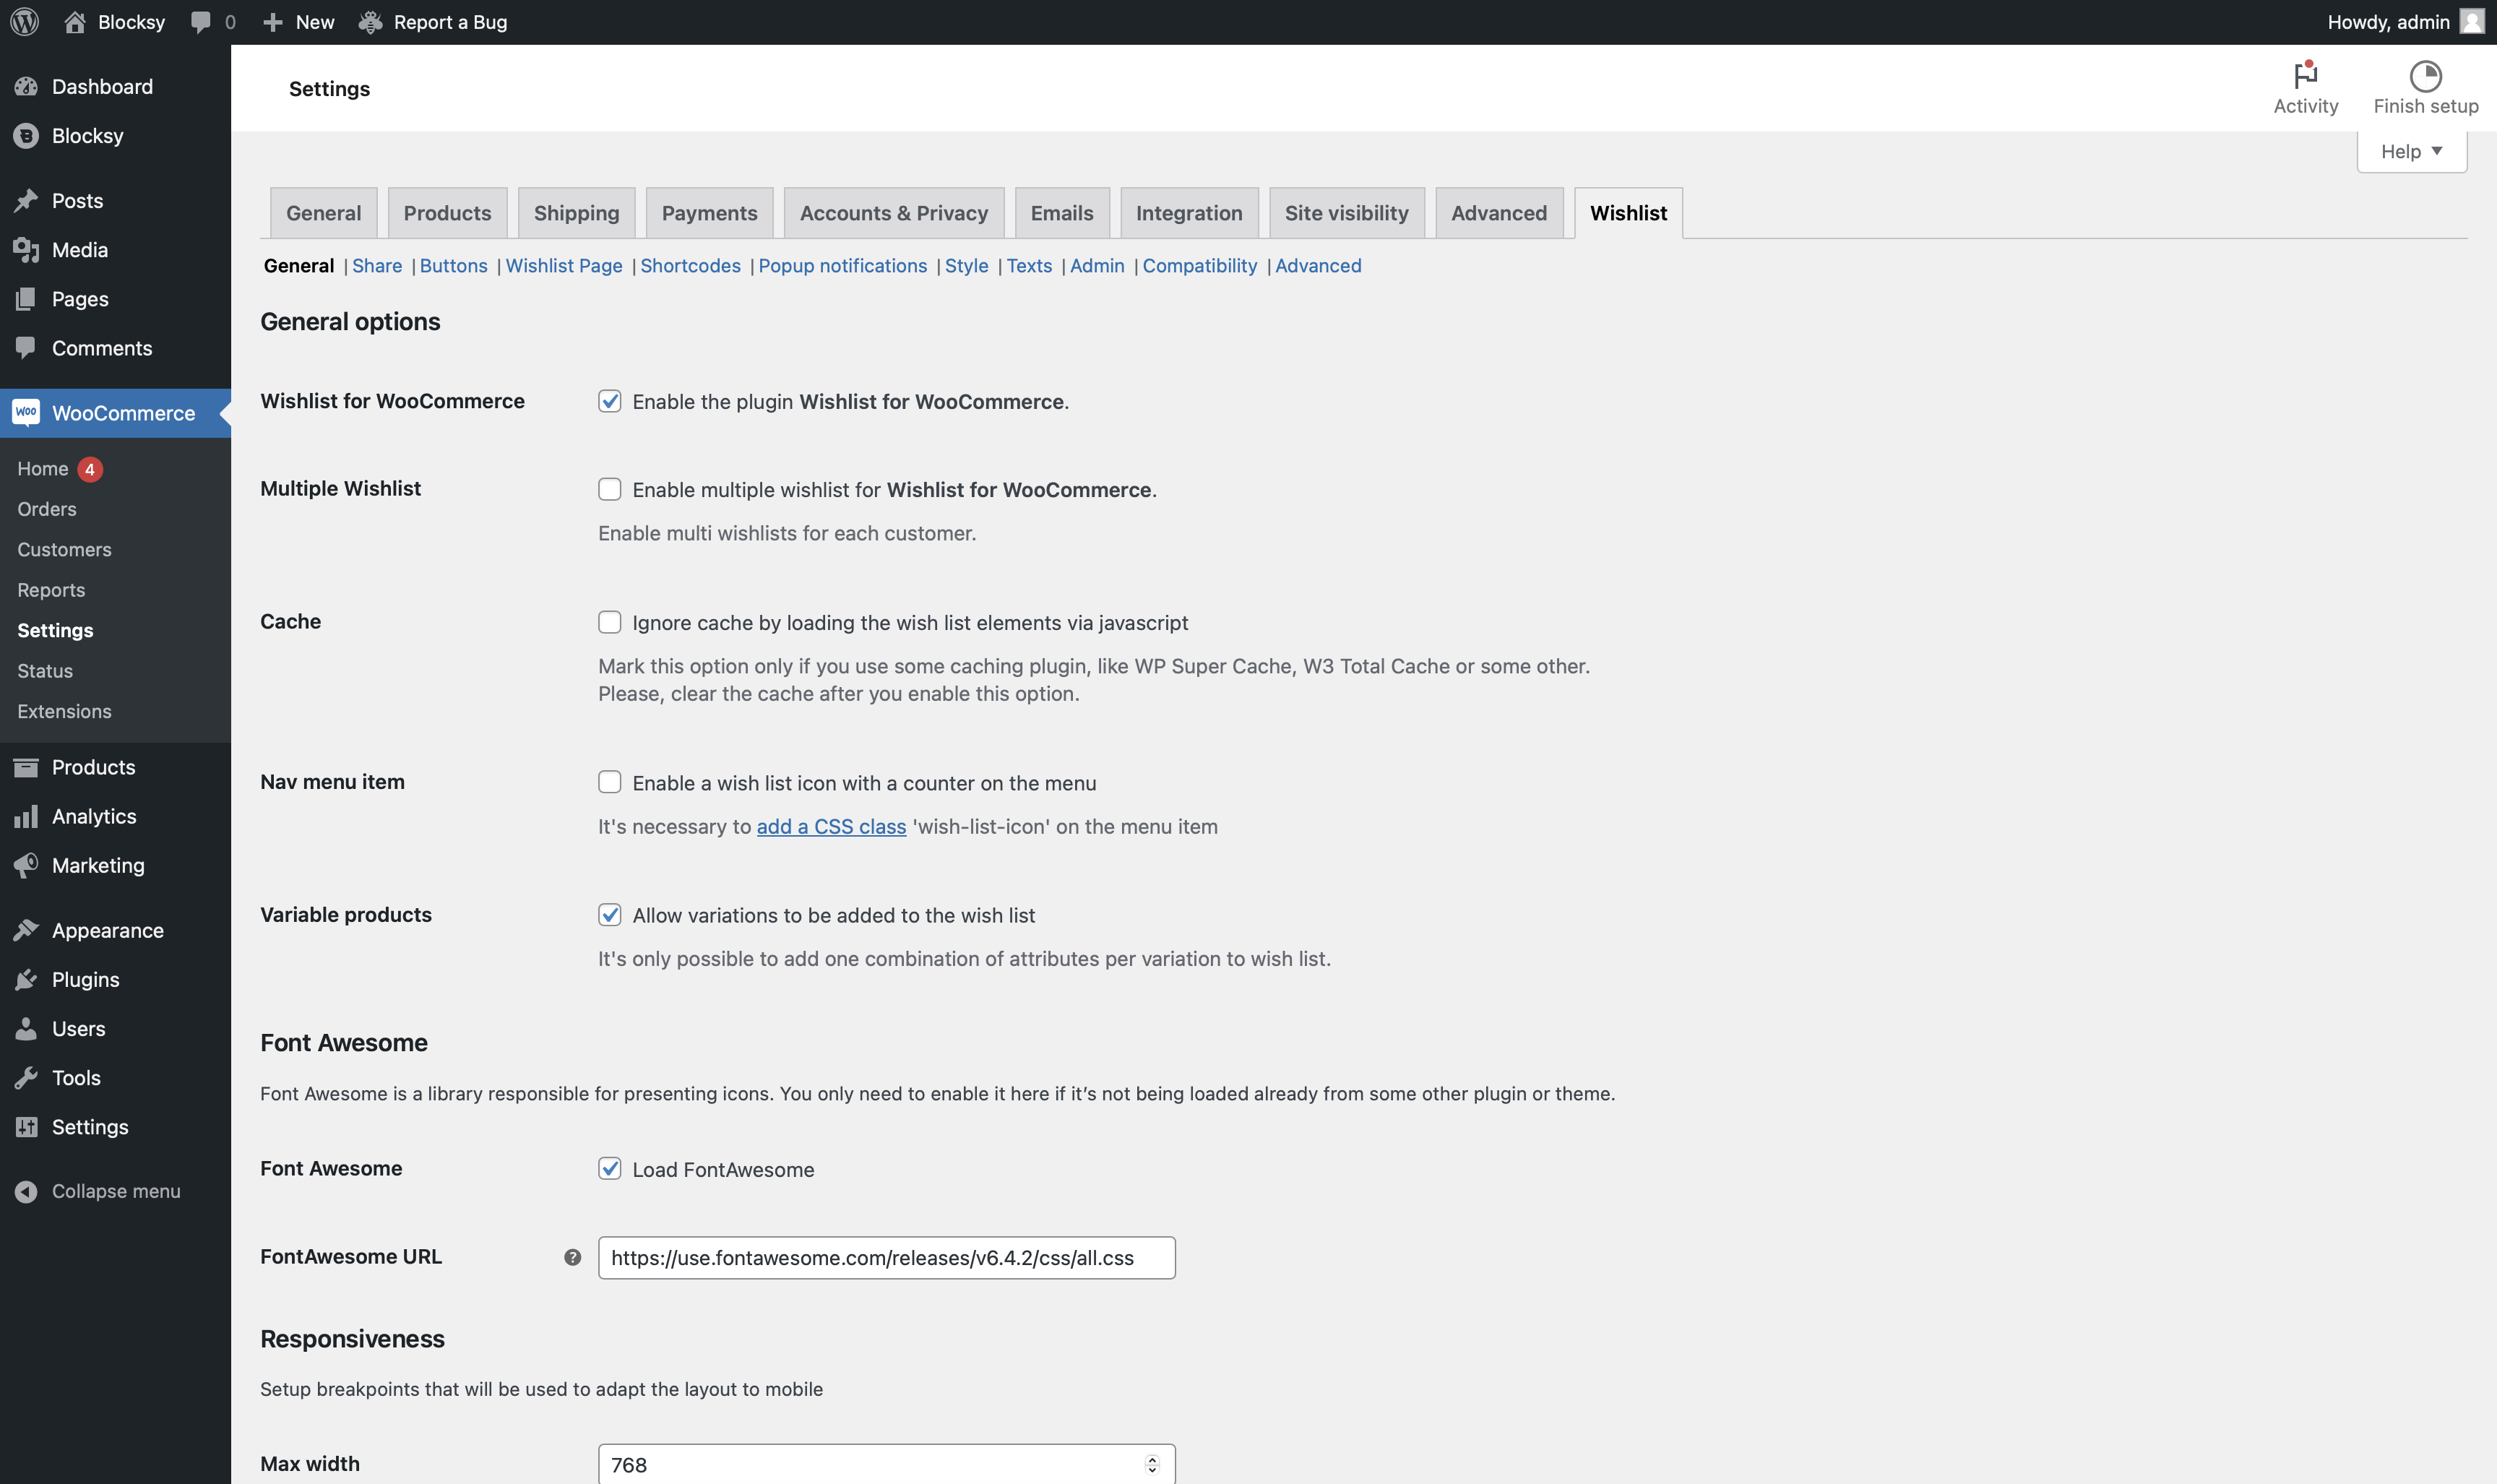
To create a WooCommerce wishlist, you need to enable the Blocksy wishlist module.
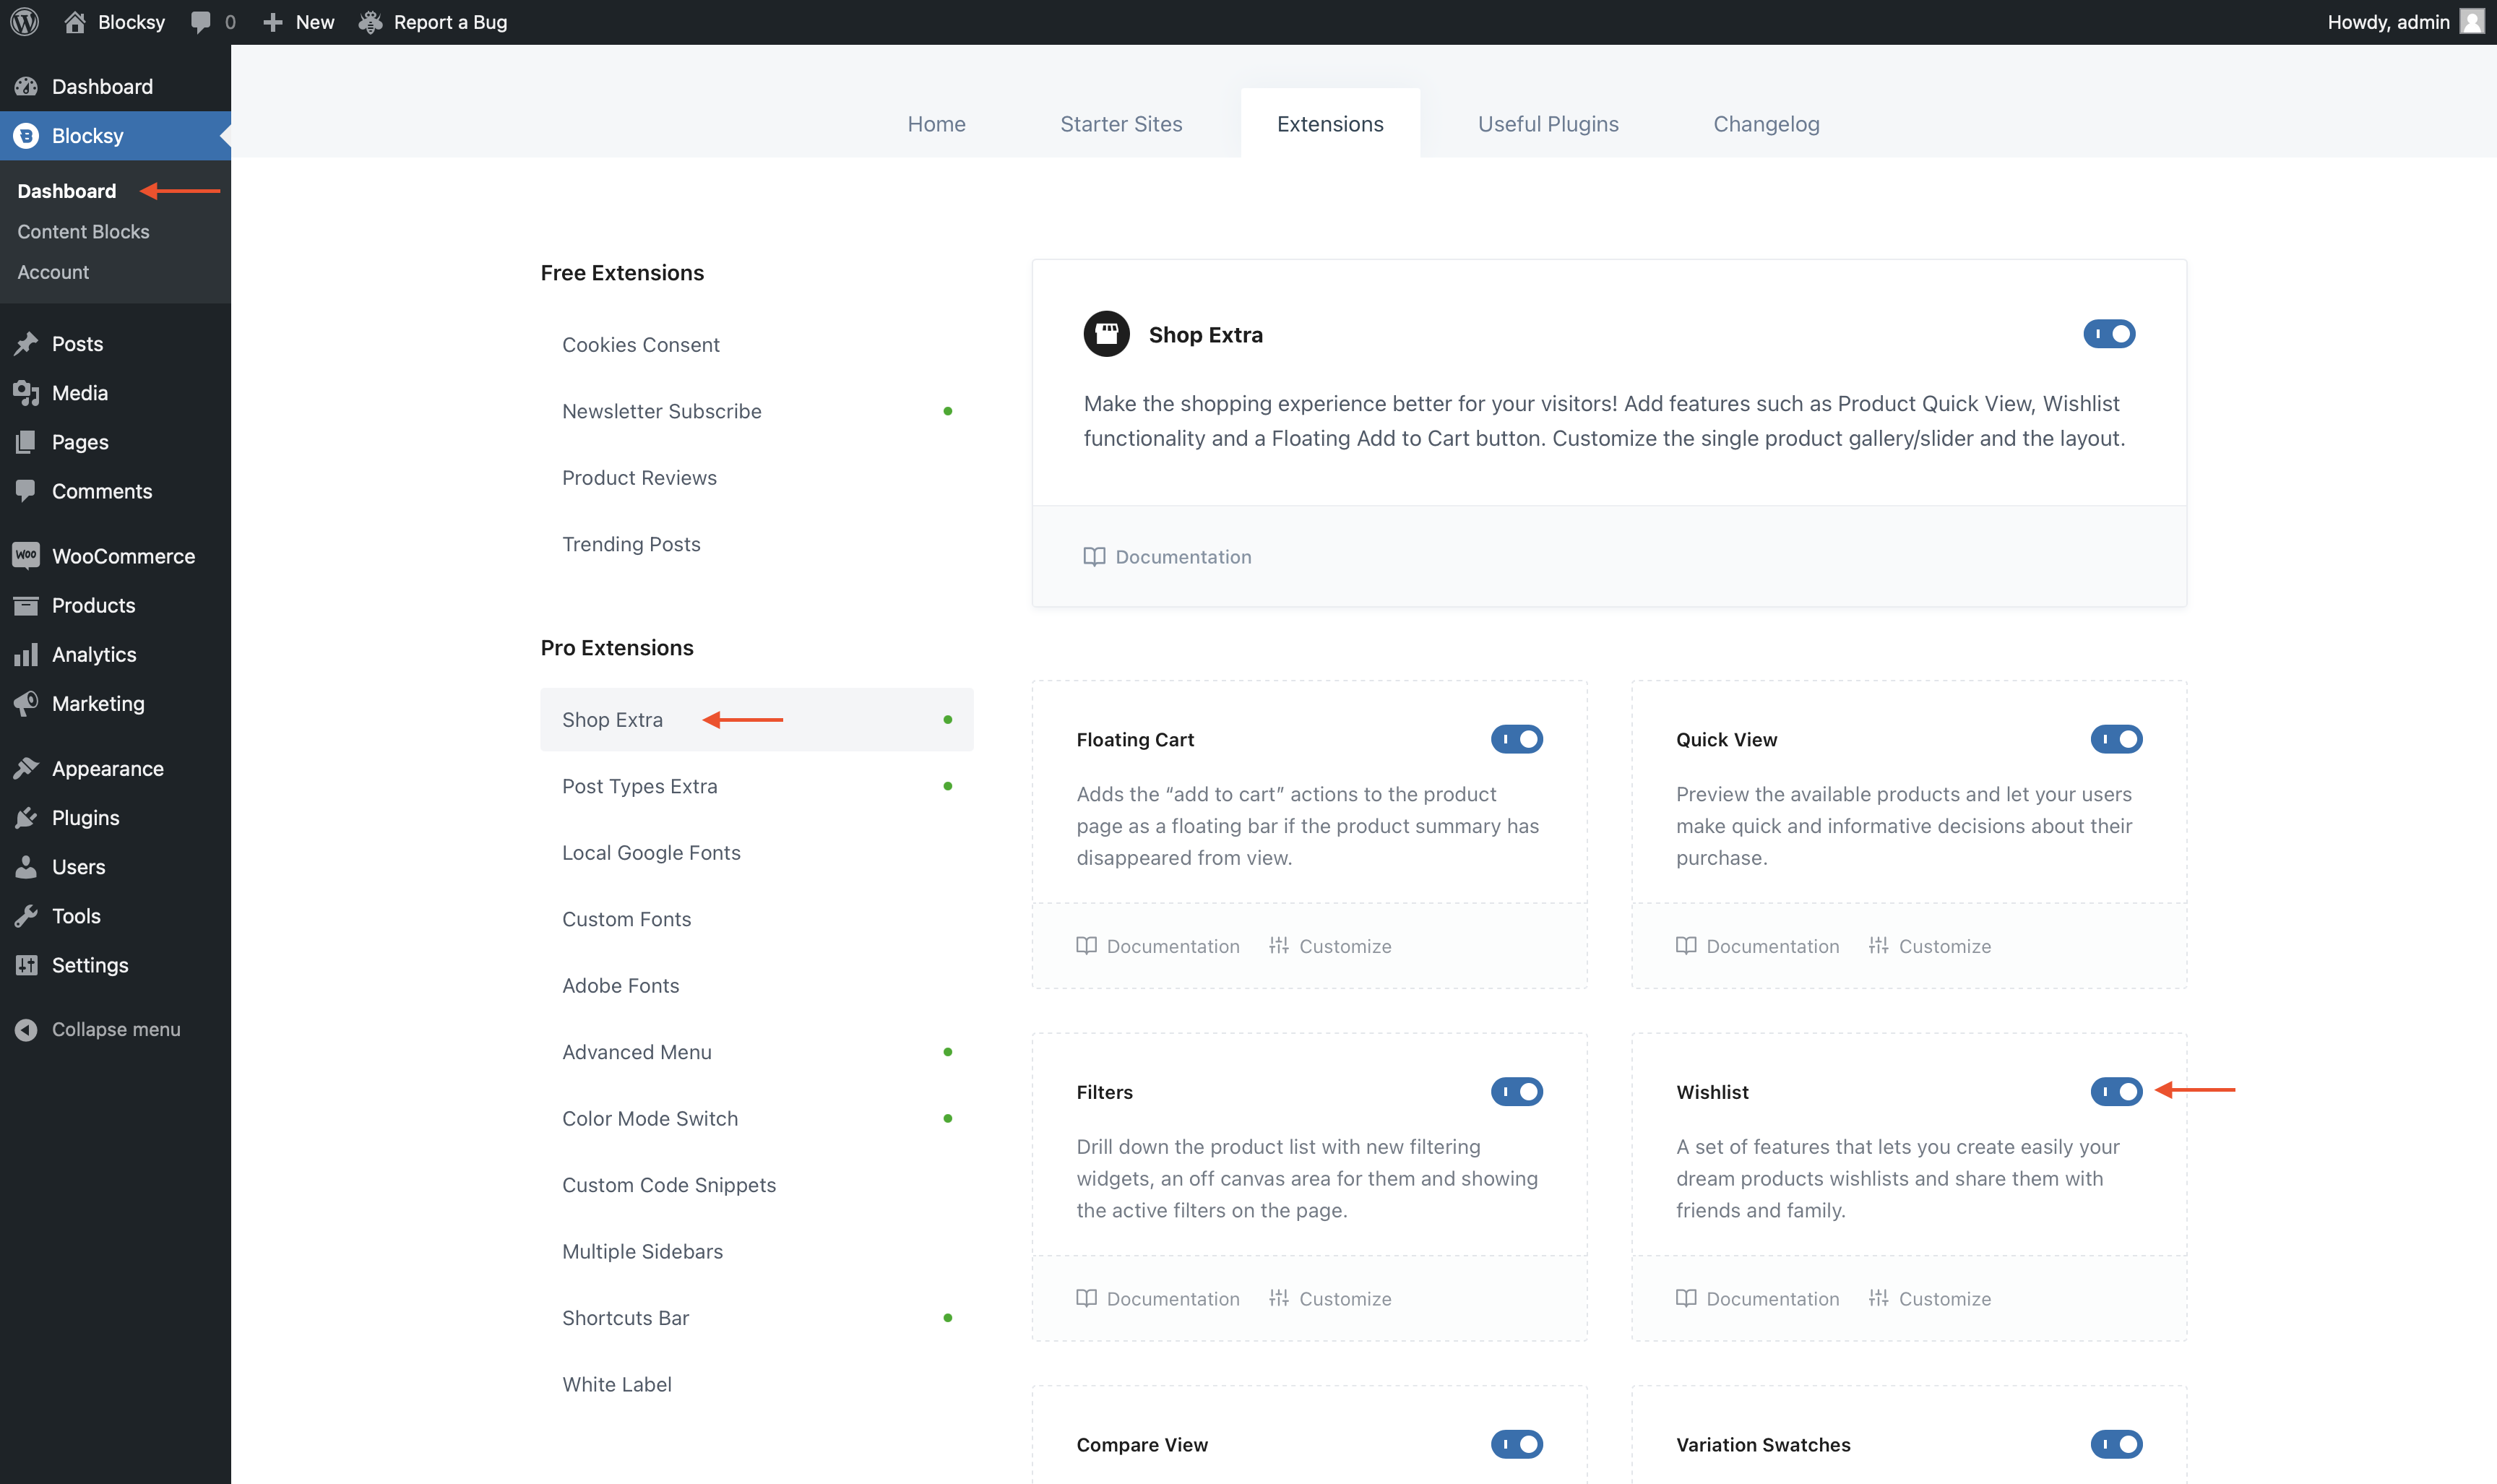
On your WordPress dashboard, go to Blocksy → Extensions → Shop Extra and toggle it on.
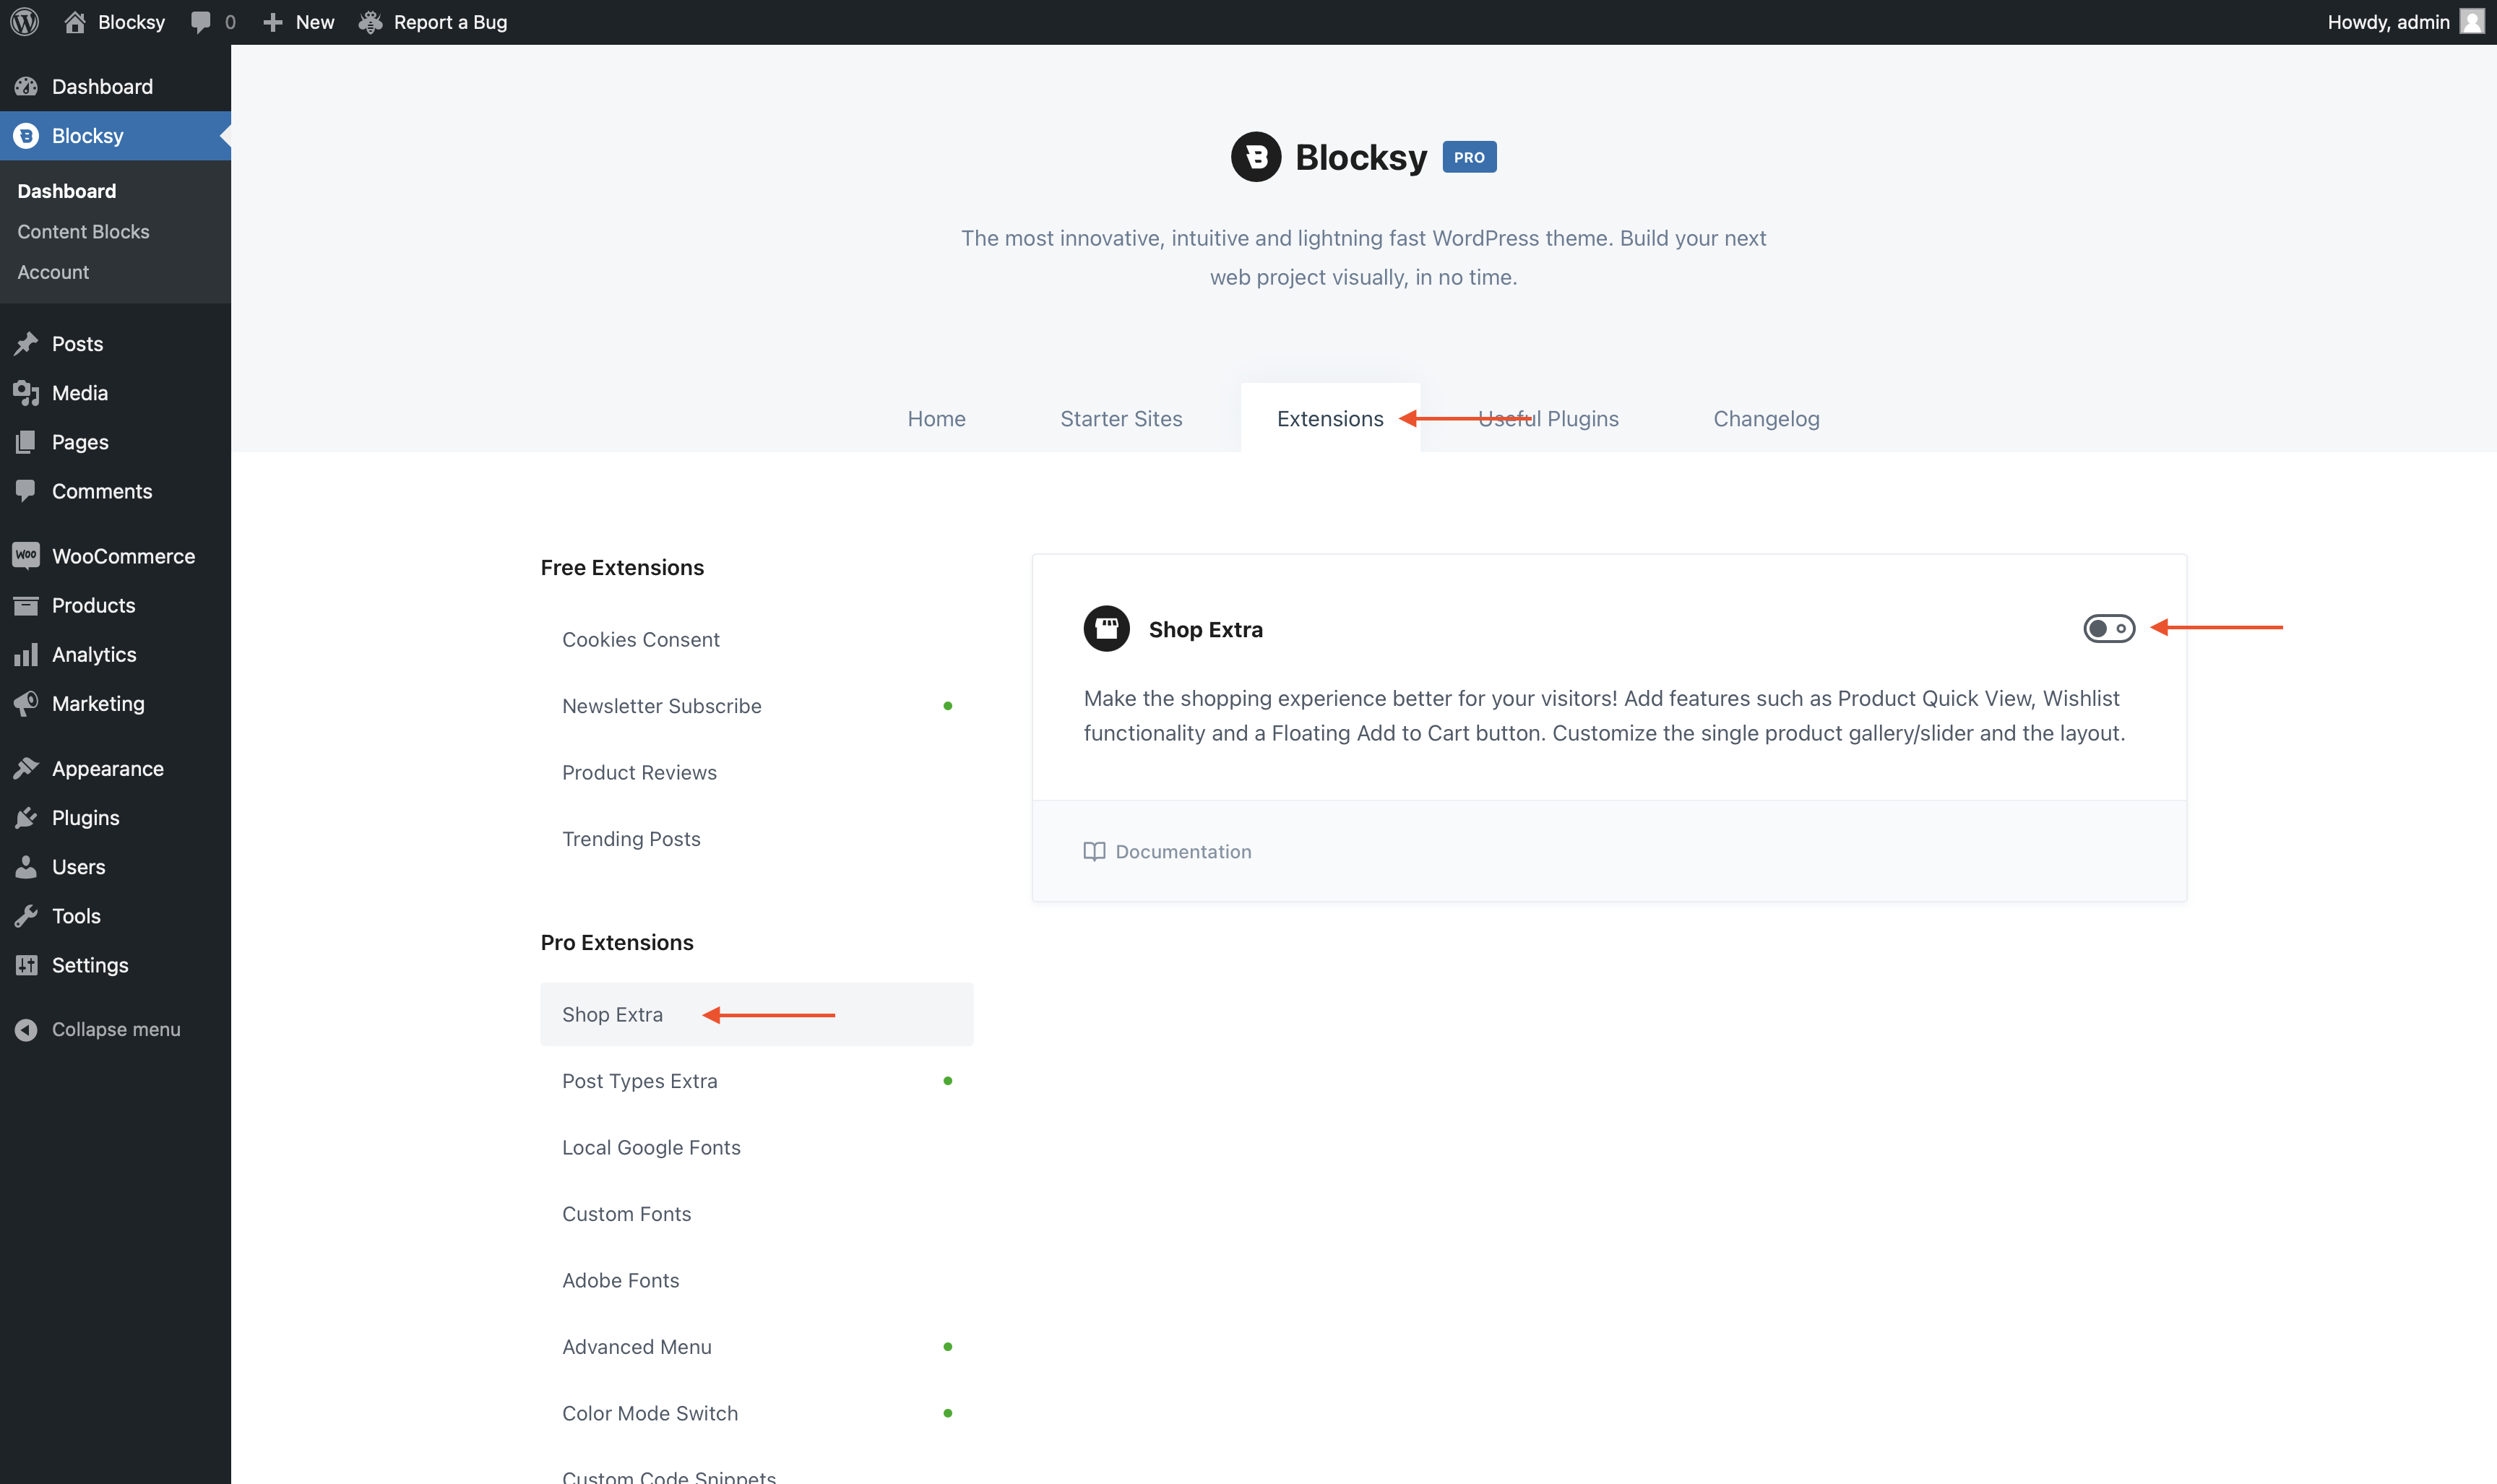
As soon as you toggle the Shop Extra module, the page will fill up with the available modules. Scroll down to the Wishlist module and toggle it on. You have now added a wishlist to your WooCommerce store.
Step 3: Add the Wishlist to Site Header
To offer easy access to the wishlist page, you can add it to your website’s header. Navigate to Appearance → Customize on your WordPress dashboard.

You will be immediately taken to the WordPress Customizer. There you need to navigate to General Options → Header → Elements and scroll down to the Wishlist option. Grab the Wishlist option and add it to your website’s header element.
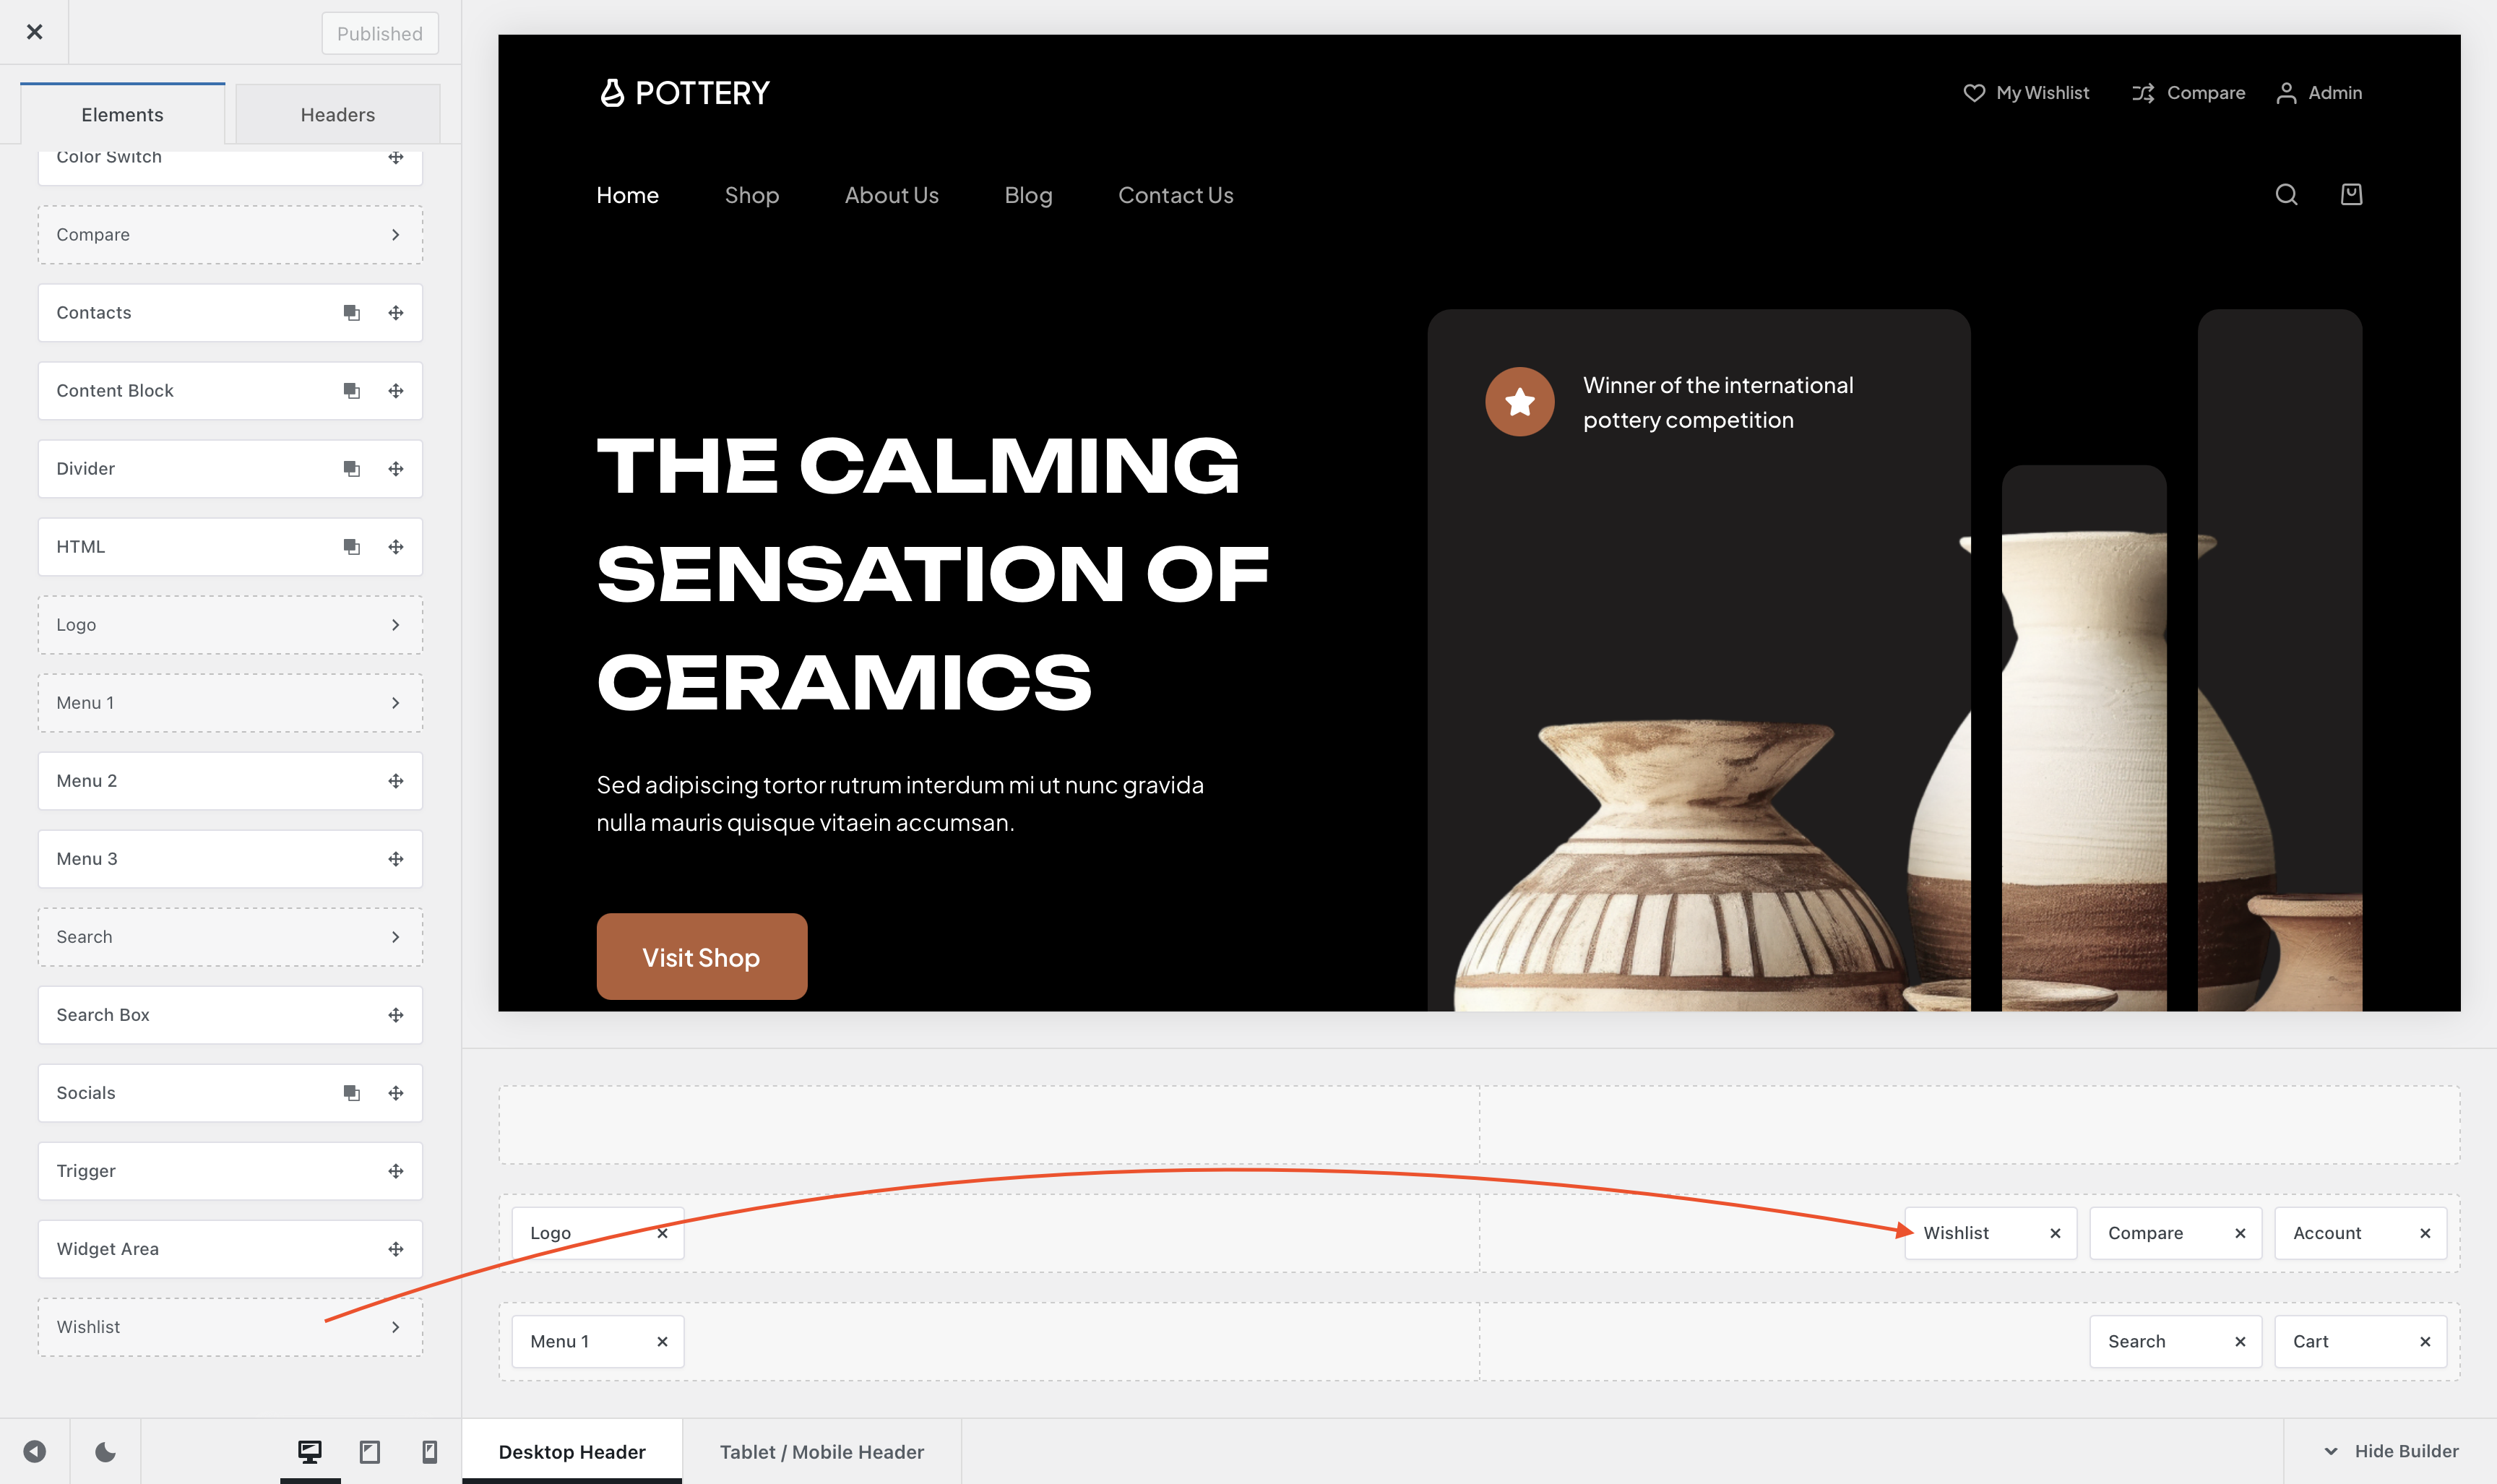
Immediately, the wishlist button/icon will appear on your website’s header. As you can see in the image below, the wishlist icon is barely visible. We will show you how to customize its design in step 5.
From now on, be sure to hit the blue Publish button located on top to save any modifications you make in the Customizer.
Step 4: How to Add Wishlist Button in WooCommerce on Single Product & Archive Pages
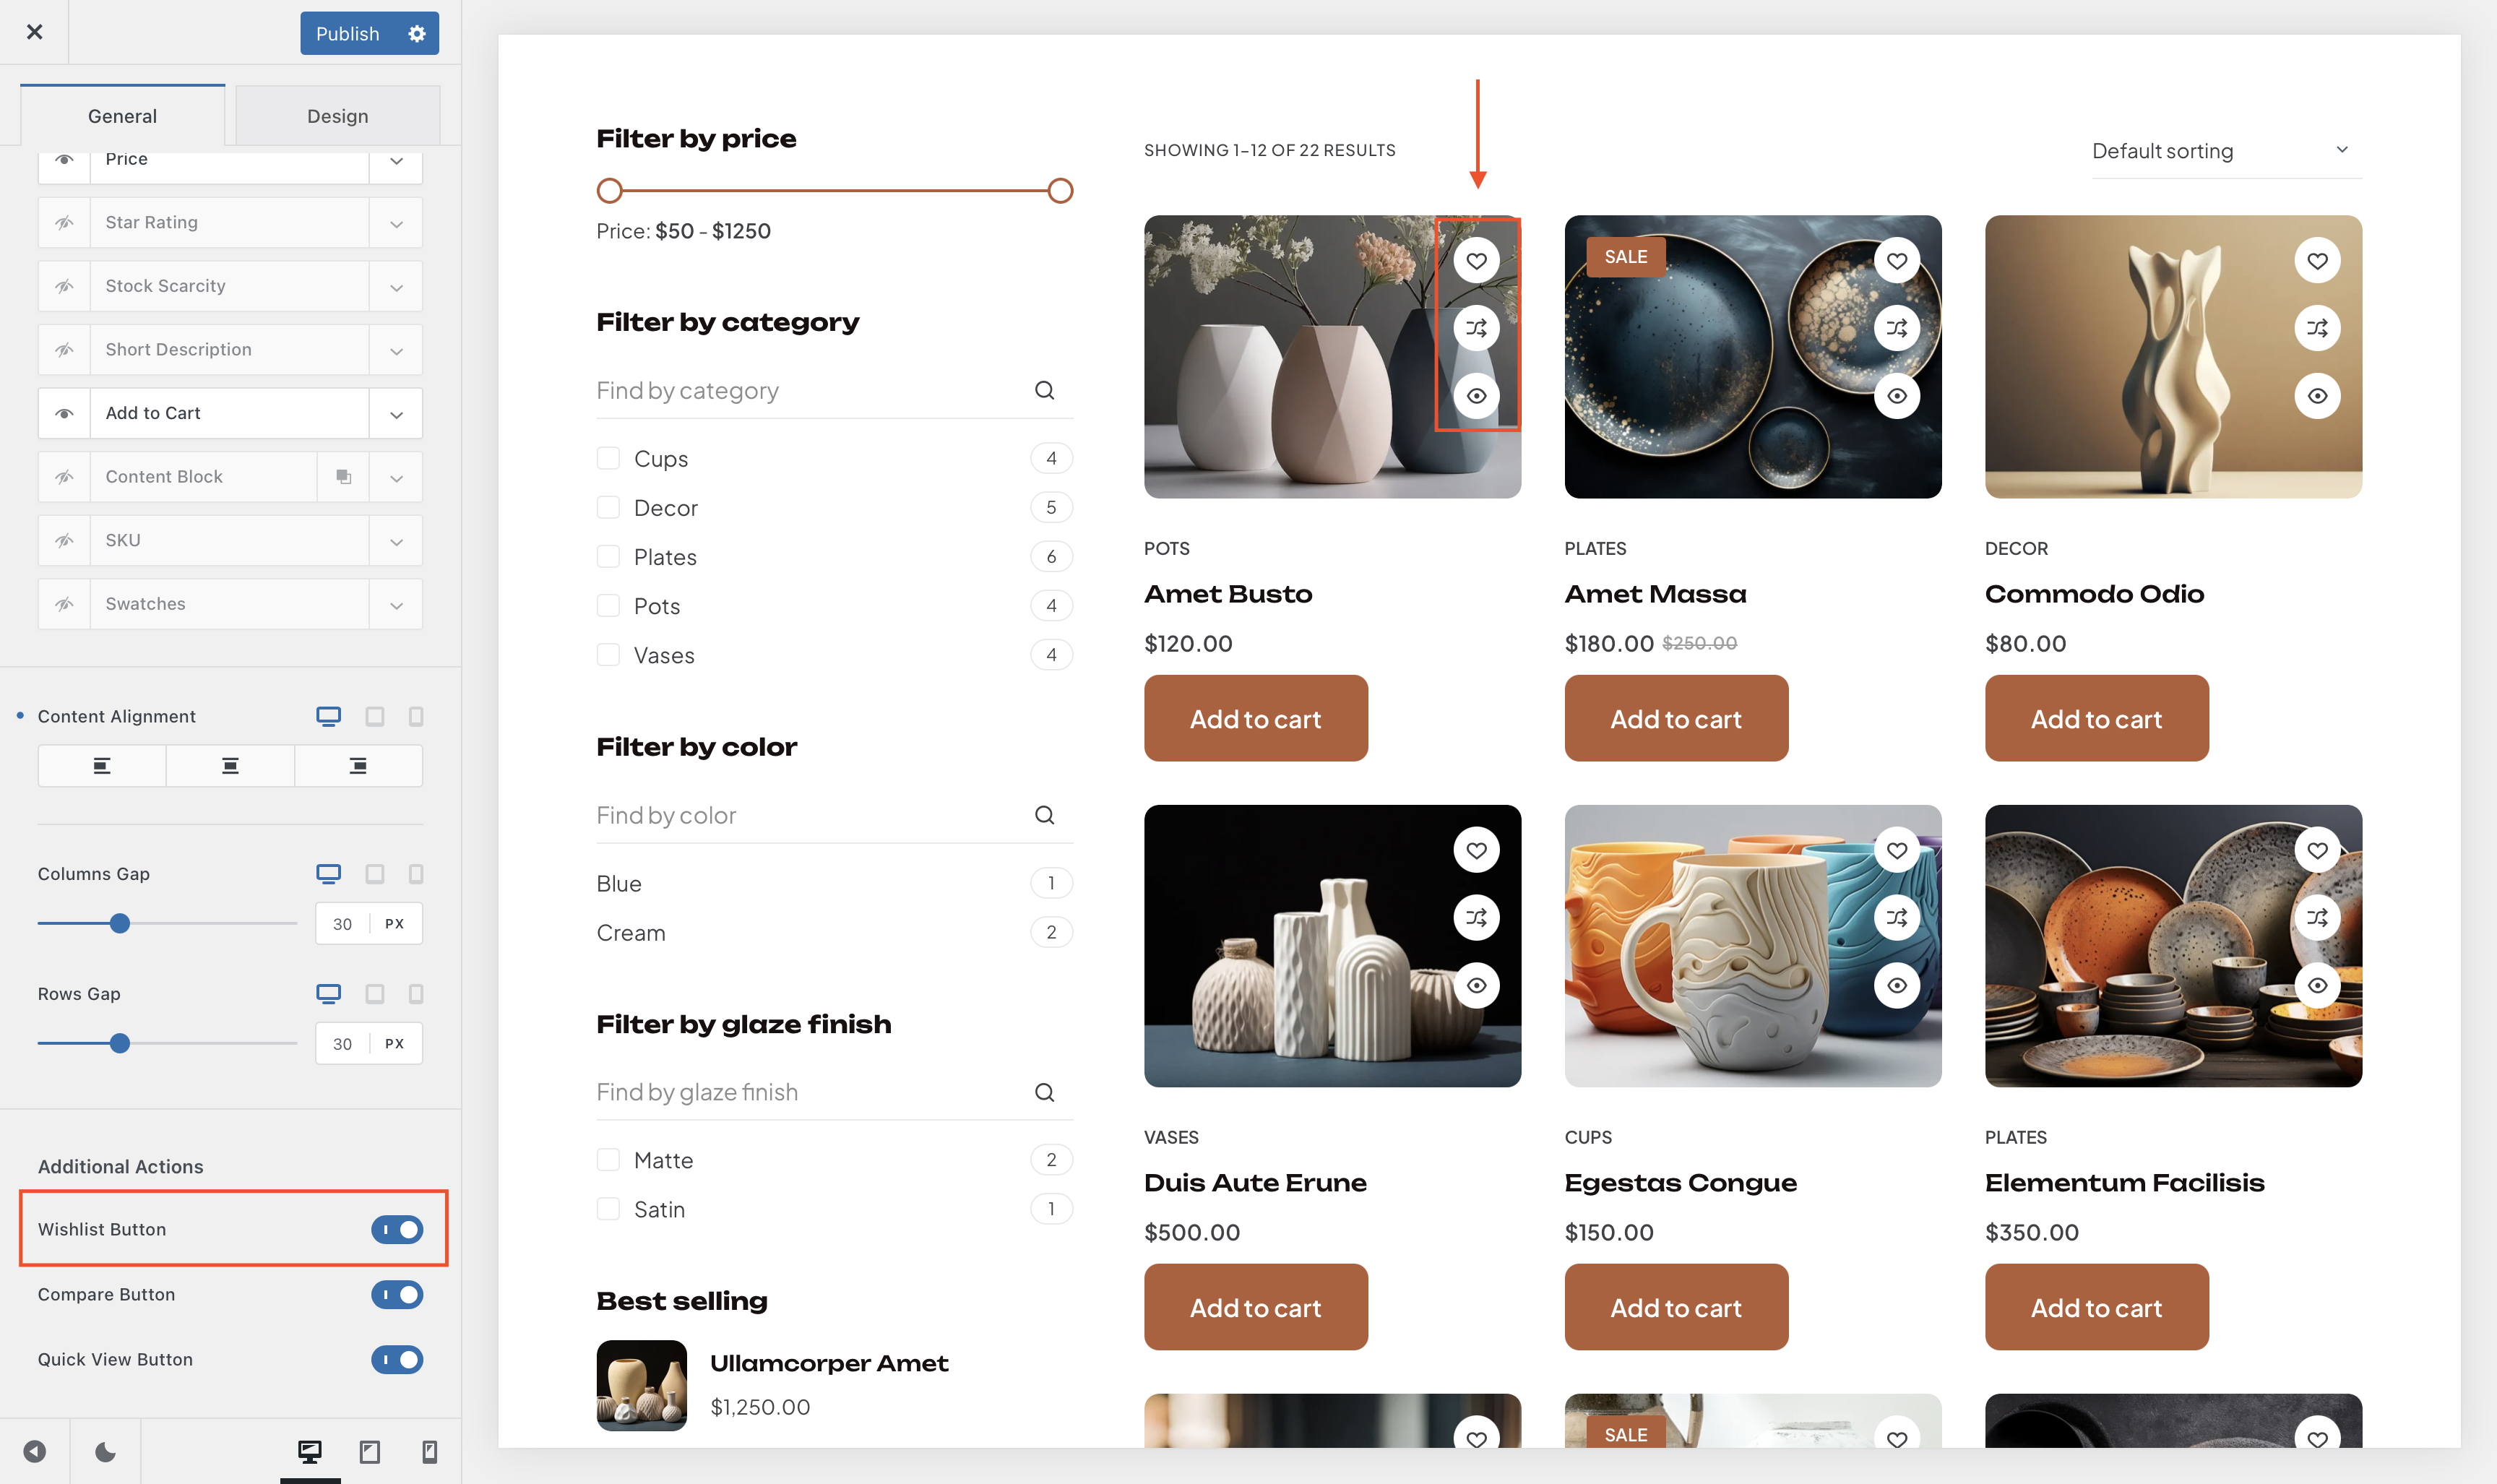
To make the Wishlist page easily accessible, Blocksy automatically adds the Wishlist button to all single product and archive pages of your WooCommerce store. But if you don’t see the button on those pages, here’s how you can enable them:
Go to Customizer → Product Archives → Card Options → Additional Actions. Scroll down to the Wishlist option and toggle it on. This will add the Wishlist button on your product archive or main shop pages.
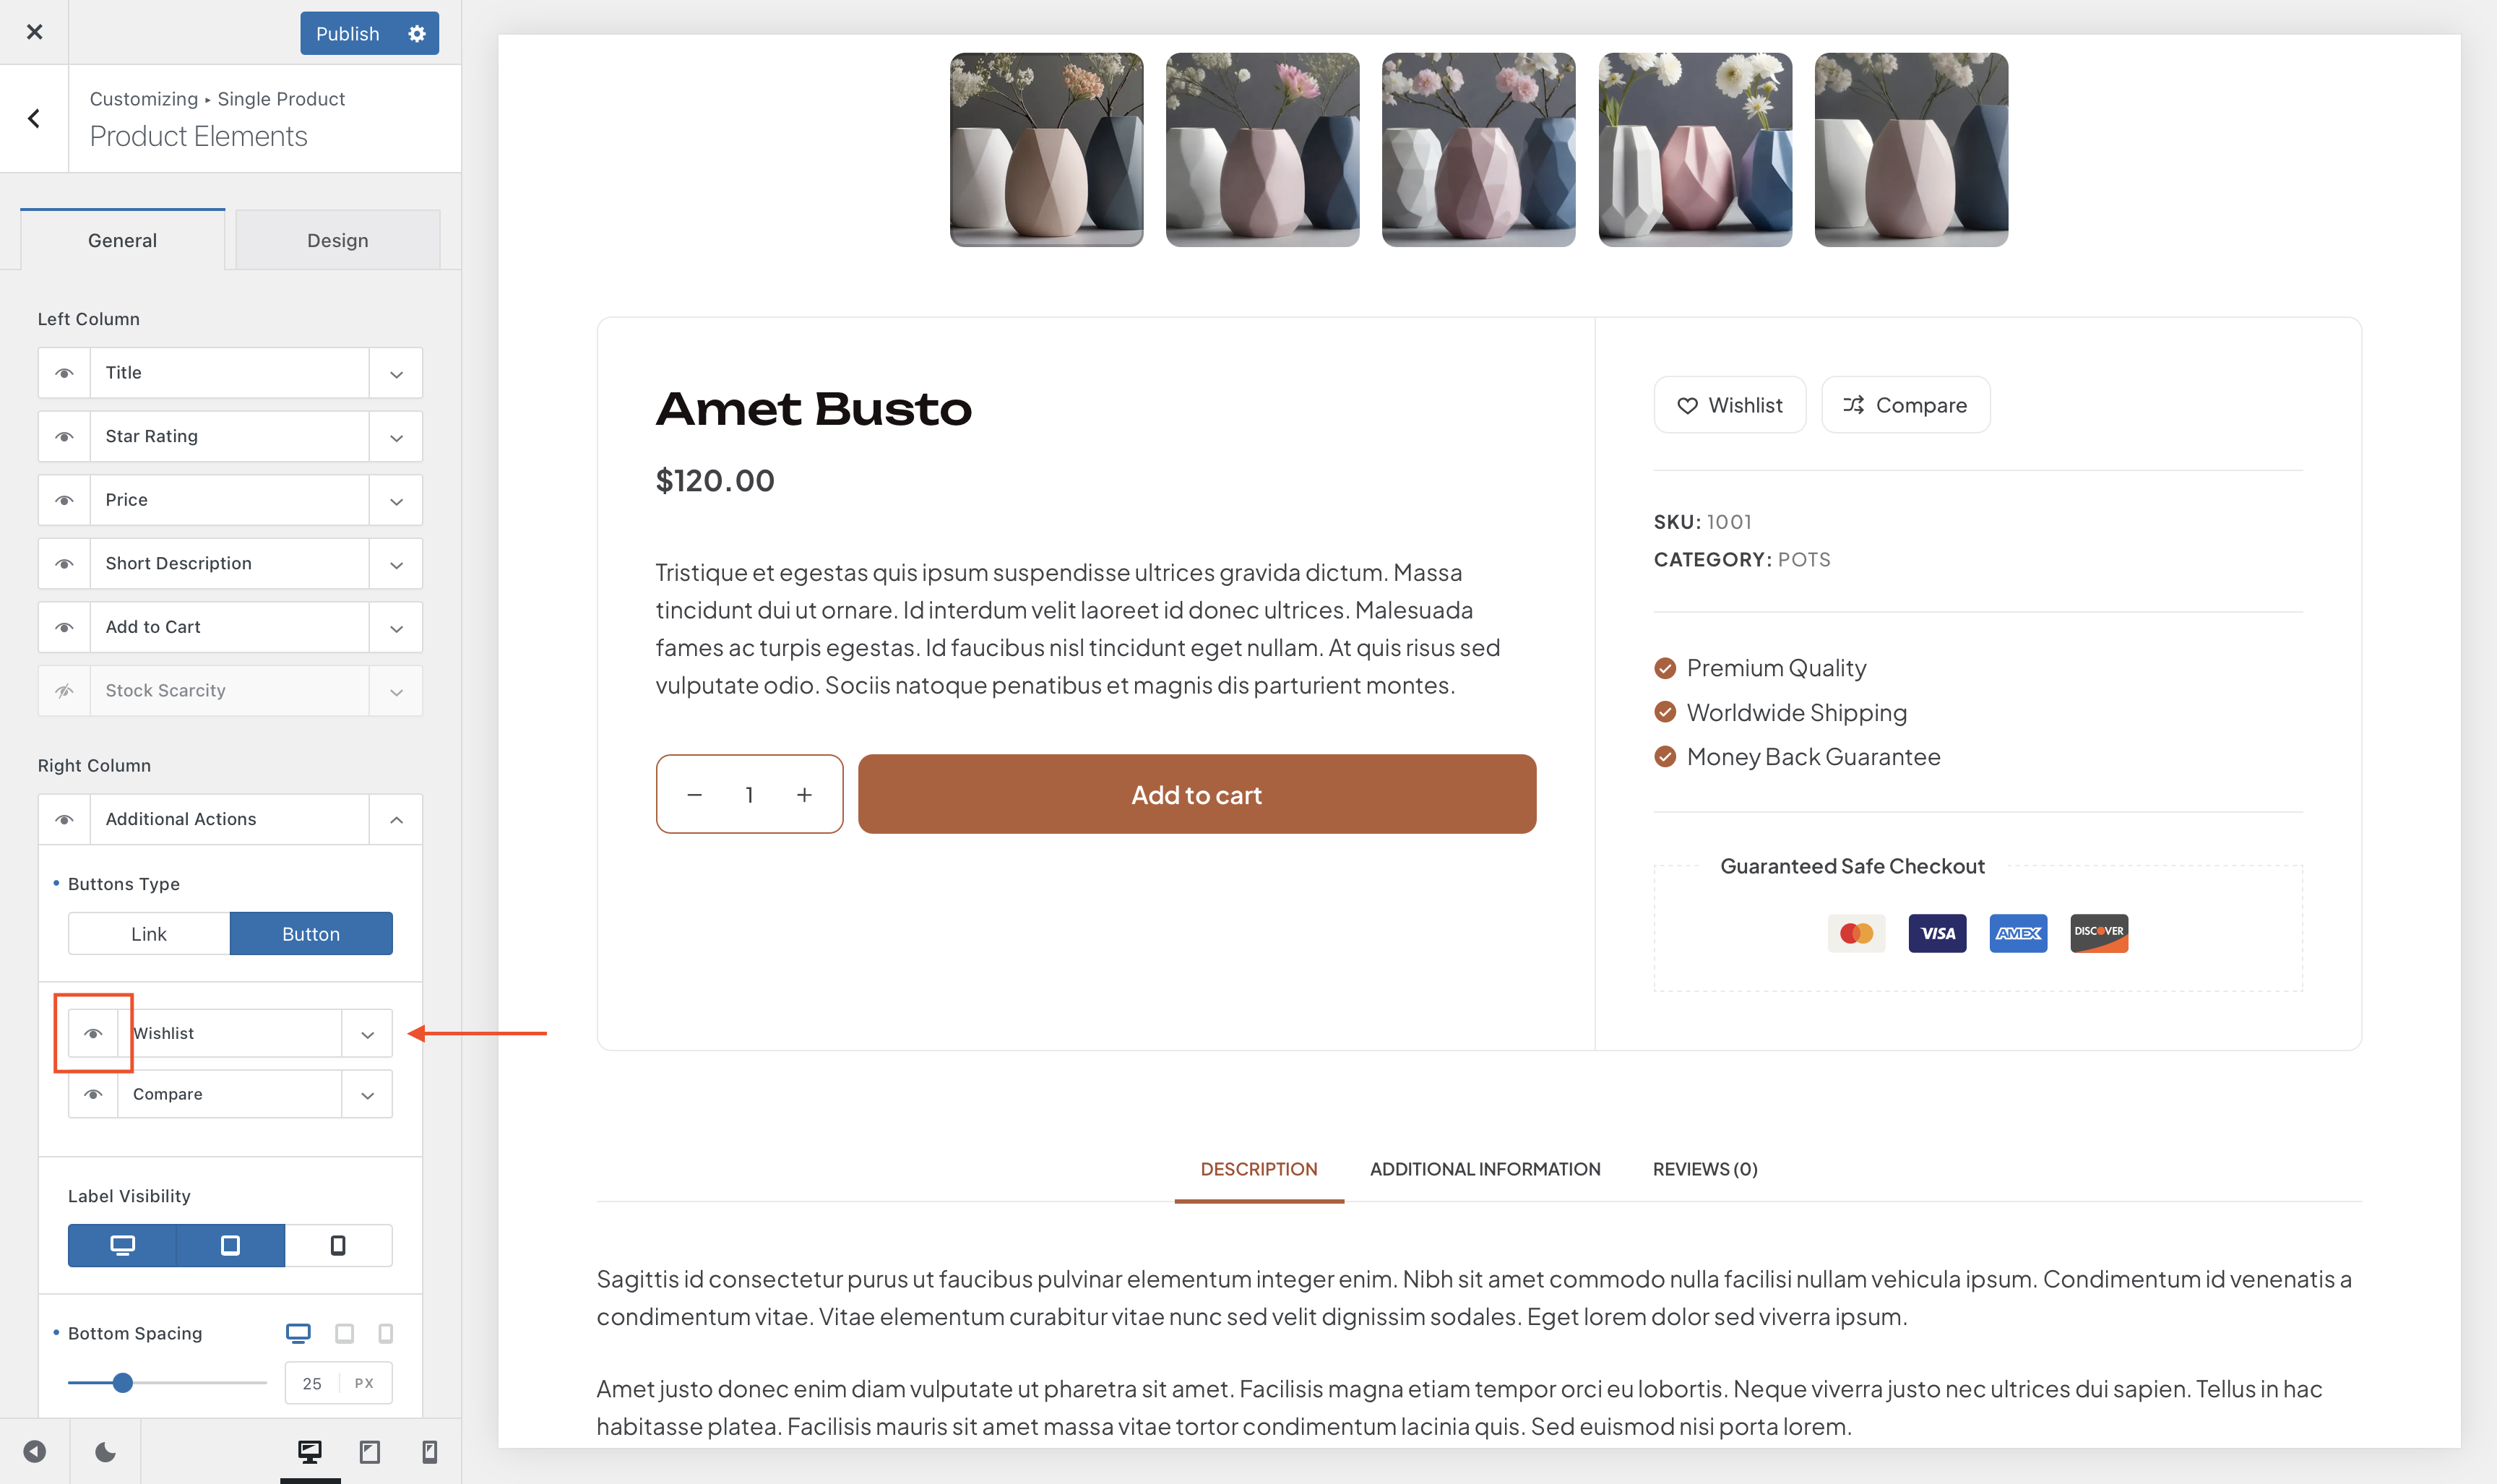
Go to the Customizer → Single Product → Product Elements, expand the Additional Actions option and enable the Wishlist button by clicking on the eye icon. It will add the wishlist button to all single product pages on your store.
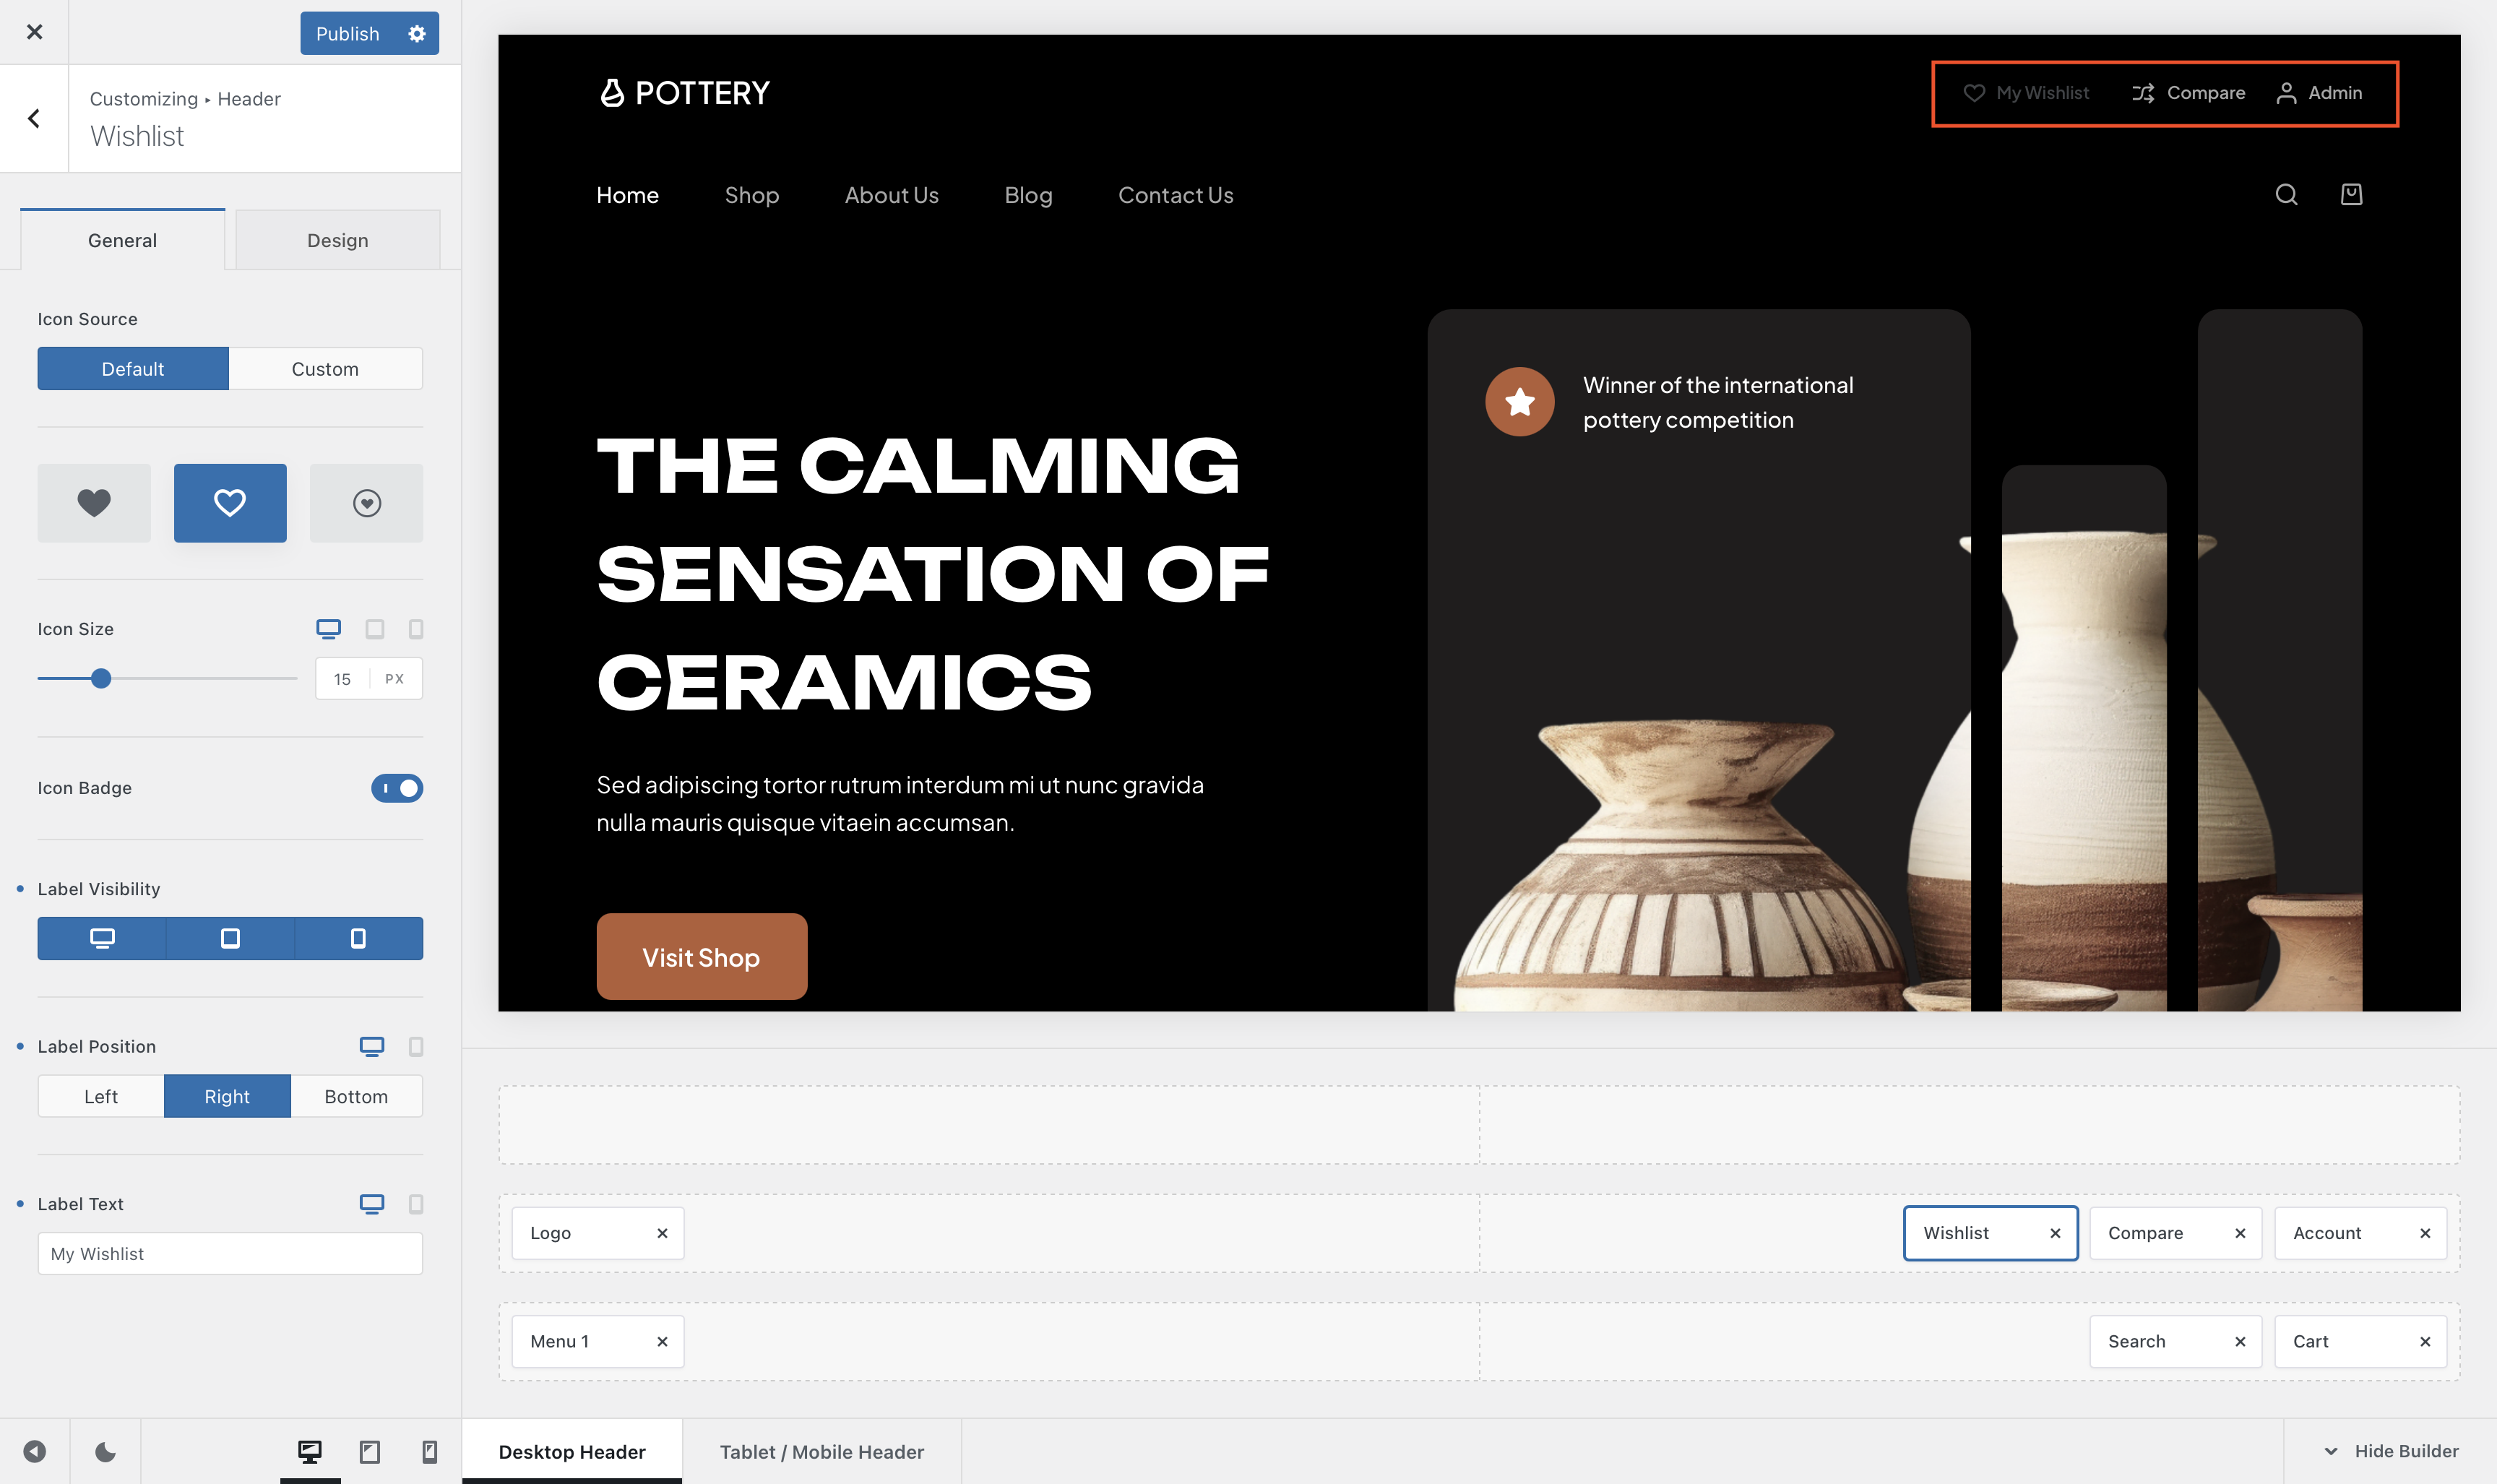
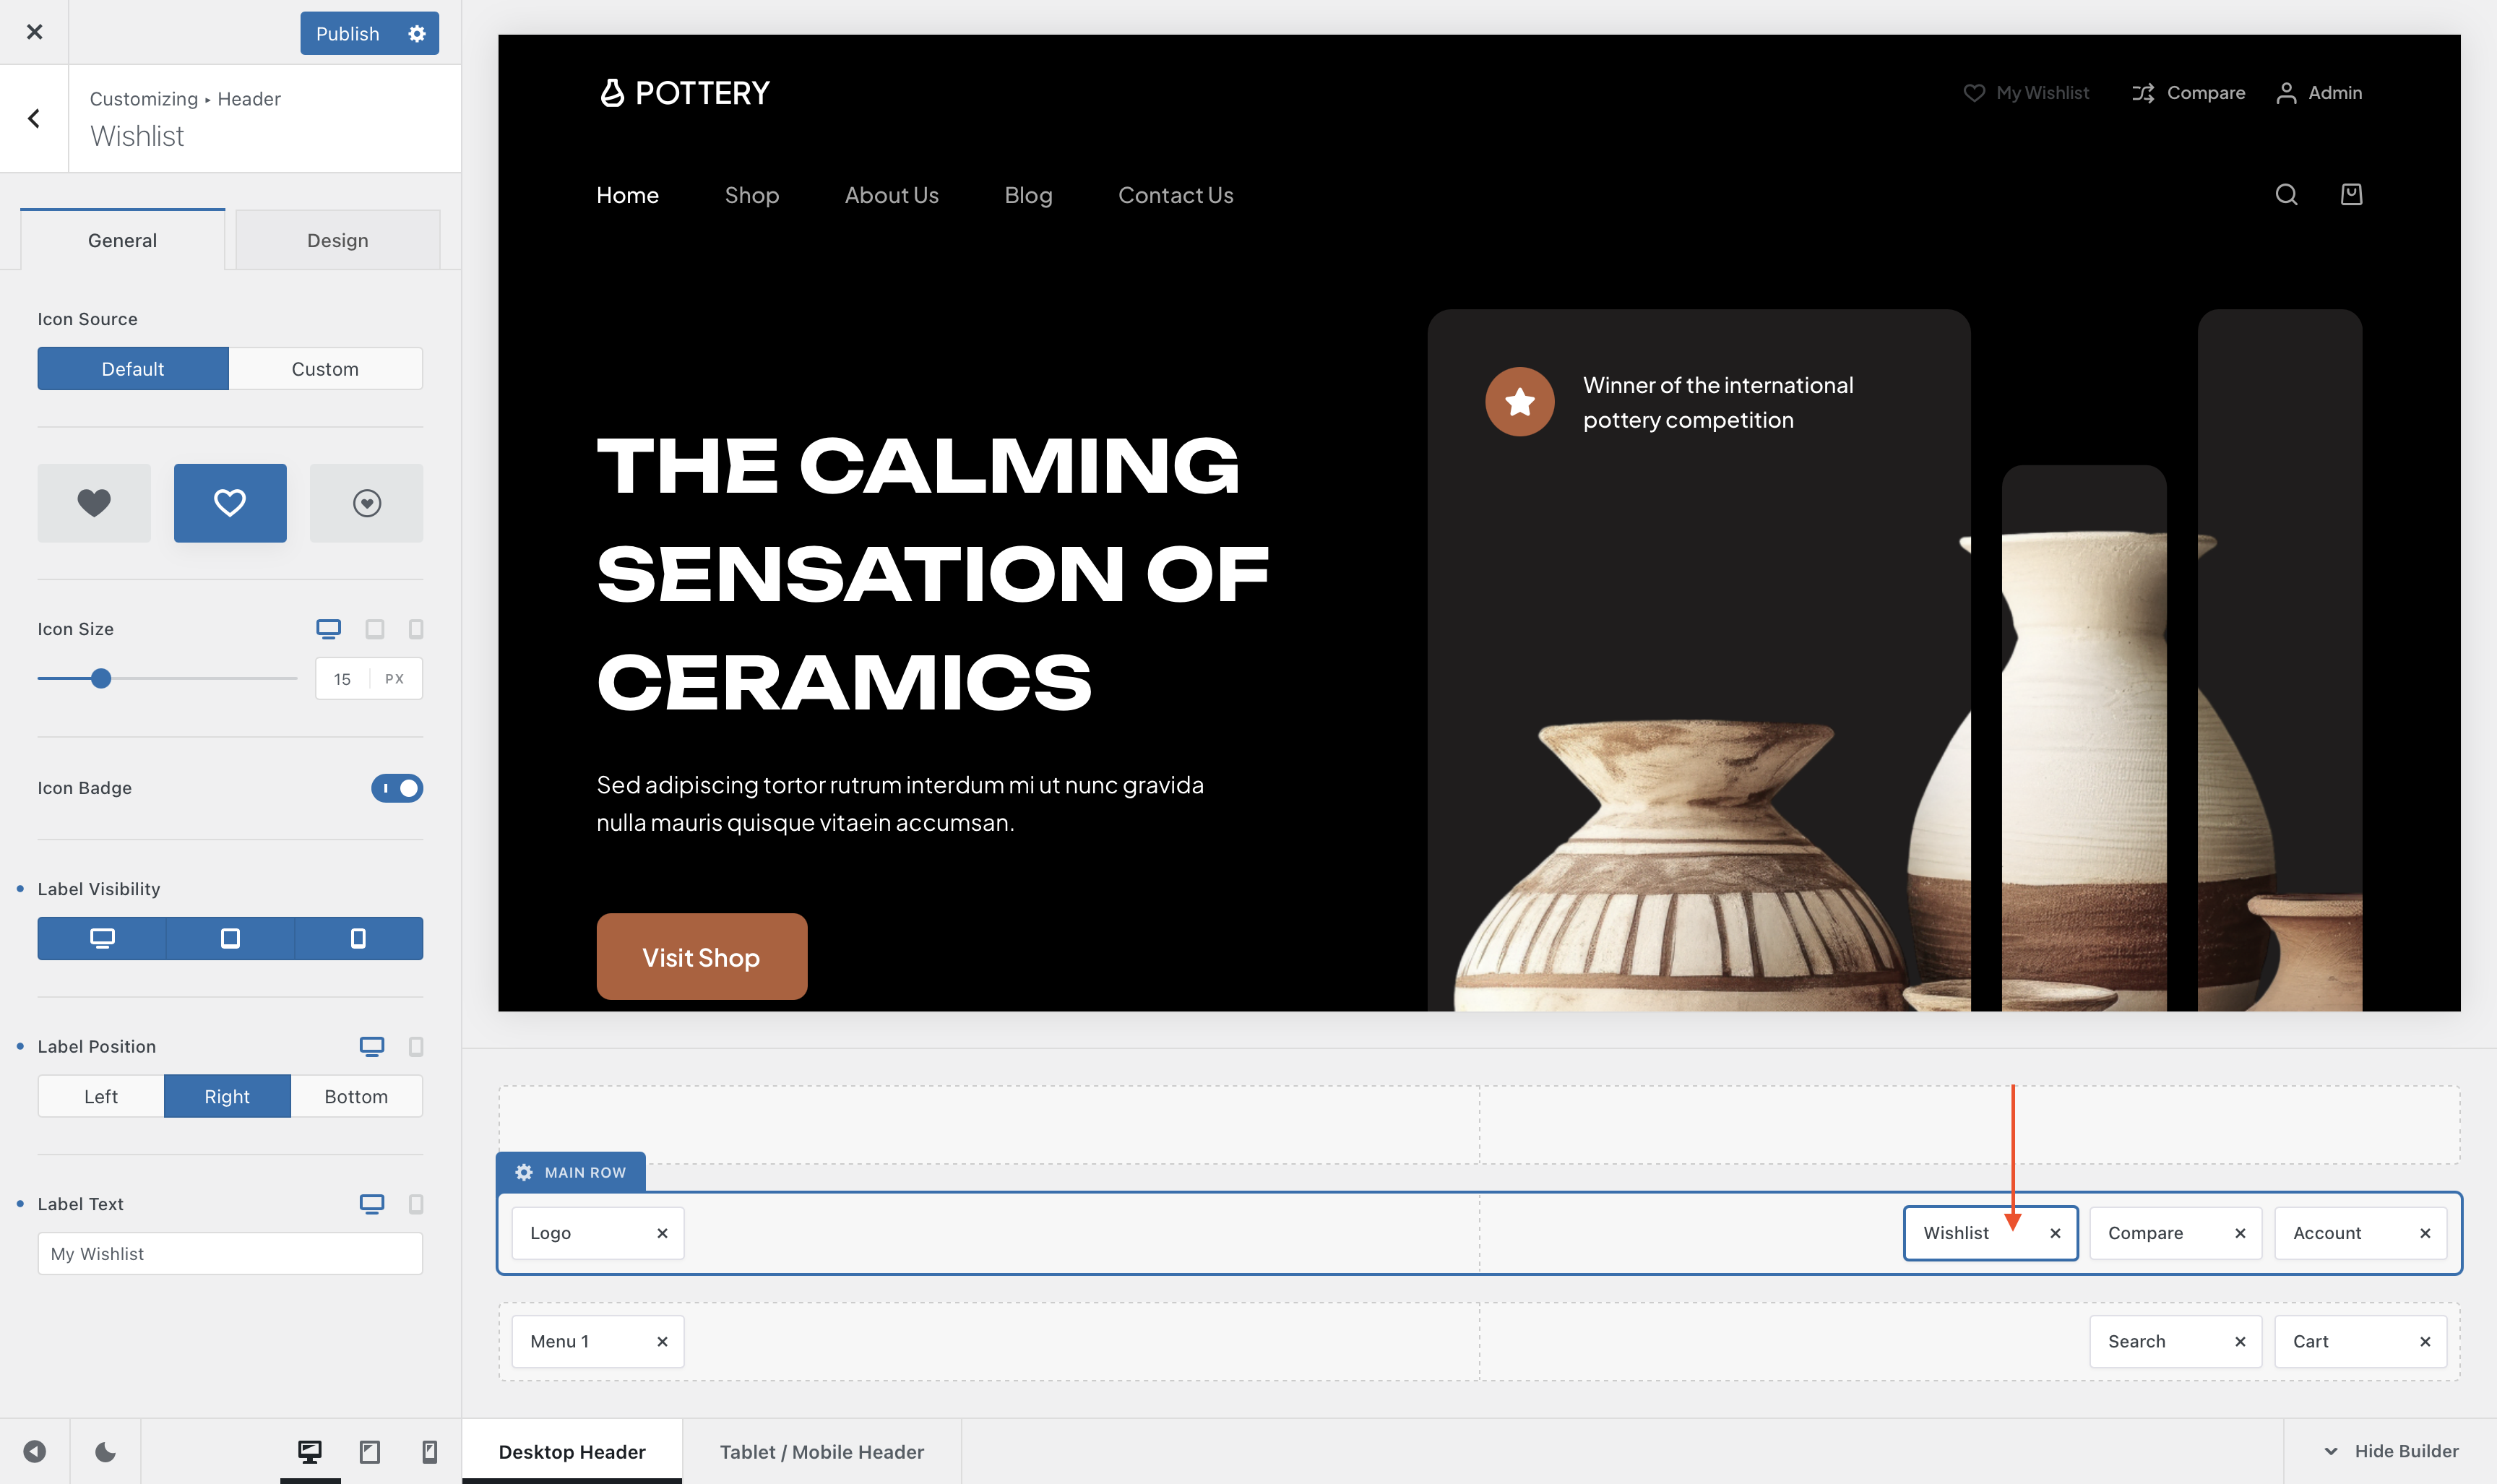
Step 5: Customize the Wishlist Icon Design
To customize the wishlist icon design, click on the wishlist option in the header element. In the Customizer, you can choose between the default icon designs, increase or decrease icon size, remove the icon altogether, and add a label instead.
With the Custom Icon Source feature, you can upload a new icon of your choice instead of using a default one.
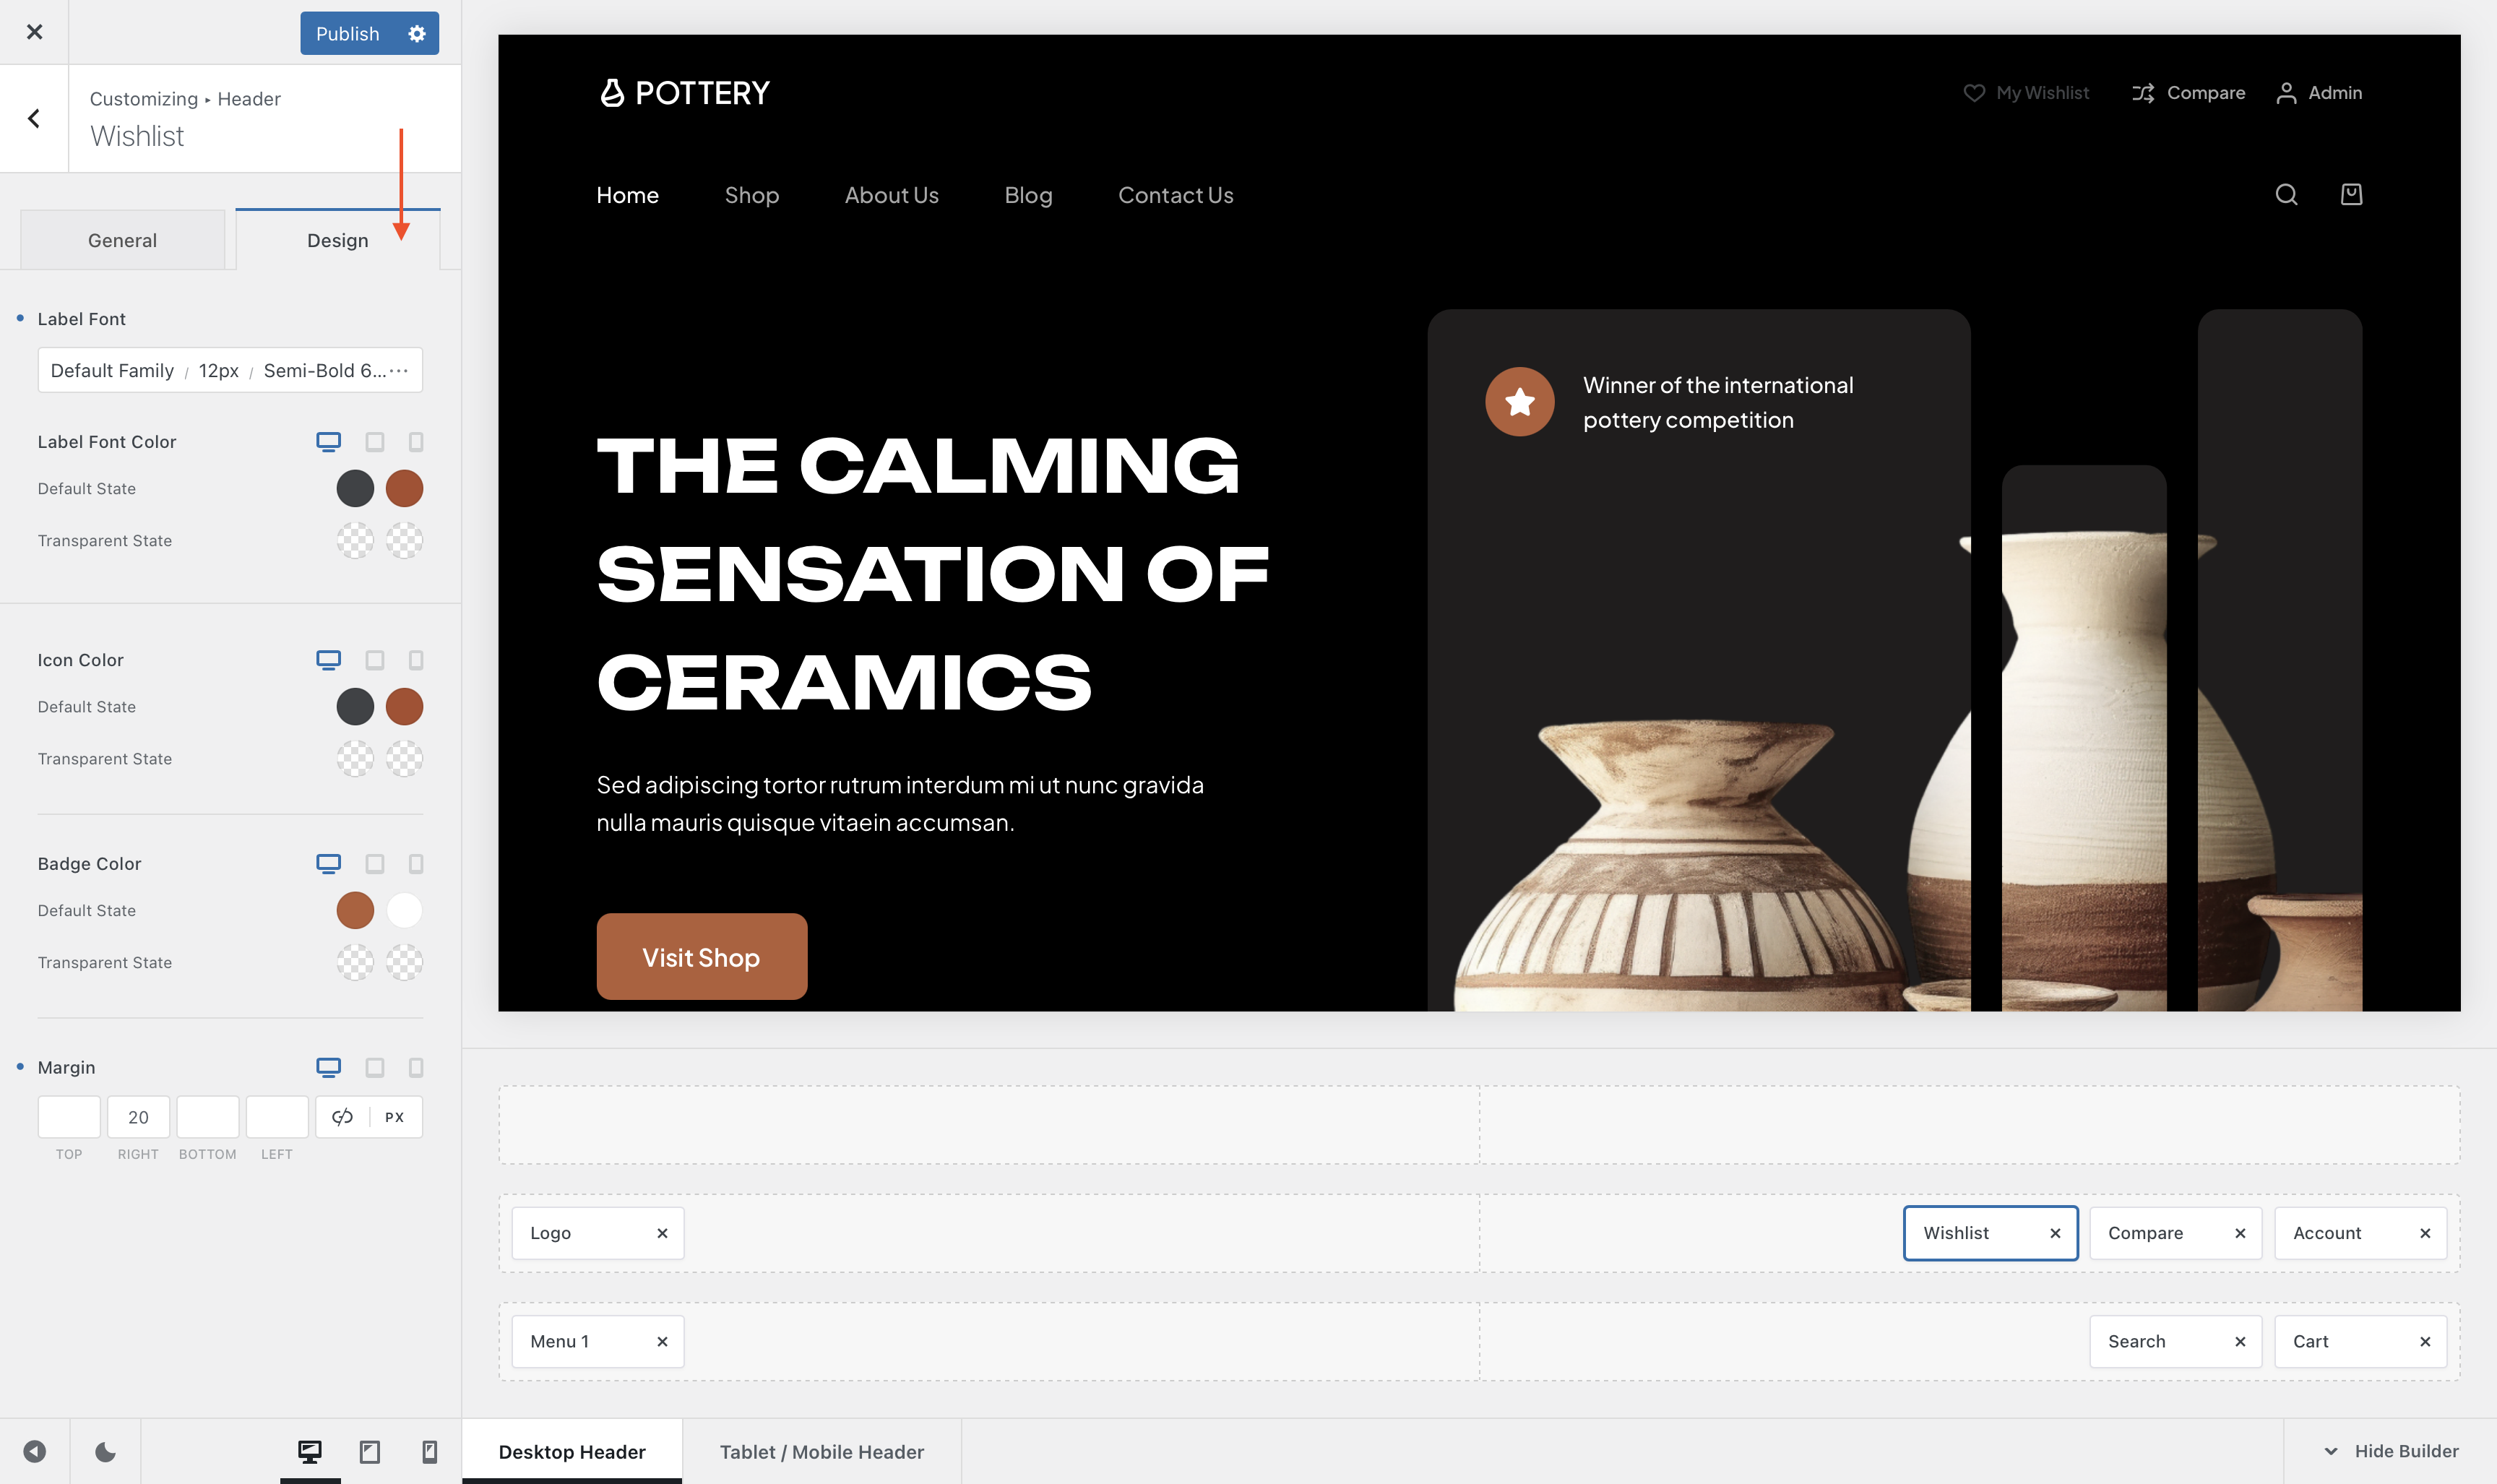
Next, proceed to the Design tab to set margins, and modify icon and badge colors, label colors, font types, and size.
Step 6: Customize the Wishlist’s General Settings
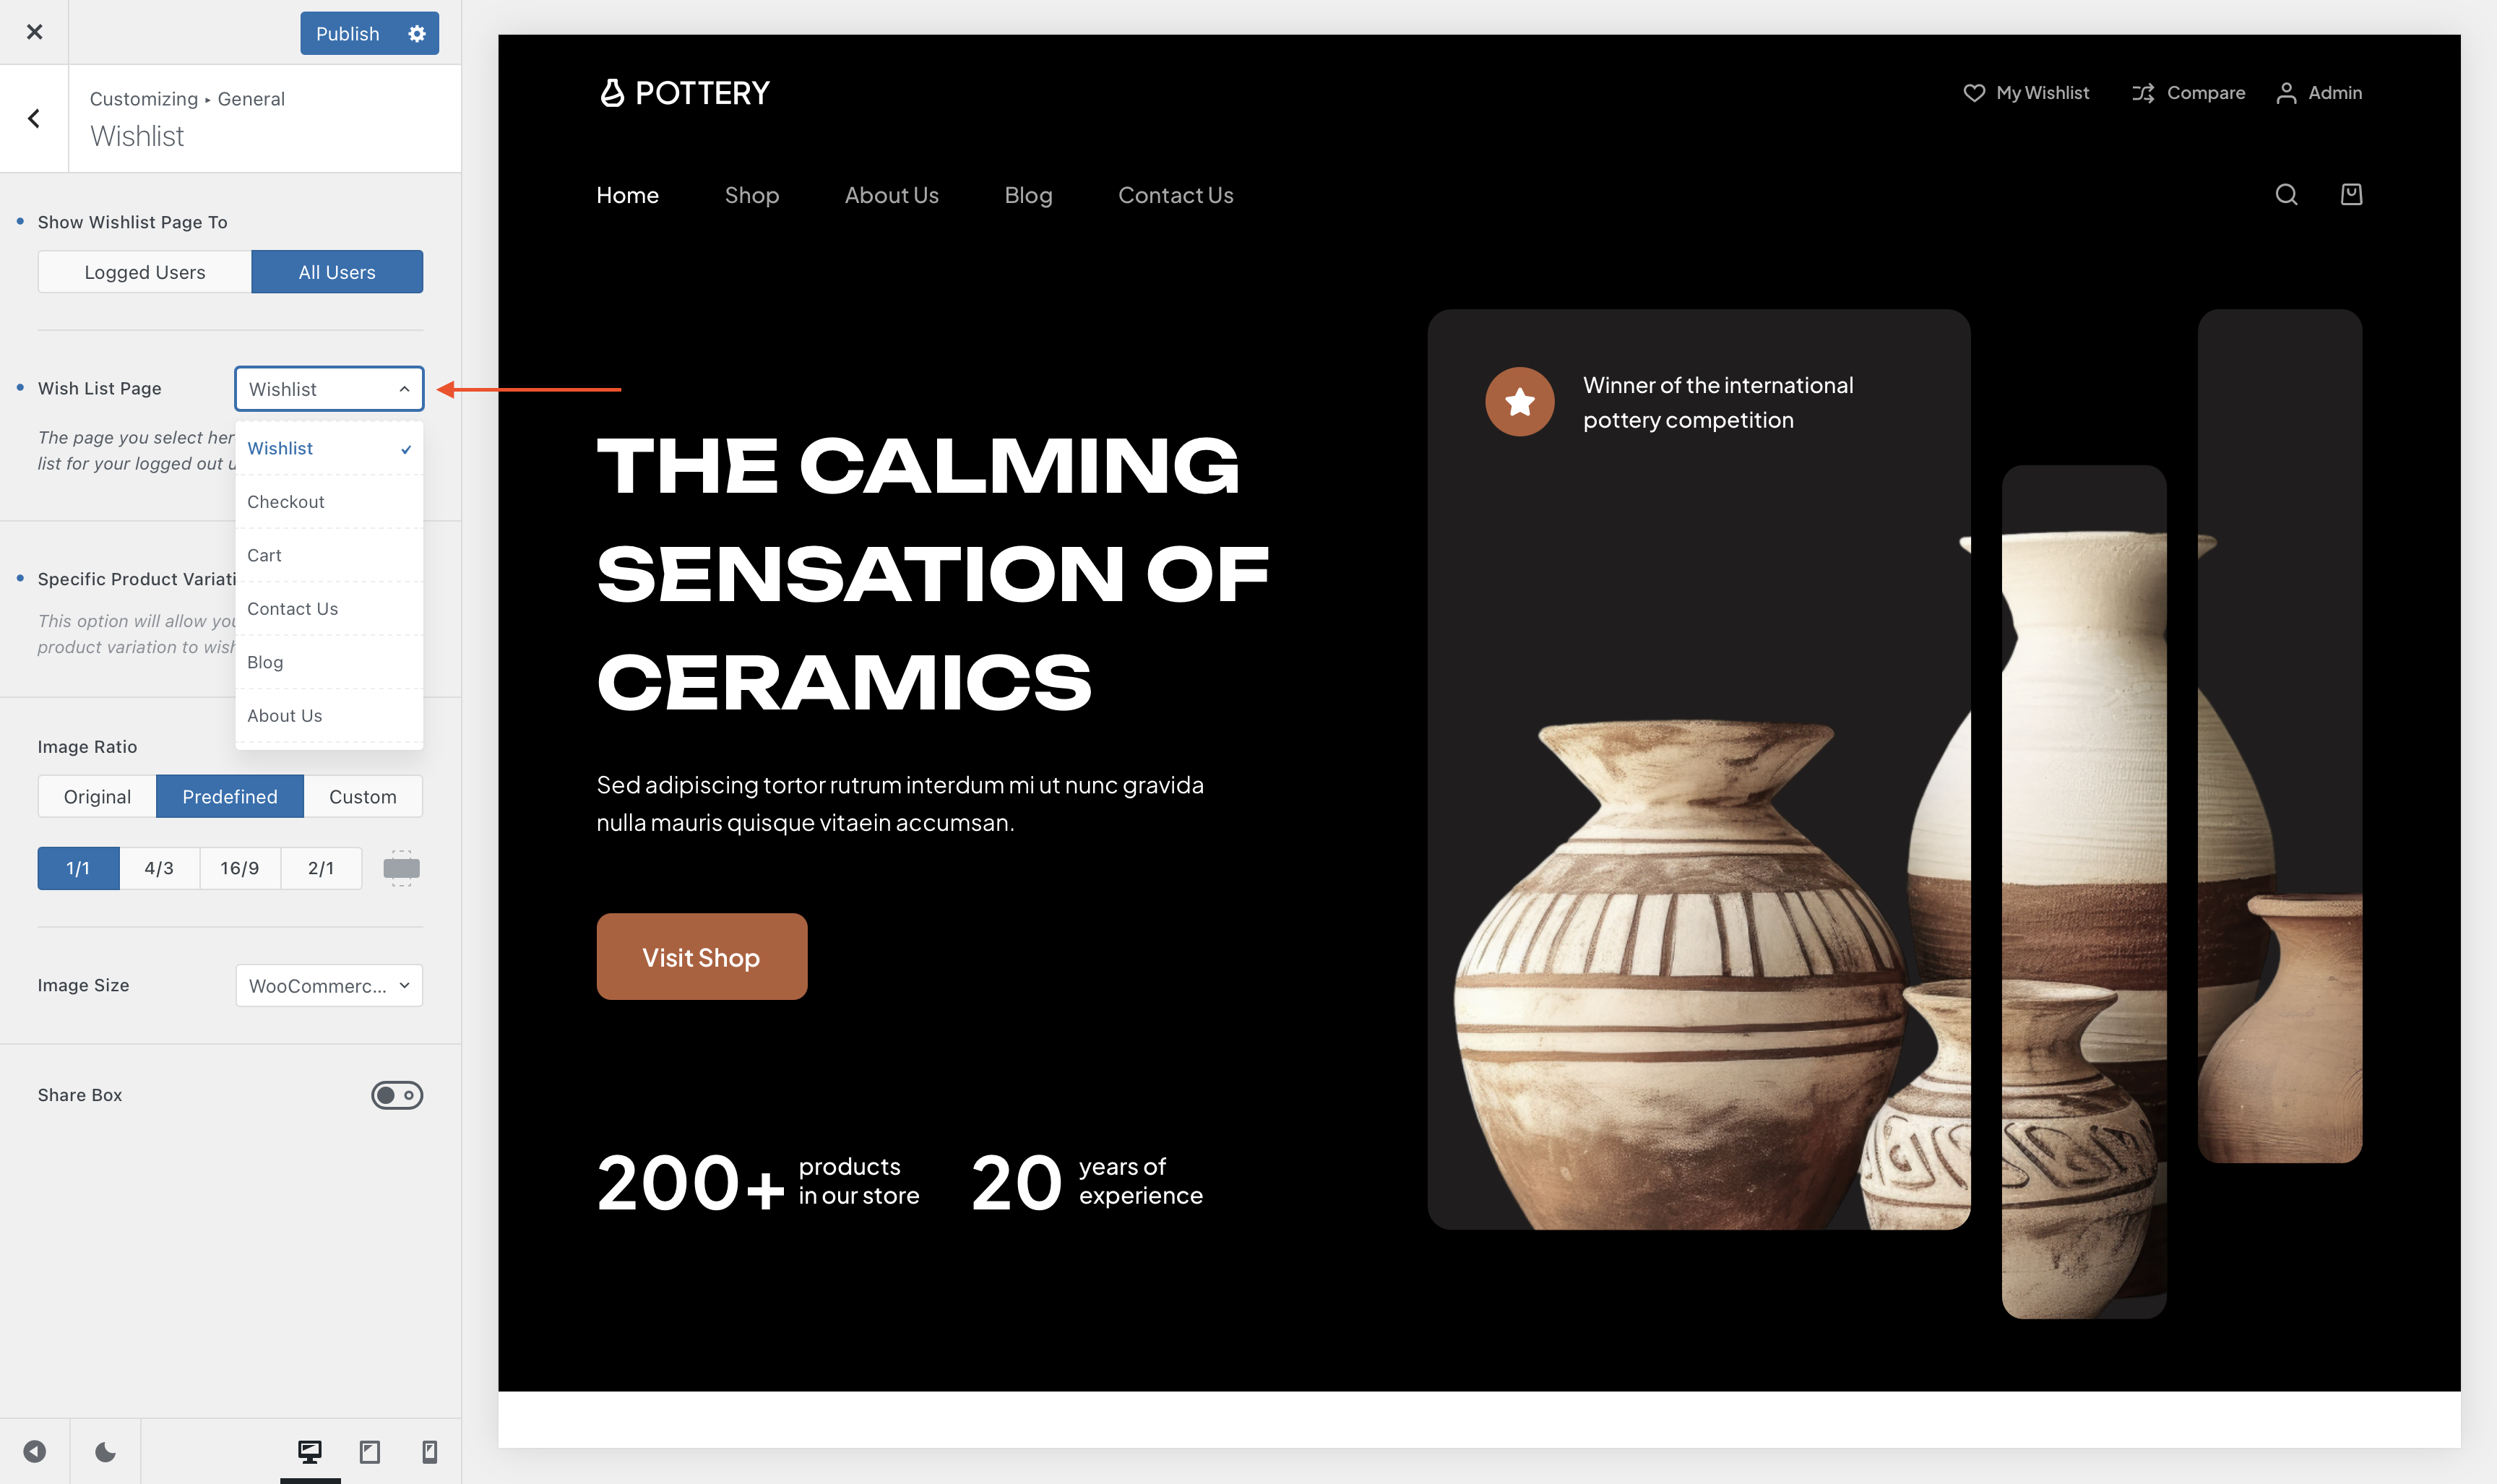
In your Customizer, navigate to WooCommerce → General → Wishlist, and you will be taken to the general setting page of the wishlist button.
Here we recommended doing two things: allow all users, including users who aren’t logged into your website, to add products to wishlists and allow variation products to be added to the wishlist.
Just choose All Users and toggle on the Specific Product Variation option.

Next, you need to create an empty page and assign it using the Wishlist Page option. To create an empty page, open your WordPress dashboard in a new tab and go to Pages → Add New Page and add a title to the page.
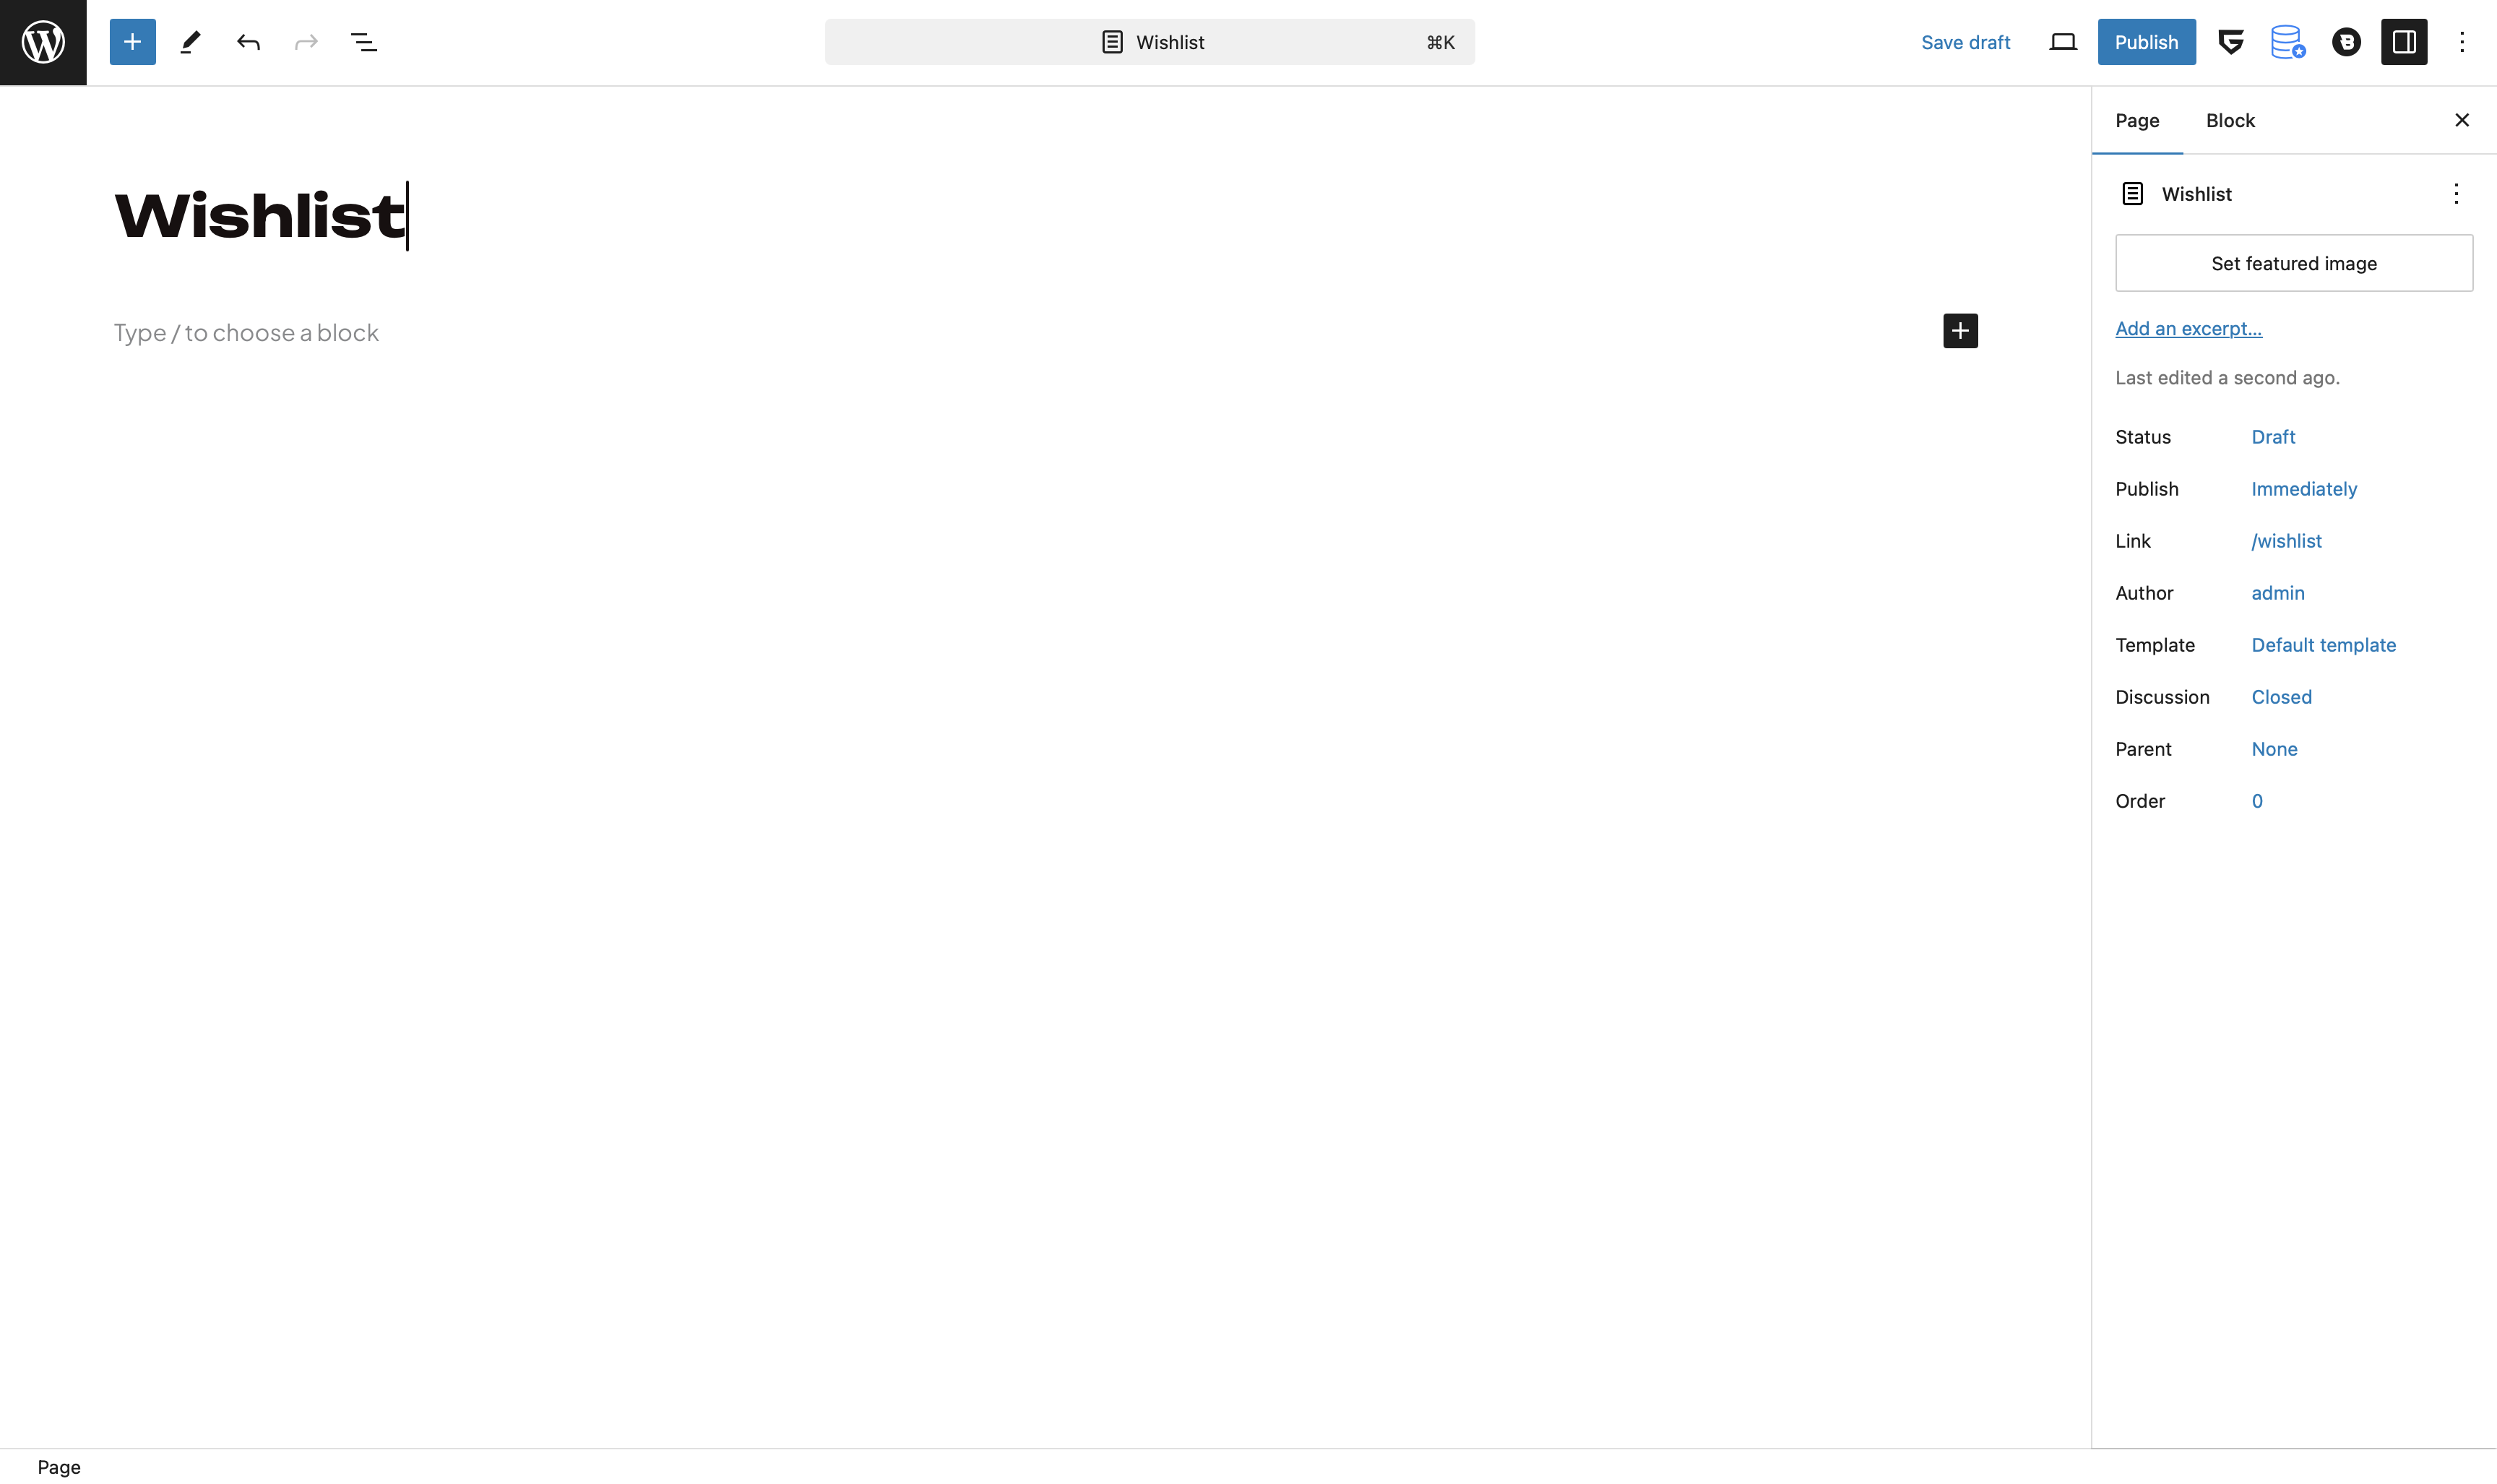
Next, select the page from the dropdown menu adjacent to the Wishlist Page option.
Hit the Publish button and that’s it. Now, all your users can add their favorite products to their wishlist.
Step 7: Clear Permalink Cache
Permalinks are URL structures assigned to individual posts, pages, and other content on a WordPress website.
WordPress offers five default permalink structures — Plain, Day and Name, Month and Name, Numeric, and Post Name — to choose from and offers the flexibility to create custom permalink structures.
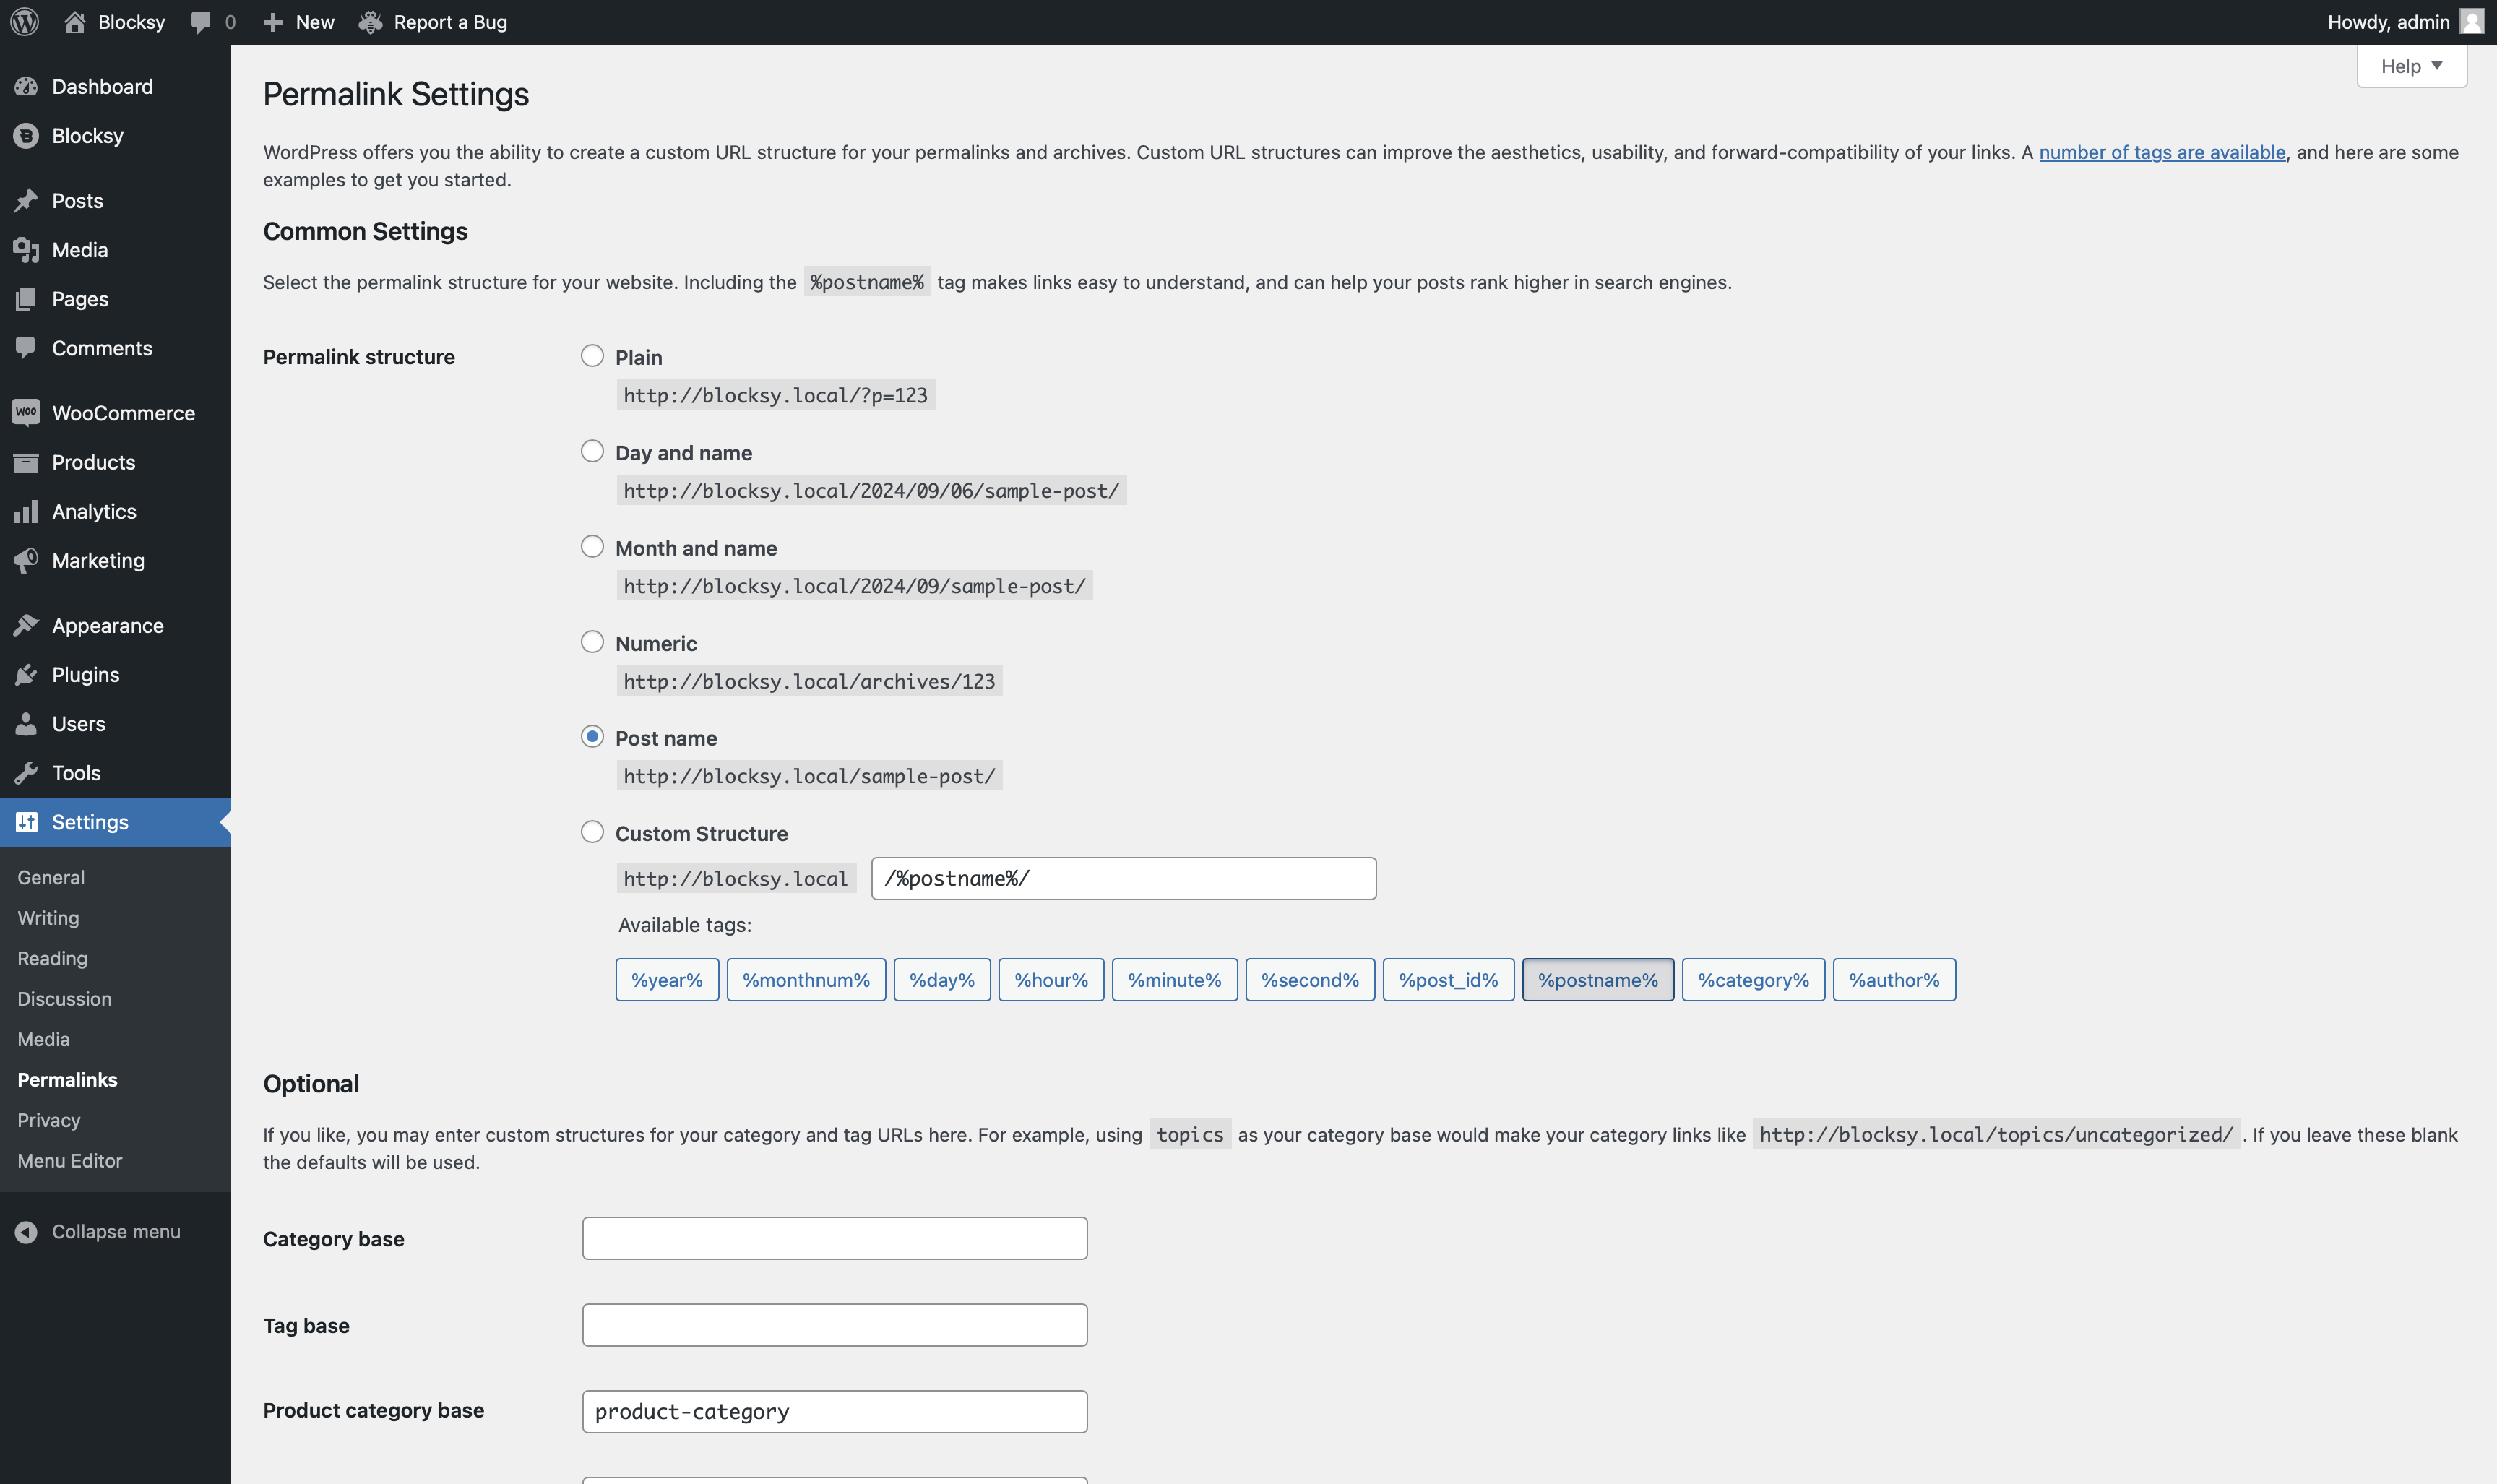
Caching is the process of storing frequently accessed data in a temporary storage area for quick retrieval. This can reduce the need to fetch the same information repeatedly, thus improving overall system performance and efficiency.
Similarly, permalink caching is the process of storing and retrieving permalink structures quickly. This reduces the need to repeatedly generate these URLs from the database improving your website performance.
The downside of the caching process is that it may display old data even after making changes to your website. Therefore, to ensure that users can access the wishlist you added to your WooCommerce store, you need to clear your permalink cache.
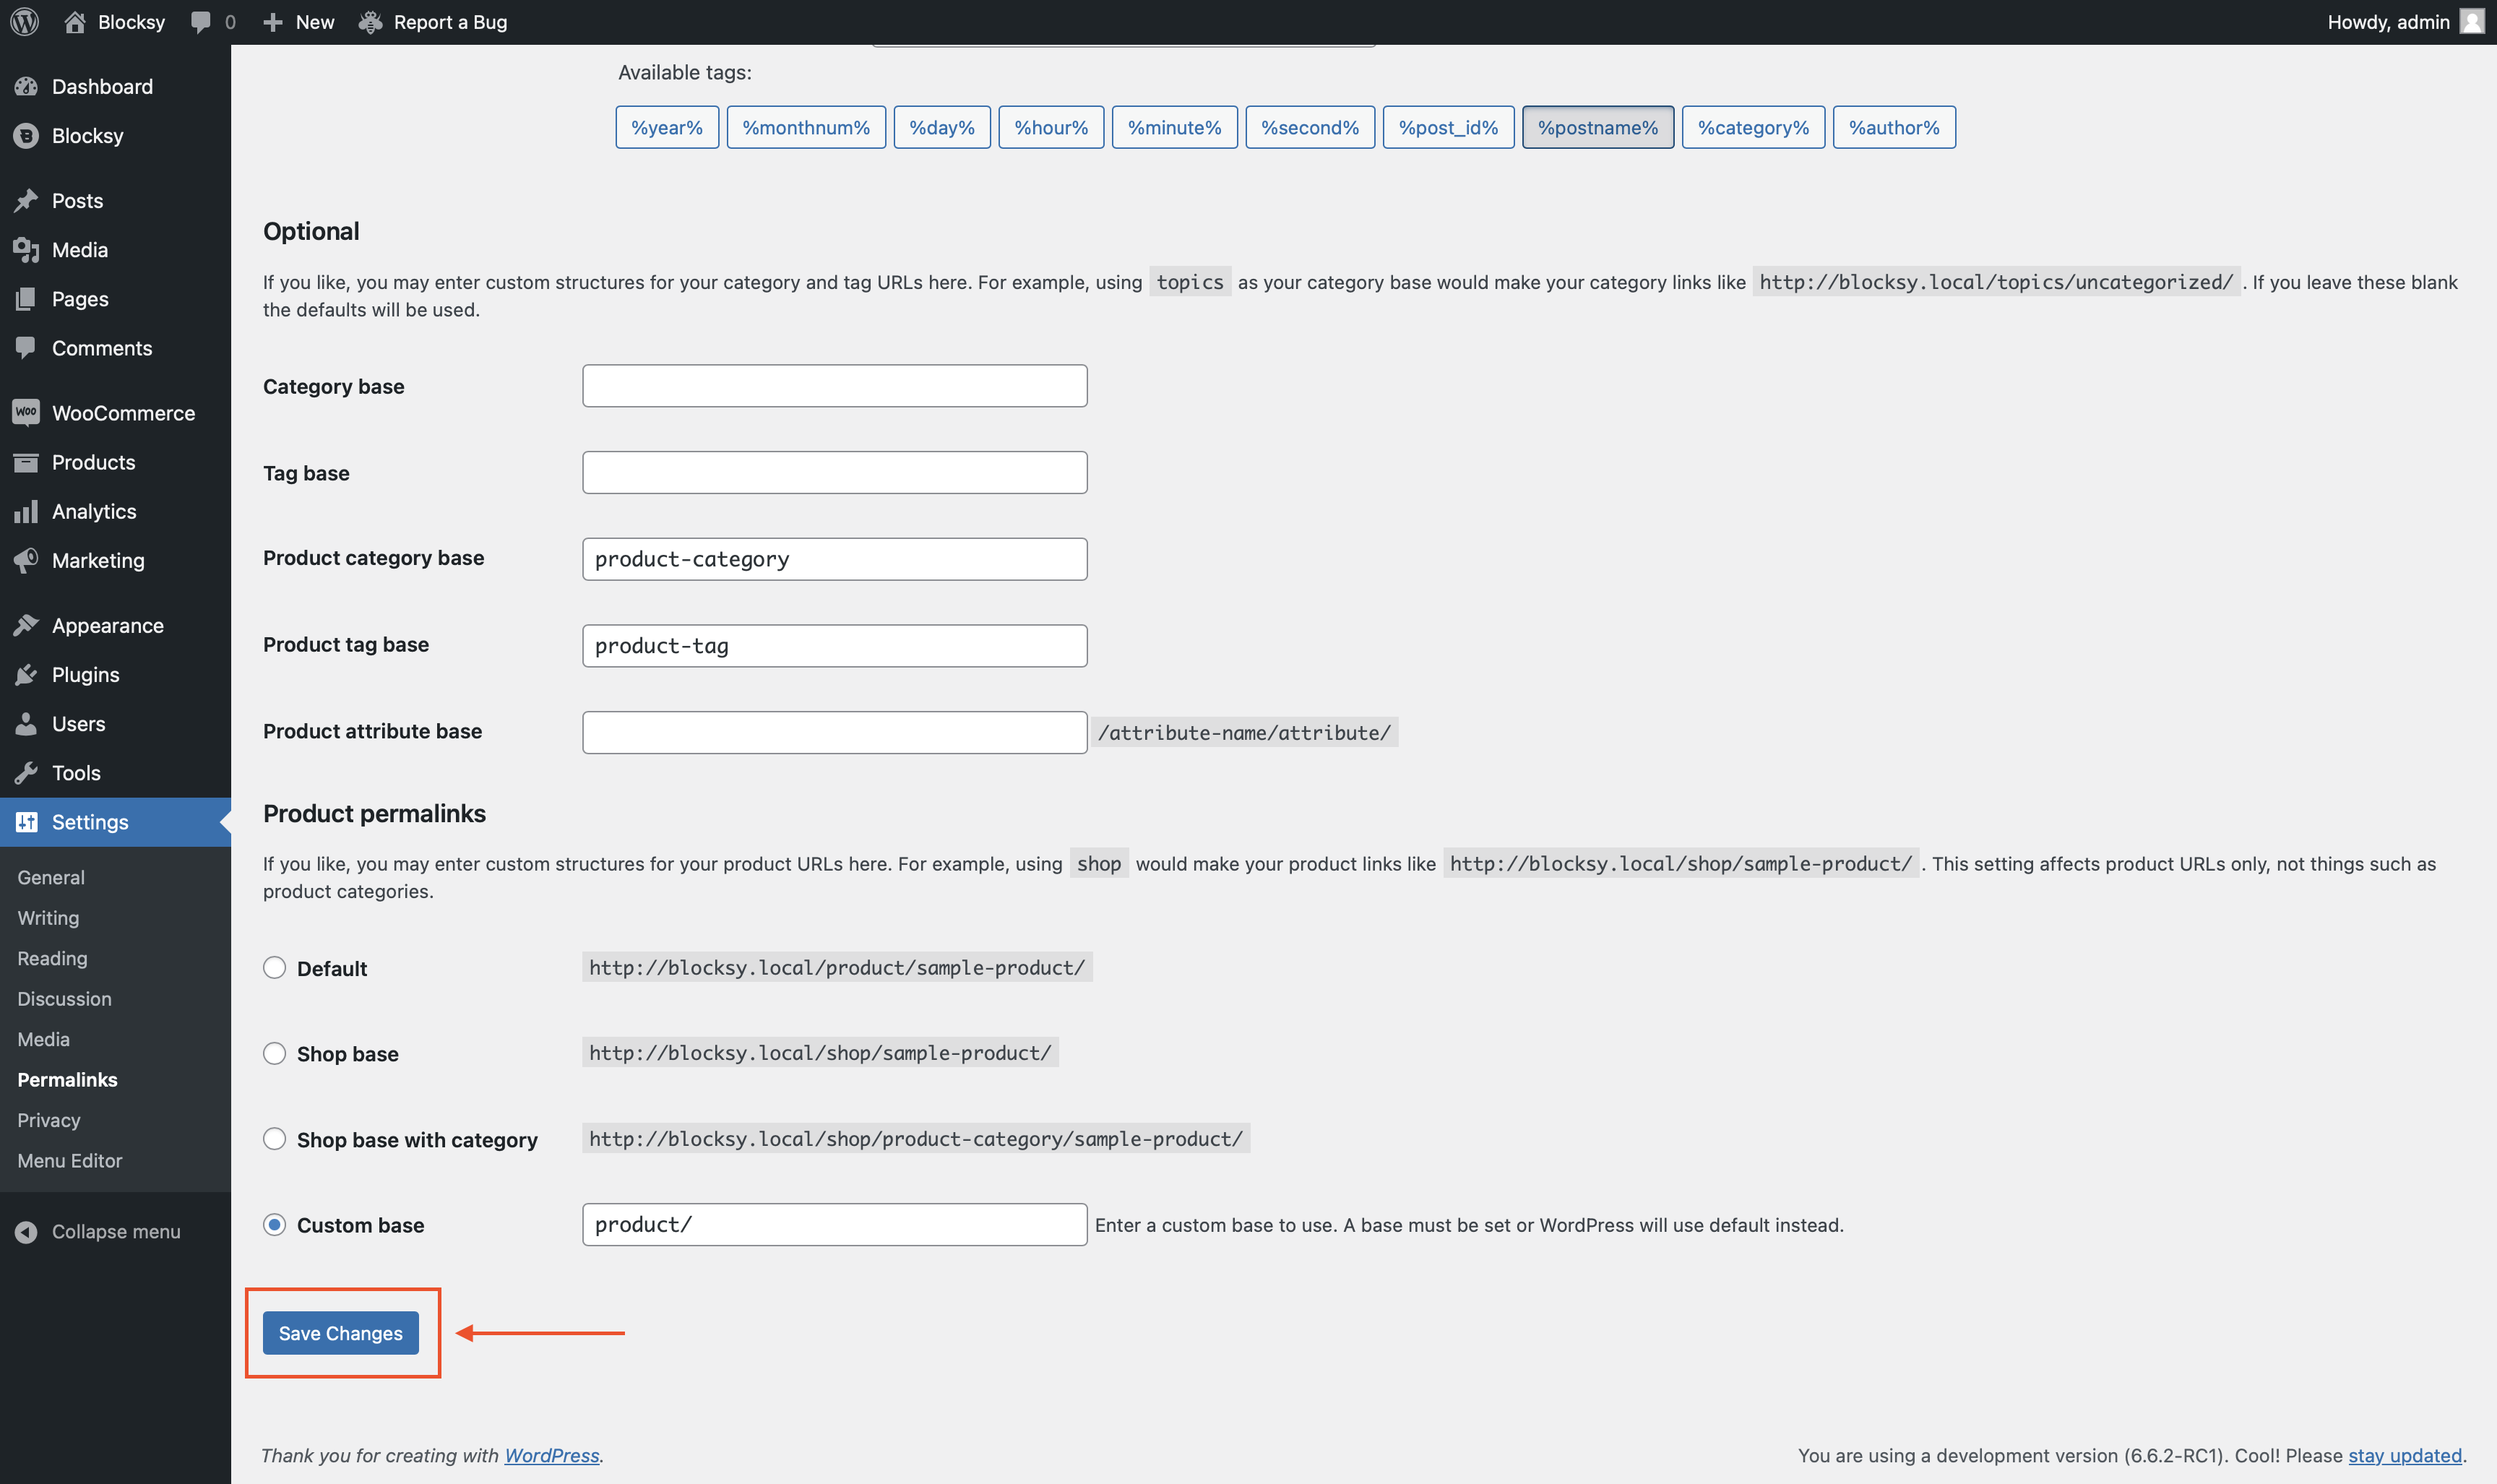
On your WordPress dashboard, go to the Settings → Permalink Settings and hit the Save Changes button. This will trigger the permalink cache to clear.
You don’t need to make any changes to the Permalink Settings page. Just hit the Save Changes button.
Frequently Asked Questions (FAQ)
Q1: Do I Need to Use a Specific Theme for These Wishlist Plugins to Work?
A: Most plugins work independently of your theme, but Blocksy Companion Pro requires the Blocksy theme to function properly.
Q2: Can Guests Use the Wishlist Without Creating an Account?
A: Yes, many plugins (like WishSuite, MoreConvert, and Blocksy) allow guest users to create wishlists, but this feature may need to be enabled in the plugin settings.
Q3: Is It Possible to Create Multiple Wishlists per User?
A: Yes, plugins like MoreConvert (Pro version) and WPFactory Wishlist support multiple wishlists, making it easier for users to categorize saved items.
Q4: Will Wishlist Plugins Slow Down My Woocommerce Site?
A: Most well-coded wishlist plugins have minimal performance impact. However, always test plugin performance and clear cache or CDN after installation.
Q5: Can I See What Products Are Most Added to Wishlists?
A: Yes, some plugins like Premmerce and WPFactory provide backend analytics so store owners can see popular wishlist items and plan promotions accordingly.
Conclusion
| Plugin Name | Price | Key Features | Best For |
|---|---|---|---|
| Blocksy Companion Pro | $99/year | Wishlist on all pages, variation support | Store customization |
| Premmerce Wishlist | Free | Backend wishlist management, filtering | Data-driven insights |
| WishSuite | Free | Shortcodes, social sharing | Easy setup for beginners |
| MoreConvert Wishlist | $79/year | Multiple wishlists, PDF export | Advanced personalization |
| WPFactory Wishlist | $4.17/month | Wishlist analytics, email sharing | Budget-friendly choice |
The wishlist is an important part of any e-Commerce store.
Wishlists help customers save, share, and track products they’re interested in—and give store owners valuable insights into customer preferences.
Unfortunately, WooCommerce does not have a built-in wishlist feature but the good news is that you can use any of the following plugins to immediately add a wishlist to your WooCommerce store:
- Blocksy Companion Pro
- Premmerce Wishlist for WooCommerce
- WishSuite
- MoreConvert WooCommerce Wishlist
- WPFactory Wishlist for WooCommerce
You can learn how to manage customer data with WooCommerce export/import for better customers database establishment.
If you have any questions about the WooCommerce wishlist, let us know in the comment section below.