After getting a steady flow of traffic from your WordPress website, the next thing to do is get value from your audience and build an email list. Having an email list is one of the efficient ways to get direct access to your audience that is interested in what you do and can offer them which can eventually grow your business.
When users subscribe to your emails, it shows they’re genuinely interested in your content and offers.
WordPress makes it easy for website owners to create and send regular newsletters with so many possible options and configurations. While WordPress doesn’t have the built-in functionality to send, track and manage newsletters and subscribers on the run, the possibility with plugins and tools is numerous.
If you are looking for ways to send a newsletter to your audience without leaving your WordPress dashboard then this article is for you. In this guide, I’m going to show you an easy way to create and send email newsletters right from the WordPress dashboard without complex configuration or hard coding methods.
Did you know that email marketing delivers an impressive return on investment (ROI) of up to 3600%? That means for every $1 spent on email campaigns, businesses can expect an average return of $36. It’s no surprise that building an email list is one of the most powerful ways to engage your audience and grow your business.
We will use the Newsletter Plugin and Postcards to easily automate our email newsletter and campaign creation as well as send and track emails in a couple of clicks out of the box. If you don’t use WordPress, you can register a free account on the Mailpost.io email marketing tool, to send newsletters to your subscribers without WordPress.
Video Tutorial
Key Takeaways:
- Email marketing delivers strong ROI: Expect up to $36 return for every $1 spent on email campaigns.
- Use the Newsletter Plugin for full control: Handle subscriptions, design, delivery, and analytics directly in WordPress.
- Design emails with Postcards: Build responsive, professional templates using a drag-and-drop editor and export clean HTML.
- Improve deliverability with best practices: Use SMTP services, avoid spam-trigger words, and test before sending.
- Troubleshoot efficiently: Resolve common issues like formatting errors or delivery failures with built-in diagnostics.
Table of Contents
WordPress Newsletter Plugin
Newsletter Plugin is the most advanced WordPress newsletter and email marketing system plugin that manages almost everything from user subscriptions to email tracking. Perfect for list building, this plugin can quickly create, upload, send and track emails hassle-free. Always utilize email verification tools like Hunter before to sending email newsletters.
It comes with a drag and drop composer feature to effortlessly make the campaign creation faster. Additionally, it also allows the external SMTP provider add-on for better email deliverability. The premium version allows you to integrate other WordPress plugins such as WooCommerce and WP forms which can extend its functionality even more. Here’s why it stands out:
- WooCommerce and WPForms Integration
- Easy Setup and Integration
- Automation Features
- Built-In Analytics
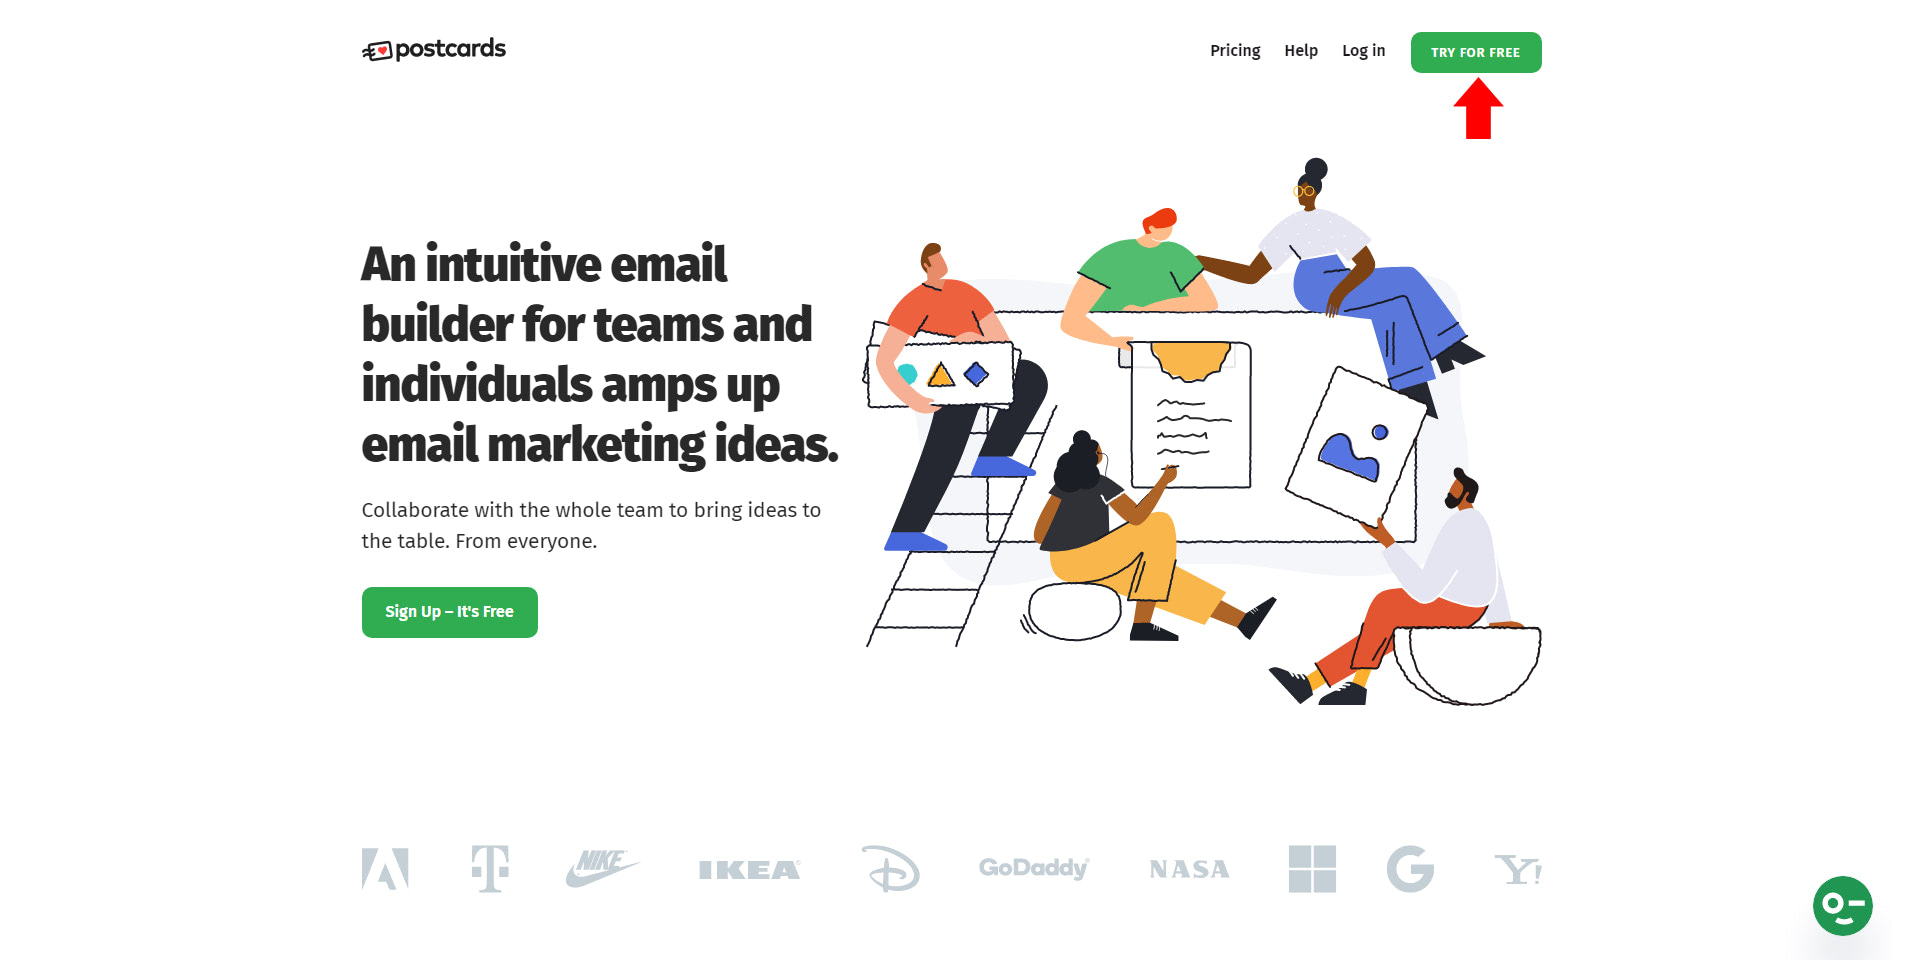
Postcards: Best Plugin for Newsletter WordPress
Designed and developed by Designmodo, Postcards is a powerful email builder for teams and individuals for your email marketing needs. It’s a feature-rich drag and drop email editor with pre-built responsive and customizable blocks. With Postcards, it’s easy to create your desired email design template using it’s a modular-based system with built-in retina-ready content, structural email blocks and elements. The best thing about this application is that it can export wordpress newsletter template to a list of popular email marketing providers such as HubSpot and Mailchimp but also offers a feature to download the raw HTML/CSS in just one click. Here’s why it’s a perfect companion to the Newsletter Plugin:
- Integration with Email Marketing Platforms
- Drag-and-Drop Editor
- Pre-Built, Customizable Blocks
- Responsive Design
- HTML Export
Step-by-Step Guide to Installing the Newsletter Plugin
Before we begin using the Newsletter Plugin for WordPress, we need to install it first.
Let’s login to our WordPress dashboard.

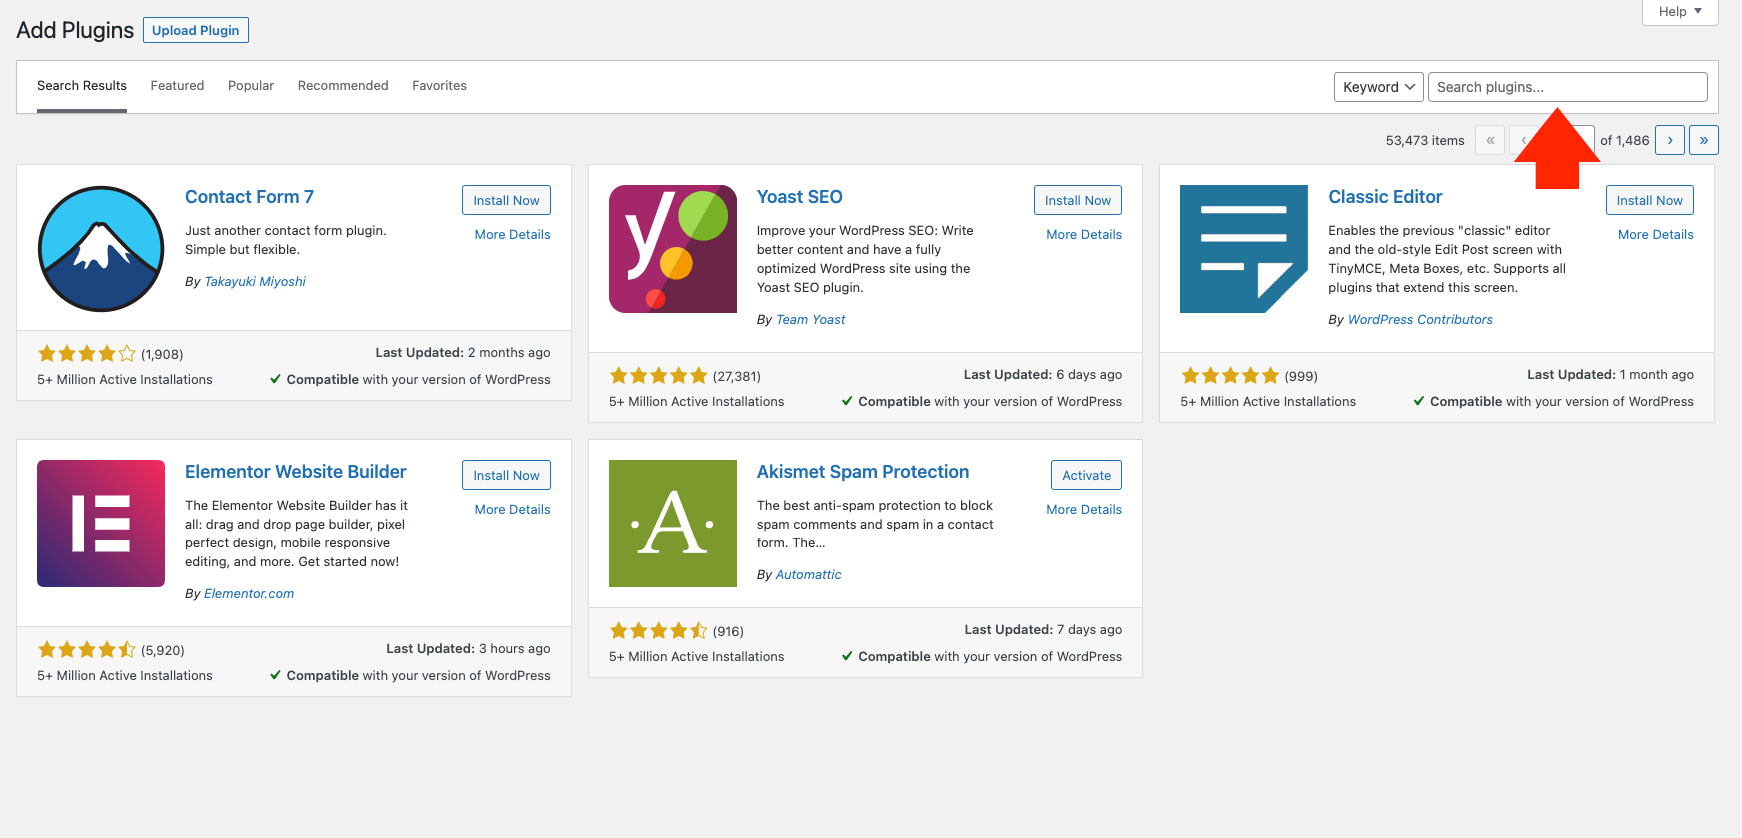
On the left menu panel hover your mouse on the “Plugins” link and click on the “Add New” Link.

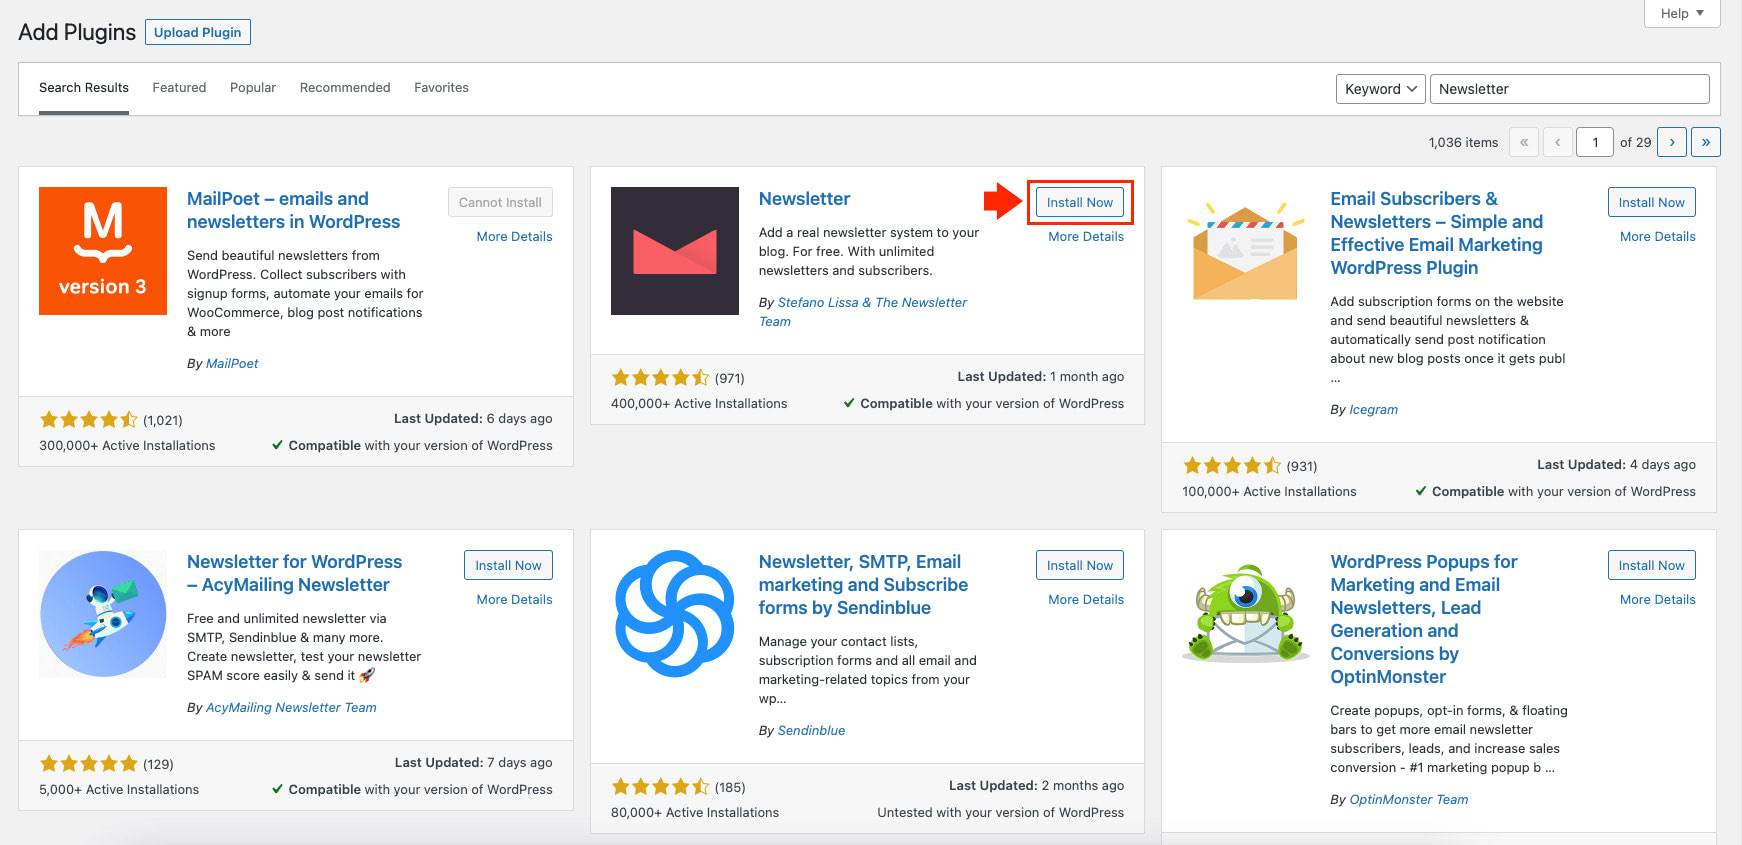
From the search box (located on the upper right corner) search for “Newsletter”.
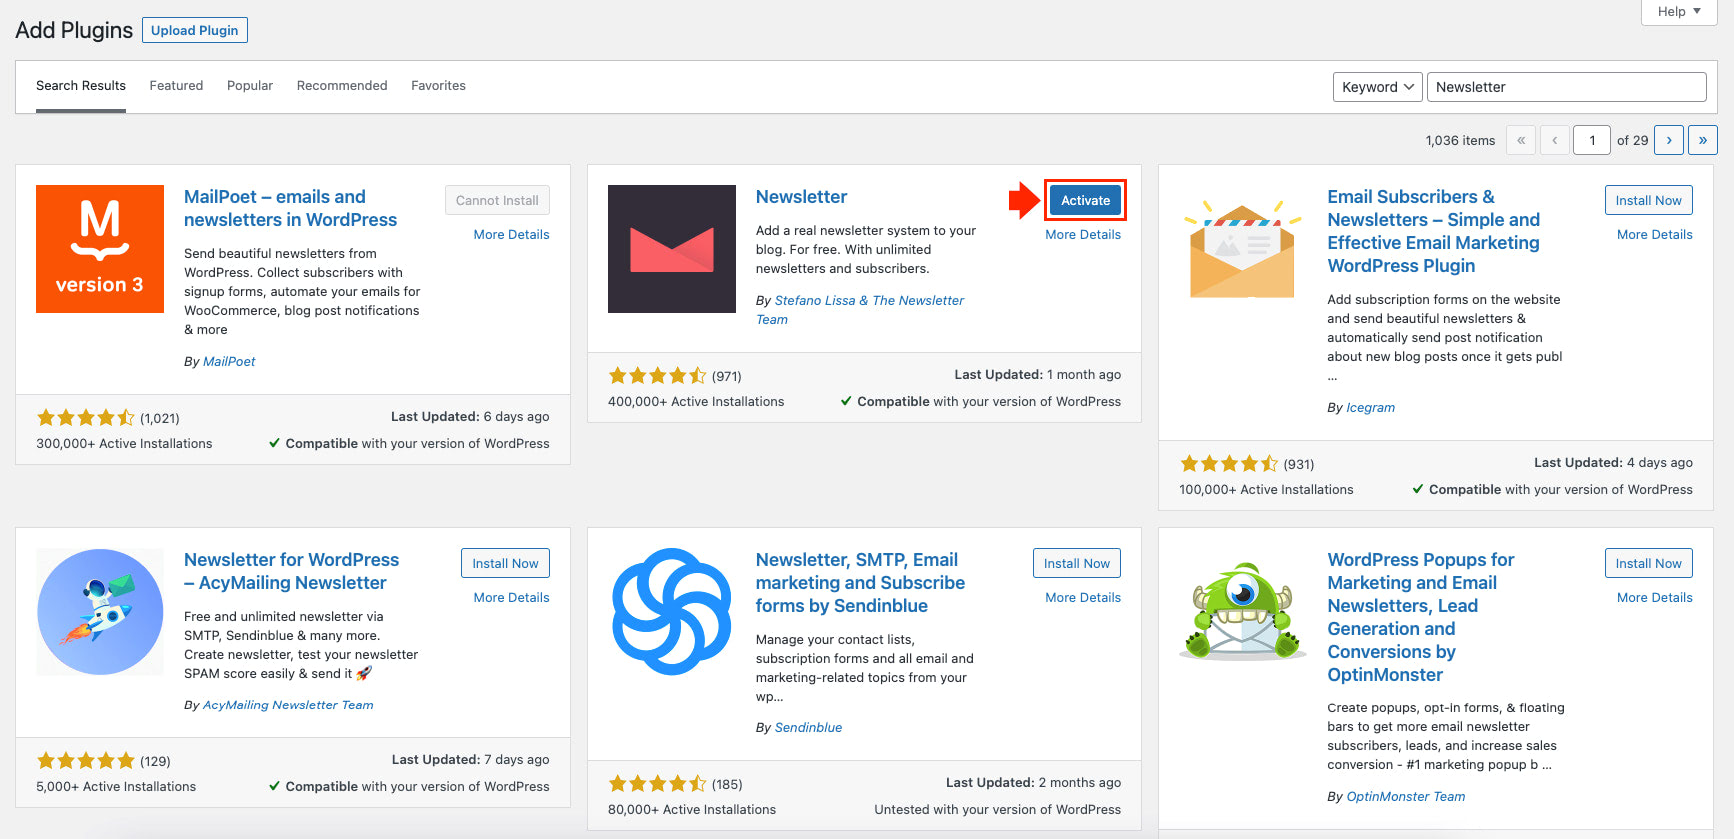
Once the Newsletter plugin appears on the search result, simply click on the “Install” button next to it to begin the installation process.
Next, click on the “Activate” button to start using it.
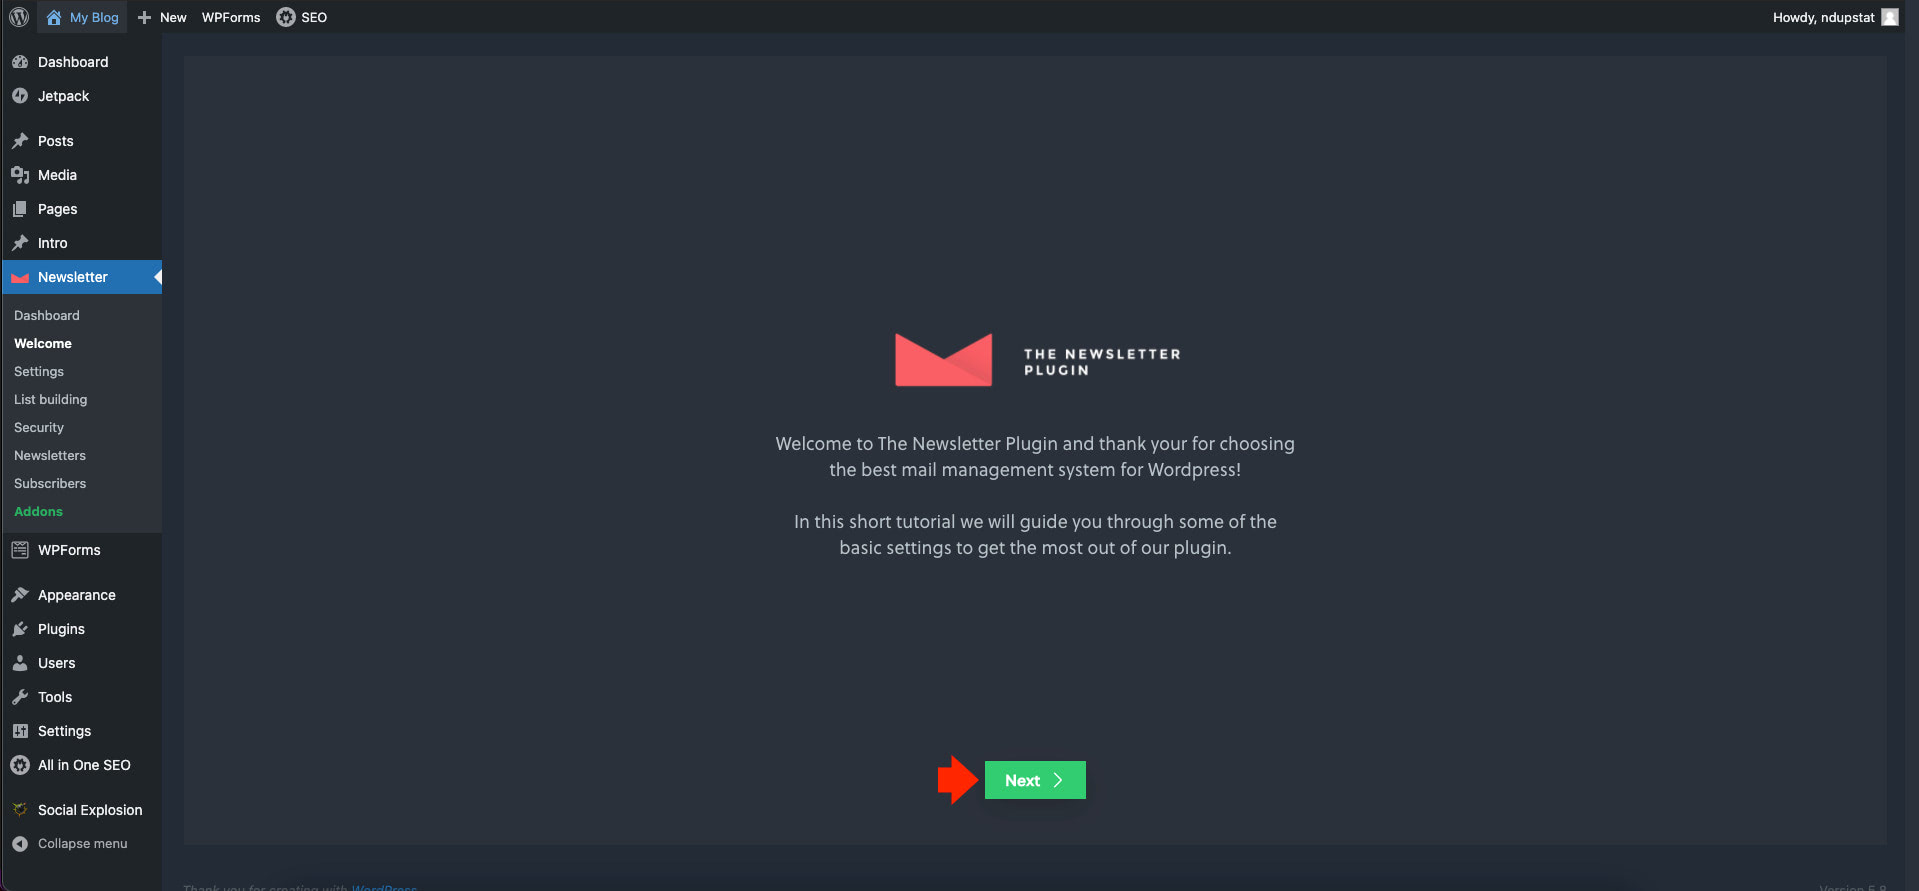
At this point, we are going to be redirected to the welcome screen wherein we will set up the basic settings of the Newsletter plugin.
To continue, simply click on the “Next” button.
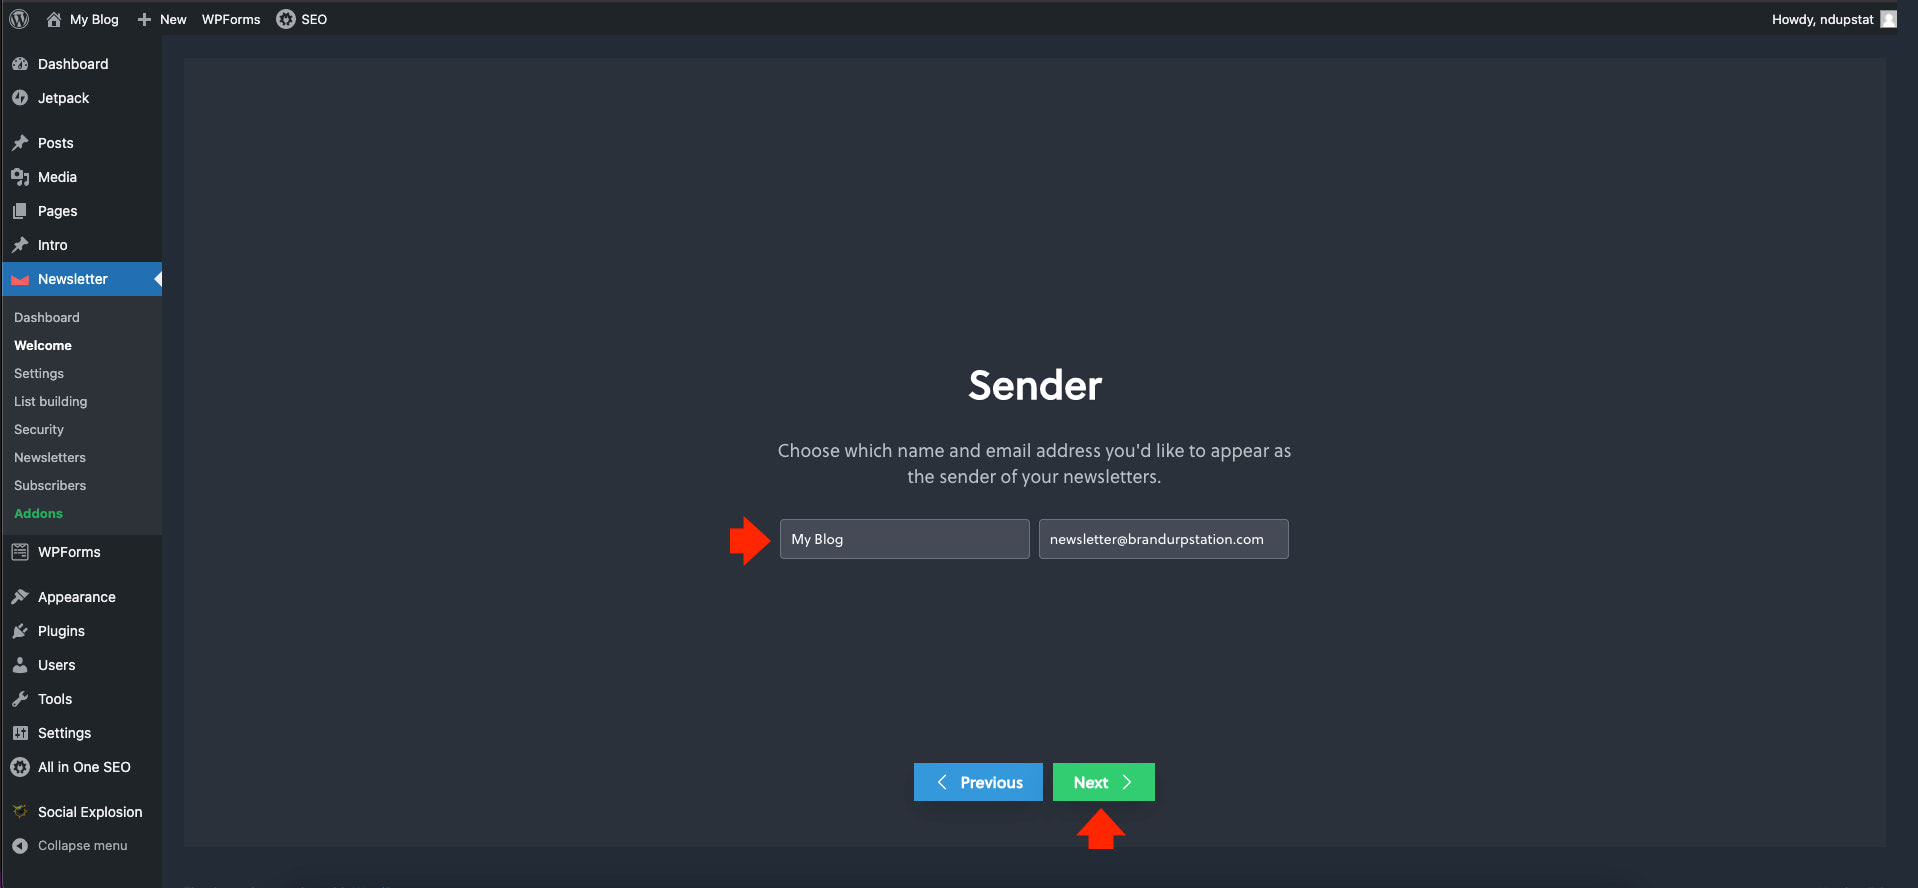
On the next screen, we need to configure the sender’s name and email address on our newsletter. Click on the “Next” button once done.
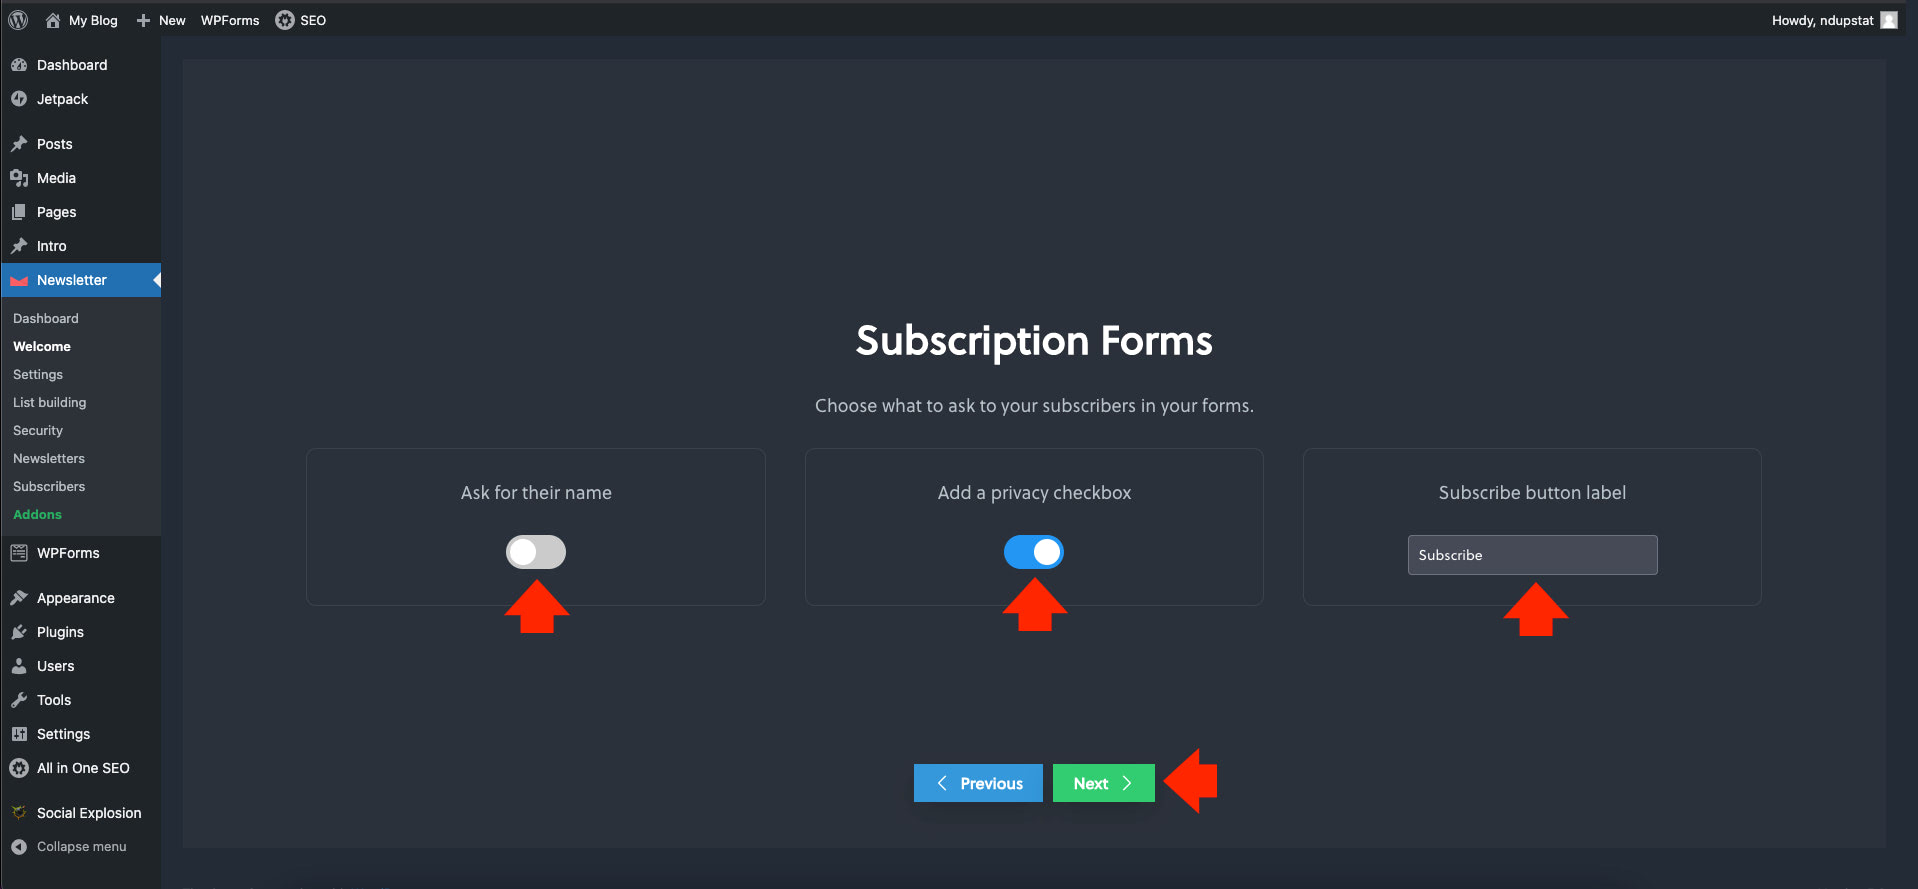
Afterwards, let’s set up the details we want to display on our newsletter form. In this example, we will only show the email and privacy checkbox field. Let’s leave the subscriber text as it is.
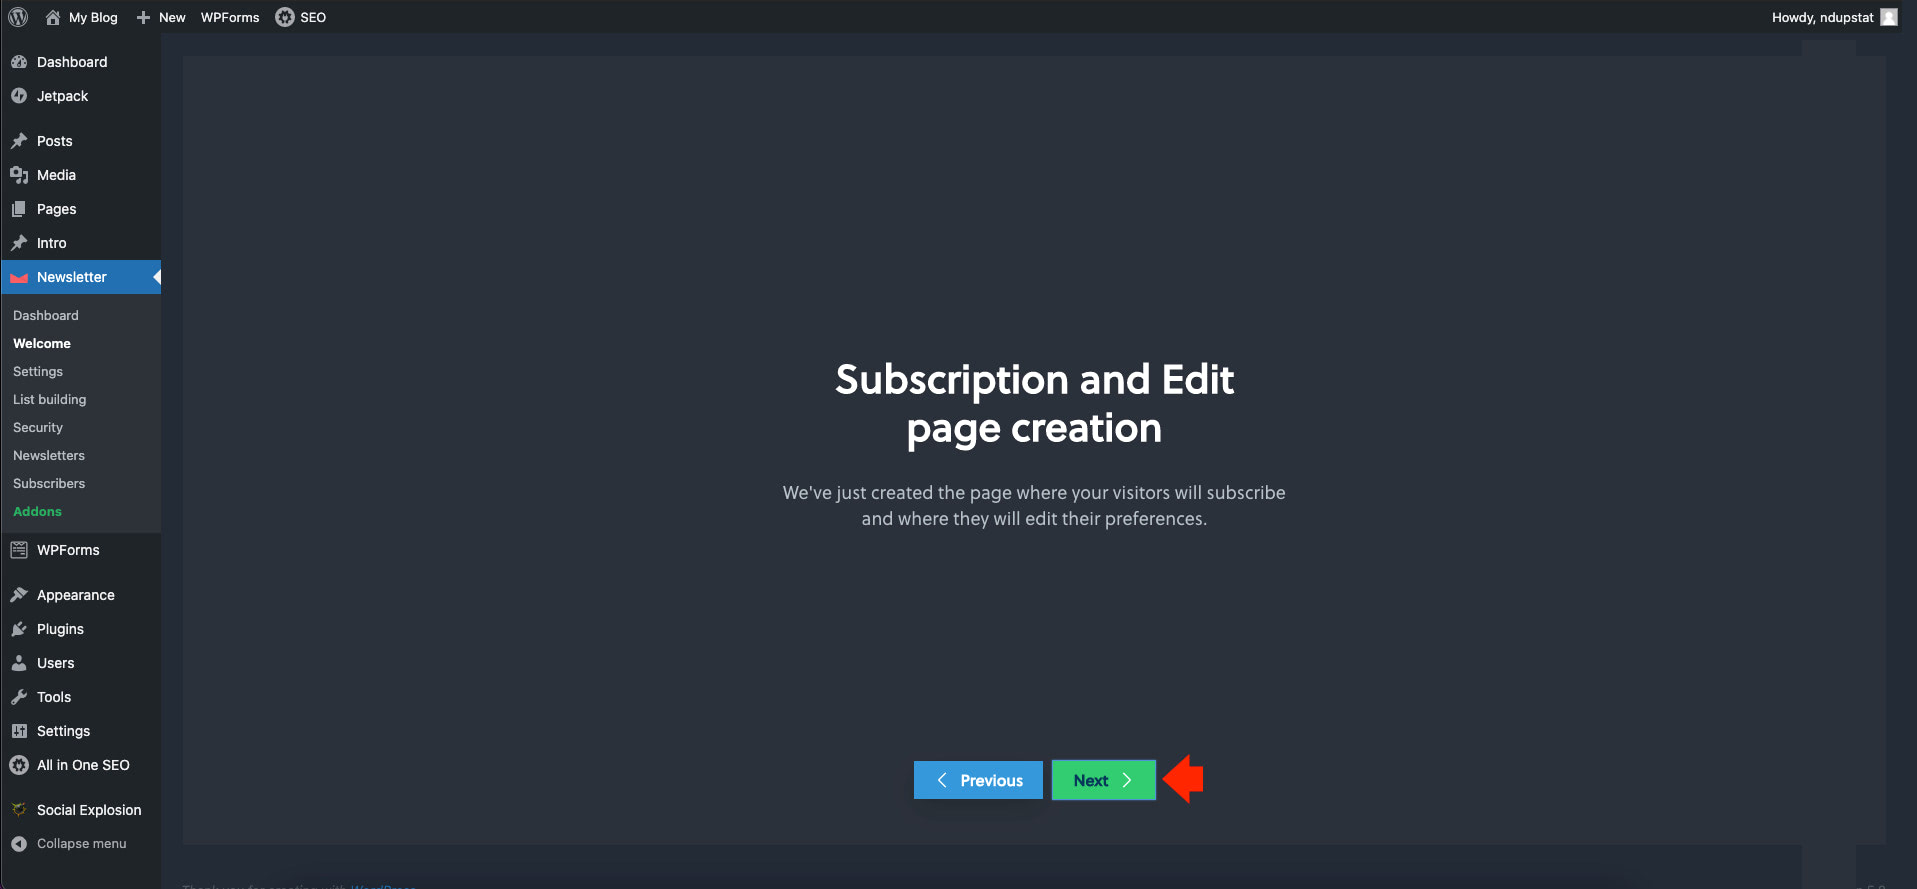
For the next screen under “Subscription and Edit page creation”, simply click on the “Next” button.
Now it’s time to test the Newsletter plugin by sending a test email. Simply put some test email address on the email field and click on the “Send a test message” button.
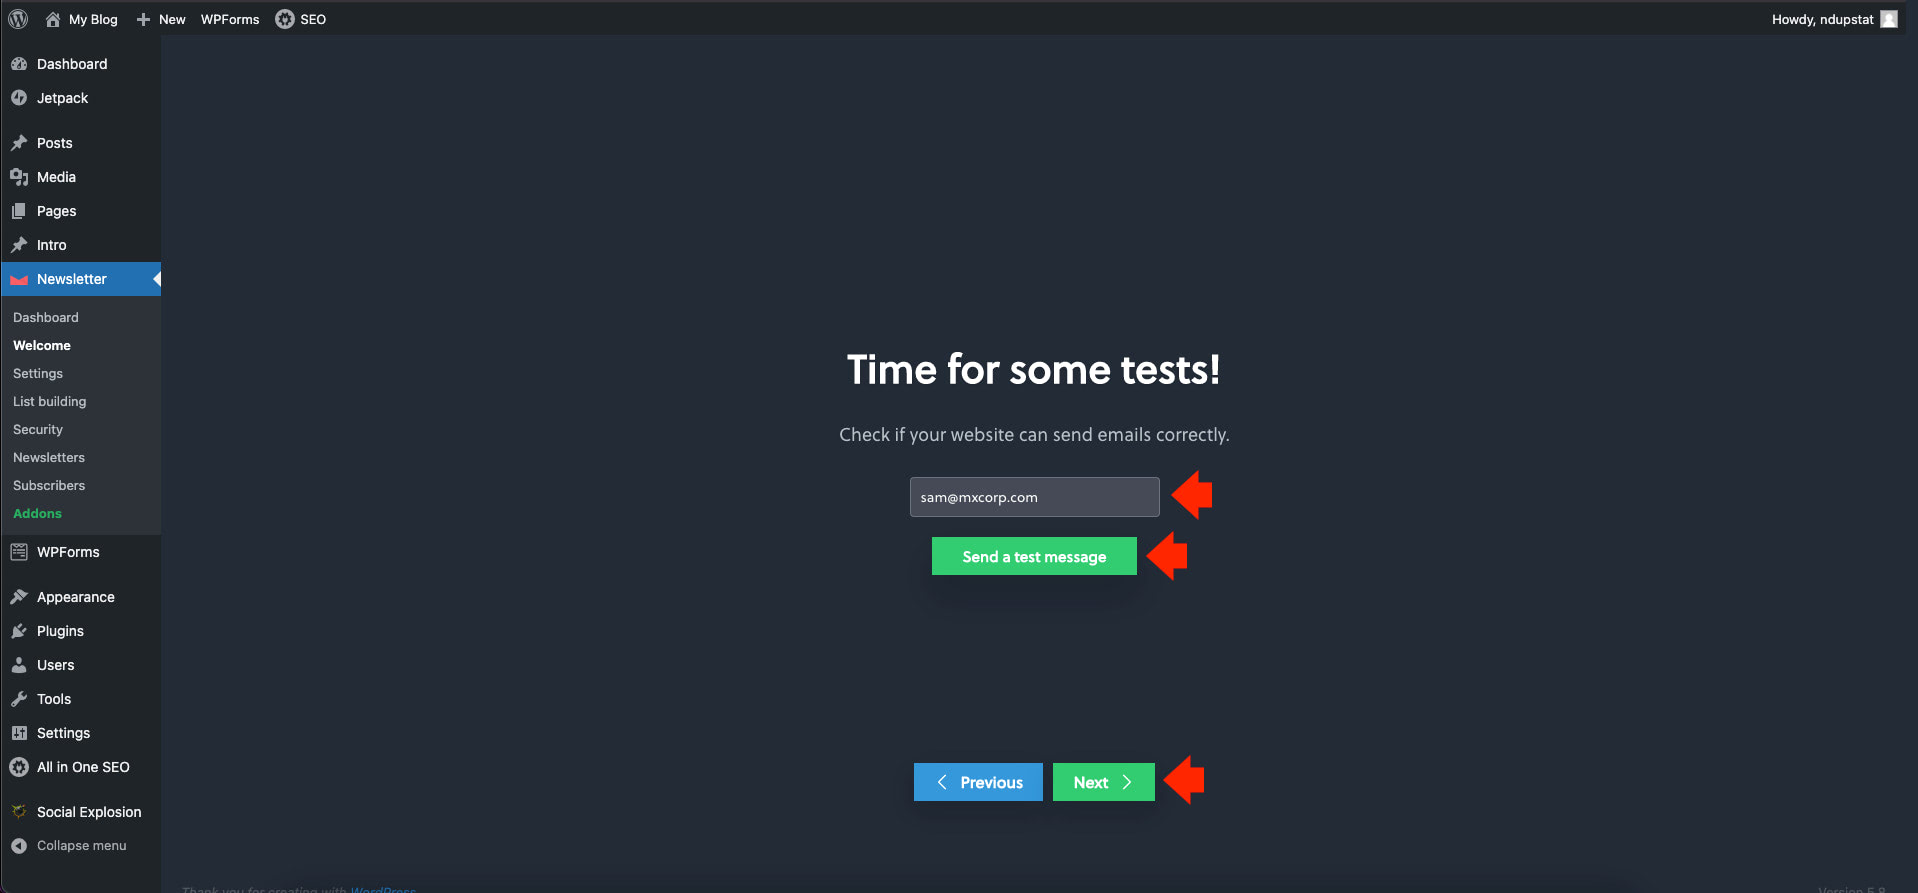
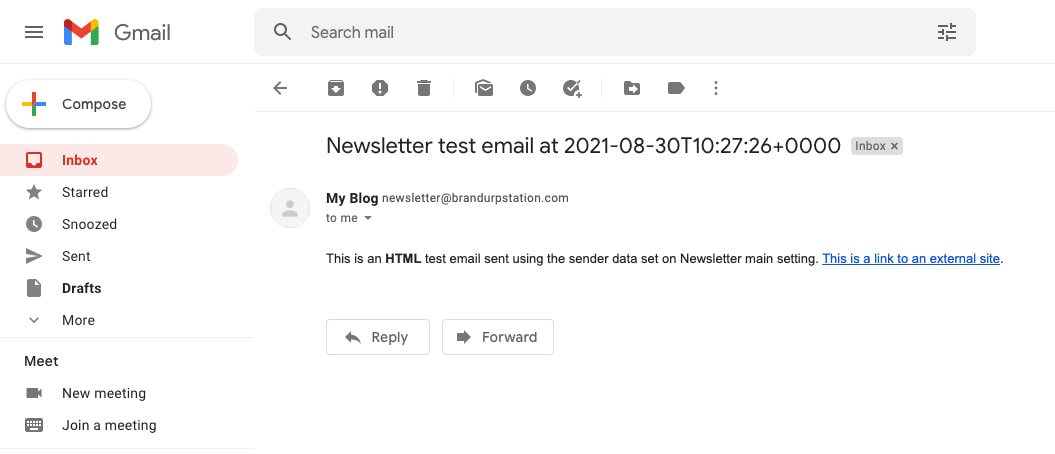
This will send a test message to the email address to ensure the deliverability of the email from the Newsletter plugin (always work with email deliverablity experts). As seen in the image below, the test email was successfully sent.
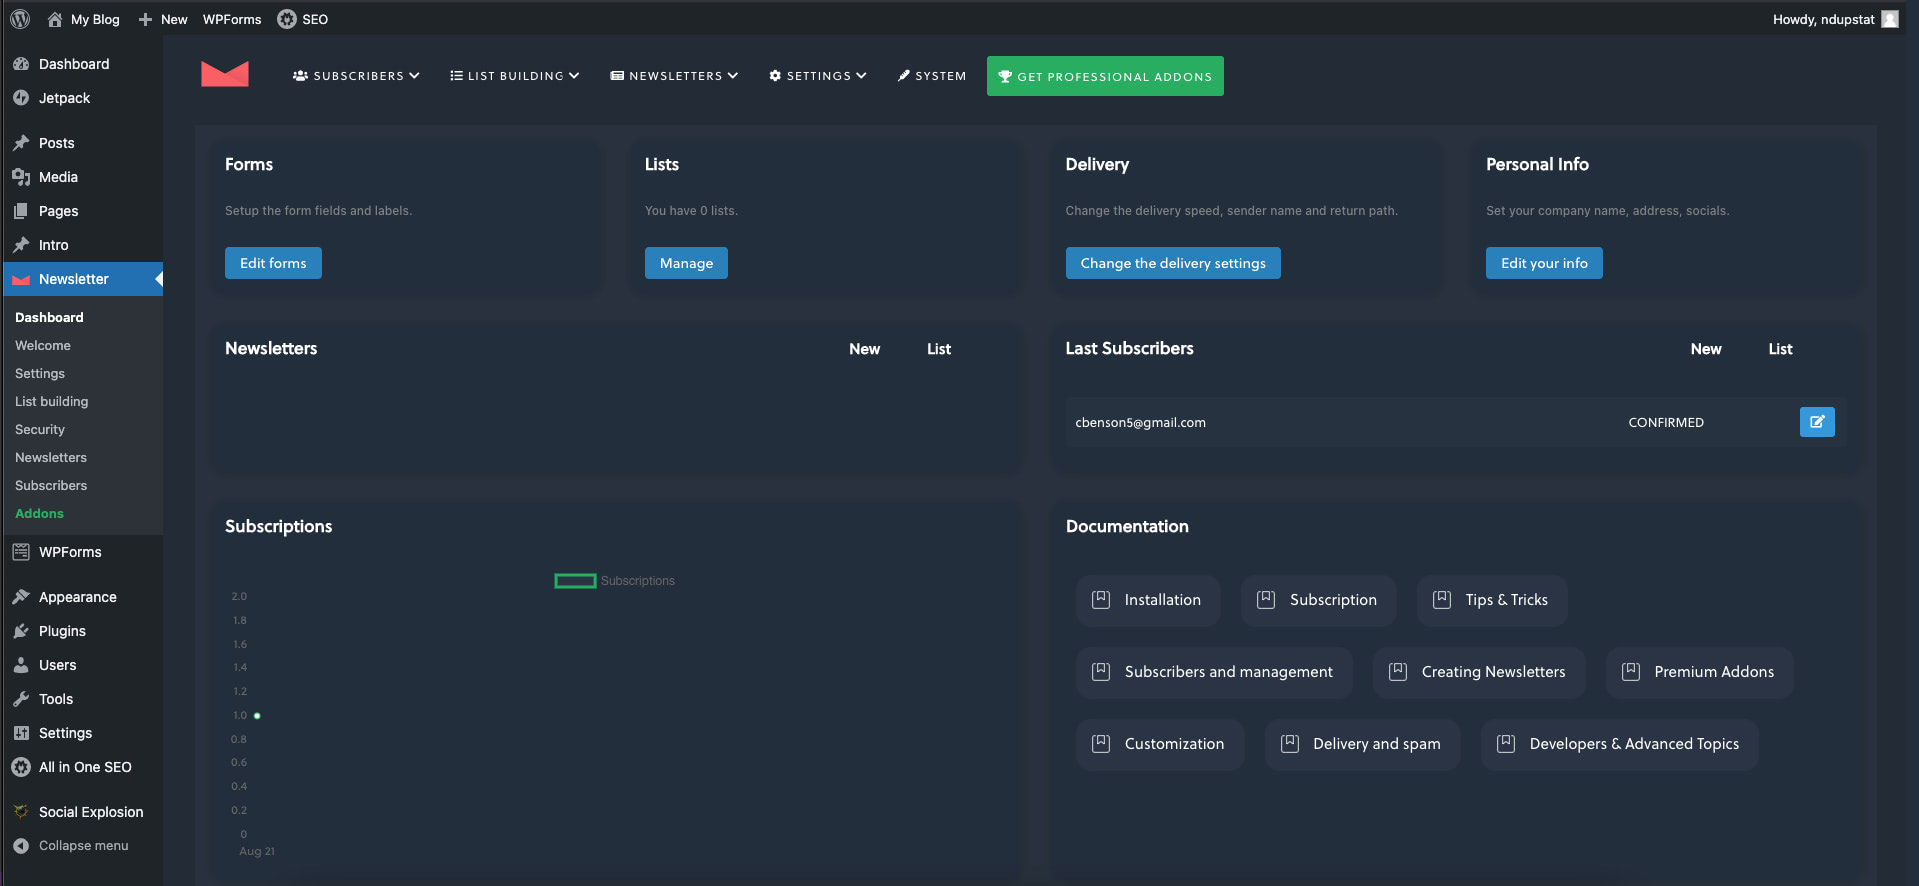
At this point our setup is complete. Simply click on the “Go to your dashboard” button to continue.
Configuring the Newsletter Plugin for Maximum Impact
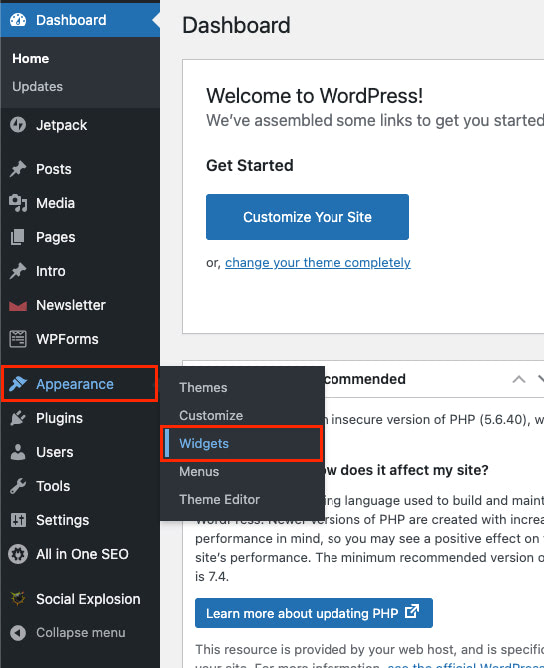
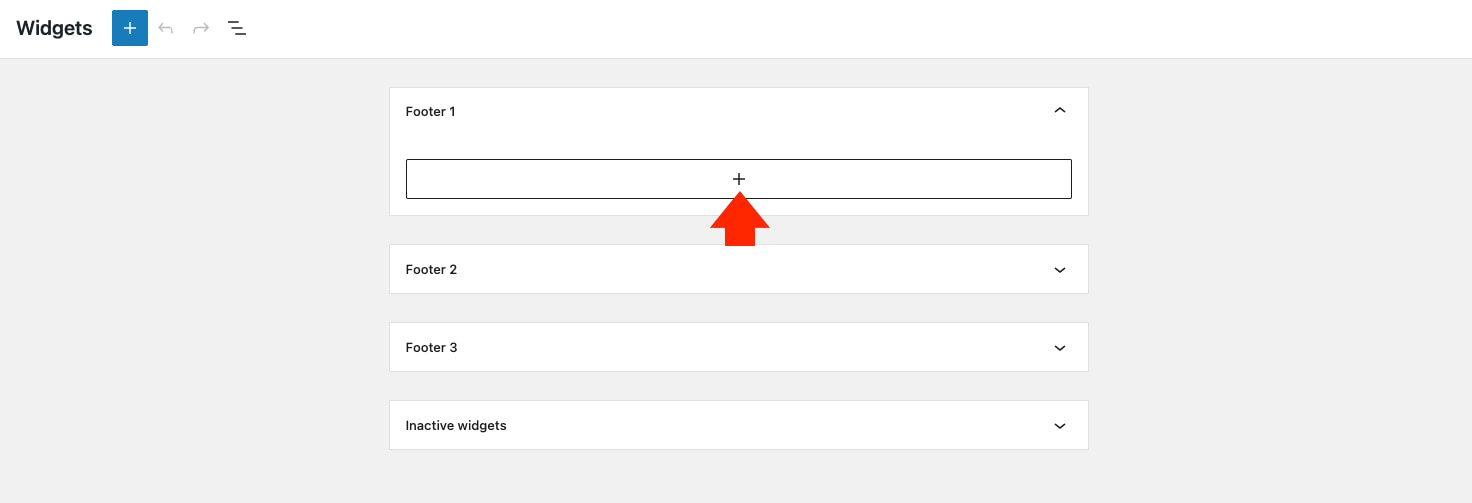
Next, let’s see how we can add a newsletter form into the footer part of our WordPress website. In order to do this, we need to hover our mouse on the “Appearance” link on the left menu panel and click on the “Widgets” link.
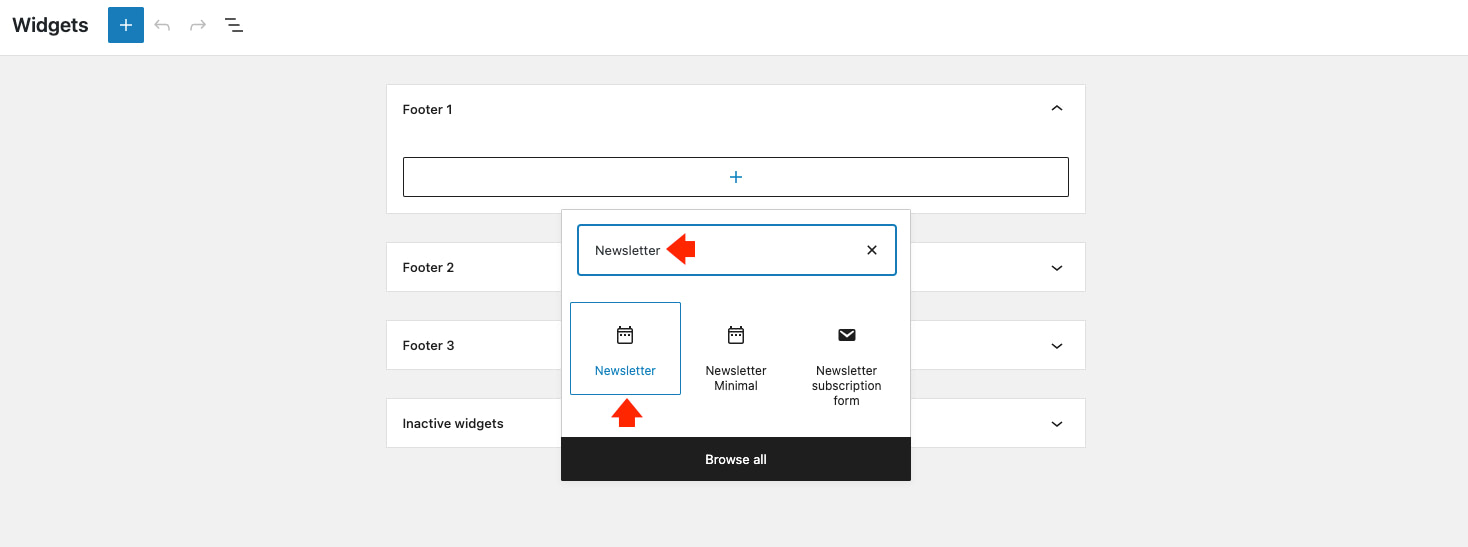
Since we want to put our newsletter form on our footer section, we need to click on the plus icon to add a new widget. A modal window will then slide down. To continue, search for the “Newsletter” widget and then click on either “Newsletter” or “Newsletter Minimal”. In this example, let’s select the “Newsletter” Widget.
Afterwards, we need to supply the necessary information for our newsletter form such as the title, introduction text, dropdown entry label and list field label. In this example, let’s set up the following text as seen in the image below.
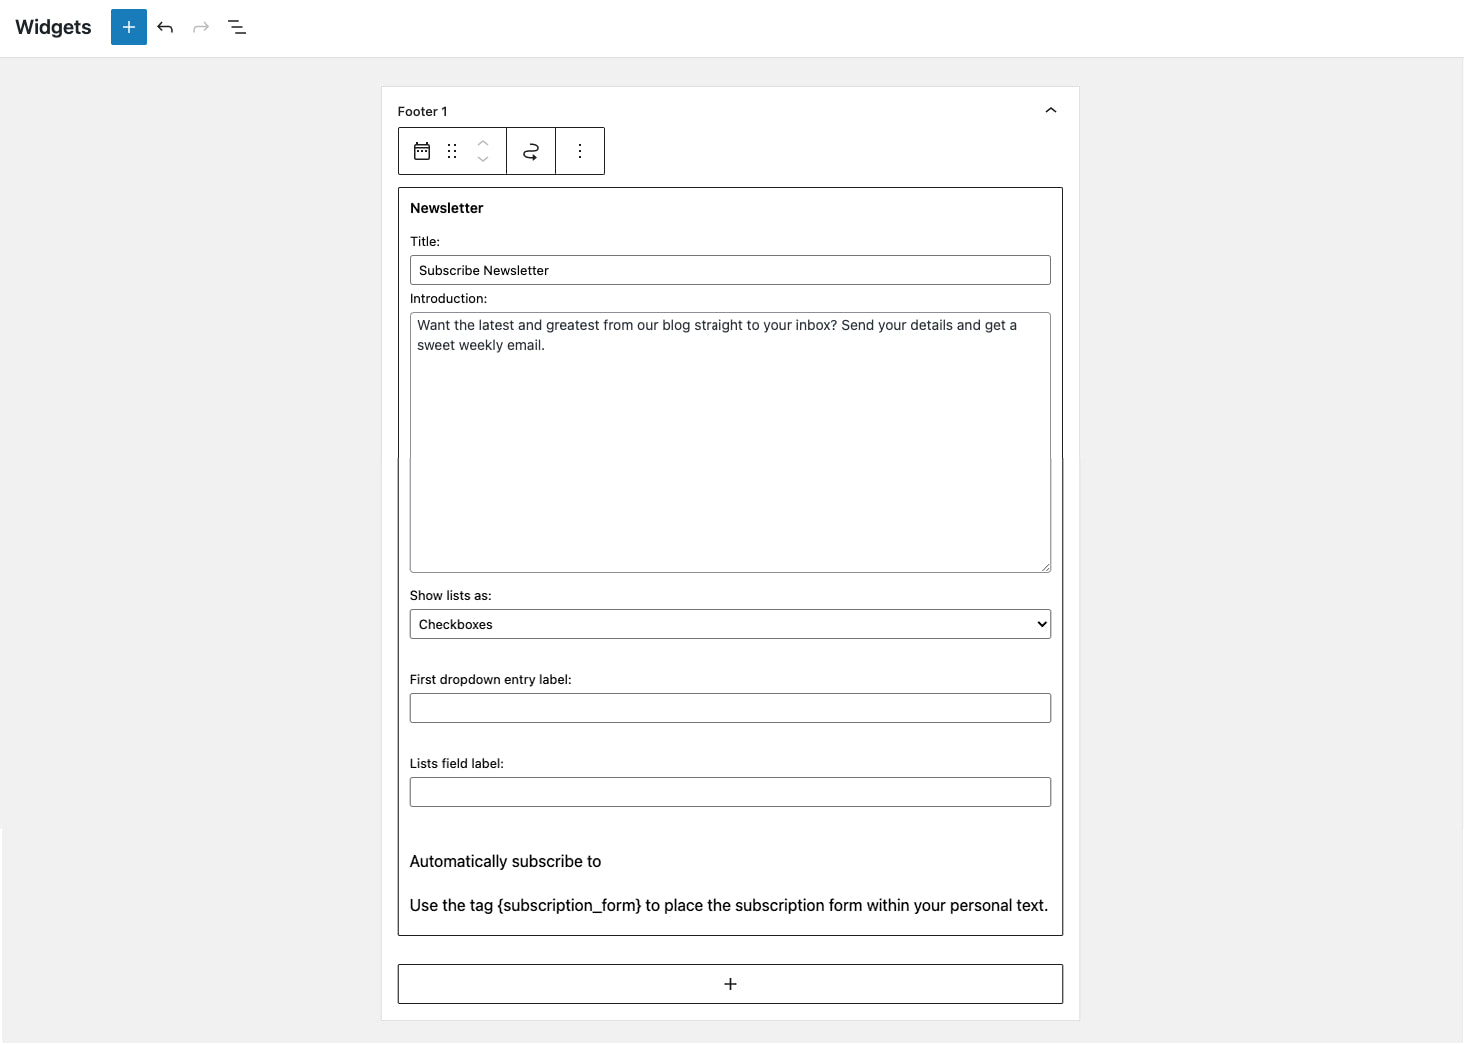
Once done, click on the “Update” button on the upper right corner of the screen to save our settings.
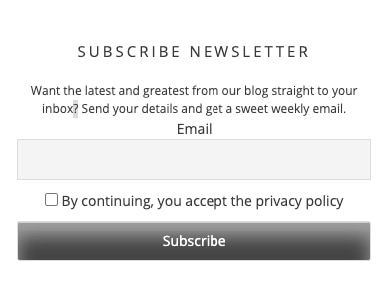
Our newsletter form will look something like the image below.
How to Use Postcards to Design Stunning Email Templates
In the next section of this article, we’re going to send an email newsletter to our confirmed subscribers using the Newsletter plugin but first let’s create an email newsletter template with Postcards.
Note: While the Newsletter plugin has its own free newsletter template, the templates provided are too basic and come with limited design features. Using postcards will give you the ability to extend your ideas using its feature-rich drag and drop email editor with pre-built responsive and customizable blocks.
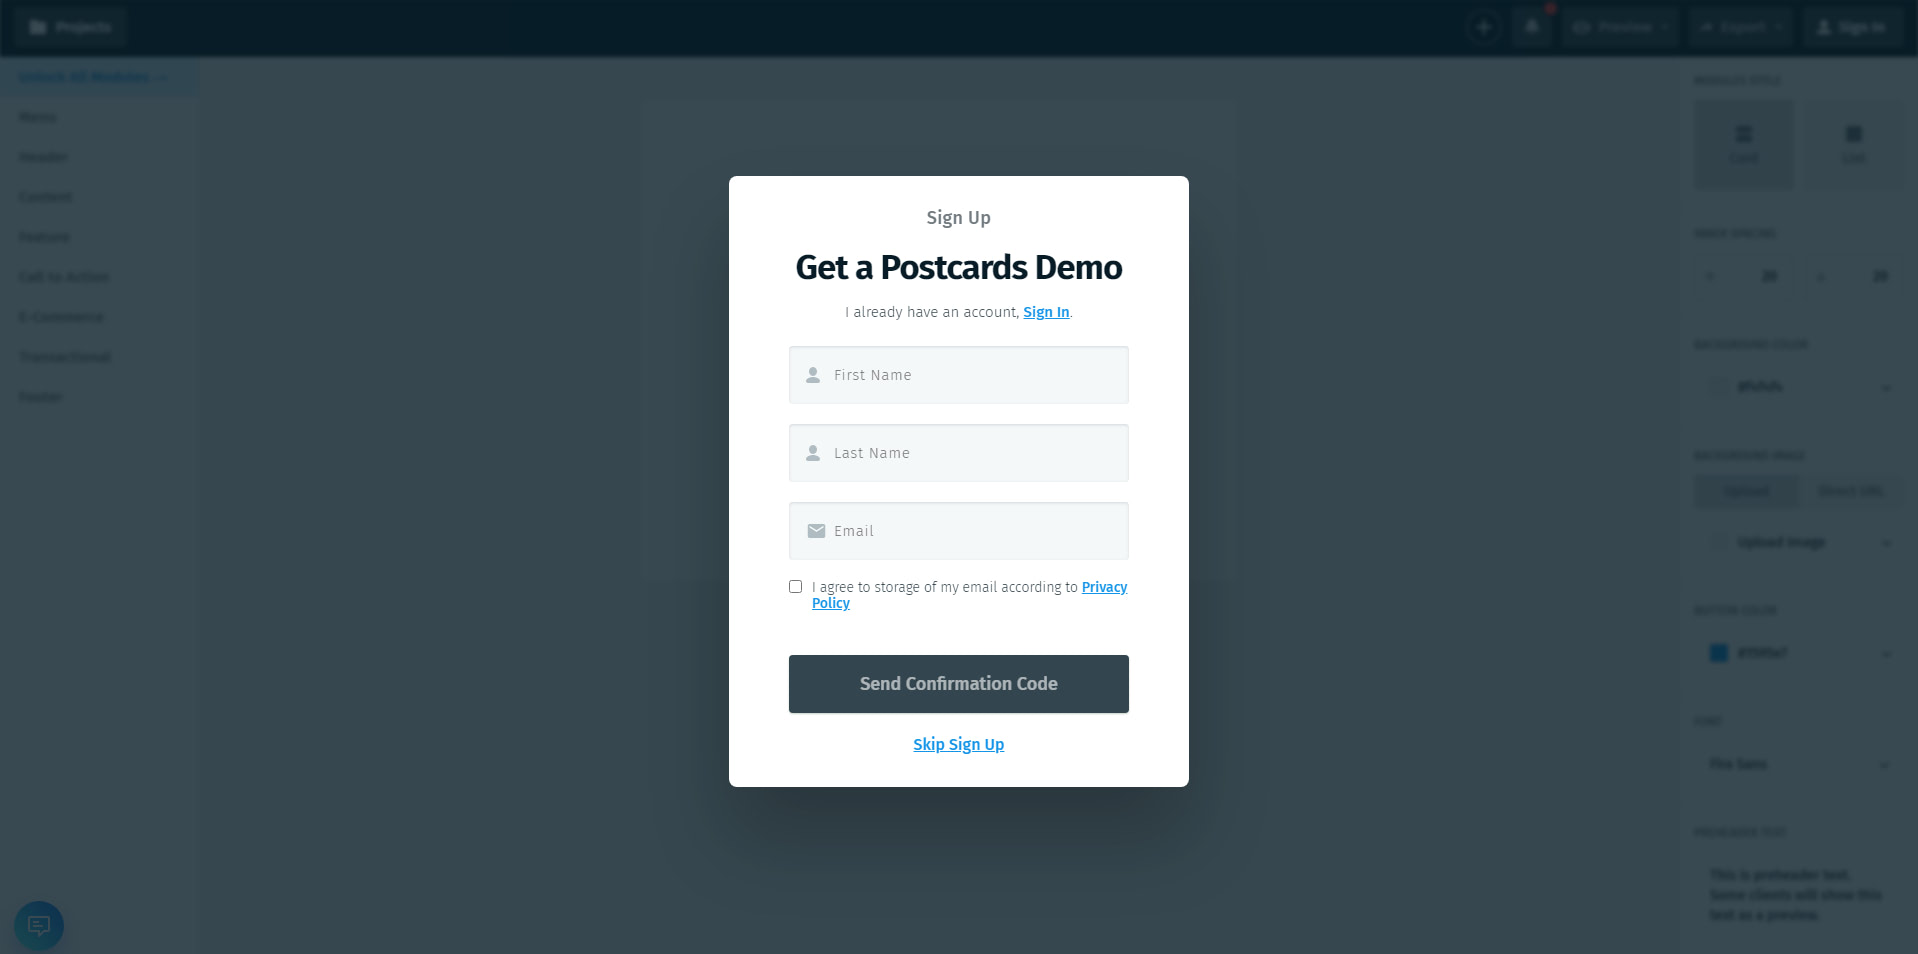
To get started, go to designmodo.com/postcards/ and signup for a free account by clicking on the “Try For Free” button.
Next, we need to fill in the signup form with our basic information and verify our email after submission.
Once verified, we can now login to our account and we will be redirected to the Postcards editor.
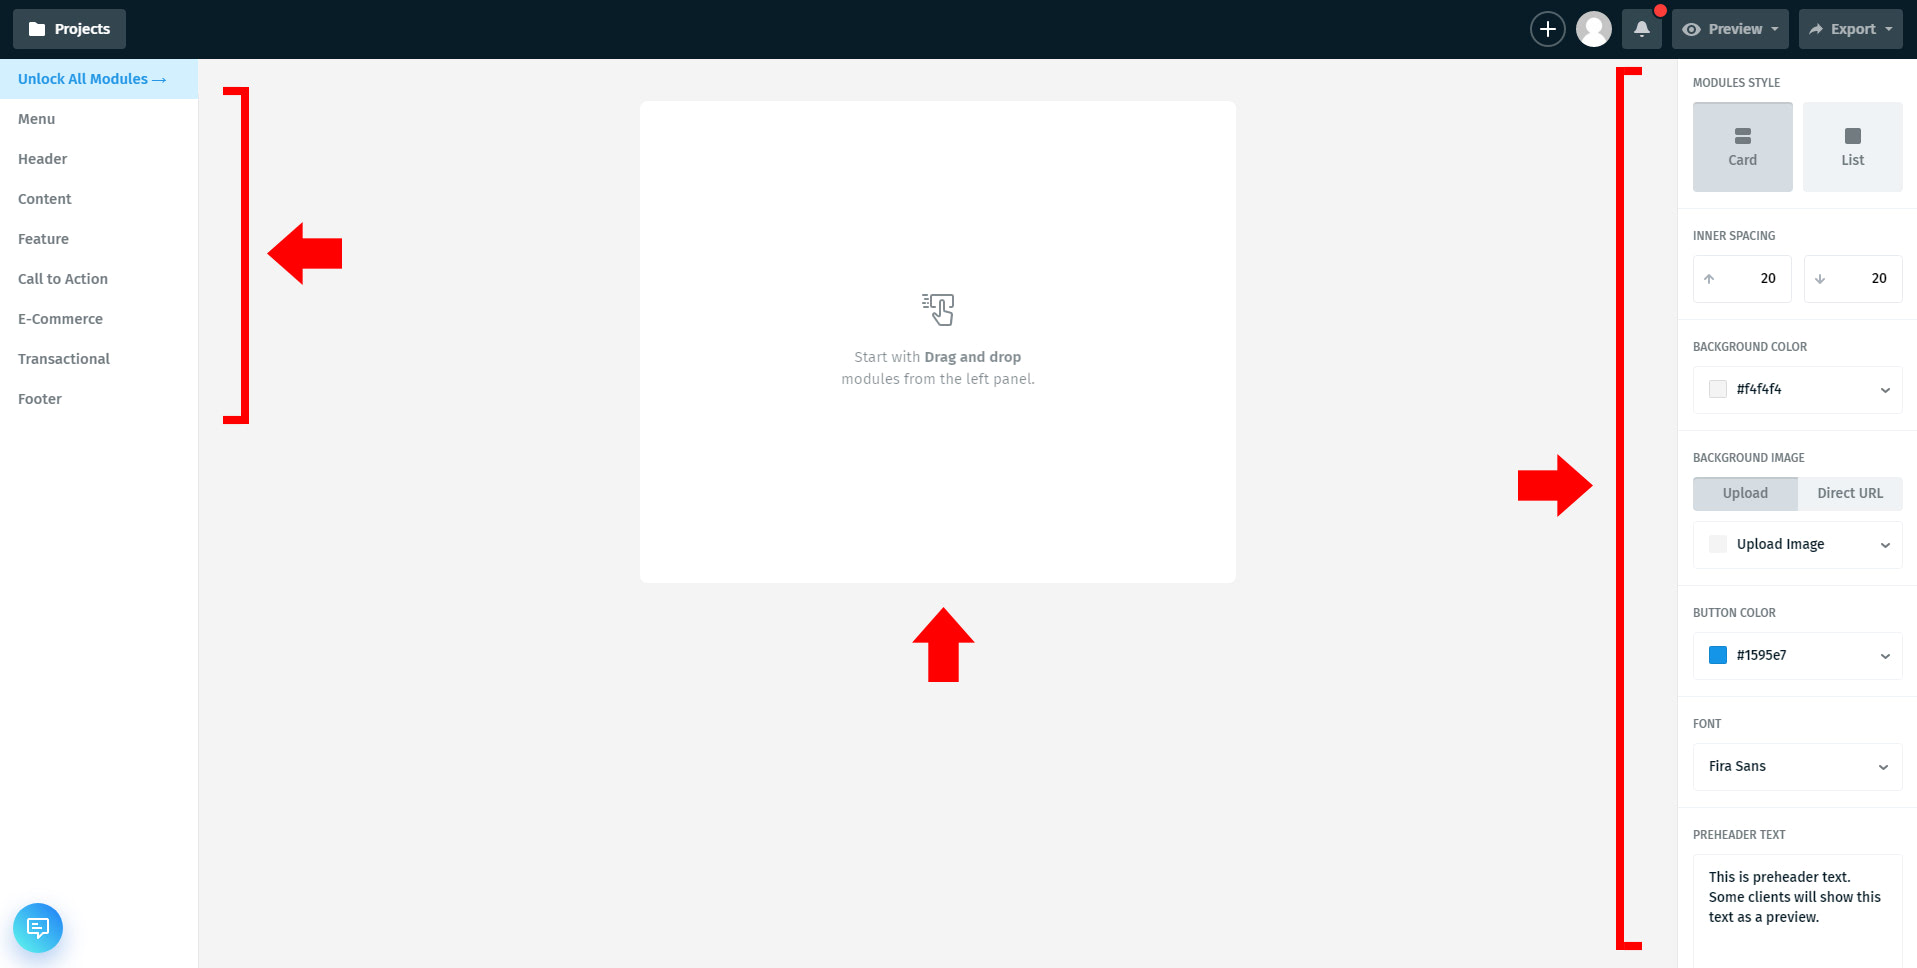
On the dashboard, we can now start creating our email newsletter template using postcards’ free content blocks from the left panel to the canvas (which is the square box in the middle) to start designing our email template. If we want to customize the module styles such as the inner spacing, background image, button color and font, simply head on to the right panel of the dashboard and modify the settings.
Let’s create a new project. To do this, click on the “Projects” button on the upper left corner of the dashboard and then click on the “Create Project” button.
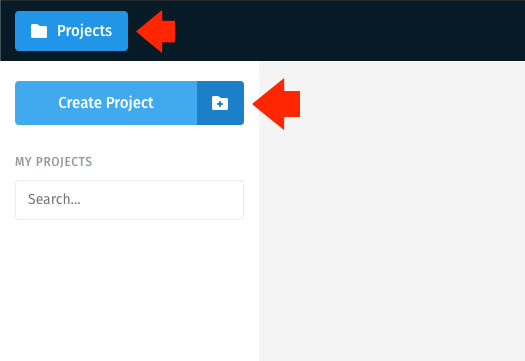
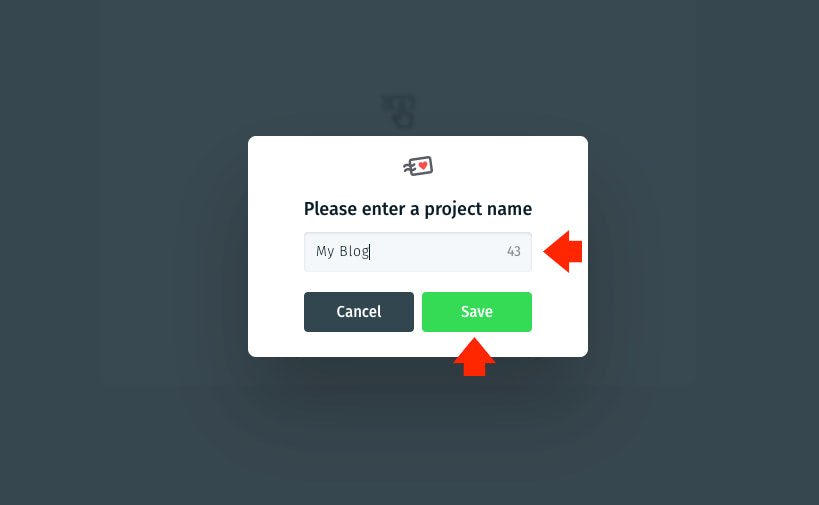
To continue, let’s name our project “My Blog”. This will create a new project with a blank email newsletter template.
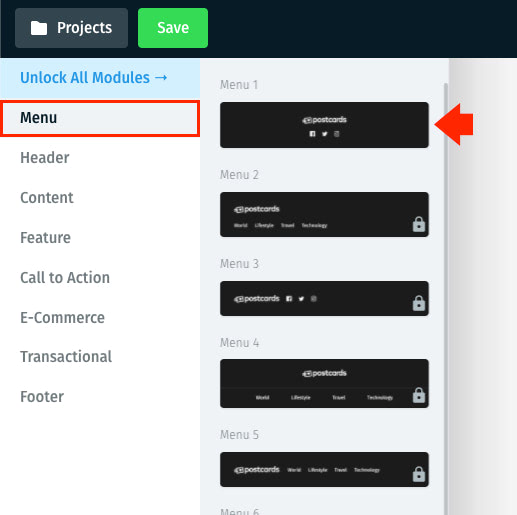
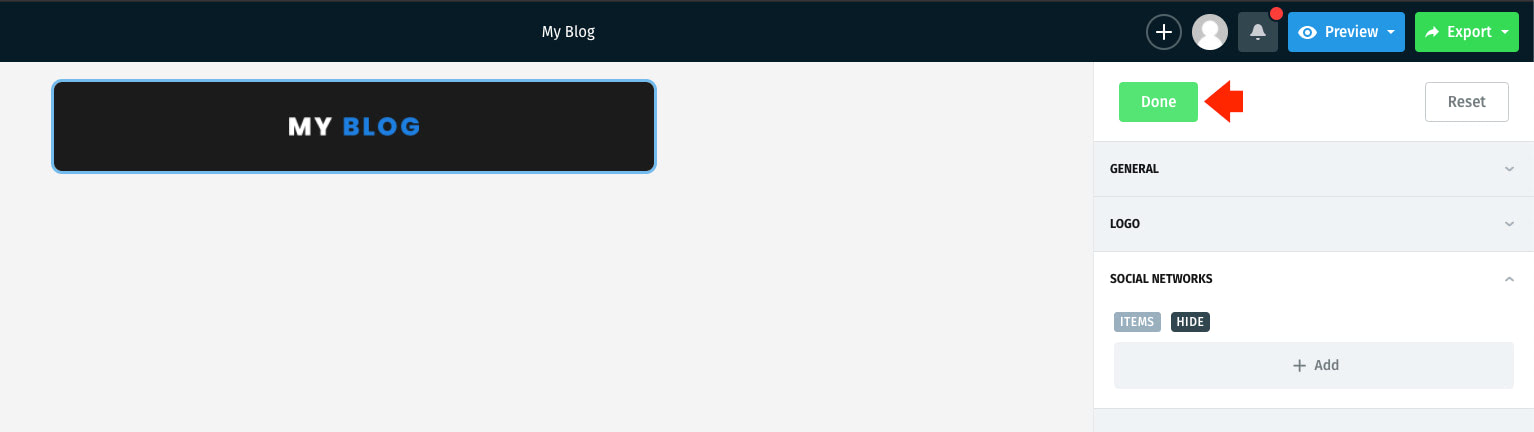
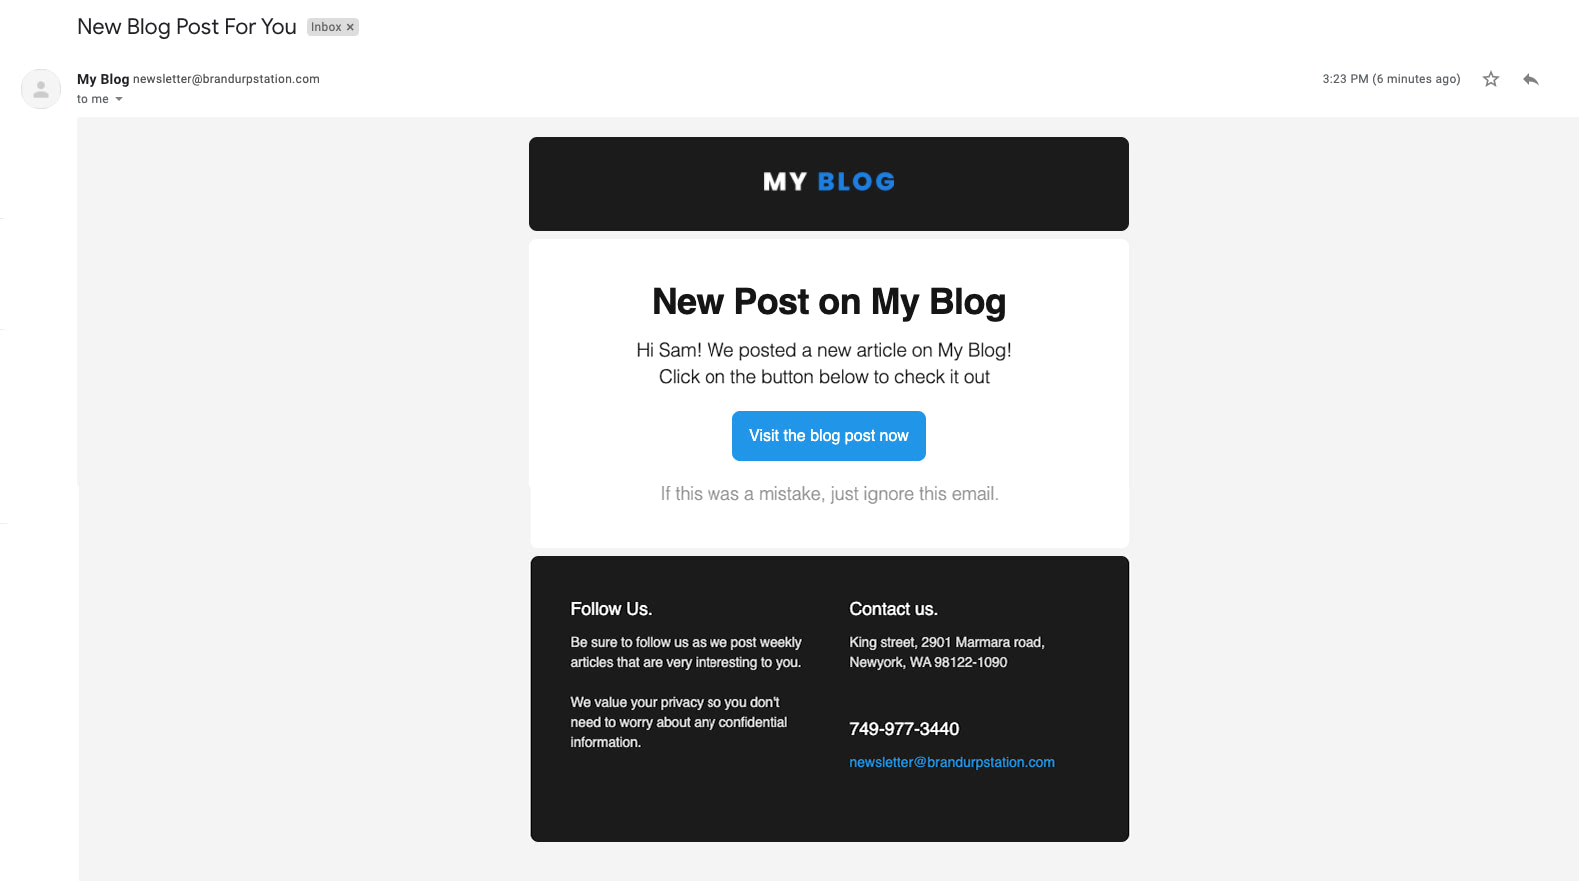
To start our My Blog email newsletter template design, let’s drag the first menu element from the menu list block on blank canvas and remove the social media icons.
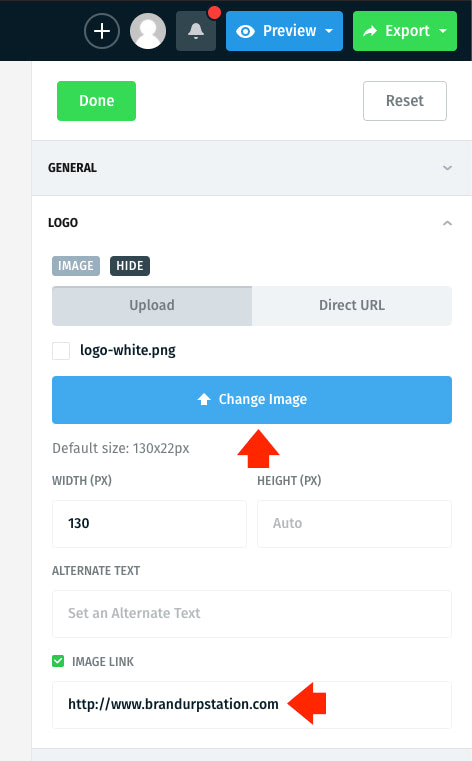
We will also change the logo by either uploading it within the app or providing an external link as seen in the images below. Click the “Done” button to save our changes.
Next, let’s add a call-to-action body element where we will put our link to our new blog post as well as the introduction text. We will use the name tag provided by the Newsletter plugin to specify the name of the subscriber. If you want to learn more about the available Newsletter plugin tags visit this page here.
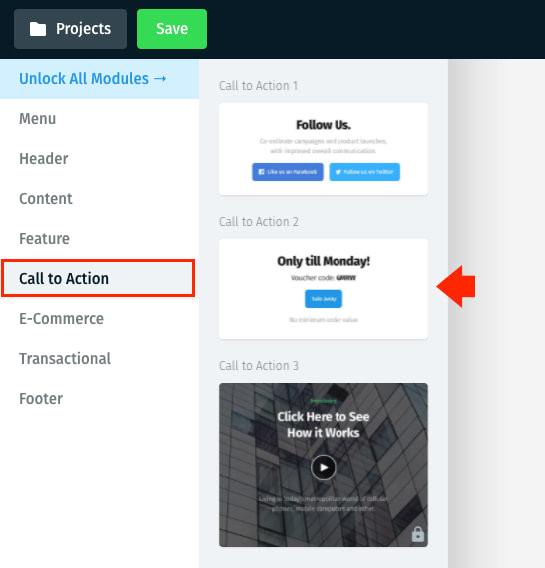
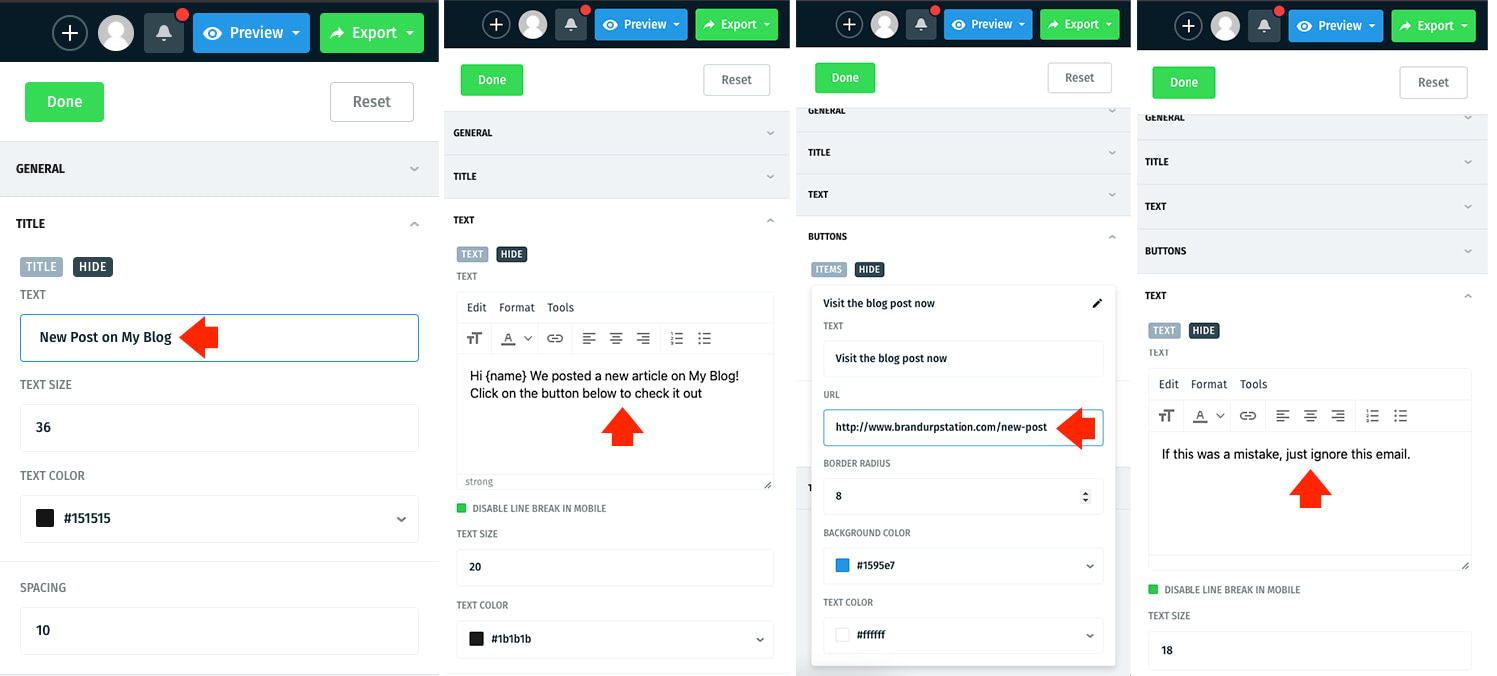
Again, click the “Done” button to save our changes.
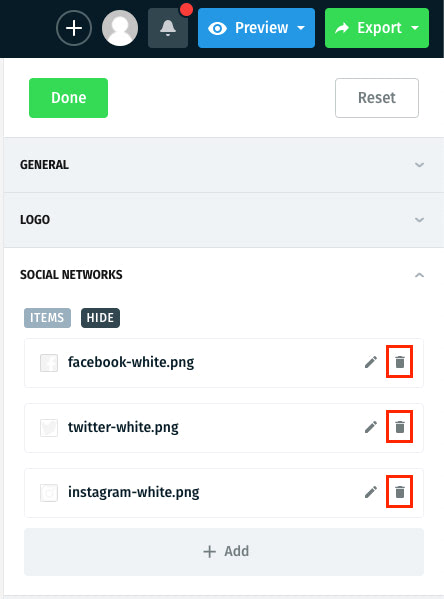
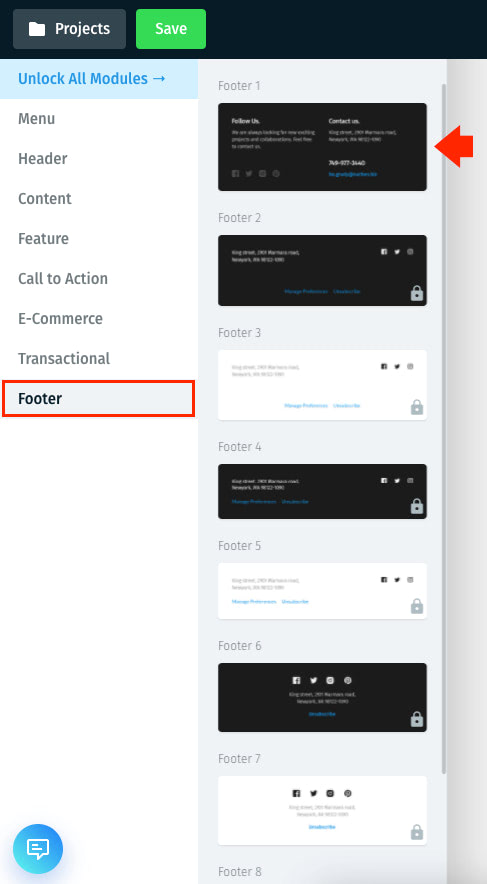
Finally, let’s drag the first footer element from the footer list block and modify the Follow us, Contact us including the phone number and email address. To wrap this up, we’re going to remove all of the social media icons. Feel free to include them if you need to. Click the “Done” button to save our changes.
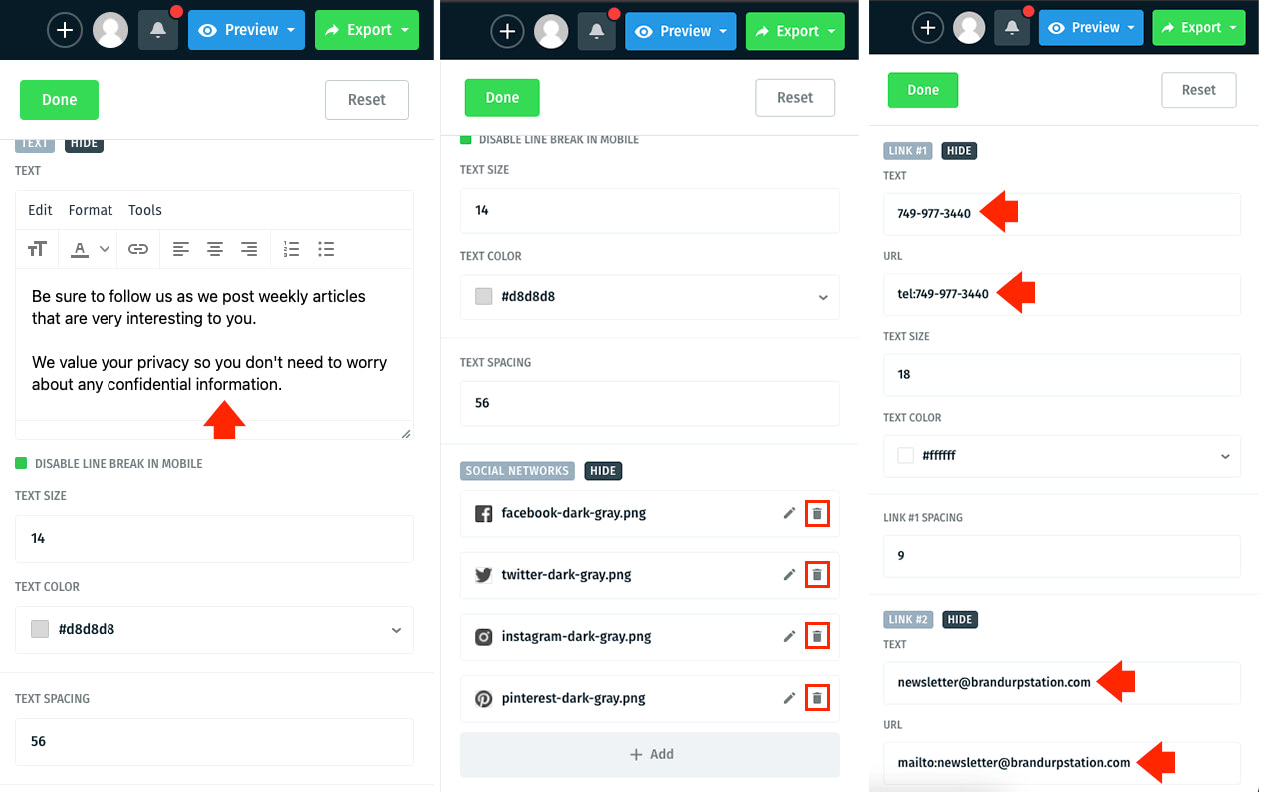

To save our project, click on the “Save” button on the upper left corner of the dashboard.
To preview our email newsletter template either on the browser or via email before exporting it by clicking on the “Preview” button.
Lastly, we need to export our email template and download it as zip. To do this, simply click on the “Export” button on the upper right corner of the screen and click on “DOWNLOAD AS ZIP” on the dropdown link. This will download the source code in zip format on our browser.
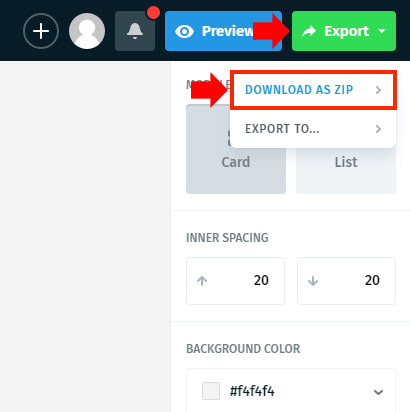
Note: Keep in mind that hosting images online is only available for users with Agency Plan. See pricing and features for more details.
Uploading Your Postcards Template to the Newsletter Plugin
Next, we need to copy the code of the downloaded Postcards’ email newsletter template to the Newsletter Plugin.
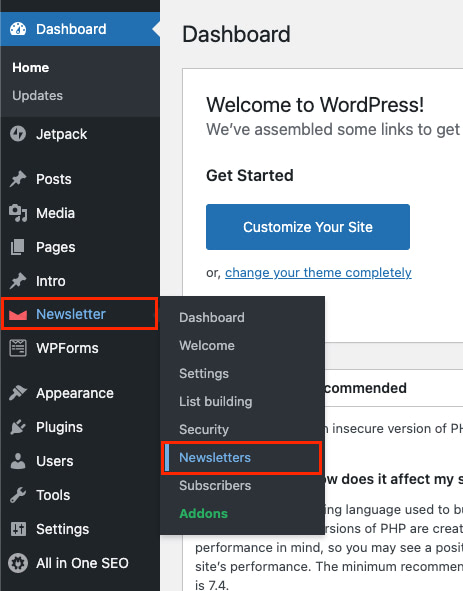
Head back to the WordPress dashboard and on the left menu panel of the WordPress dashboard, hover your mouse on the “Newsletter” link and then click on the “Newsletters” link.
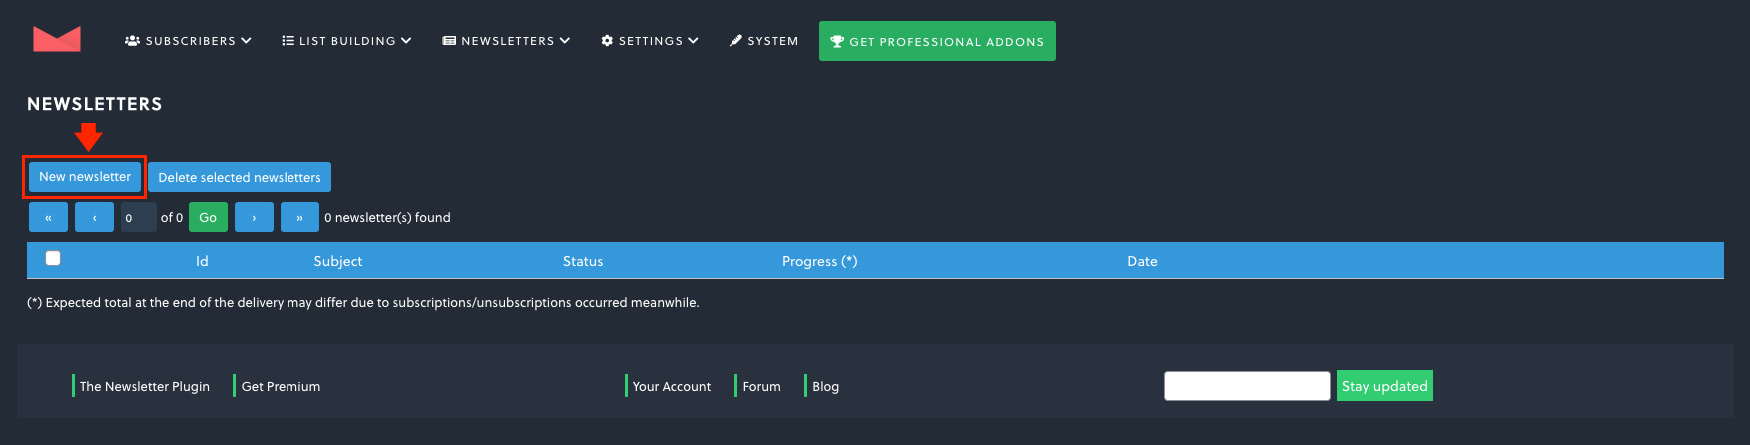
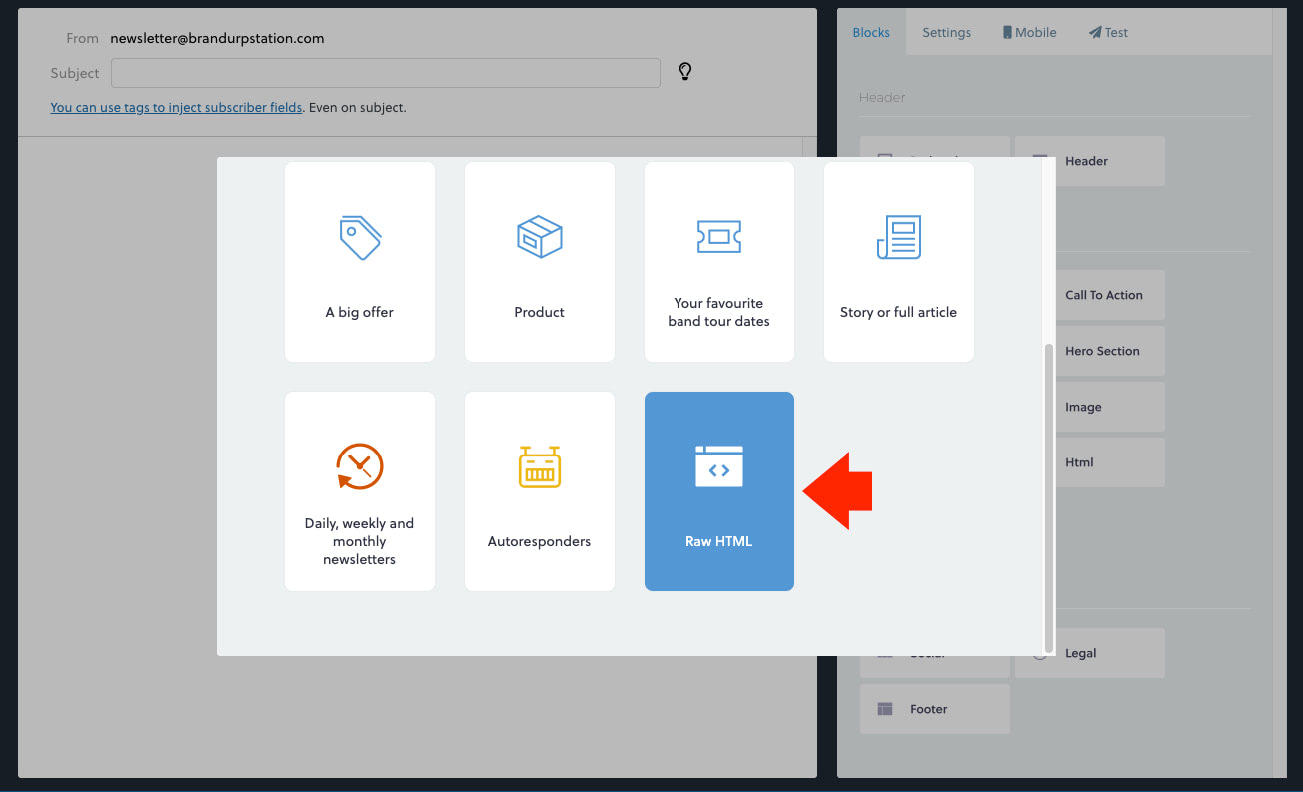
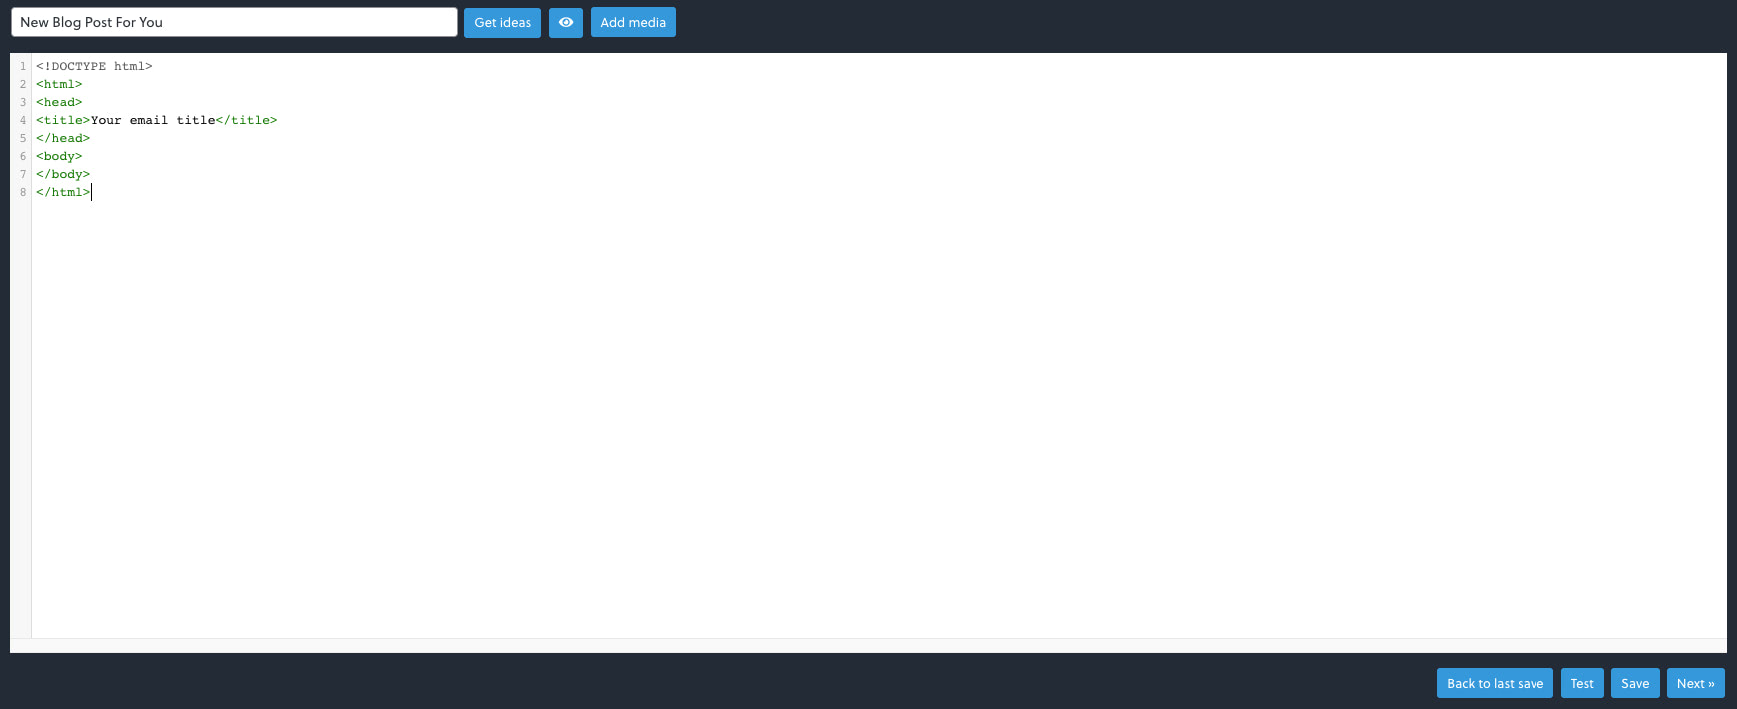
From the “Newsletters” page, click on the “New newsletter” button. This will redirect us to the “New newsletter” page where a new window will pop-up. From the modal window, scroll down and select “Raw HTML”.
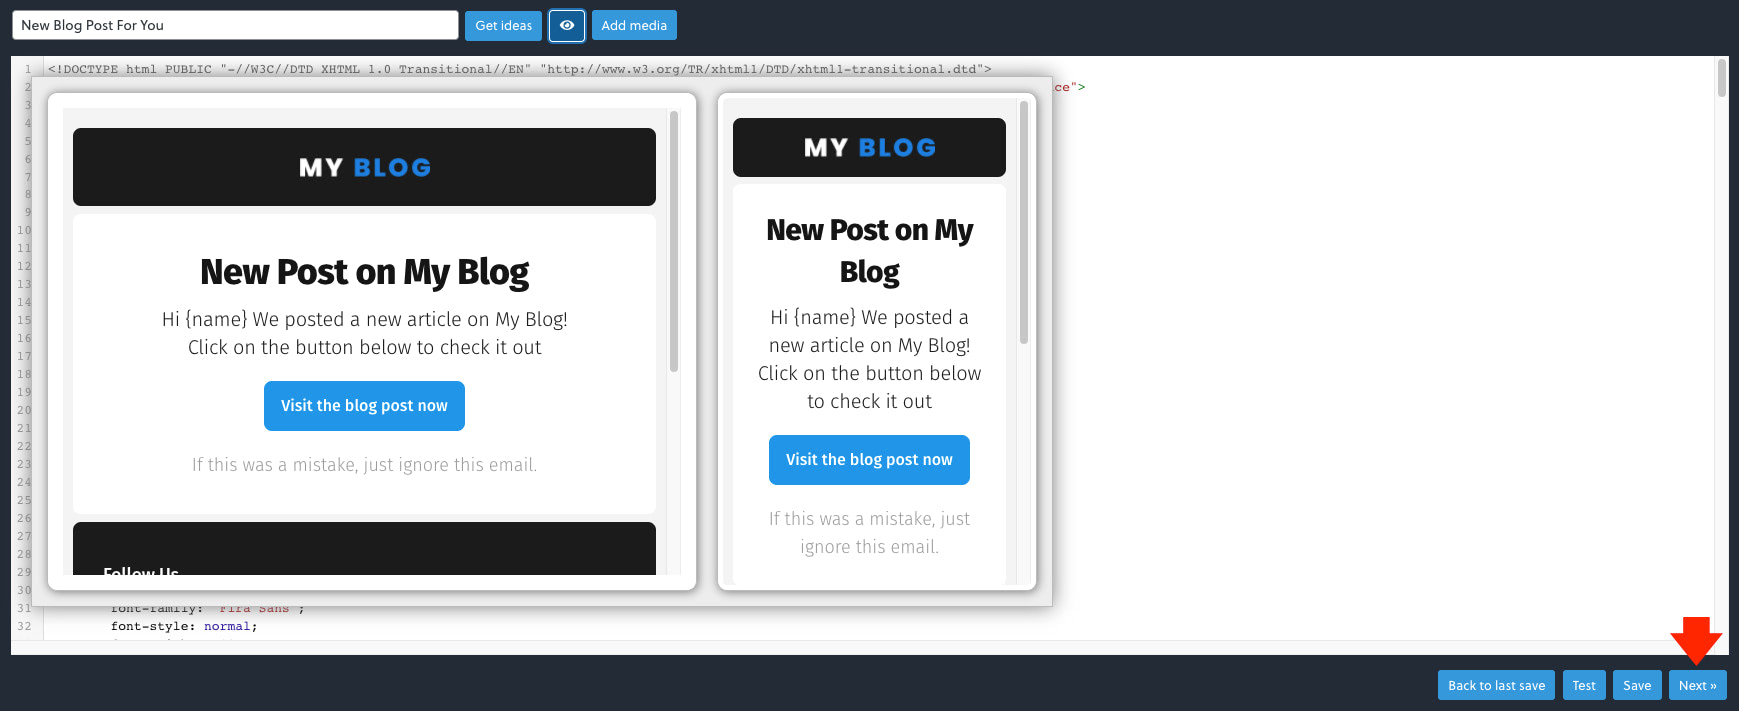
This will redirect us to the code editor page where we can put both our subject and our Postcards’ email newsletter code.
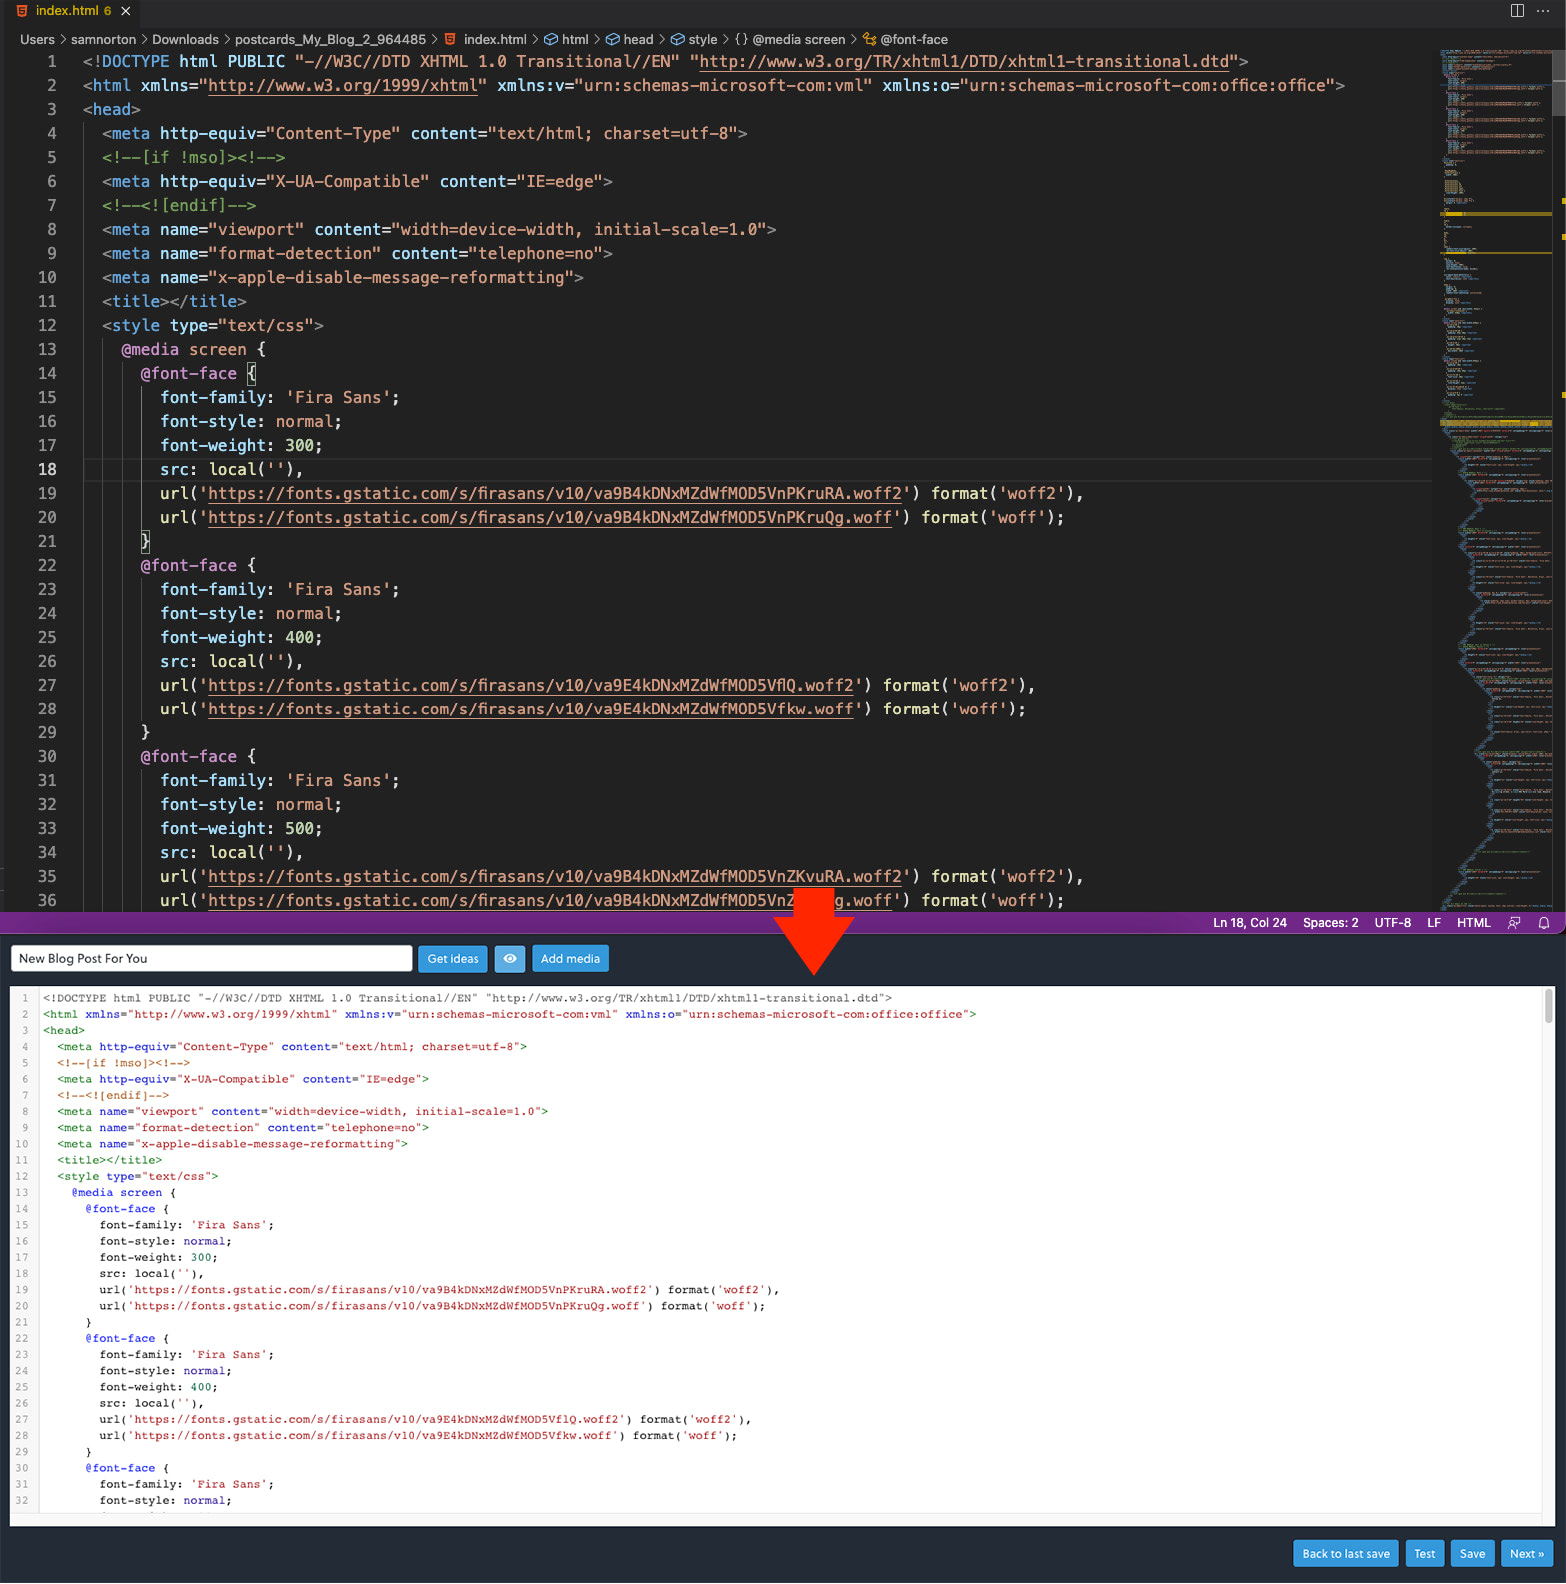
To continue, we need to unzip our downloaded Postcards’ email newsletter template file and open the index.html file either on a notepad app or any code editor app. From here, copy all of the codes you see from the index.html file and paste the codes into the code editor on the newsletter plugin.
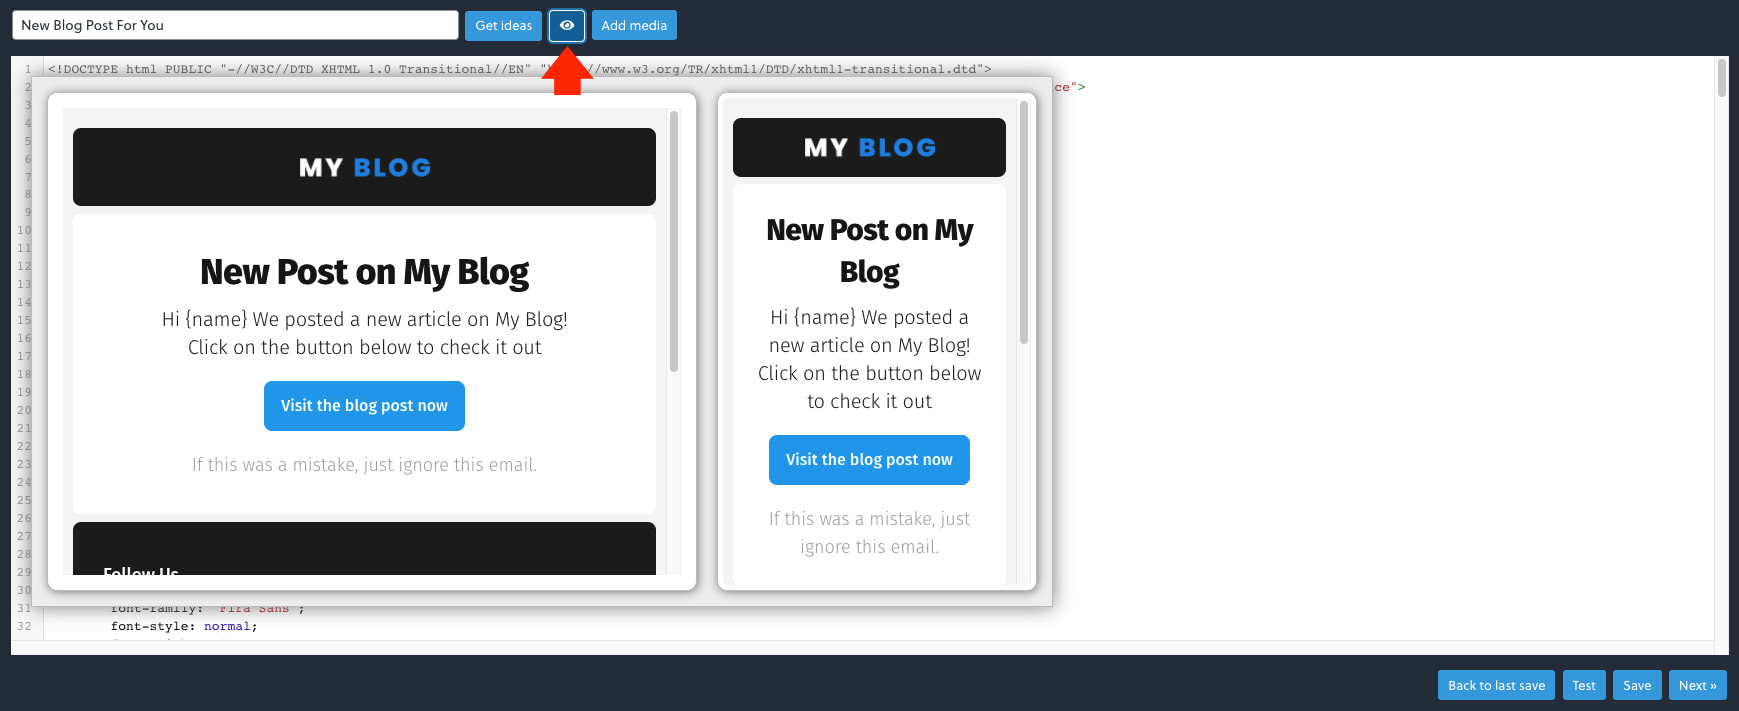
To preview our email newsletter template, click on the eye icon button located on the upper left buttons.
Sending Your Email Campaign and Tracking Its Success
This time our newsletter is ready to be sent. Click on the “Next” button to continue.
Note: If you wish to send a test email on your default email address, you can click on the “Test” button. Additionally, if you plan on sending it later and just want to save it for now, you can click on the “Save” button and this will save it to the list of the newsletters.
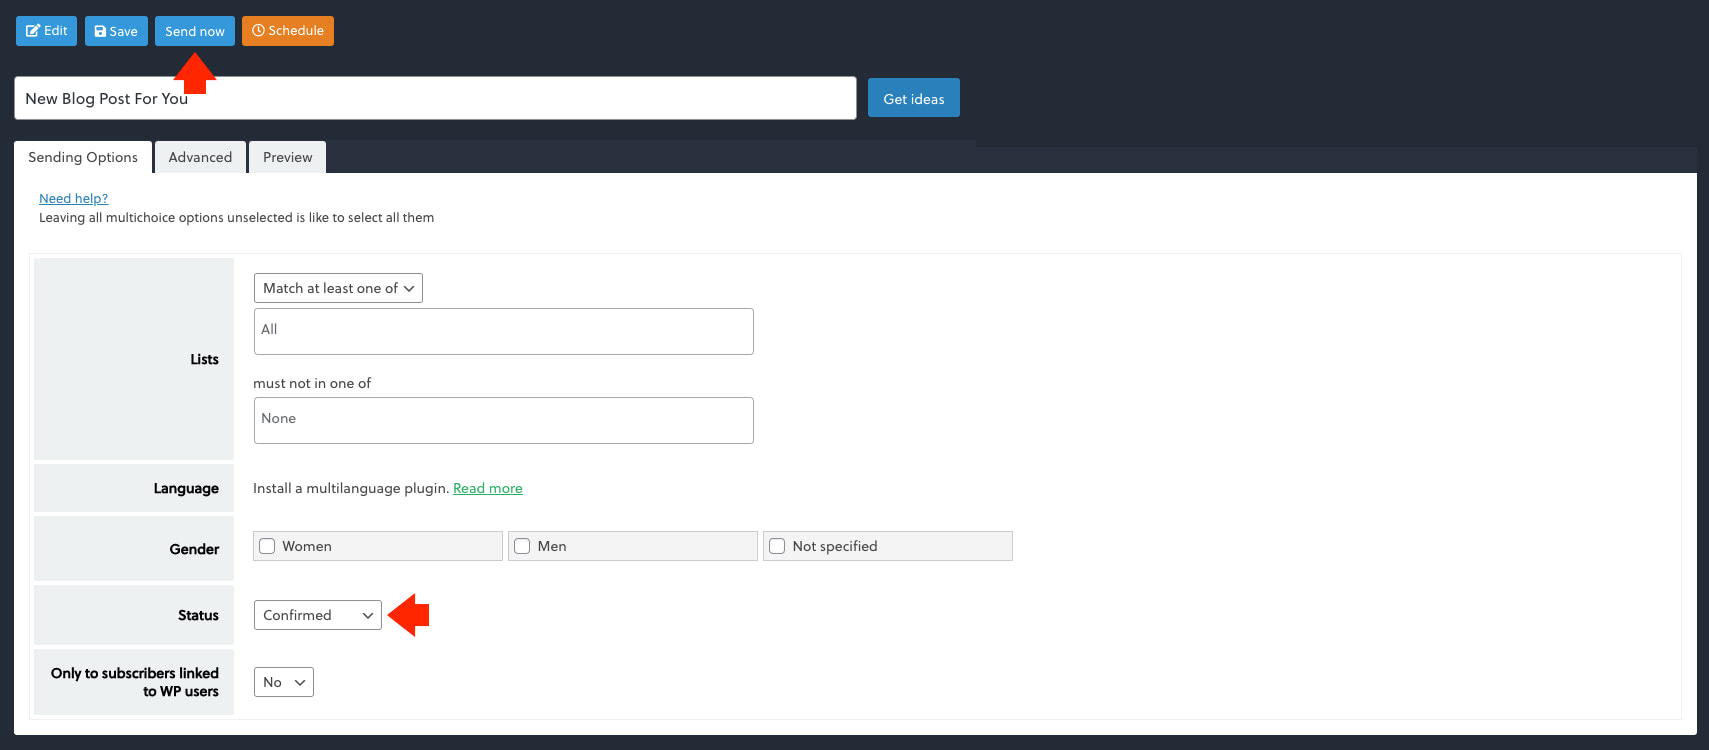
This will redirect us to the sending options page wherein we need to set up the email list where we want this email newsletter or campaign to get sent. In this example, let’s only send this to the email addresses that confirmed the subscription with our website. Under the “Status” dropdown menu, select “Confirmed”.
Afterwards, click on the “Send now” button on the upper left corner of the screen as seen in the image below.
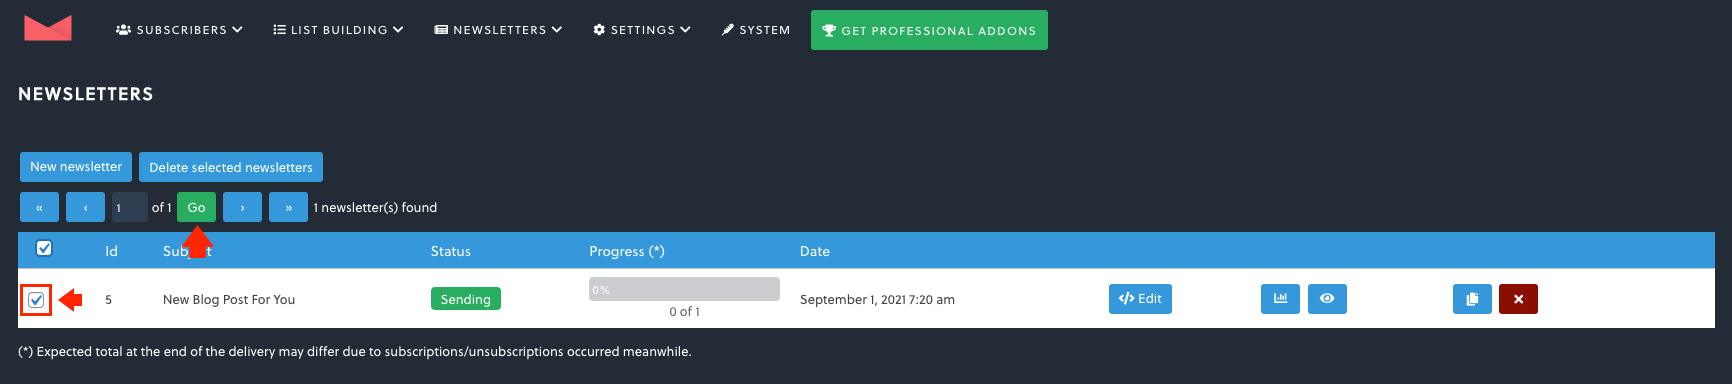
This will prepare our email newsletter or campaign in sending mode. To finally send this email newsletter, once again hover your mouse on the “Newsletter” link and then click on the “Newsletters” link.
From the newsletters list, click on the checkbox next to the email newsletter or campaign we wish to send and then click on the “Go” button located on the upper left buttons of the screen as seen in the image below.
Once sent, you will see the “Sent” status on the email newsletter list.
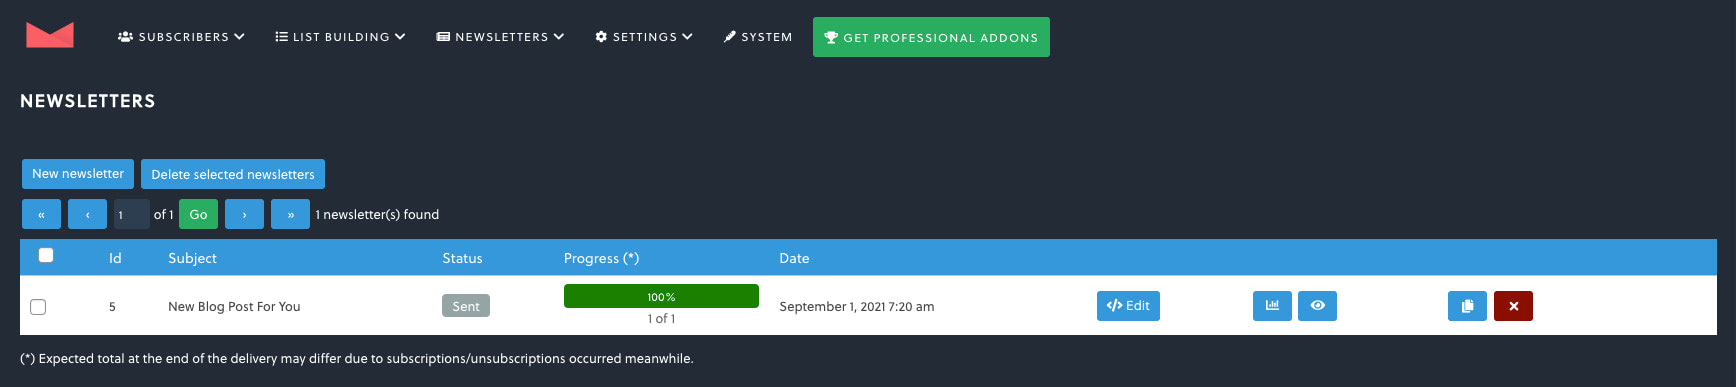
At this point, our email newsletter wordpress was successfully sent as seen in the image below.
Troubleshooting Section: Common Issues and Solutions for WordPress Email Campaigns
You may face some issues and these are the most common ones with solutions as a bonus:
- Emails going to “spam”
- Solutions: use an SMTP service, avoid using phrases commonly flagged by spam filters, limit the use of images and ensure there’s a good balance of text and visuals, always include a visible unsubscribe link and your business’s physical address, as required by law
- Emails not neing sent or stuck in queues
- Solutions: go to Newsletter > System Status to ensure everything is configured correctly, if your hosting provider limits email sending, consider switching to a hosting plan that allows for higher email traffic, temporarily disable other email-related plugins or tools that might be interfering with the Newsletter Plugin
- Email formatting issues
- Solutions: use postcards for email design, send test emails, simplify your code
FAQ: Sending Email Campaigns in WordPress
What Is the Newsletter Plugin in WordPress?
The Newsletter Plugin is a WordPress tool that lets you manage subscribers, design newsletters, and send email campaigns—all from your dashboard.
Do I Need Coding Skills to Send Newsletters with WordPress?
No. The Newsletter Plugin and Postcards email builder offer drag-and-drop interfaces, so no coding is required to create or send campaigns.
How Do I Design Better-Looking Emails in WordPress?
Use Postcards to build modern, responsive email templates with customizable blocks, then export the HTML and import it into the Newsletter Plugin.
How Can I Improve Email Deliverability?
Use SMTP providers, avoid spammy phrases, test before sending, and make sure to include unsubscribe links and your business address.
Why Are My Emails Going to Spam?
Emails may land in spam if you’re not using SMTP, including too many images, missing unsubscribe links, or using phrases that trigger spam filters.
Can I Track Email Opens and Clicks?
Yes. The Newsletter Plugin includes built-in analytics to monitor performance like open rates and link clicks.
Is It Better to Use an External Email Tool Instead of WordPress?
If you prefer not to use WordPress for email campaigns, tools like Mailpost.io offer user-friendly dashboards for managing email marketing outside WordPress.
Best Practices for Email Campaigns: How to Use Newsletter Plugin in WordPress
With the right plugin and tools, WordPress makes it easy to set up your newsletter to build your subscriber’s list, create campaigns and track emails. While there are some issues relating to sending an email using WordPress wp_mail function with hosting providers, using third-party email system plugins ensures that emails are always delivered.
Additionally, adding Postcards to your list of tools makes it easier to design professional-looking email newsletter templates using its feature-rich drag and drop platform,
If you wish not to use WordPress as your mailing system, you can use Mailpost.io. simplifies the email marketing process by providing an easy-to-use platform to create and manage your campaigns and subscribers highlighting your marketing achievements and giving smart suggestions with a dashboard of insights.