
WordPress has come a long way since it was created back in 2003 by Matt Mullenweg and Mark Little.
Eventually, the open-source framework has progressed from a simple blogging platform into the most popular content management system (CMS) on the web. Over 60% of CMS websites on the web use WordPress, and 40% of all websites on the web have WordPress at their core according to W3Techs.
Because it is a free and open-source content management system (CMS), anyone can contribute, so its development is very community-driven. This means that there are lots of things built around WordPress from themes, plugins, and documentation.
Table of Contents
Can WordPress Be Used For Email Marketing?
WordPress is also a pluggable framework. You can use any function to override specific core functions. When it comes to sending emails, the wp_mail() function is the most used function. While this function enables WordPress to send emails via its core system, these emails can pile up in a spam folder since PHP emails are created in the same way spam emails are formed.
Sending emails from WordPress is not efficient enough by default. There are times that when you send out an email from WordPress, you won’t know if the recipient has ever received the email and there are situations wherein emails are going straight to the recipient’s spam folders. This can be a problem for the website owner since emails are very important when it comes to confirmation and communication.
WordPress email setup by default doesn’t notify users if the email was ever sent or delivered unless you installed a special plugin for it. Thankfully, there is even a better solution for this problem by using Mailgun (for sending emails) and Unspam.email (for checking emails setup).
Mailgun offers reliable transactional email APIs that enable you to send, receive, and track emails to ensure email deliverability. This simply means that you can track your emails to check if they are getting sent out or not. Mailgun offers a much more efficient way to send WordPress transactional emails which can go beyond the default features including sending marketing emails right from the WordPress dashboard. Additionally, using Mailgun takes the computational load off in sending and receiving email from servers since it reduces the amount of computational power needed from email operation.
Whereas, Unspam.email is an email spam checker and heat map prediction app. It provides a better way of email testing to check if your email is being sent out or not with full accessibility checks. With this app you can also know right away when your domain or your IP address has been blacklisted, so you can fix the problem quickly. Moreover, its eye-tracking prediction heat map will help you create impactful campaigns and get better results.
How to Use SMTP for Sending Emails in WordPress
In this article, you will learn how to:
- Set up Mailgun Account
- Install the WP Mail SMTP plugin for WordPress
- Send a test email using Unspam.email
- Check email activity in Mailgun
Setting up Mailgun Account
For this part of the tutorial, let’s set up a Mailgun account. Afterward, we’re going to configure the essential setup that we will use later on our WordPress website using WP Mail SMTP plugin.
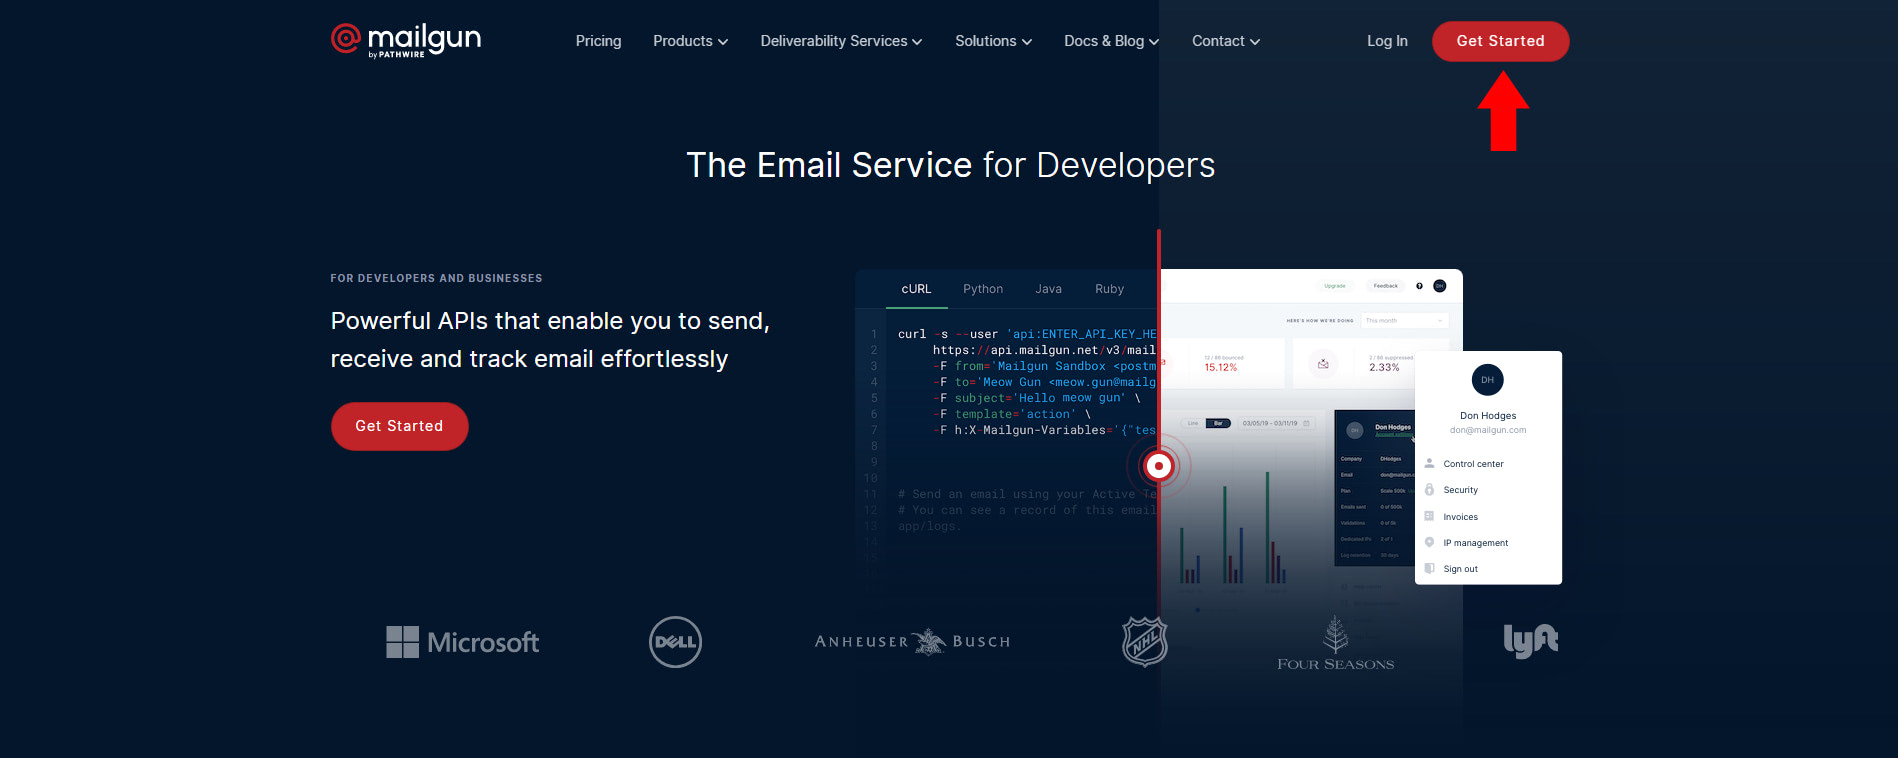
To do this, we need to go to Mailgun’s website and click on the “Get Started” button to register for a new account. Next, we need to fill out the basic information form and add a credit card to access Mailgun’s free features. If you want to learn more about Mailgun’s other flexible plans you can visit the pricing page here.
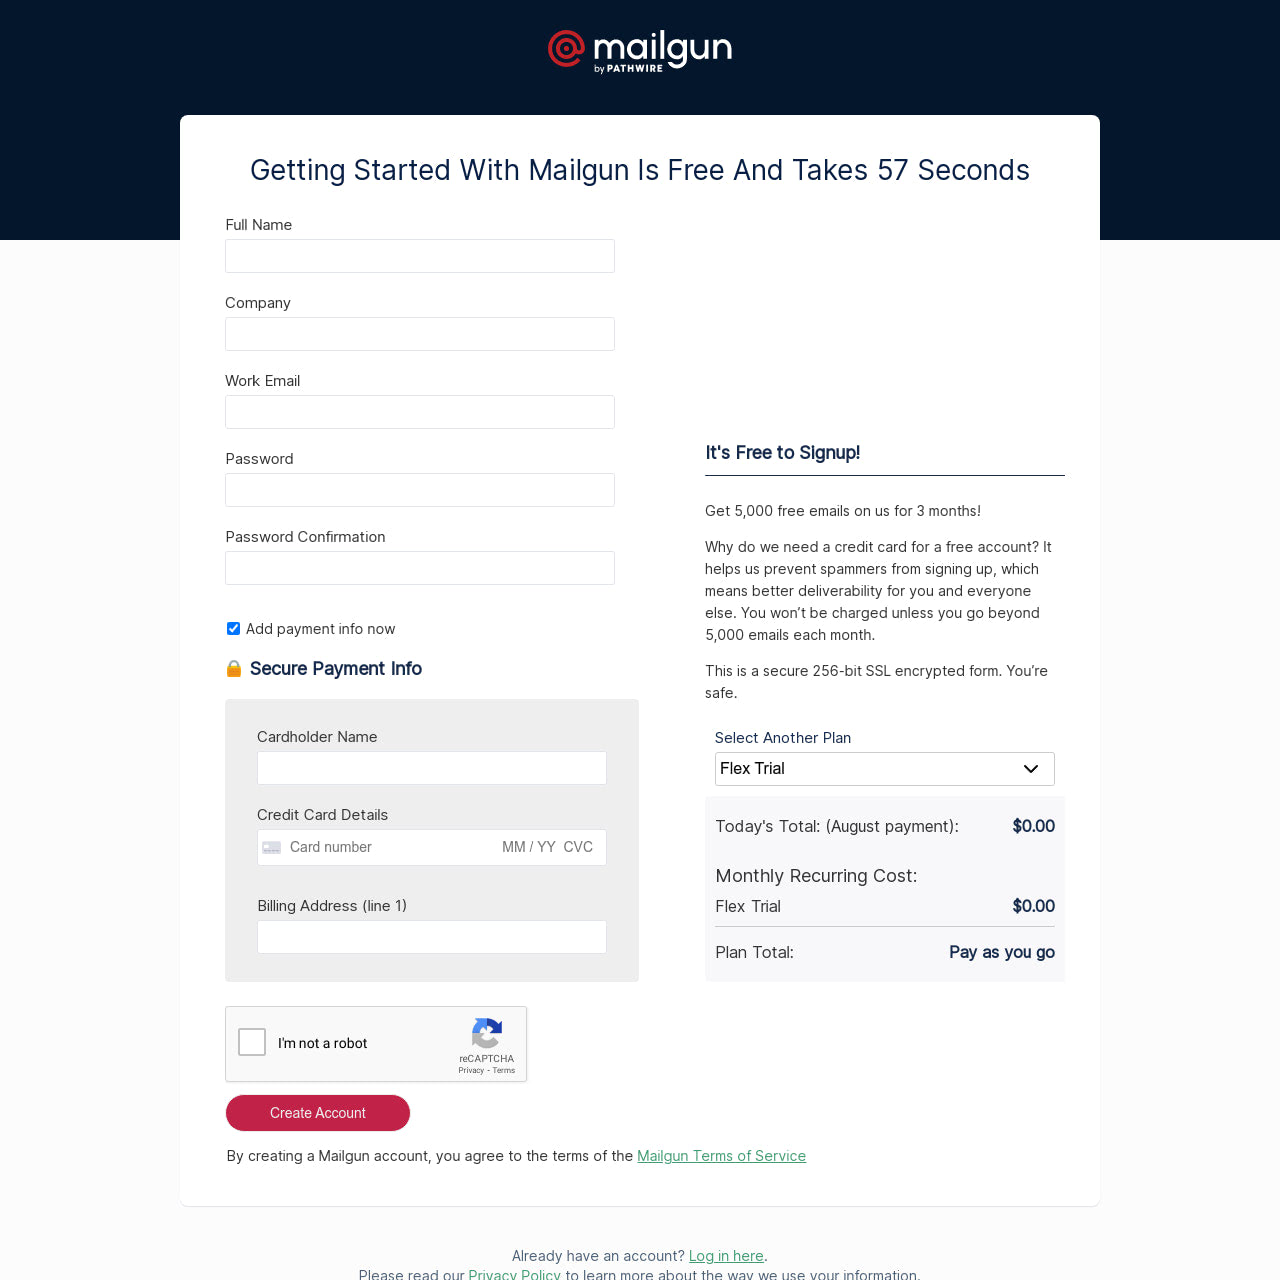
Note: Mailgun’s free tier account offers a three-month trial period limited to 5,000 emails and then after that, it will start charging per email which is $0.80 per 1000 emails on the basic Pay As You Grow plan.
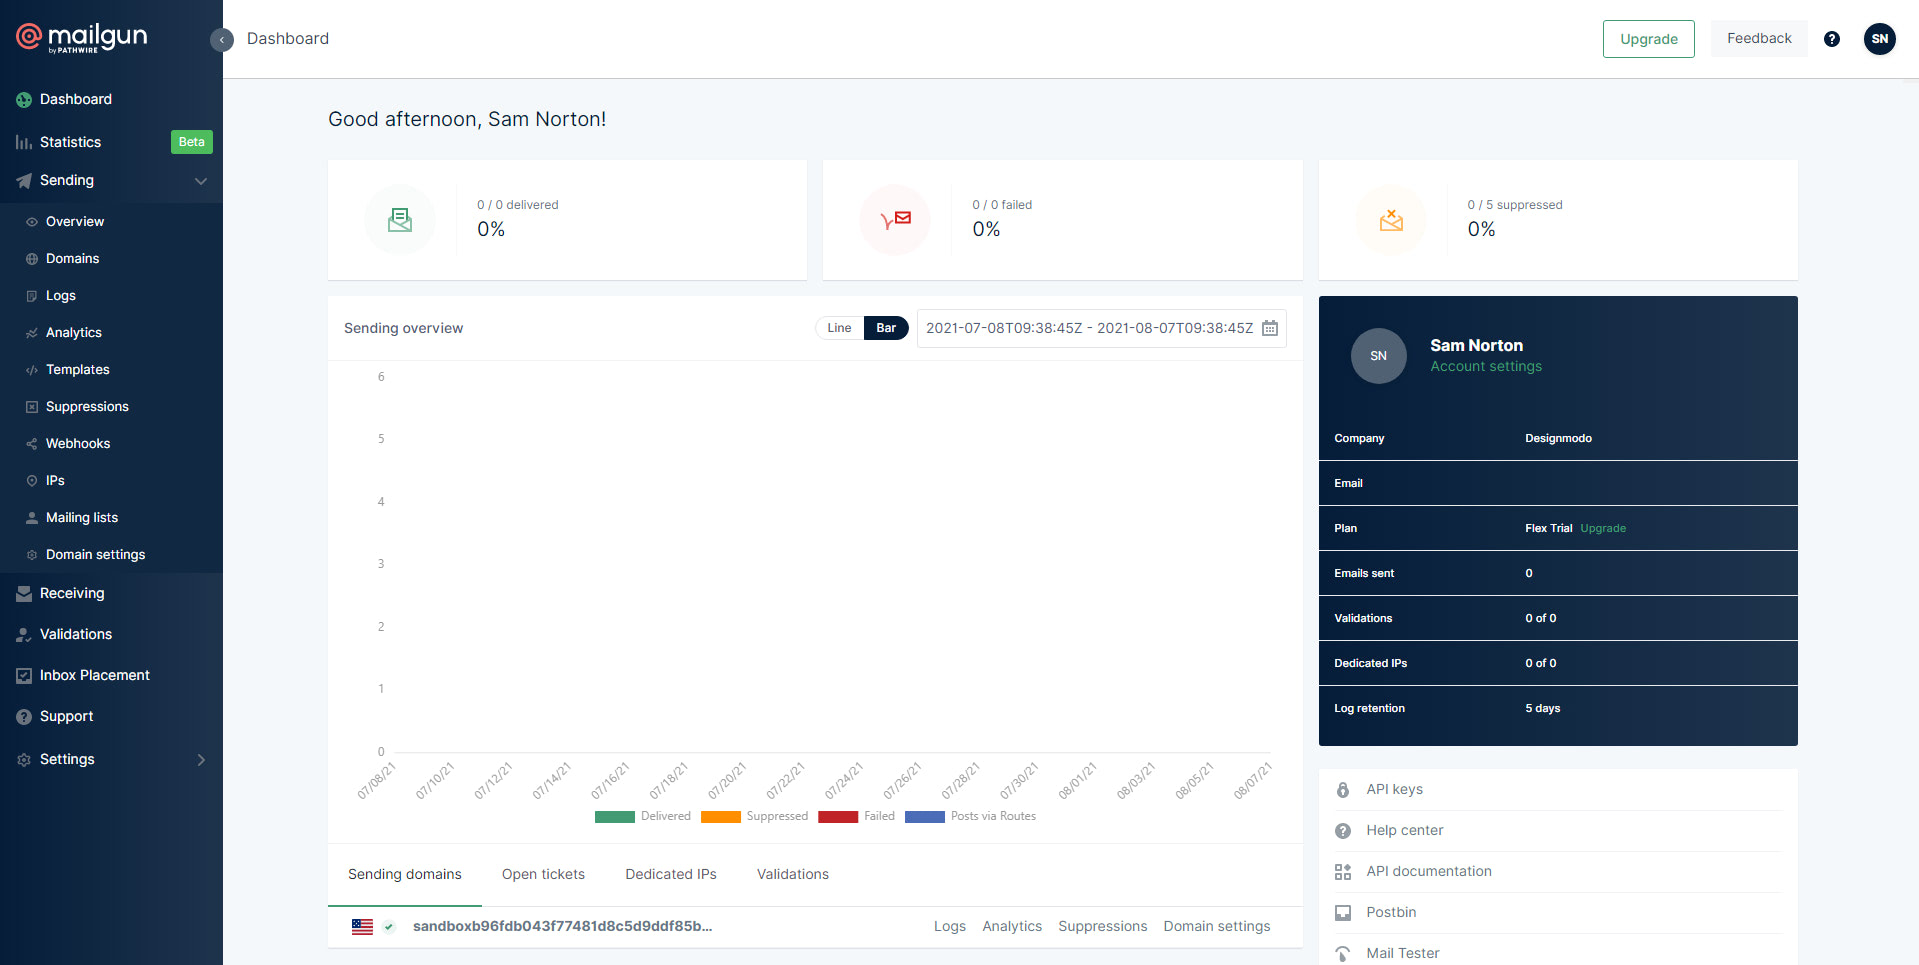
After the registration process, phone and email verification, we’ll get access to the Mailgun dashboard once we logged in to the platform as seen in the image below.
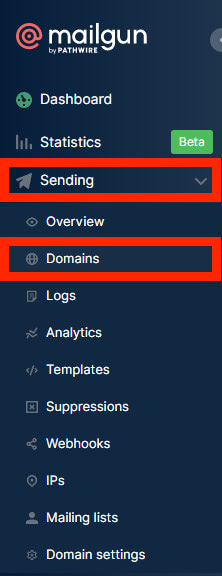
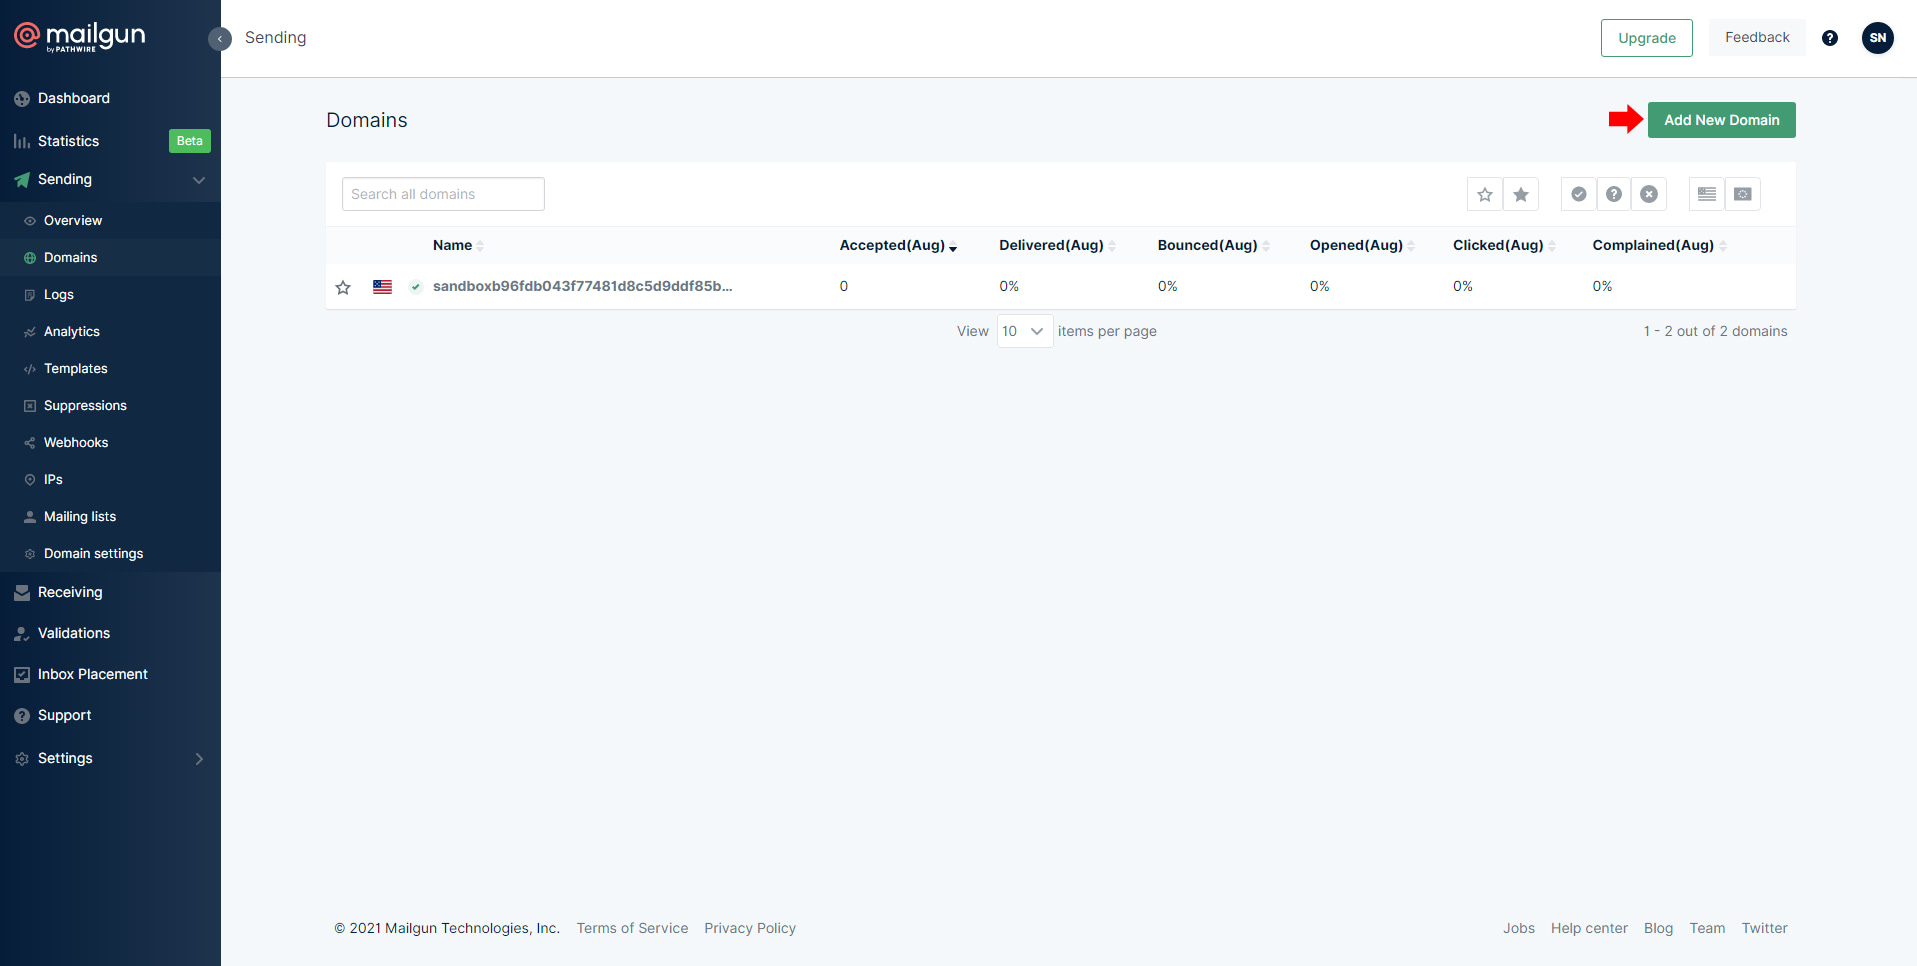
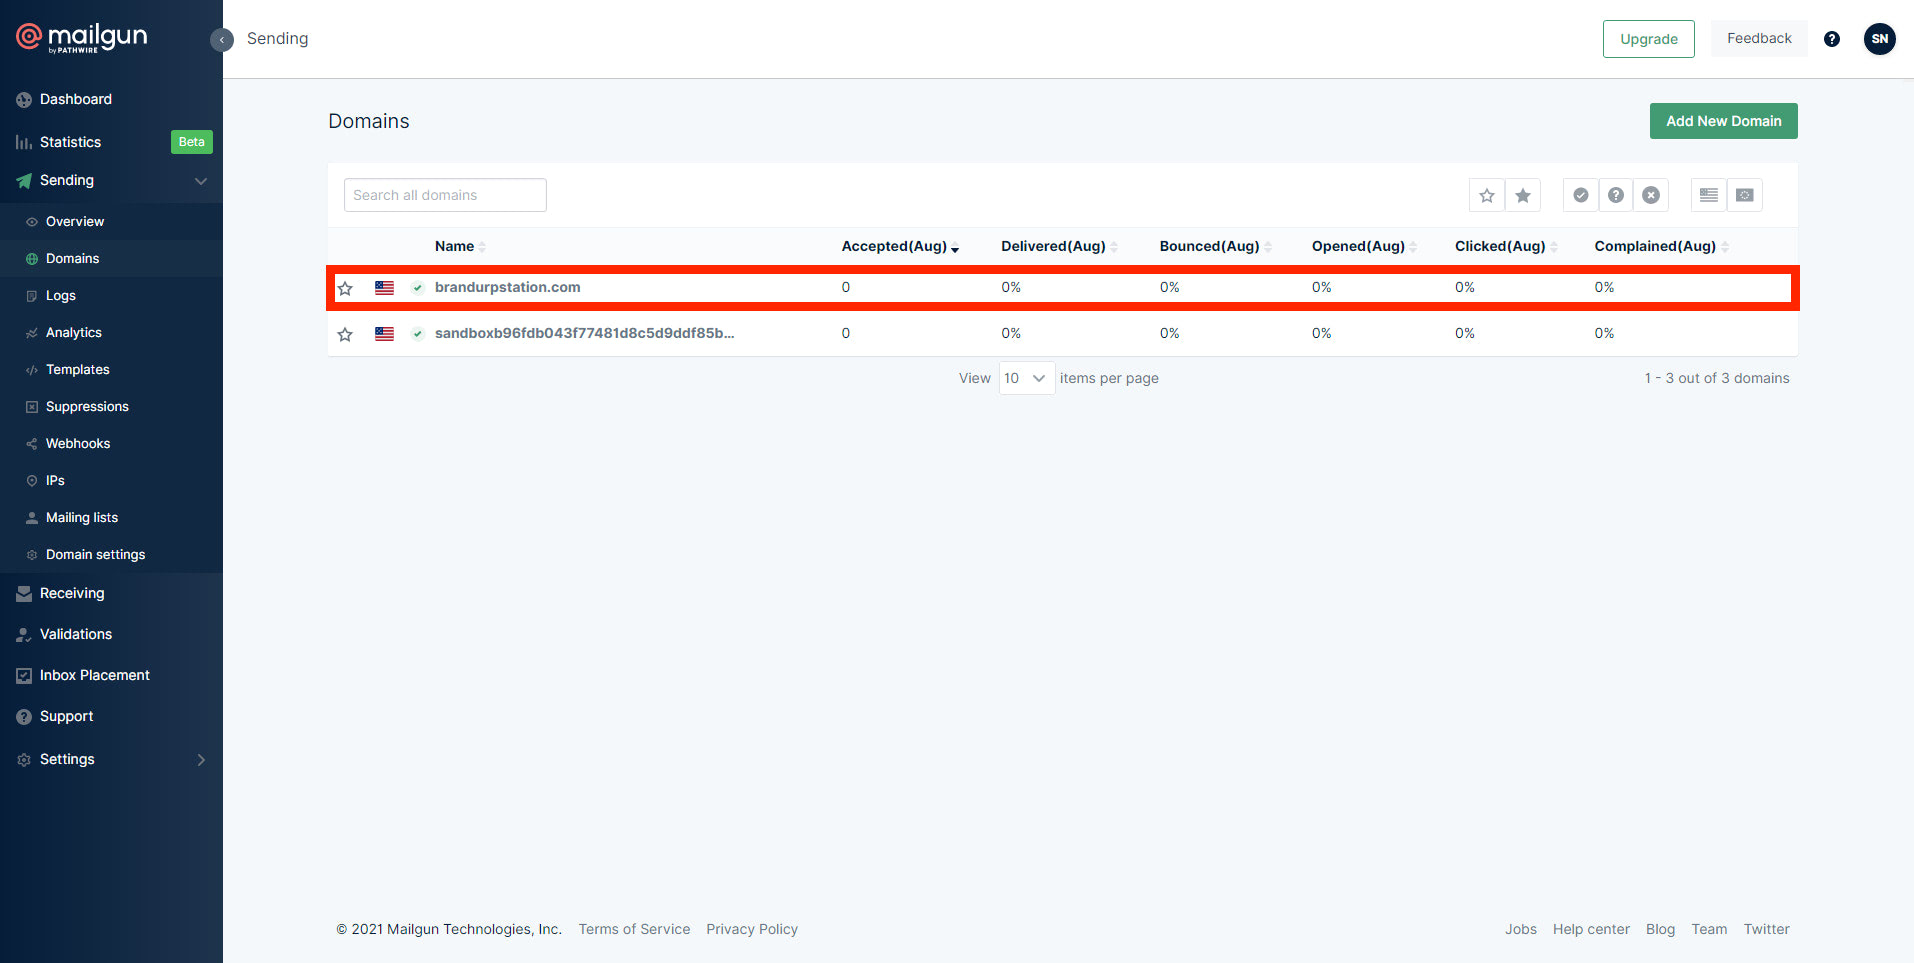
Next, we need to configure our domain within the Mailgun dashboard. To do this, click on the “Sending” link followed by the “Domains” link in the left menu.
On the Domains page, we need to click the “Add New Domain” button in the upper right corner of the screen.
Note: Keep in mind that if the “Add New Domain” button is not displayed on the screen, it is likely that you have not yet entered your credit card information. It is required by Mailgun to any of its account types to provide the credit card information of users before using it’s platform’s features.
On the Add new domain page, we need to enter the domain name of our WordPress website and click on the “Add Domain” button to add it to our Mailgun domain’s list as seen in the image below.
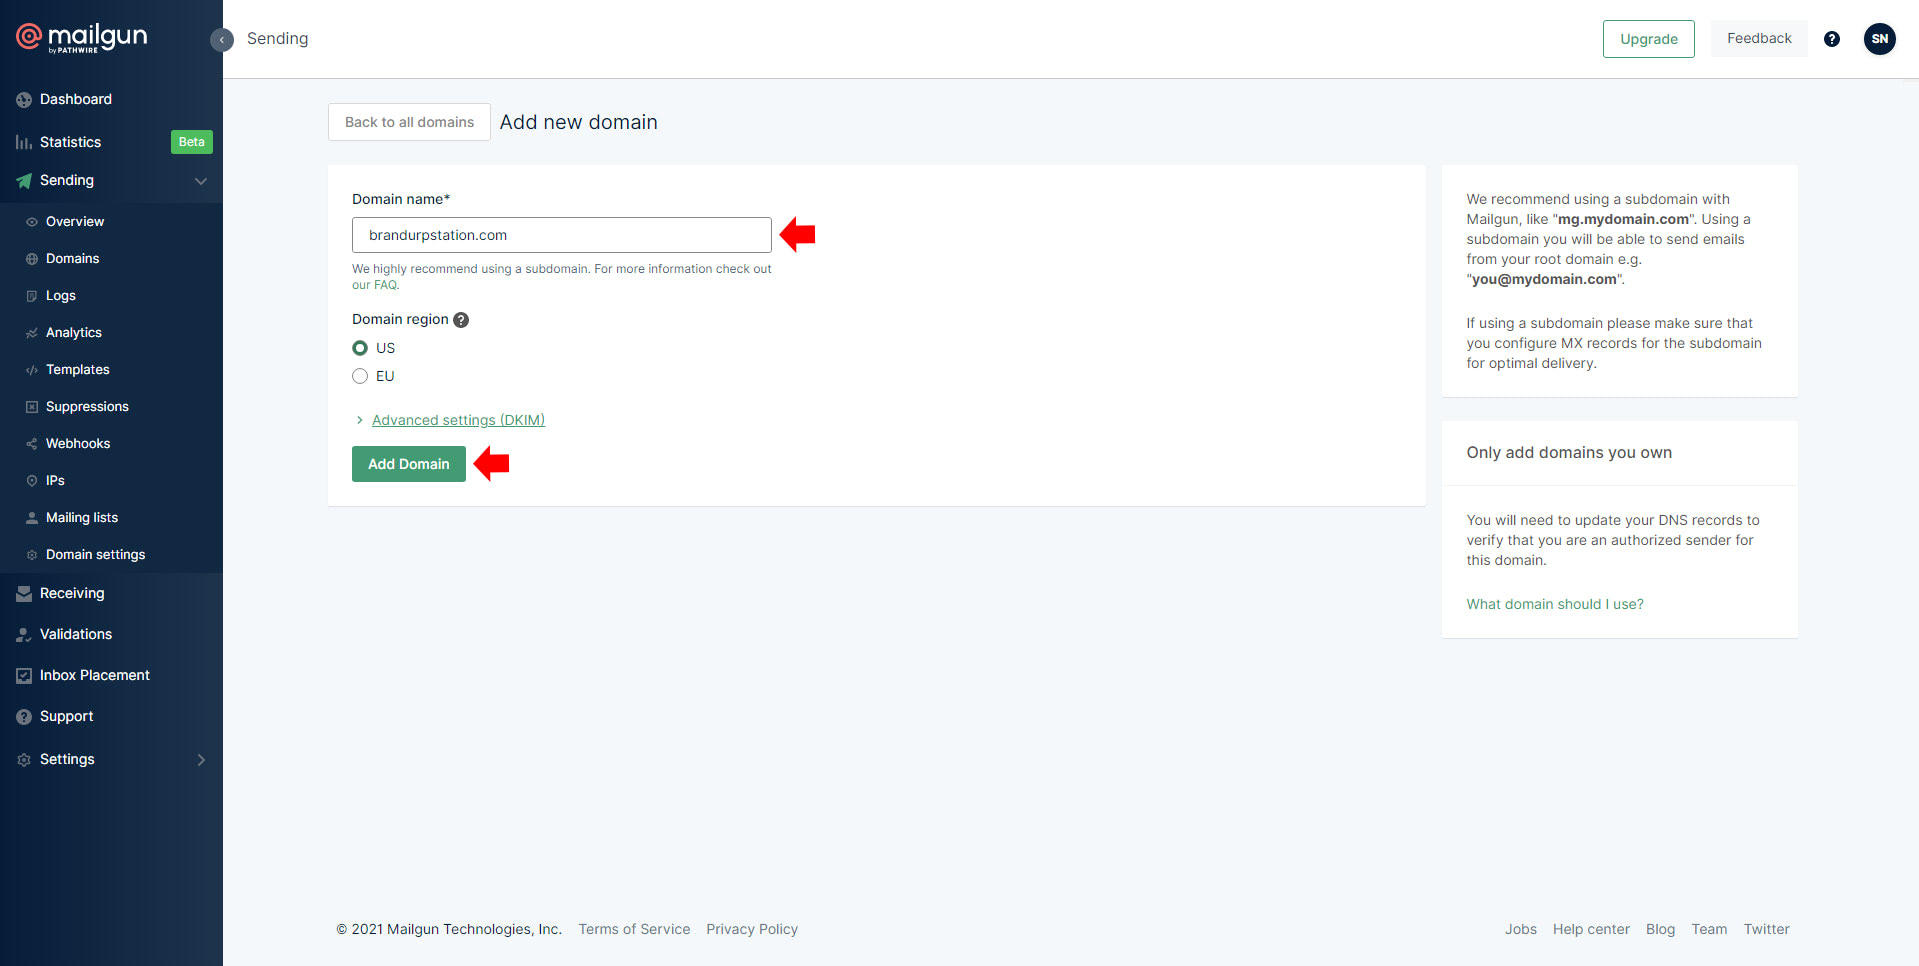
Note: If your website is hosted in the European Union, you need to choose EU on the radio button below the domain name form. Otherwise, leave it on the default US option.
Next, we need to verify our added domain by adding records to our WordPress website’s DNS settings. Depending on your hosting provider, Mailgun will provide the proper documentation on how to add each DNS record as guided on the overview page (see image below).
Additionally, we also need to add both MX and CNAME records for tracking opens, clicks, and unsubscribes as commended by Mailgun. Keep in mind that the CNAME record is not significant if you are only using Mailgun to send emails.
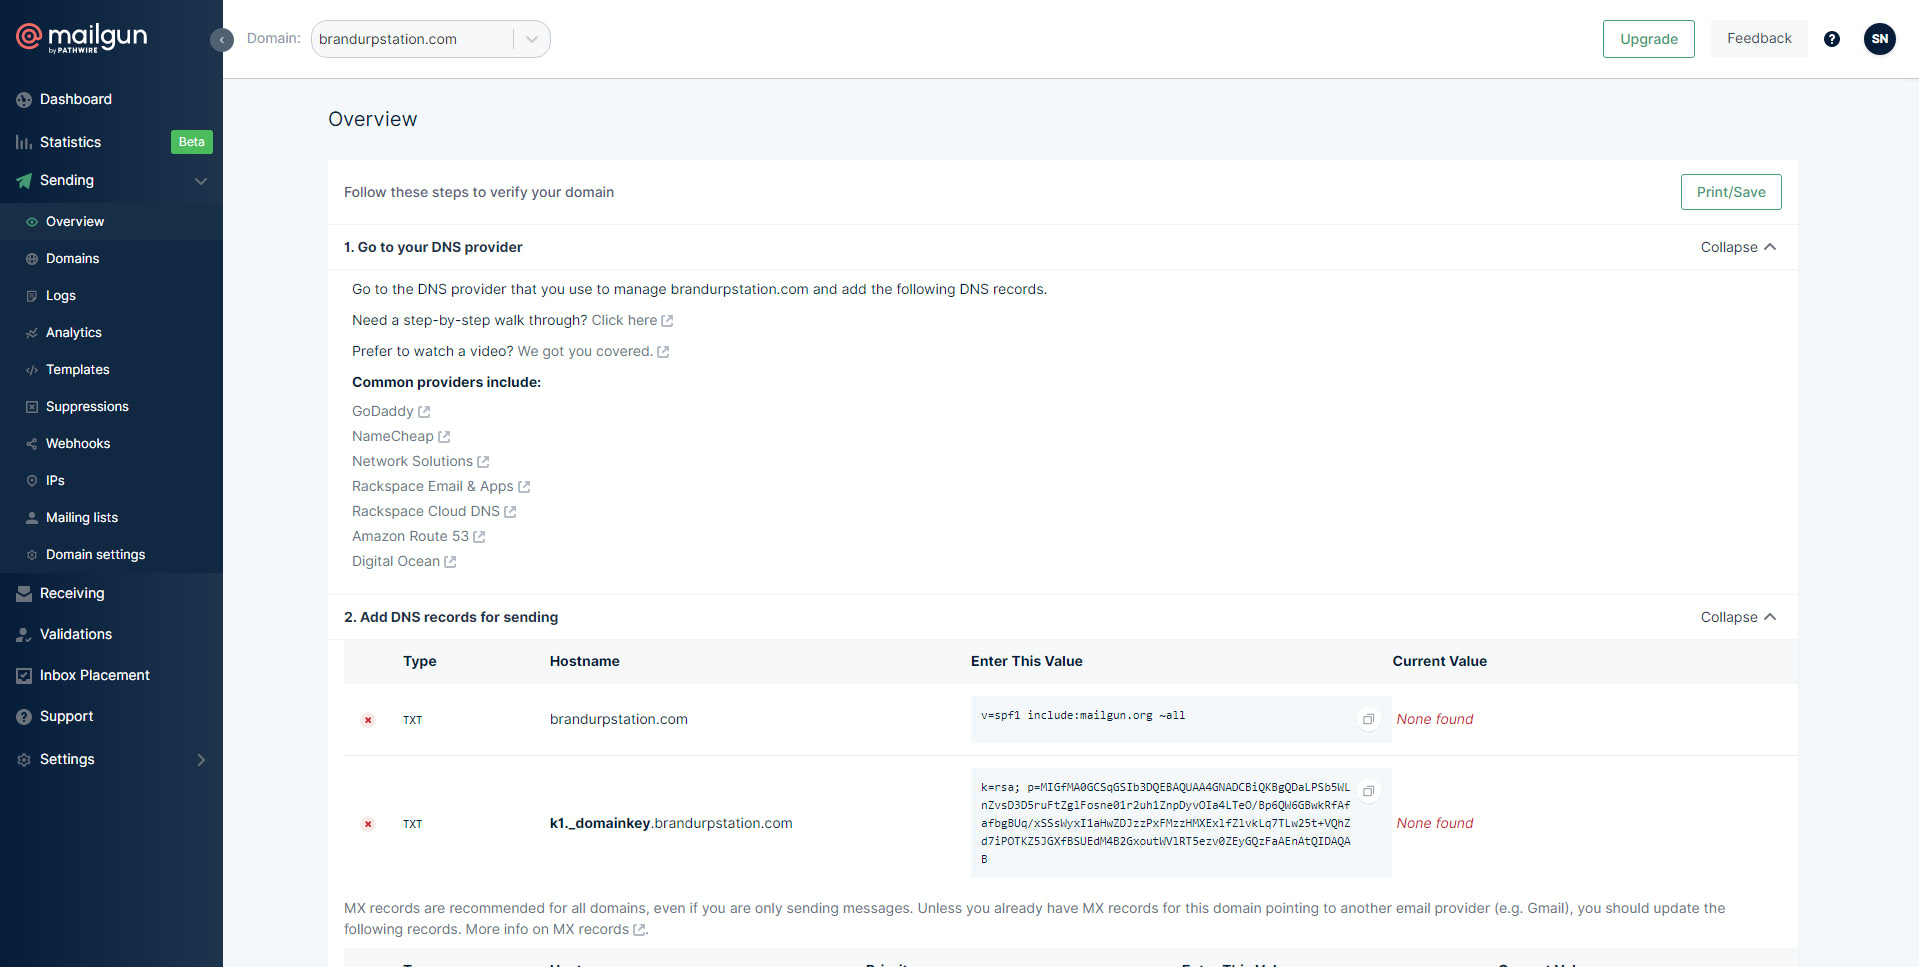
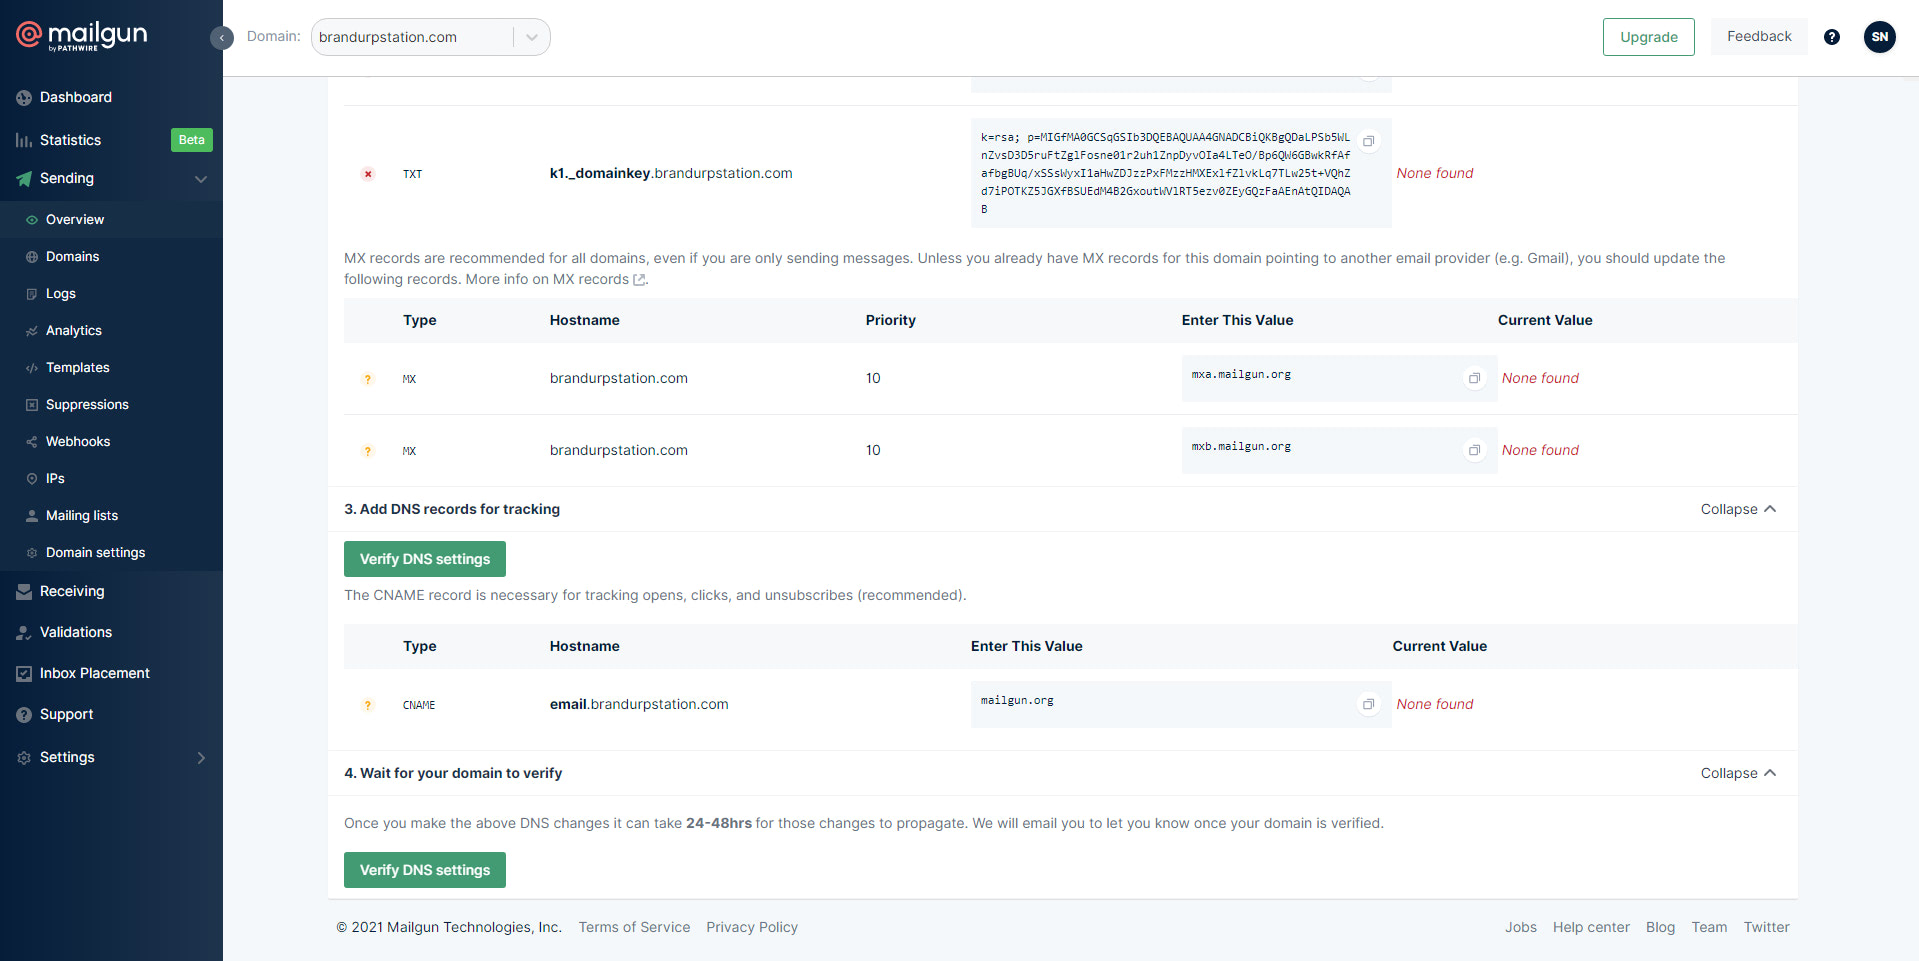
After adding all the necessary DNS records, we need to verify that our domain has been properly configured and validated by clicking on each of the three “Verify DNS settings” as seen in the images above. Please take note that the verification process might take 24-48 hours to update.
In order to check the status of our domain simply click again on the “Sending” link followed by the “Domains” link in the left menu. After Mailgun has already verified the DNS updates we made on our WordPress website’s DNS settings, it will show a green checkmark next to our domain name as seen in the image below.
Installing the WP Mail SMTP plugin for WordPress
After configuring all the necessary setup on our Mailgun account, we are now ready to configure our WordPress website for efficient email deliverability.
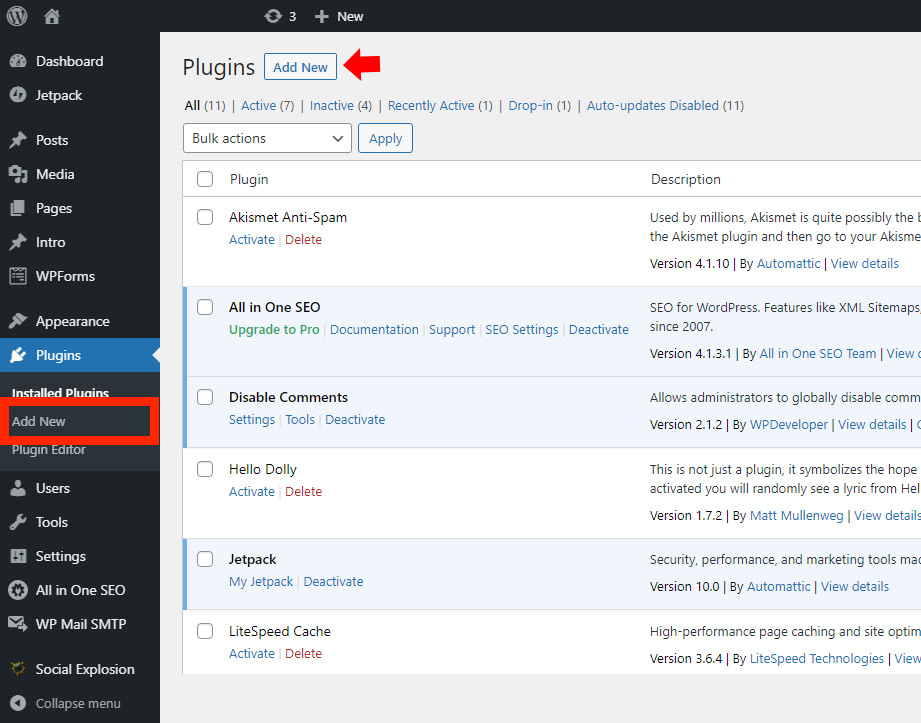
To do this, we need to login into our WordPress account and head on to the plugins page to add a new plugin.
On the plugins page, click on the “Add New” button in the upper left corner of the page or click on the “Add New” link in the menu panel as seen in the image below.
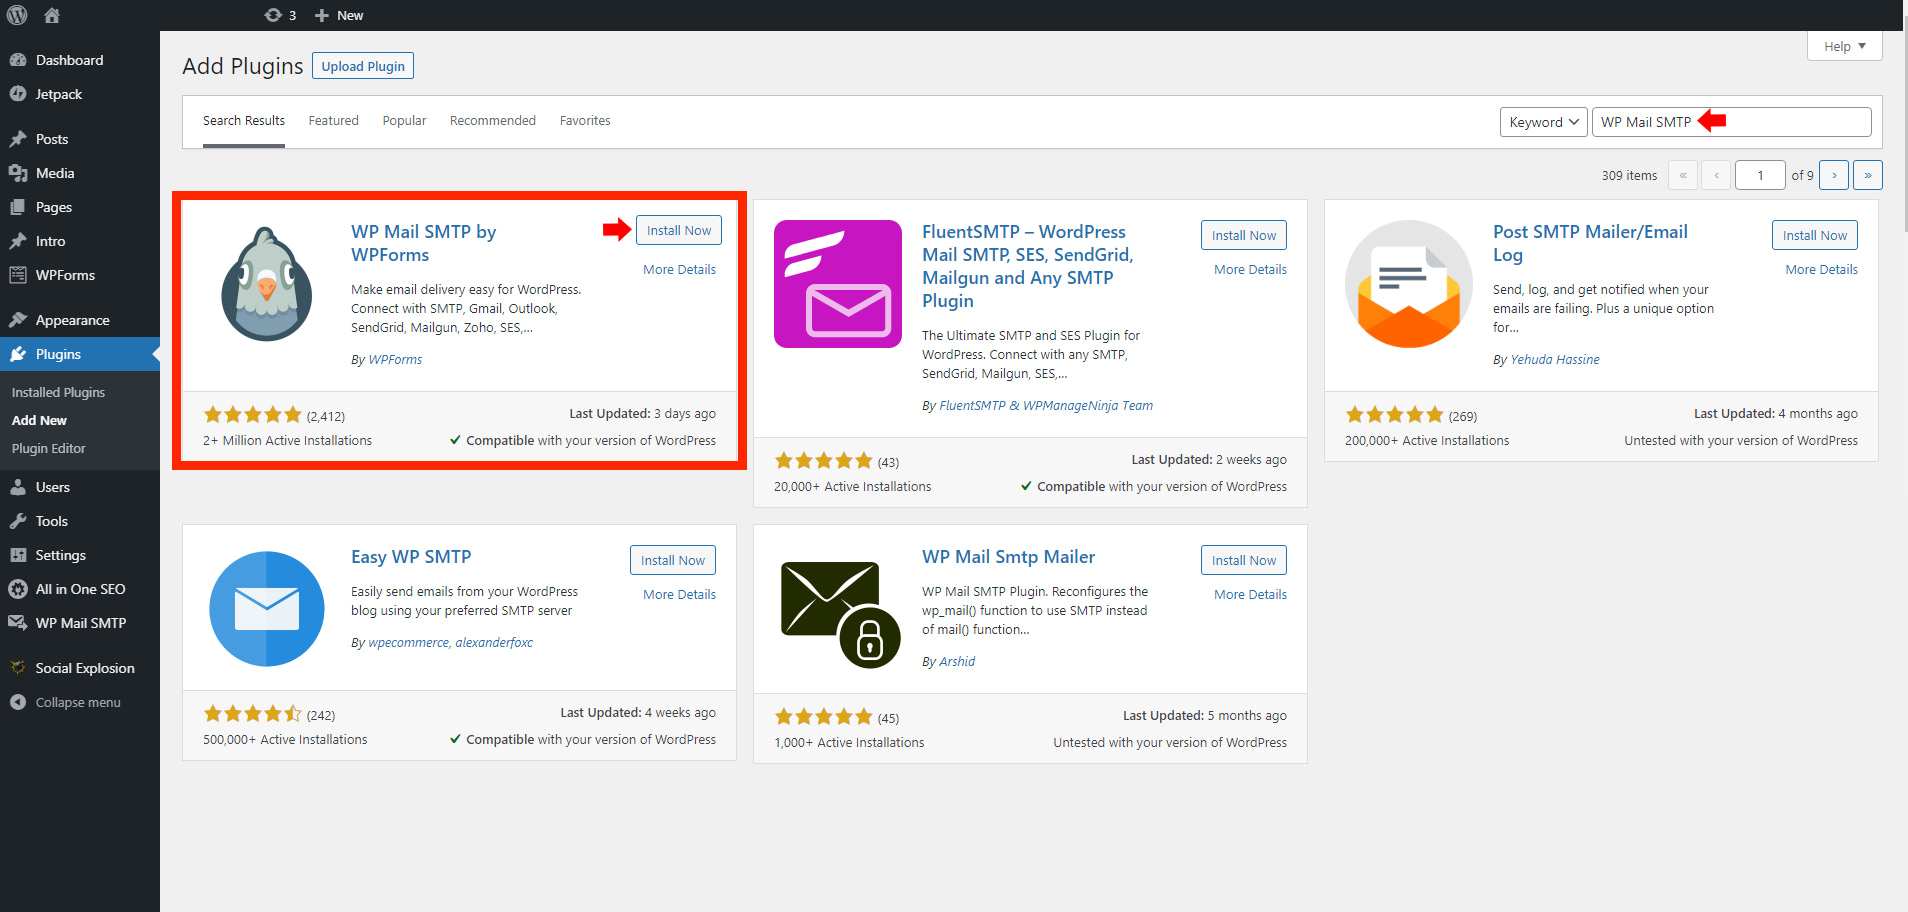
Next, on the Add Plugins page search for “WP Mail SMTP” plugin and then click on the “Install Now” button. Finally, click on the “Activate” button to activate the plugin.
Next, we need to configure the settings of WP Mail SMTP. Head on to “WP Mail SMTP” and then click on the “Settings” link in the WP menu panel.
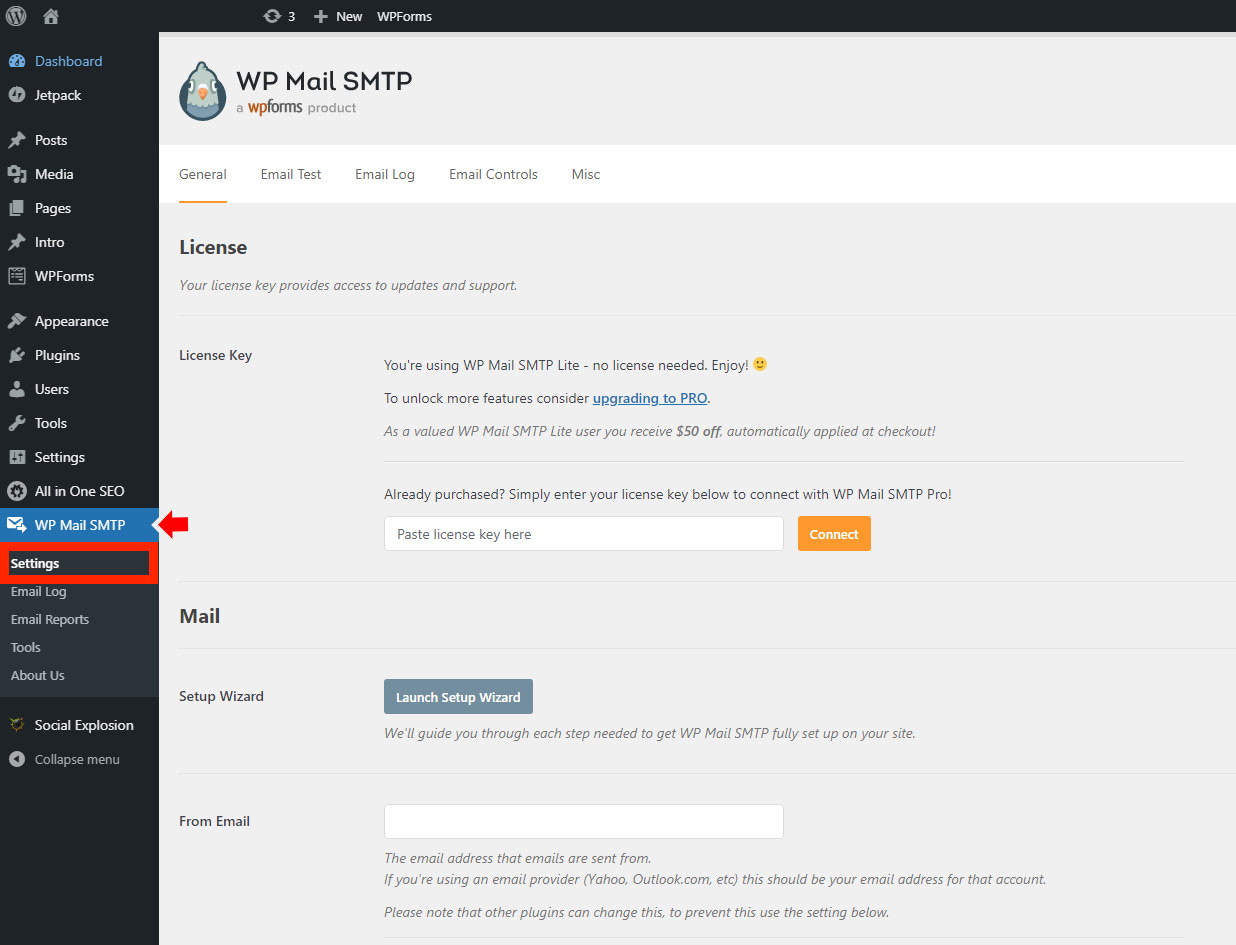
There are a few things that we need to configure on this page before finally making an email test with the Unspam.email app.
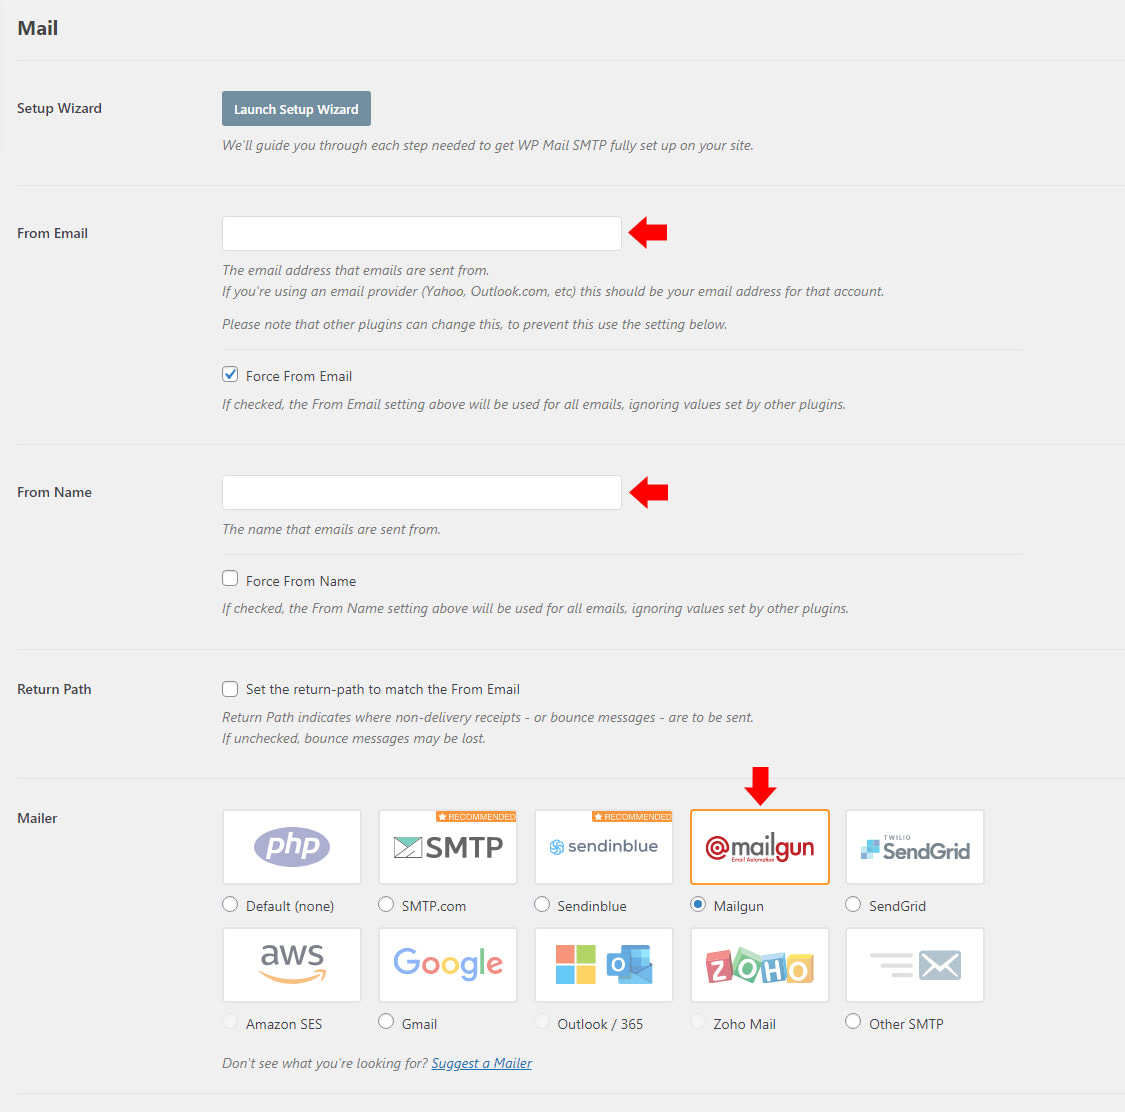
First, we need to configure our “From Email“, “From Name” and “Mailer” setup as seen in the image below. Since we’re using Mailgun as our email API service, we will select Mailgun on the Mailer option as seen in the image below.
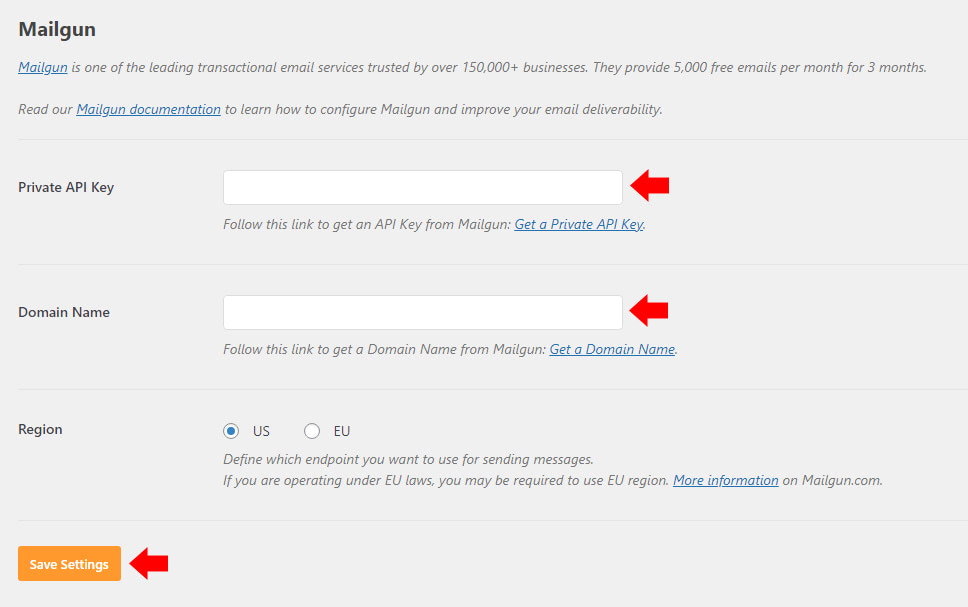
Lastly, we need to provide our Mailgun’s “Private API Key“, “Domain Name” and “Region” as seen in the image below. Keep in mind that the Domain Name and Region should match with the one that we set up on our Mailgun’s account above.
If you are not sure how to get your Mailgun’s API Key, simply click here to get your API Key or follow these instructions to learn more. Don’t forget to click on the “Save Settings” button to save your changes.
And that’s it! Our WordPress setting is all set up. Just make sure that the DNS changes we’ve made on our Mailgun account are fully verified before proceeding with the email testing.
Sending a Test Email using Unspam.email
Now that our DNS records are all verified along with the WP Mail SMTP setup, we’re going to do an email deliverability test to make sure that all our setup is working properly.
For our email testing, we’re going to use Unspam.email as our email tester app. As mentioned above, Unspam.email works as an email spam checker and map heat map prediction app.
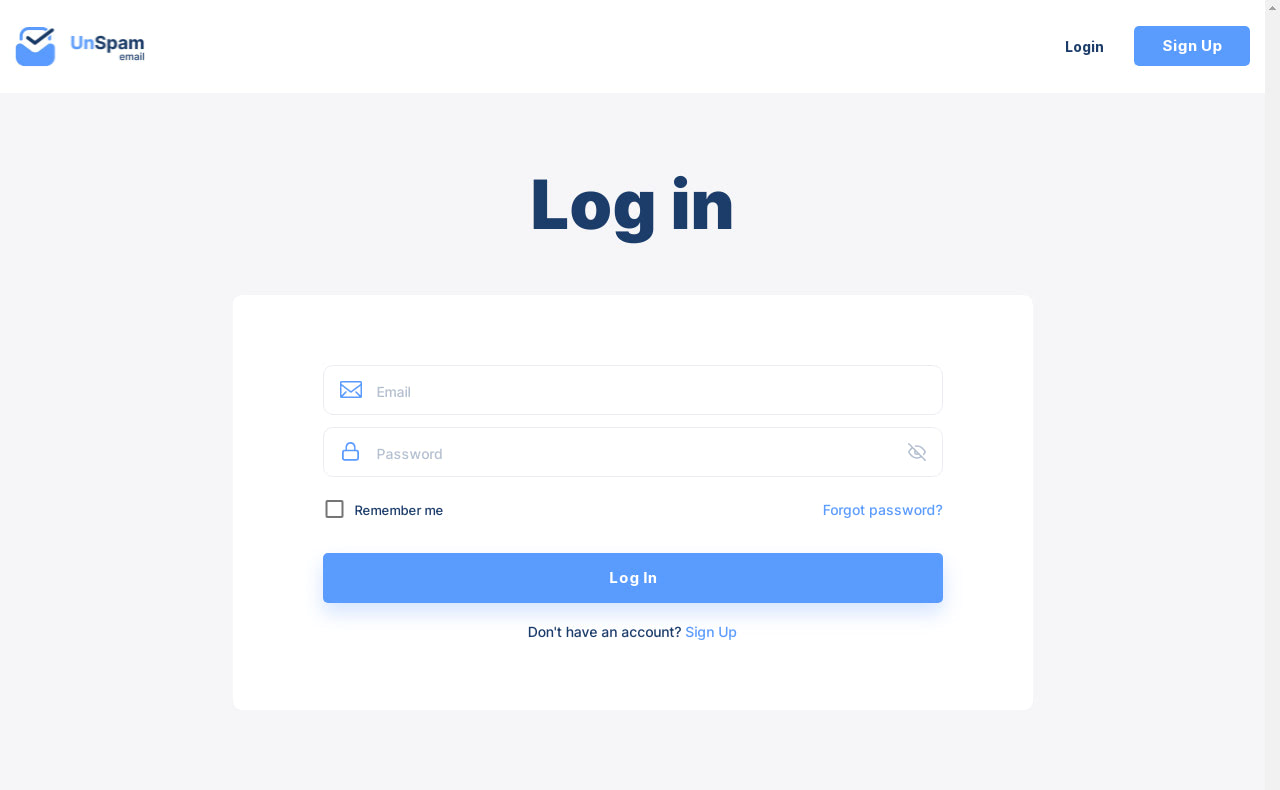
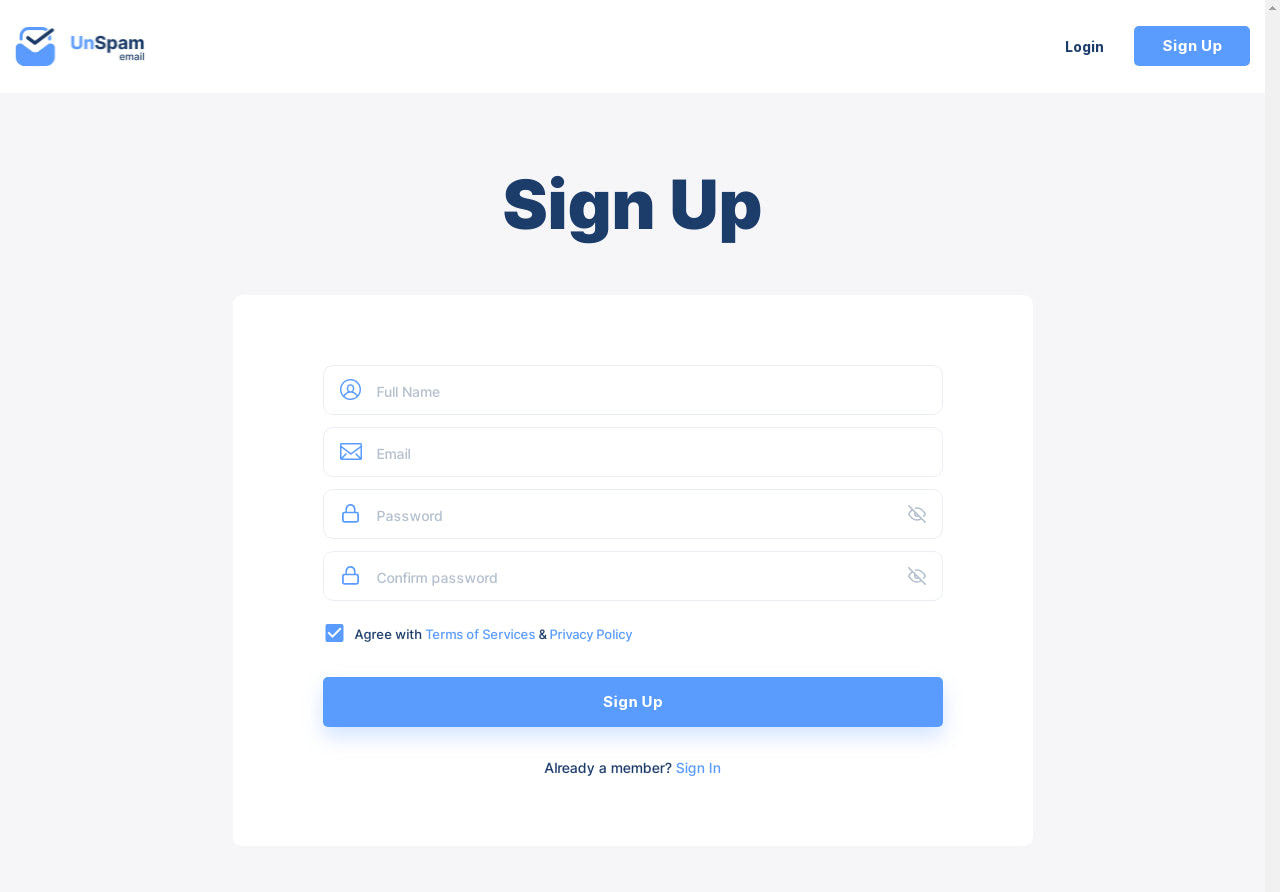
To use this app, we need to signup for a free account and once done we can login here.
After logging in to our account, we’ll be redirected to the homepage. From here, we need to copy the email address from the email input box provided by Unspam.email for email testing.

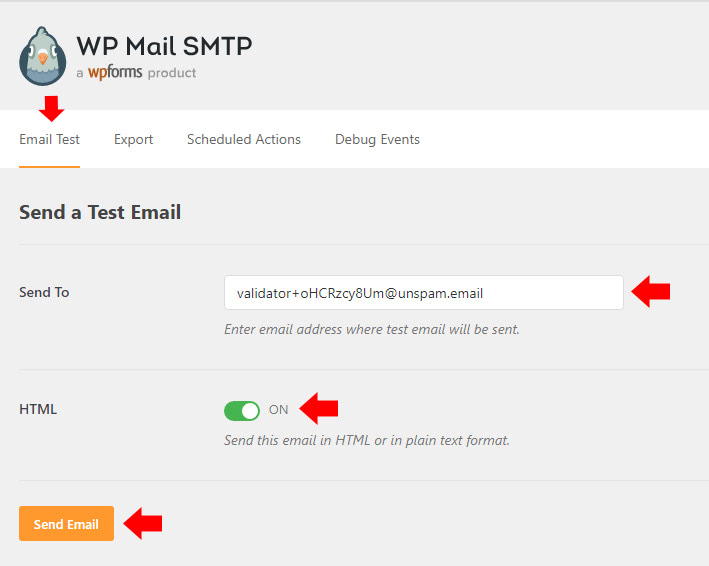
Next, we need to go back to our WordPress dashboard particularly on the WP Mail SMTP Settings Page and click on the “Email Test” tab as seen in the image below.
On this tab, we need to paste the email we copied from the Unspam.email dashboard to the “Send To” input box and turn on the HTML option so we can send our test email in HTML format. Finally, to send the test email, simply click on the “Send Email” button.
After sending the test email, we should see a success message similar to the image below.

Now to check the email deliverability of our email test, we need to go back to the Unspam.email homepage and click on the “Step 2: View Result” button.

After clicking the “Step 2: View Result” button, it will process the email spam checker and will return the result with Unspam Score as seen in the image below.
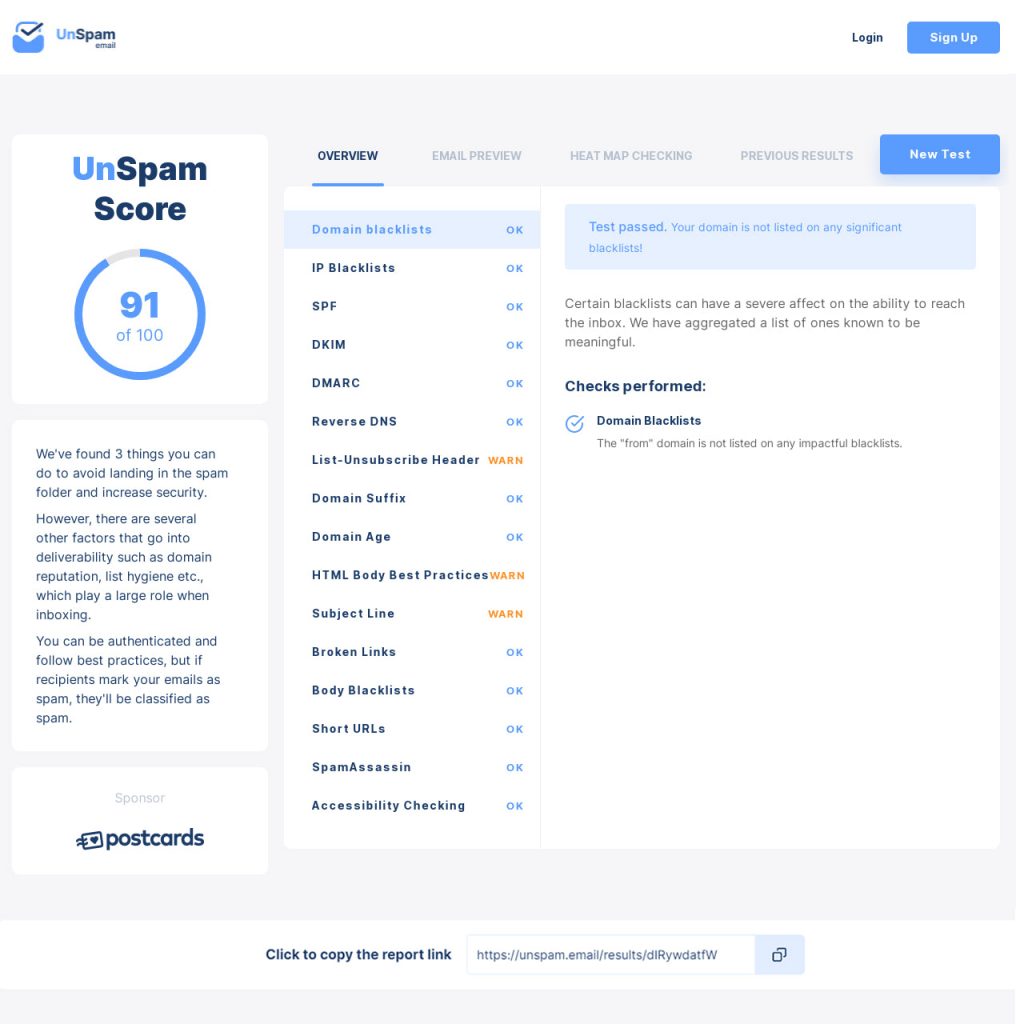
As you can see, Unspam.email presented our email test with a score of 91 out of 100 and gave an overview report on what is good and what needs to improve on our email setup to avoid getting sent to our recipient’s spam folders. In this case, the List-Unsubscribe Header, HTML Body Best Practices and Subject Line need to improve to get better results.
Note: If you want to share the result of your email test, simply copy the link provided by the result page at the bottom of the page.
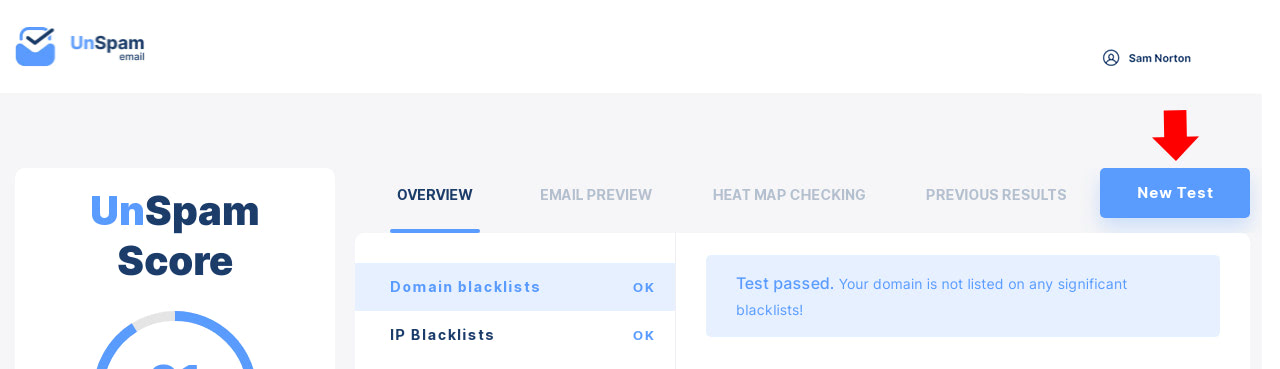
Additionally, we can also do a couple of things on the result page including email preview, heat map checking and preview previous results as seen on the tabs on the result page. Keep in mind that both heat map checking and preview previous results are not available in a free plan. If you are interested in these features, you need to upgrade to a paid plan. See pricing for more details.
Lastly, if we want to make a new test using our free account, simply click on the “New Test” button on the upper right corner of the result page and we’ll be redirected again on the homepage.

Checking Email Activity in Mailgun
With Mailgun, it’s easy to know if there are any issues delivering our emails since warnings and errors will show up in the Mailgun log. This makes it easy for users to plan ahead on how to rectify the issue.
To check the Mailgun logs, we need to go to our Mailgun’s dashboard. Then, on the bottom of the screen, click on the “Logs” link of the domain we want to check as seen in the image below.
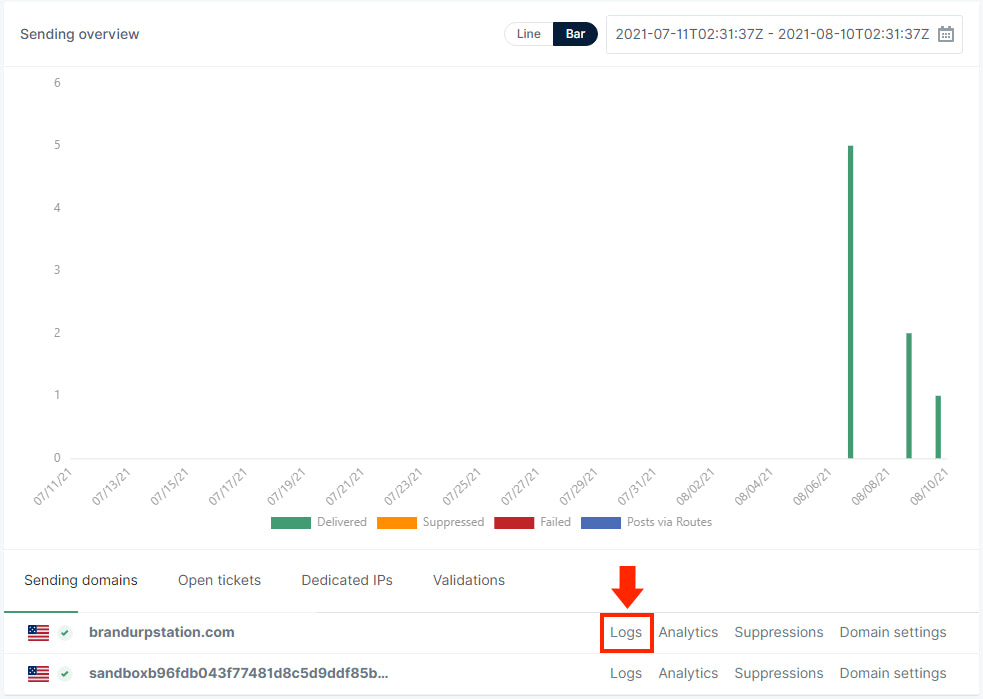
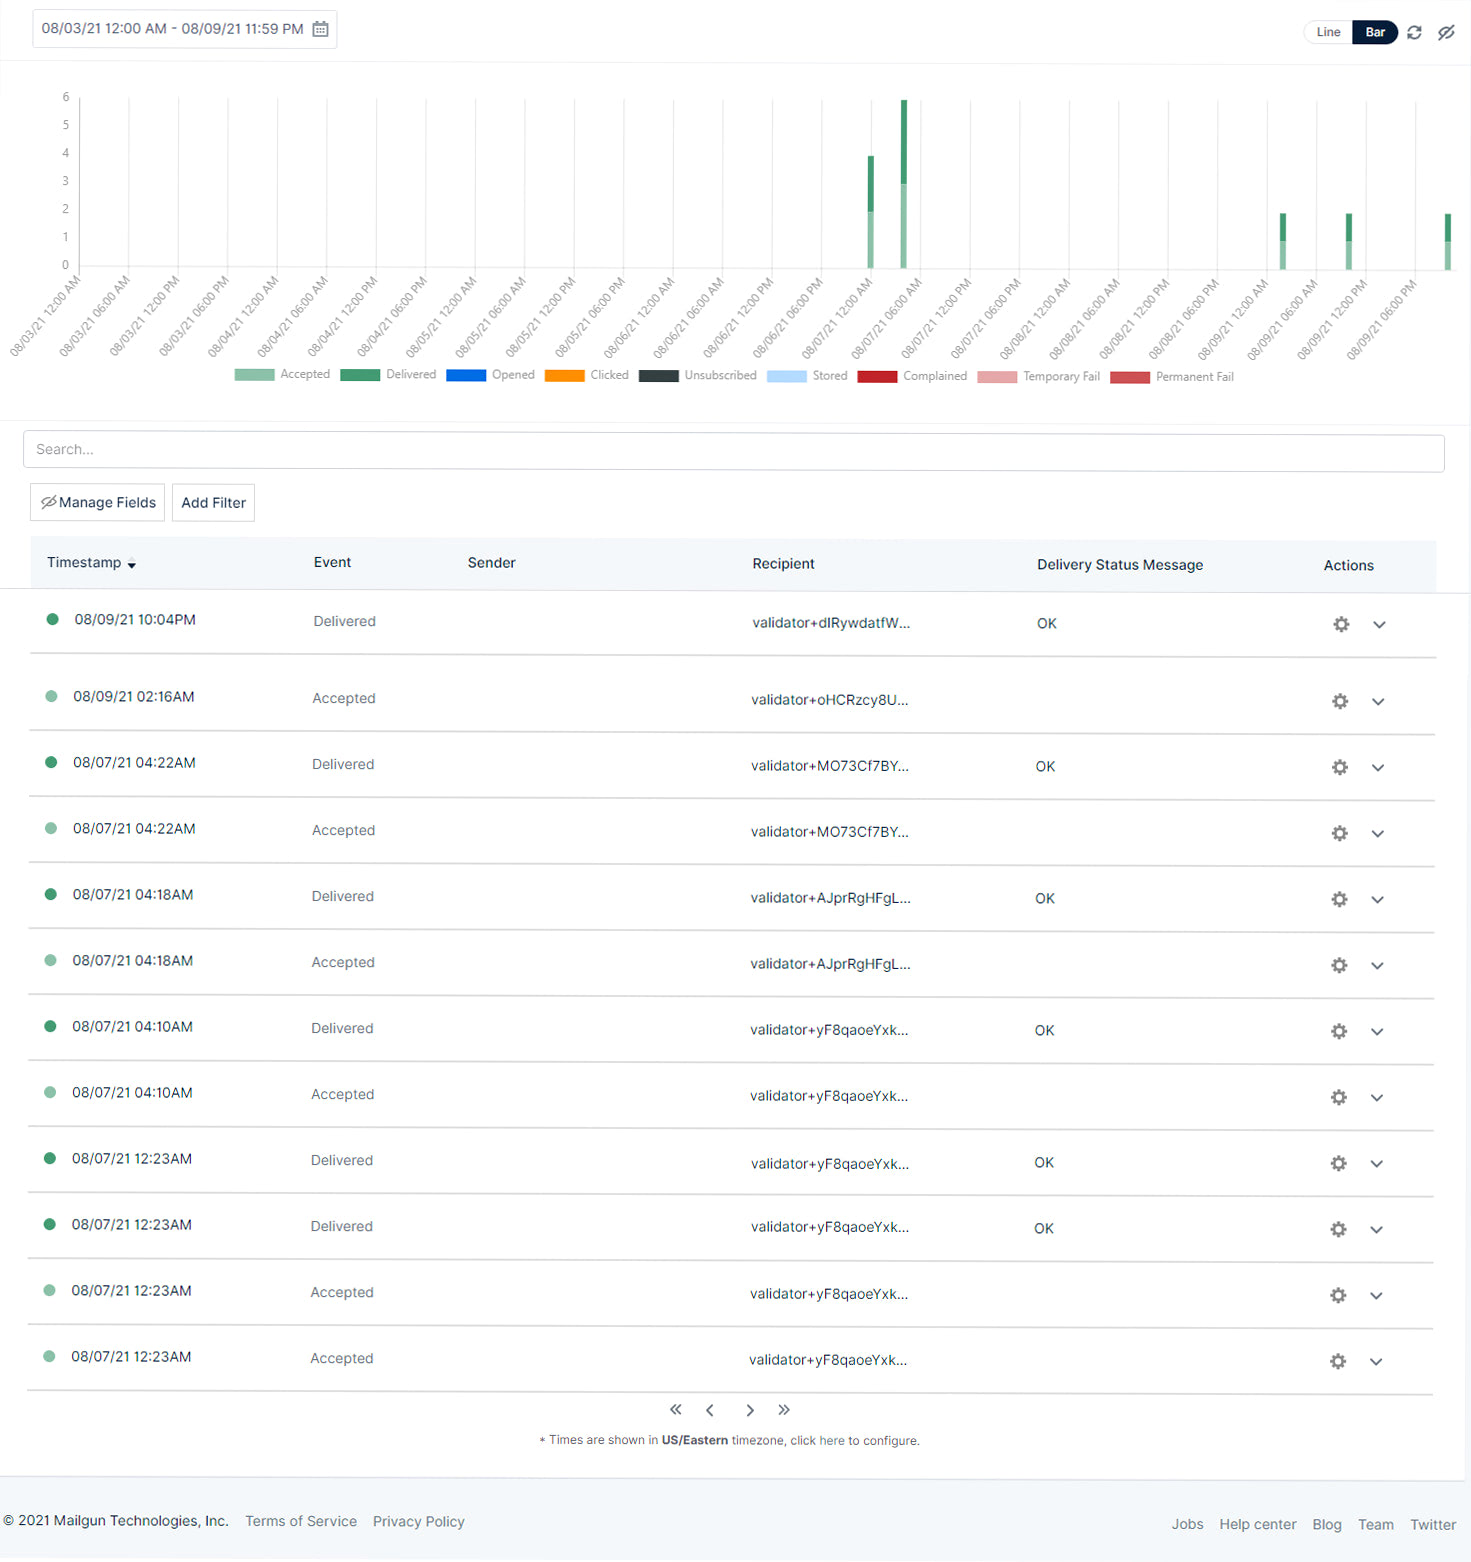
After clicking the “Logs” link, we will be redirected to the logs page which contains all the necessary data including the delivered emails which are in green and failed emails which are red. These logs can then be selected and reviewed to find out what the issue was if there is any.
Comparison Table: Alternatives to Mailgun
| SMTP Provider | Best For | Key Features | Pricing | Ease of Use | Support |
|---|---|---|---|---|---|
| Mailgun | Transactional & Marketing | Reliable APIs, tracking, analytics | Free tier (5,000 emails/month for 3 months), then $0.80/1,000 emails | Moderate | Email & detailed documentation |
| SendGrid | Transactional & Marketing | User-friendly interface, robust analytics | Free tier (100 emails/day), paid plans start at $15/month | Easy | 24/7 chat & email support |
| Postmark | Transactional | Ultra-fast delivery, simple integration | $10/month (10,000 emails) | Very Easy | Email, chat during business hours |
| Amazon SES | High-Volume Sending | Cost-effective, flexible APIs | $0.10/1,000 emails | Requires technical setup | Limited (paid support optional) |
| SparkPost | High-Volume Sending & Analytics | Advanced reporting, email optimization | Free tier (100 emails/day), paid plans start at $20/month | Moderate | 24/7 chat & email support |
Wrapping Up
WordPress by default has its own mailing features but it sometimes tends to fail since emails from wp_mail() have a risk of not getting delivered or even spammed, and website owners would have no way of knowing when or why it’s happening.
Some practical tips:
- Use a Professional Domain-Specific Email Address
- Regularly Test Email Deliverability
- Implement Proper Email Authentication
- Keep Your Email List Clean
- Monitor Email Sending Limits
- Different SMTP providers cater to various needs
- Optimize Email Content
Using services like Mailgun for ESP and Unspam.email for testing, makes it a lot easier for users to check and improves email deliverability. Setting up Mailgun with WP Mail SMTP plugin to work with WordPress takes only a few steps. Just make sure that all DNS configurations are properly set up. To create a custom status page in WordPress that may help you get new subscribers, read our guide next.


great information, it is so helpful for me.