
Third-party scripts are everywhere on a WordPress website.
Analytics tools, ad pixels, fonts, chat widgets, tracking scripts – most of these are essential, but there are trade-offs.
Every third-party script adds extra work for the browser.
More requests, more processing, more load! Over time, this bogs your site down significantly.
These scripts are often the biggest reasons behind poor Core Web Vitals and slow-loading pages.
You can’t just remove them because you still need analytics, tracking, ads, embeds, etc. But you can control how they load on your site.
In this guide, we’ll walk through a practical, step-by-step approach to optimizing third-party scripts in WordPress.
What Are Third-Party Scripts in WordPress? And Why Are They Harmful?
Third-party scripts are any scripts or resources that load from a domain outside your WordPress site.
In simple terms, if some elements on your website (like ad networks, analytics, embedded YouTube content, etc) are asking another website for a file – that’s a third-party script.
These scripts are useful to help you track users, run ads, improve design, and add functionality.
But they also come with performance costs.
- First, every third-party script requires the browser to connect to an external server. This involves extra steps like finding the server, establishing a secure connection, and then downloading the file. All of this takes time.
- Second, you don’t control how these scripts are delivered. If the third-party server is slow or poorly optimized, your site receives information slowly.
- Third, many of these scripts run JavaScript in the browser, which can delay how quickly your page becomes interactive.
This impacts Core Web Vitals in a few ways, like pages can appear slower, interactions can feel laggy, and layout shifts when fonts or embeds load unpredictably.
That said, not all third-party scripts are bad.
The real problem occurs when too many scripts are added without thinking about their impact. Over time, they build up and slow your site down.
The solution is not to remove them blindly, but to manage them more carefully.
Optimizing WordPress Third-Party Scripts
Optimizing third-party scripts is not about applying one quick fix. It’s a process.
Most performance issues come from a combination of scripts. So instead of trying random tweaks, it helps to follow a structured approach.
The goal is simple: keep the scripts you need, reduce their impact, and remove what you don’t.
A practical way to do this is:
- Identify all third-party scripts on your site
- Decide which ones are essential, which can be delayed, and which can be removed
- Apply targeted optimizations like delaying, conditional loading, or hosting locally
- Test your site to make sure performance improves without breaking functionality
Instead of guessing, let’s make informed changes step by step.
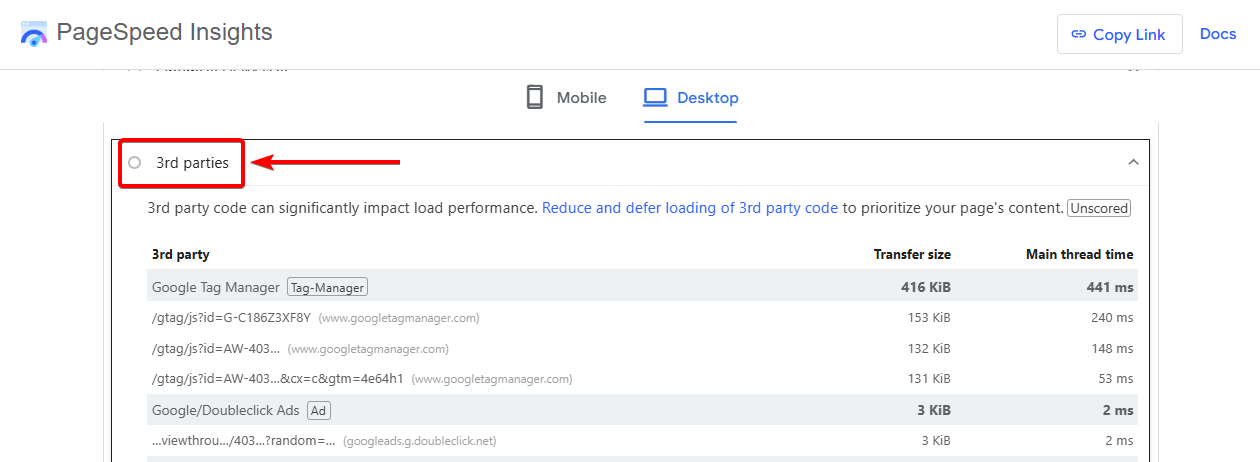
Step 1: Find Existing Third-Party Scripts on Your Site
Before optimizing anything, you need to know what your site is actually loading.
You can use tools like PageSpeed Insights or Chrome DevTools to do this. These tools show a list of third-party domains along with how much data they load and how much work they create for the browser.
You don’t need to understand every technical detail. Just look for patterns:
- Which scripts appear frequently
- Which ones load large files
- Which domains show up across multiple pages
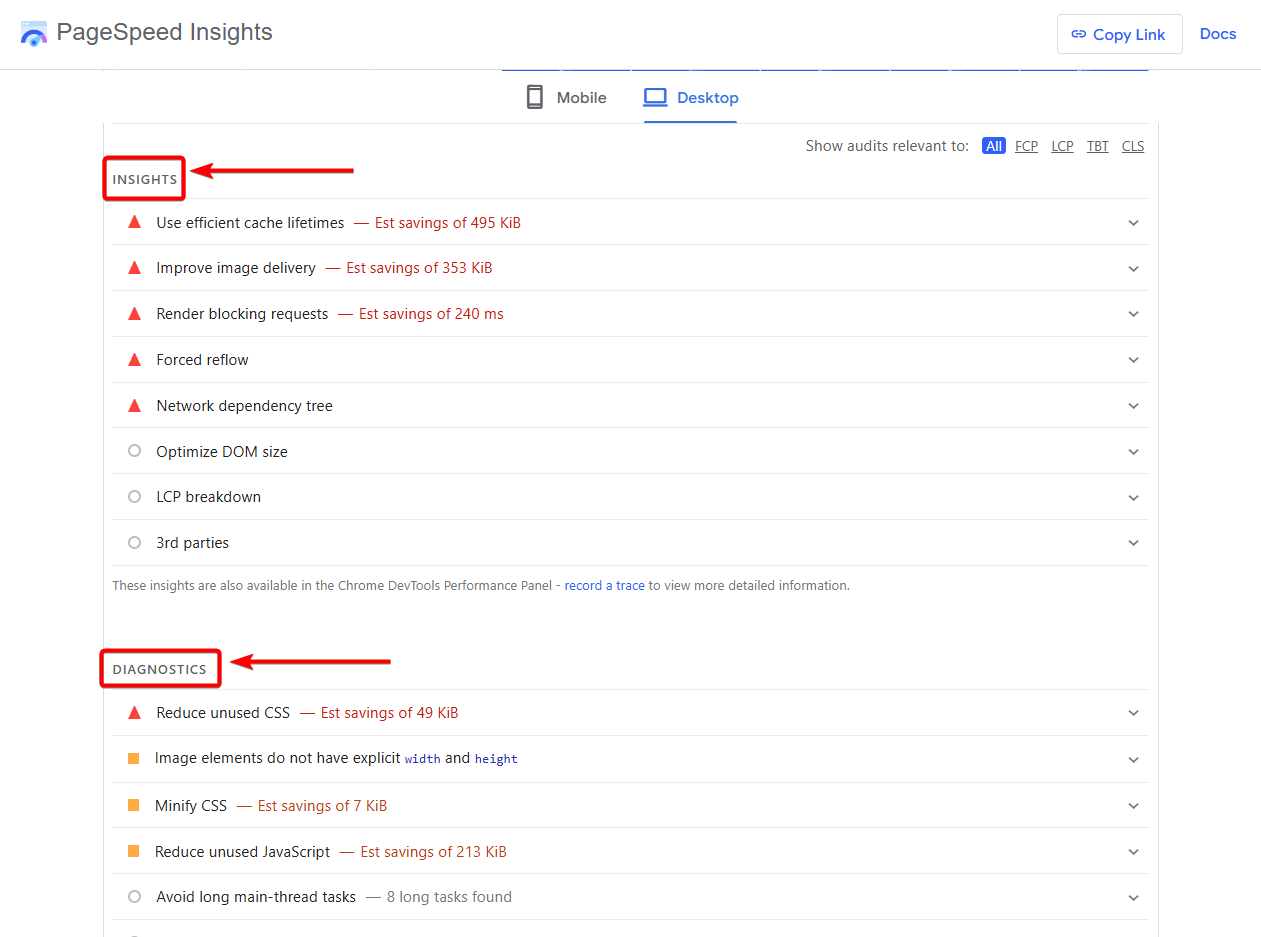
It’s also important to check more than just your homepage.
By testing a few key pages, you’ll get a clearer picture of what’s actually affecting performance.
Step 2: Decide What to Keep, Delay, or Remove
Once you know which third-party scripts your site is loading, the next step is to prioritize them.
Not every script should be treated the same. Some are critical for your site to function, while others are optional or rarely used.
A simple way to approach this is to group scripts into three categories.
Must load immediately: These are essential for core functionality. Examples include payment gateways, security scripts, and anything required for checkout or form validation.
Useful but not urgent: These scripts add value but are not needed right away. Examples include analytics tools, ad pixels, chat widgets, and A/B testing tools.
Nice-to-have or unnecessary: These are scripts that don’t provide clear value or are no longer needed. Examples include unused tracking tools, duplicate analytics scripts, or heavy embeds that can be replaced.
Removing or delaying the wrong scripts can break important functionality. But keeping everything as-is can slow your site down. This step is about balancing performance with business needs.
Step 3: Tactics to Implement
Once you’ve identified and prioritized your scripts, the next step is to optimize how they load.
Reduce & Simplify Third-Party Dependencies
Before optimizing how scripts load, it’s worth asking whether you need all of them in the first place.
Over time, WordPress sites tend to accumulate multiple tracking tools, widgets, and integrations. Each one adds extra work for the browser.
In many cases, there’s overlap. Different tools may be doing similar things, such as analytics, heatmaps, or tracking user behavior.
Instead of optimizing every script individually, reducing the total number of scripts can often have a bigger impact on performance.
This might involve removing unused tools, consolidating your tracking setup, or replacing heavy scripts with simpler alternatives.
For example:
- Use a single analytics tool instead of multiple tracking platforms
- Remove old or unused ad tracking scripts
- Replace heavy social sharing plugins with simple share links
The goal is to keep only the tools that provide real value and remove anything unnecessary.
Delay JavaScript Execution
Instead of loading scripts immediately when the page loads, you delay them until the user interacts with the page, such as scrolling or clicking.
This prevents non-critical scripts from loading upfront and reduces the amount of work the browser has to do early on.
This works best for scripts that are not needed right away, such as analytics, ad pixels, chat widgets, and A/B testing tools.
In WordPress, this is usually done using performance plugins. For example, tools like Flying Scripts allow you to delay specific scripts until user interaction.
In setting up the plugin, you will need to add keywords that uniquely identify that script. For example, “gtag” for Google Tag Manager, “fbevents.js” for Facebook Pixel, “customerchat.js” for Facebook Customer Chat plugin, etc.
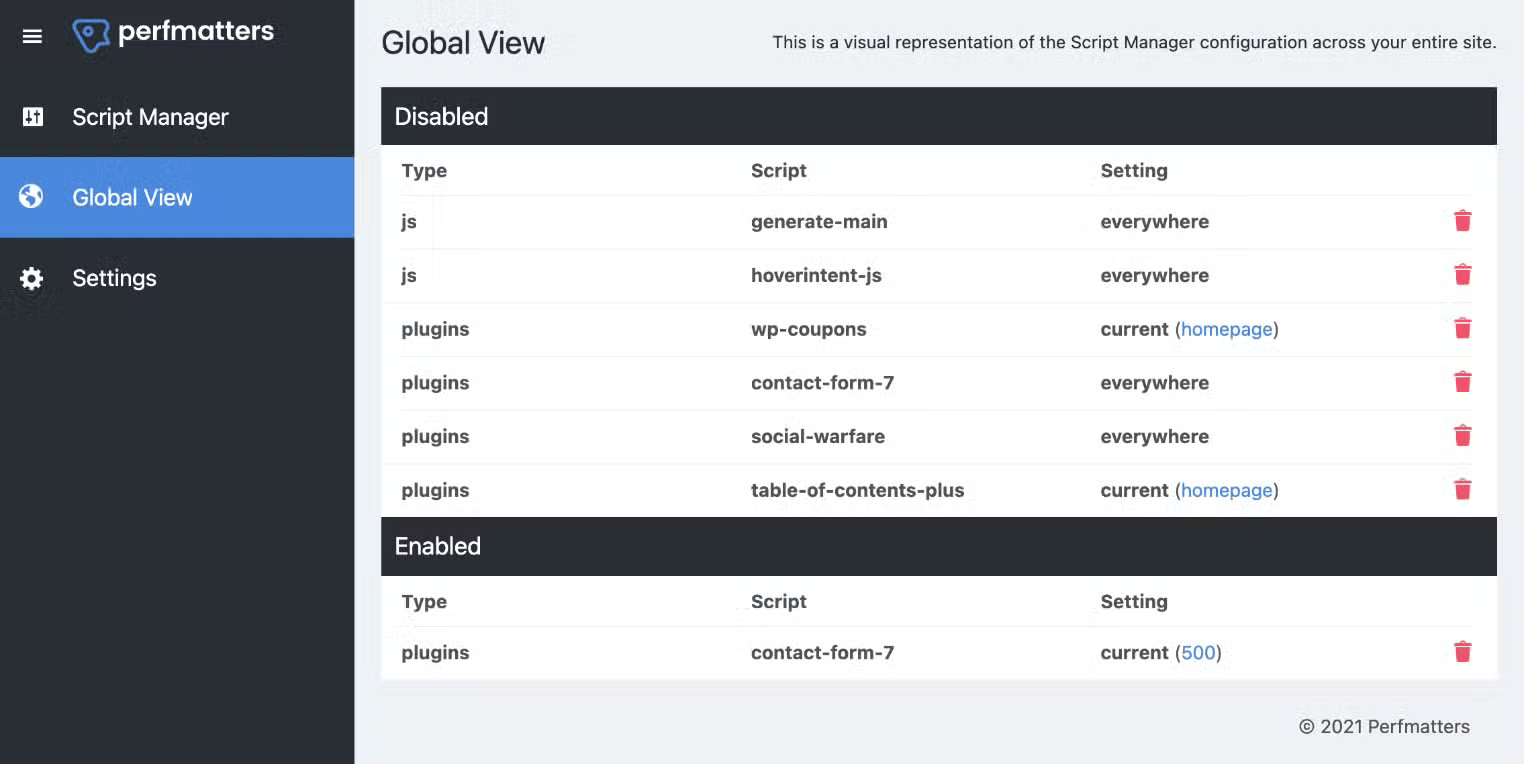
Load Scripts Conditionally
By default, many plugins and tools load their scripts site-wide, even when they’re only useful on specific pages. Not all scripts need to load on every page.
This creates unnecessary requests and slows down your site.
A better approach is to load scripts only where they’re actually needed. By limiting where scripts load, you reduce both the number of requests and the amount of work the browser has to do.
For example, tools like analytics, ad pixels, chat widgets, and tracking scripts are relevant on pages, such as product pages, checkout pages, or blog posts.
They don’t need to run on pages like privacy policy and terms and conditions.
In WordPress, you can use a tool like Perfmatters. It lets you enable or disable scripts on specific pages, posts, or post types.
Host Third-Party Resources Locally (Like Fonts)
Some third-party resources can be loaded from your own server instead of external domains.
Instead of your site fetching files from another website, it serves those files directly from your own domain.
For instance, by default, many WordPress sites load fonts from services like Google Fonts. But these fonts can be stored on your site and served locally instead.
This removes the extra step of connecting to an external server, which helps reduce loading delays.
If you’re using Blocksy, it includes built-in options to host Google Fonts locally, making this easier to implement.
Speed Up Essential Third-Party Scripts
Some third-party scripts need to load early and can’t be delayed, removed, or limited to specific pages.
In these cases, the goal is not to reduce them, but to make them load faster.
One way to do this is to help the browser prepare for these scripts in advance (using techniques like preconnect and prefetch), instead of waiting until the last moment.
This allows the browser to start connecting to external services earlier or begin loading resources in the background.
For example, if your site uses a payment provider like Stripe on the checkout page, the browser needs to connect to Stripe’s servers before processing payments. Preparing this connection early can make the process faster when the user reaches checkout.
This approach doesn’t reduce the number of requests, but it helps reduce waiting time for important scripts.
It should be used selectively, only for scripts that must load early. Adding too many of these optimizations can create unnecessary work for the browser.
In WordPress, plugins like Perfmatters or WP Rocket allow you to preconnect or prefetch for specific domains.

Step 4: Monitor Performance
Once you’ve applied these optimizations, it’s important to check if they’re actually making a difference.
Start by testing your site again using the same tools (PageSpeed Insights or Chrome DevTools) and compare the results with your earlier tests.
You don’t need to focus on every metric. Look for simple improvements like faster page load time, better Core Web Vitals scores, and fewer third-party requests.
At the same time, make sure your site is still working properly. Test key actions like form submissions, tracking events, and checkout flows to ensure nothing has broken after delaying or removing scripts.
If everything works and your site is faster, your changes are working.
If not, don’t worry. It may mean that third-party scripts weren’t the main issue, or that some scripts need to be handled differently.
In that case, continue refining your setup or look into improving other areas like images, hosting, or theme performance.
Also read:
- How to Improve Cumulative Layout Shift (CLS)
- How to Improve Interaction to Next Paint (INP)
- How to Improve Largest Contentful Paint (LCP)
- Guide to WooCommerce Speed Optimization
FAQs
Will delaying scripts break my site?
It can if you delay scripts that are required for core functionality, such as payments, security checks, or form validation. Start by delaying non-critical scripts like analytics or chat widgets, then test your site carefully. If something breaks, exclude that script and adjust your settings before continuing.
Which scripts should I delay first?
Begin with scripts that are not needed during the initial page load. These typically include analytics tools, ad pixels, chat widgets, and A/B testing scripts. These can safely load after user interaction without affecting functionality. Avoid delaying anything related to checkout, security, or essential user interactions.
How many third-party scripts are too many?
There’s no exact number, but performance usually declines as more scripts are added. Instead of counting scripts, focus on their value. If multiple tools serve similar purposes or are no longer used, remove them. Keeping only essential scripts helps maintain better performance and simplifies future optimization efforts.
Conclusion
Third-party scripts are a necessary part of most WordPress websites, but they can also be a major source of performance issues if left unmanaged.
The key is not to remove them completely, but to control how and when they load.
By identifying what your site uses, prioritizing what matters, and applying targeted optimizations, you can significantly reduce their impact.
Even small changes like delaying non-critical scripts or limiting where they load can lead to noticeable improvements in performance and Core Web Vitals.
Over time, maintaining a smaller, more intentional set of third-party tools will help keep your site fast, stable, and easier to optimize.