
WordPress is capable of many things. For several years of continuous improvement, it has grown into a valuable solution for almost every type of website and web app. While it’s not perfect for every task, it is well adapted for a wide range of tasks.
All WordPress websites use the same core files but may differ on plugins and themes used, which individualize websites by adding additional features and tools that benefit the overall website’s purpose. Needless to say, if your WordPress website requires custom functionality that cannot be found on any existing plugins online, you might need to hire a developer to build it if you are not sure how to do it.
With all of these powerful features added to WordPress, you can create almost everything from posts and pages with dynamic content and custom fields without the need to code HTML or even CSS. However, there are times when your project requires adding static HTML to your WordPress website.
Table of Contents
Key Takeaways
- WordPress supports static HTML pages – with plugins like Static Pages, you can easily integrate older HTML layouts or custom-built pages.
- Flexible upload options – from plugins like WP File Manager to the built-in Custom HTML block, users can choose methods that fit their skill level.
- Compatibility matters – using a Gutenberg-ready theme like Blocksy ensures smooth integration of HTML pages with modern block editing.
- Tools speed up workflows – page generators like Slides or CodePen simplify creating static HTML pages before uploading.
- SEO & performance must stay top of mind – proper URL structures, clean code, and optimized assets keep uploaded HTML pages fast and search-friendly.
HTML to WordPress: Why to Use HTML Page in WP
Since WordPress now powers over 43.5% of all websites globally, it’s common for site owners to import older static HTML designs into WordPress to take advantage of its flexibility while retaining legacy layouts.
There are a couple of reasons you might want to upload an HTML file or webpage to your WordPress website, such as you want to use an HTML layout from an old static website to your current WordPress website, and the list goes on. Whatever the reason might be, uploading an HTML file or page to your WordPress may cause permission errors or HTTP 404 errors.
In this article, I’ll show you how to safely add an HTML page to your WordPress website while avoiding such errors by using a plugin called “Static Pages“.
Static Pages is a WordPress plugin that allows you to upload and publish HTML files or pages on a WordPress website with any custom URL easily and quickly.
Some of its best features include:
- Multi-page support. Allows you to create custom links for every webpage you upload using the plugin.
- Dynamic brackets. Compatible with WordPress shortcodes.
- Customizable URL. Allows you to create custom URLs or slugs in a matter of seconds
- Structured resources and pages. It enables you to make more pages by reusing common assets.
- Unlimited websites. No limitation on the number of websites you can make.
- Clean code. It supports clean coding without any extra styles/scripts.
- SEO-friendly. Excellent for search engine ranking and page speed.
- AceIDE editor enabled. Allows you to edit uploaded HTML, styles, and scripts using the powerful AceIDE editor.
If you use Figma, you can export the Figma design to HTML using the plugin from Siter.
Step 1: Select and Install a Compatible WordPress Theme
Let’s conclude that we already have the latest WordPress version installed at our disposal. At this point, we need to select a theme that we will use for our demo. If you are unsure how to install WordPress, you can refer to my previous tutorial if you need a guide on installing WordPress using the Softaculous Cpanel Software. You can also follow this guide if you wish to install WordPress manually.
While there are thousands of WordPress themes you can choose online, it is essential to select a Gutenberg-ready theme for several reasons. The Gutenberg editor is the new default WordPress editor, making creating posts and pages easier using the new intuitive block editor.
With all of the possible themes to choose from, most of which are not Gutenberg-ready, I wanted to make it easier for you to find the perfect theme that comes with lots of features. In this tutorial, we will use Blocksy, the utmost groundbreaking, lightning-fast, and Gutenberg-ready WordPress theme, packed with lots of cool key features inside, including:
- Speed Optimized. It loads faster in most speed testing platforms.
- Gutenberg Ready. It is compatible with the latest WordPress Gutenberg editor and blocks feature.
- Code Splitting. Load JavaScript when needed using webpack’s support for dynamic imports.
- eCommerce Ready. Develop and customize your online store easily.
- Translation Ready. It can be translated into several languages with the hardcoded strings.
- Clean Code. Each line of code was coded beautifully.
- Live Preview. Customizer modifications are synced in real-time in the preview window, speeding up your workflow.
- Fully Responsive. Dynamic viewport changes depending on the website’s screen size and orientation.
- Custom Ads Landing Pages. Learn how to easily add ads to WordPress pages and posts in our guide.
Let’s install Blocksy WordPress theme on our website. First, we need to visit the WordPress login URL and log in using our username and password.
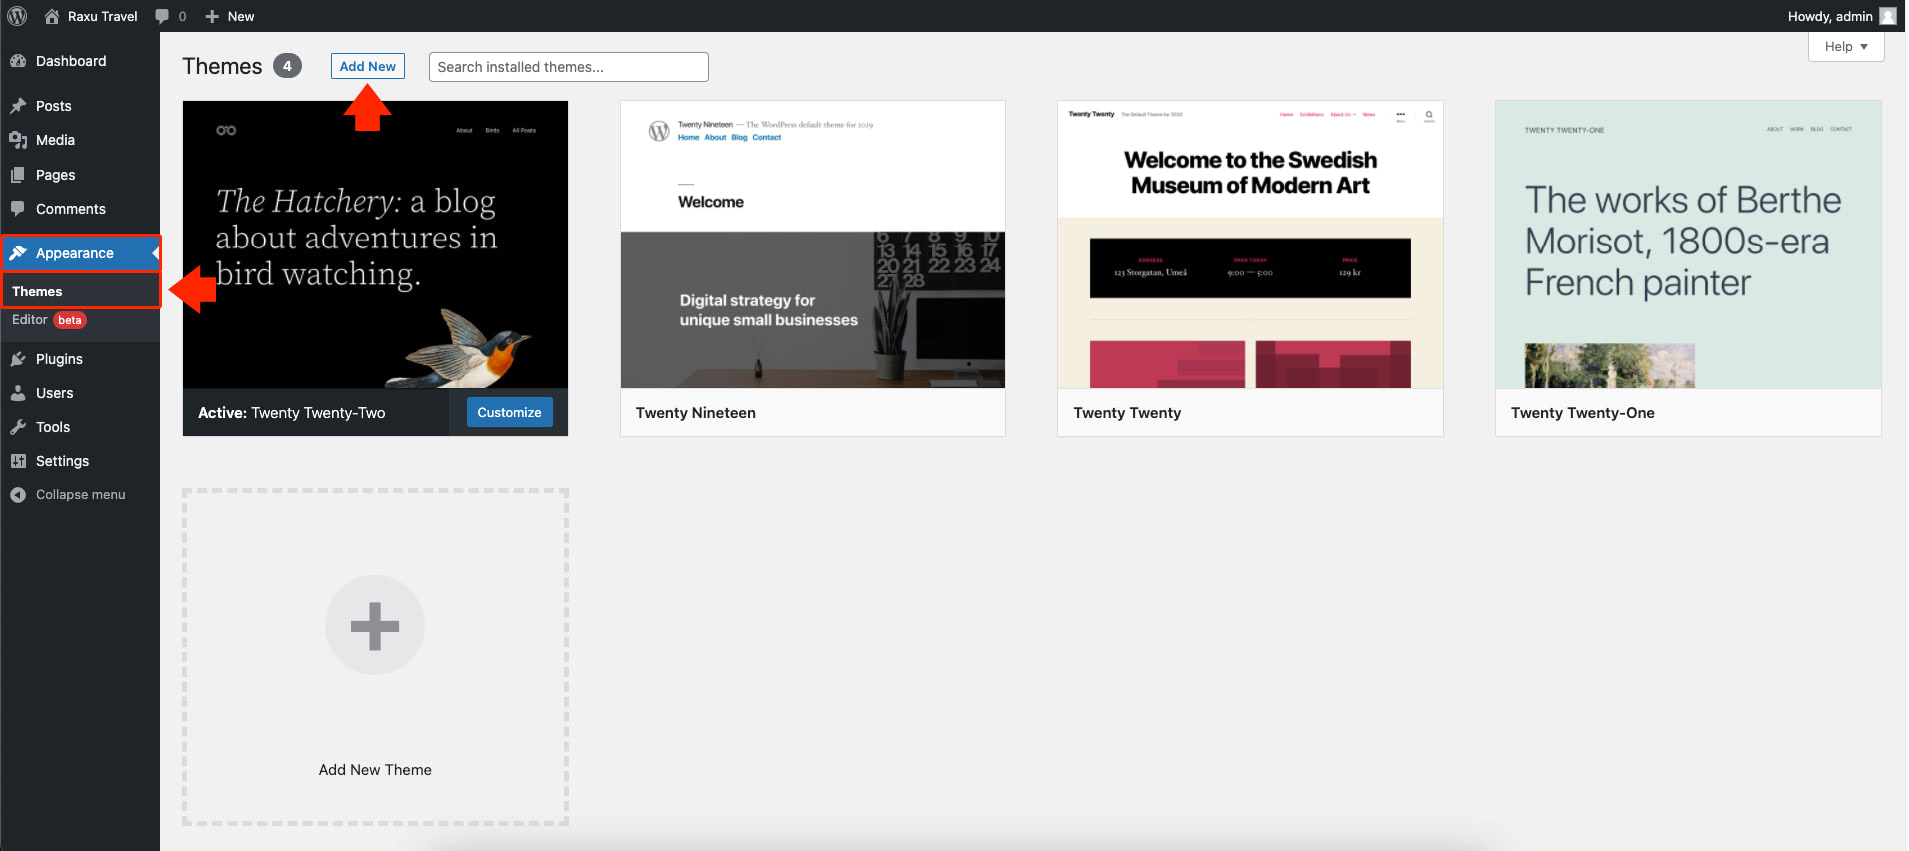
On our WordPress Dashboard, click on “Appearance” followed by “Themes” on the left panel menu. Then, click on the “Add New” button, as seen in the image below.
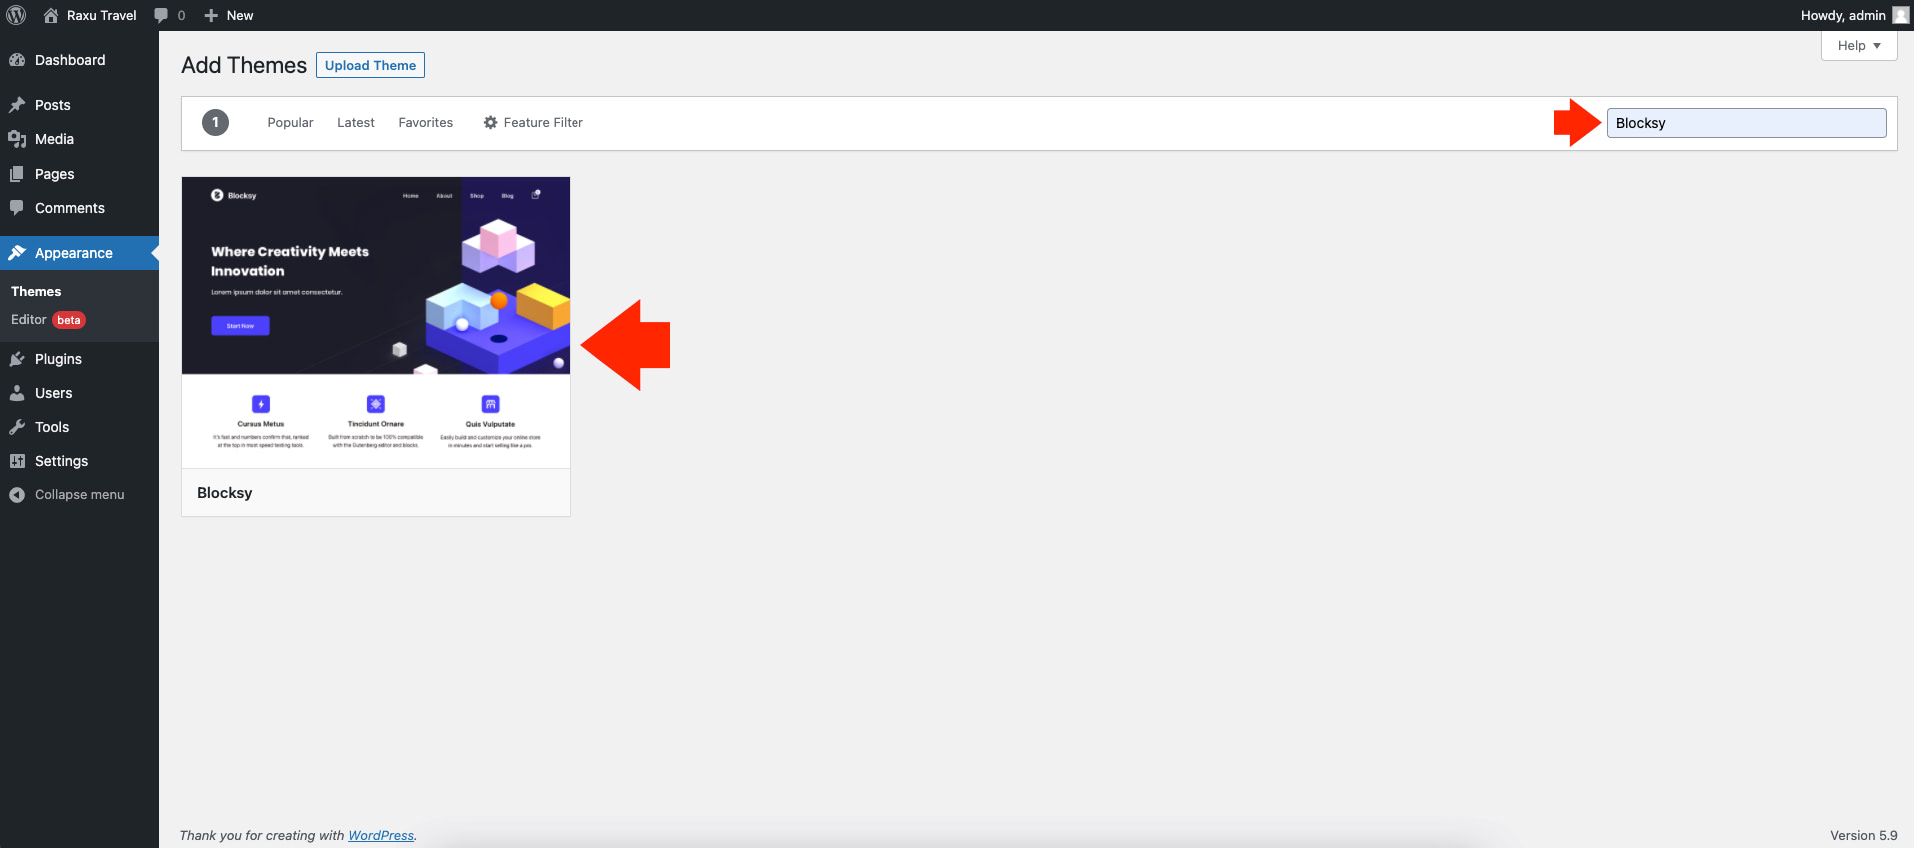
Then, on the search box on the upper right corner of the screen, type in the keyword “Blocksy,” and it will return the Blocksy WordPress theme on the search result as seen in the image below.
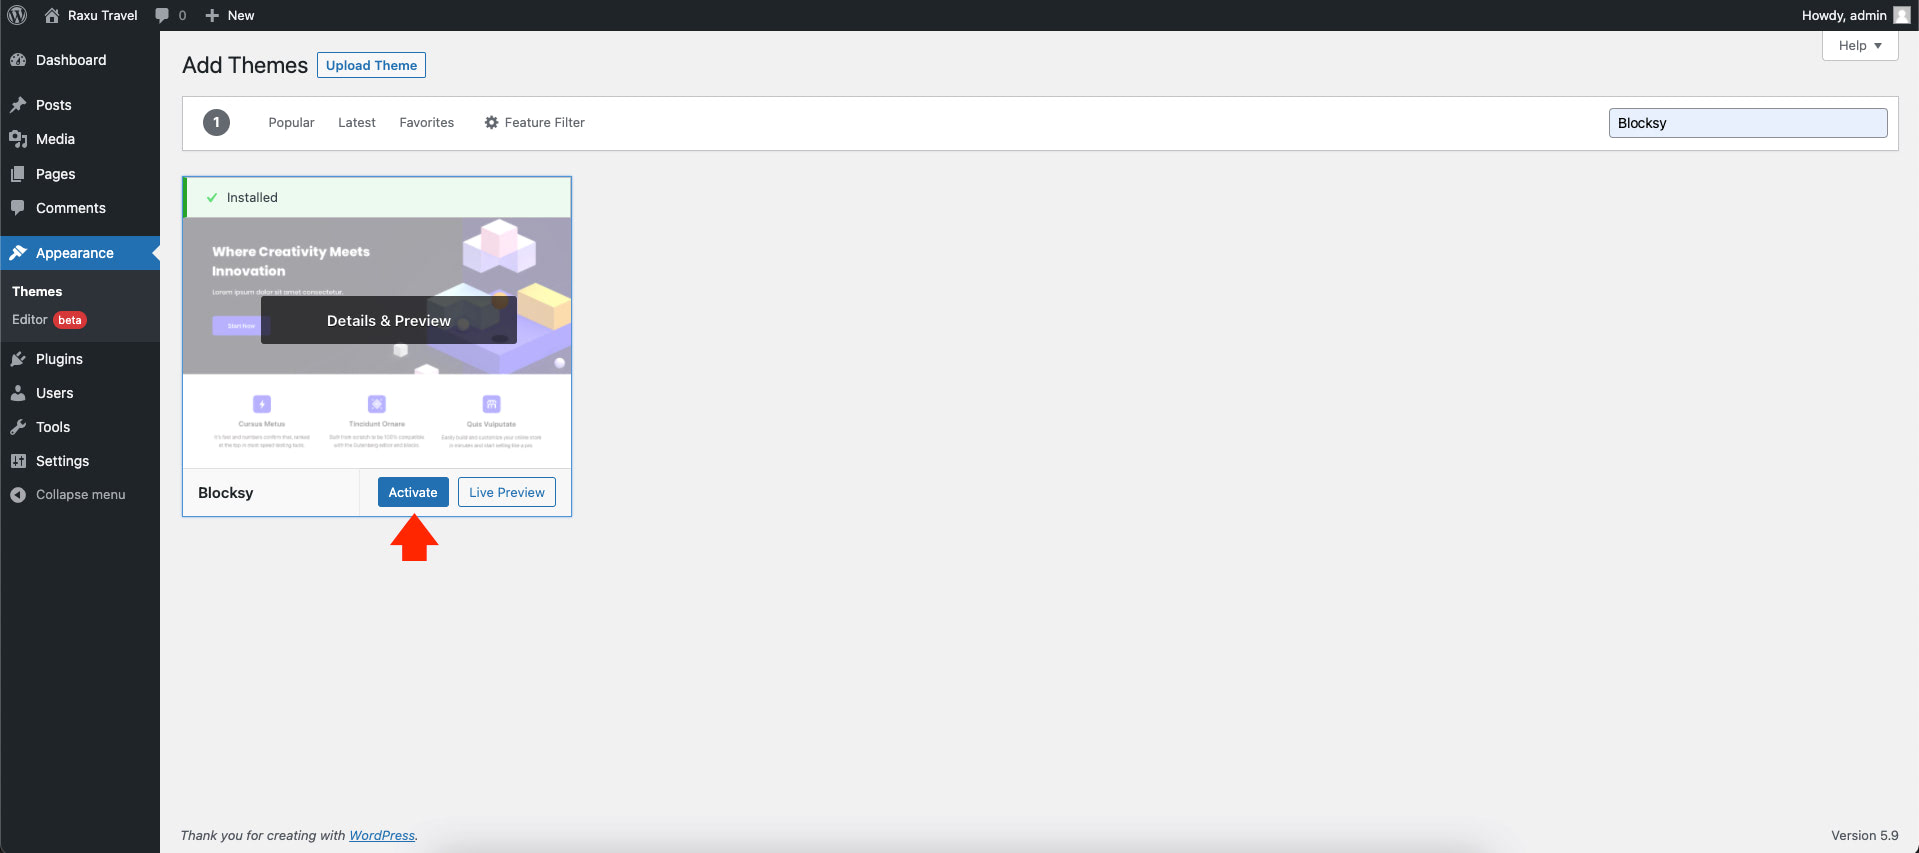
Next, hover your mouse on the Blocksy WordPress Theme box and click on the “Install” button. Afterward, click on the “Activate” button to activate the theme.
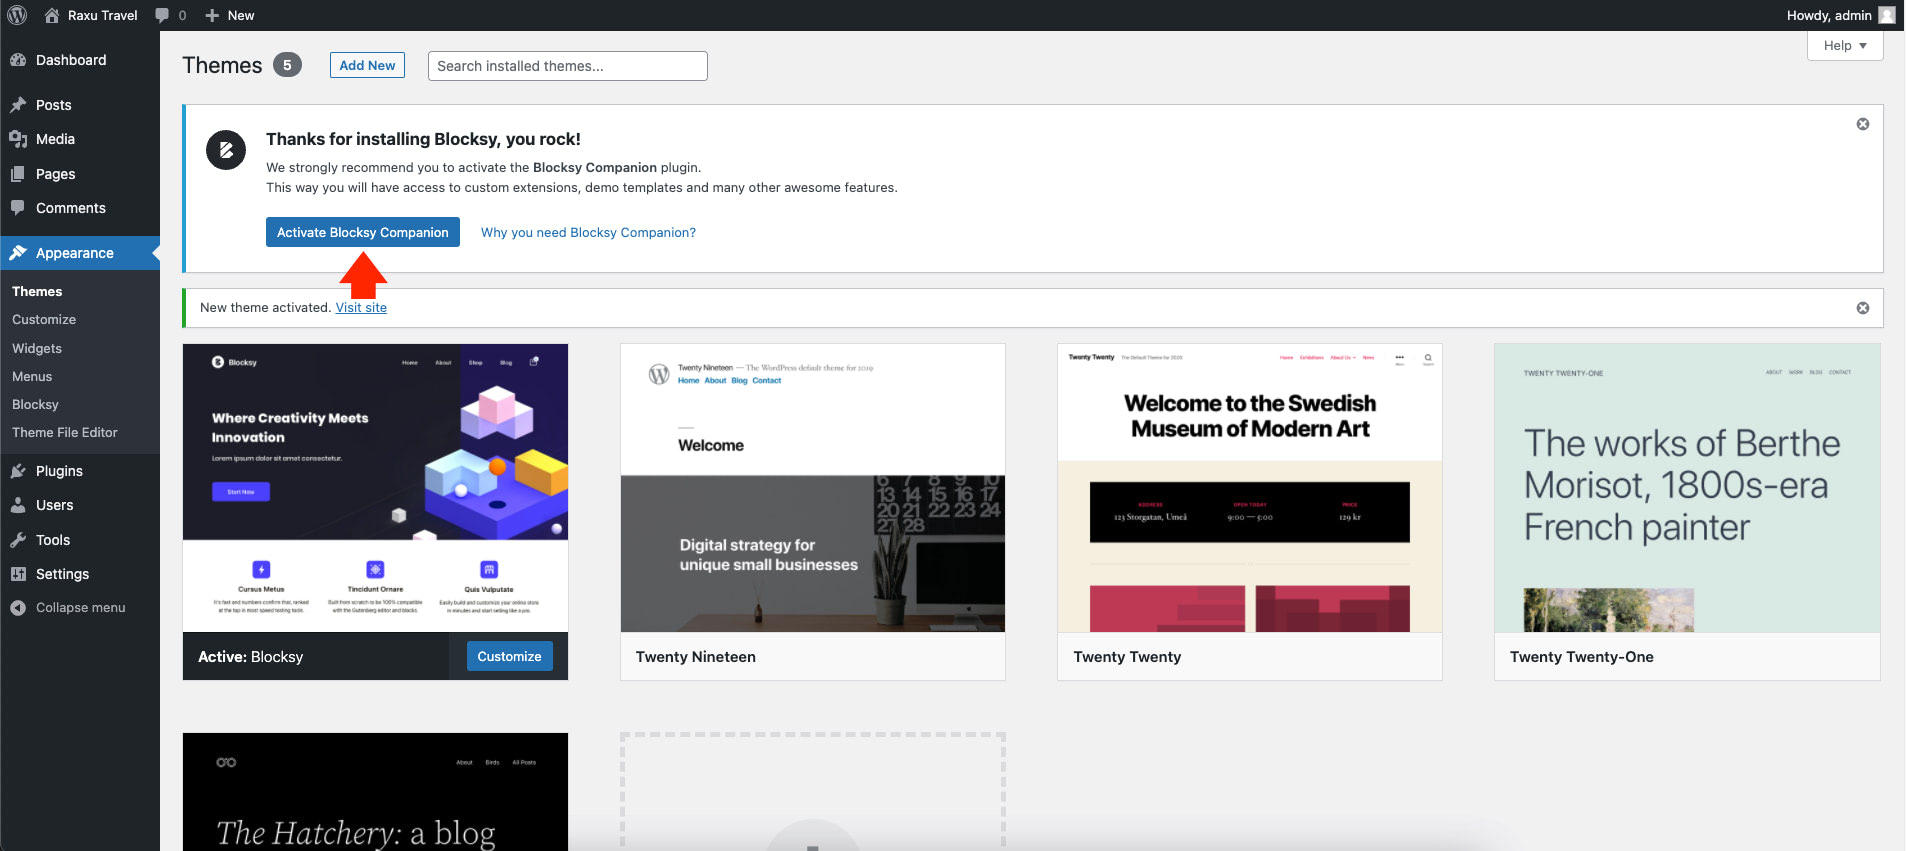
Congratulations! We just installed the Blocksy WordPress Theme on our website. The next thing we need to do is activate Blocksy Companion and select our preferred design for our WordPress website.
To activate the companion settings of theme, click on the “Activate Blocksy Companion” button, as seen in the image below.
Once the Blocsky companions got installed, we need to choose our starter theme. To do this, we need to go to the Blocksy WordPress Theme Dashboard and click on the “Starter Sites” Tab and select our preferred theme and layout.
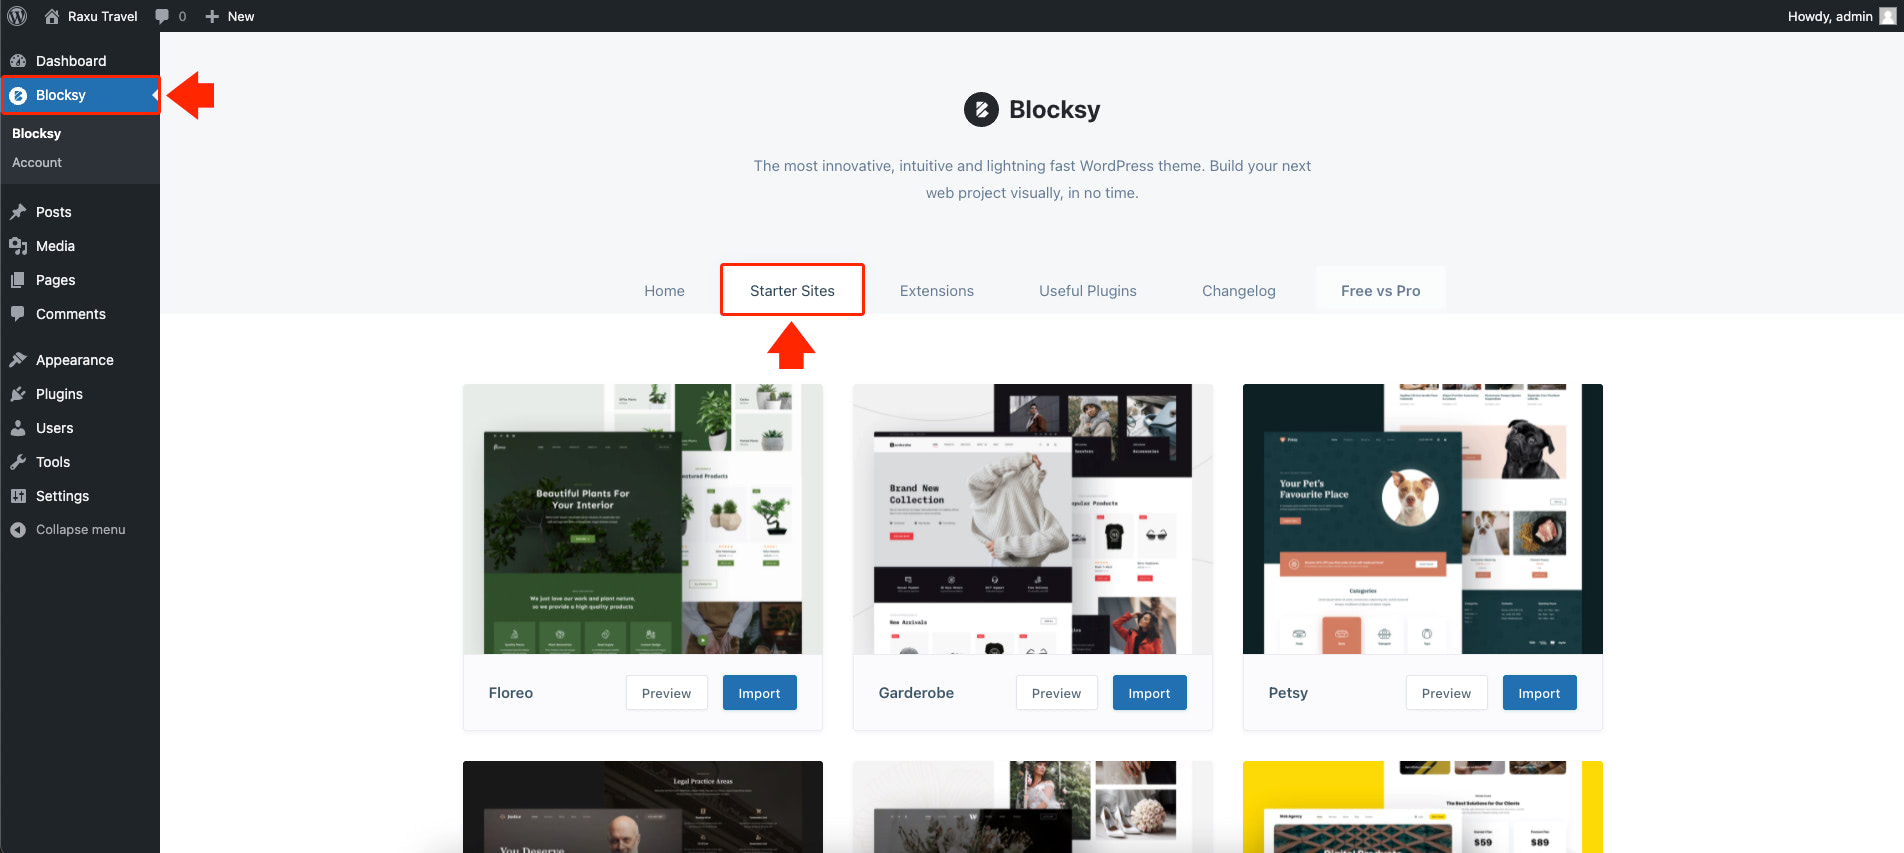
In this tutorial, let’s use the “Business” theme, which can be found at the bottom part of the second row.
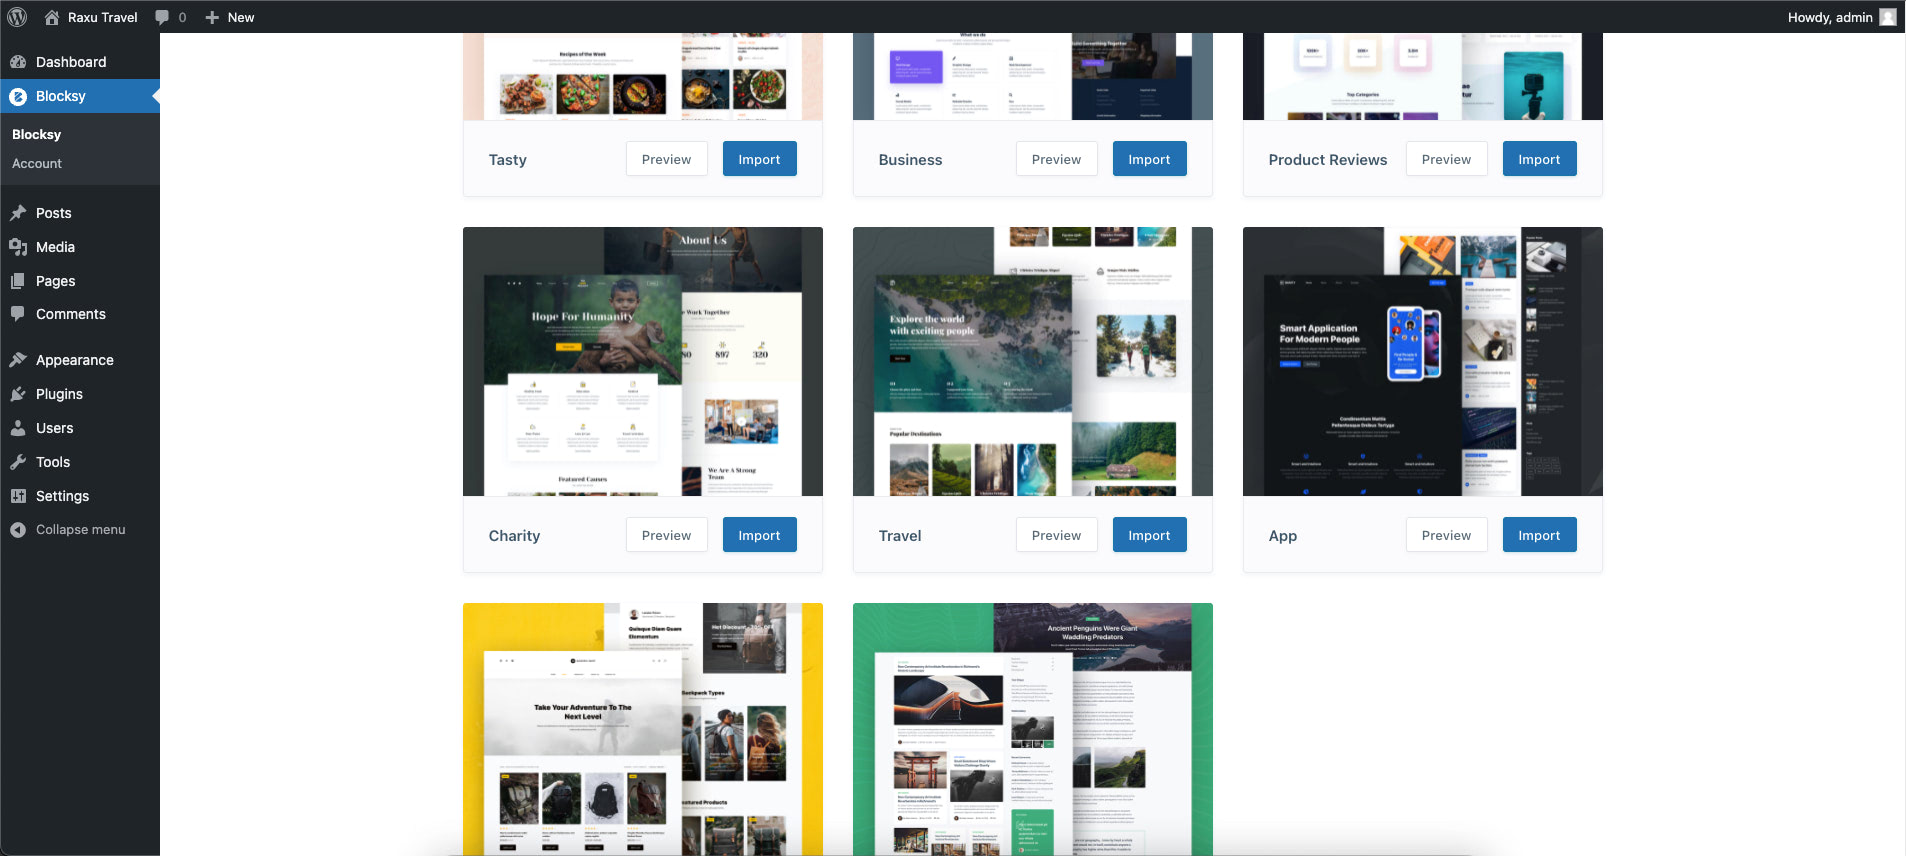
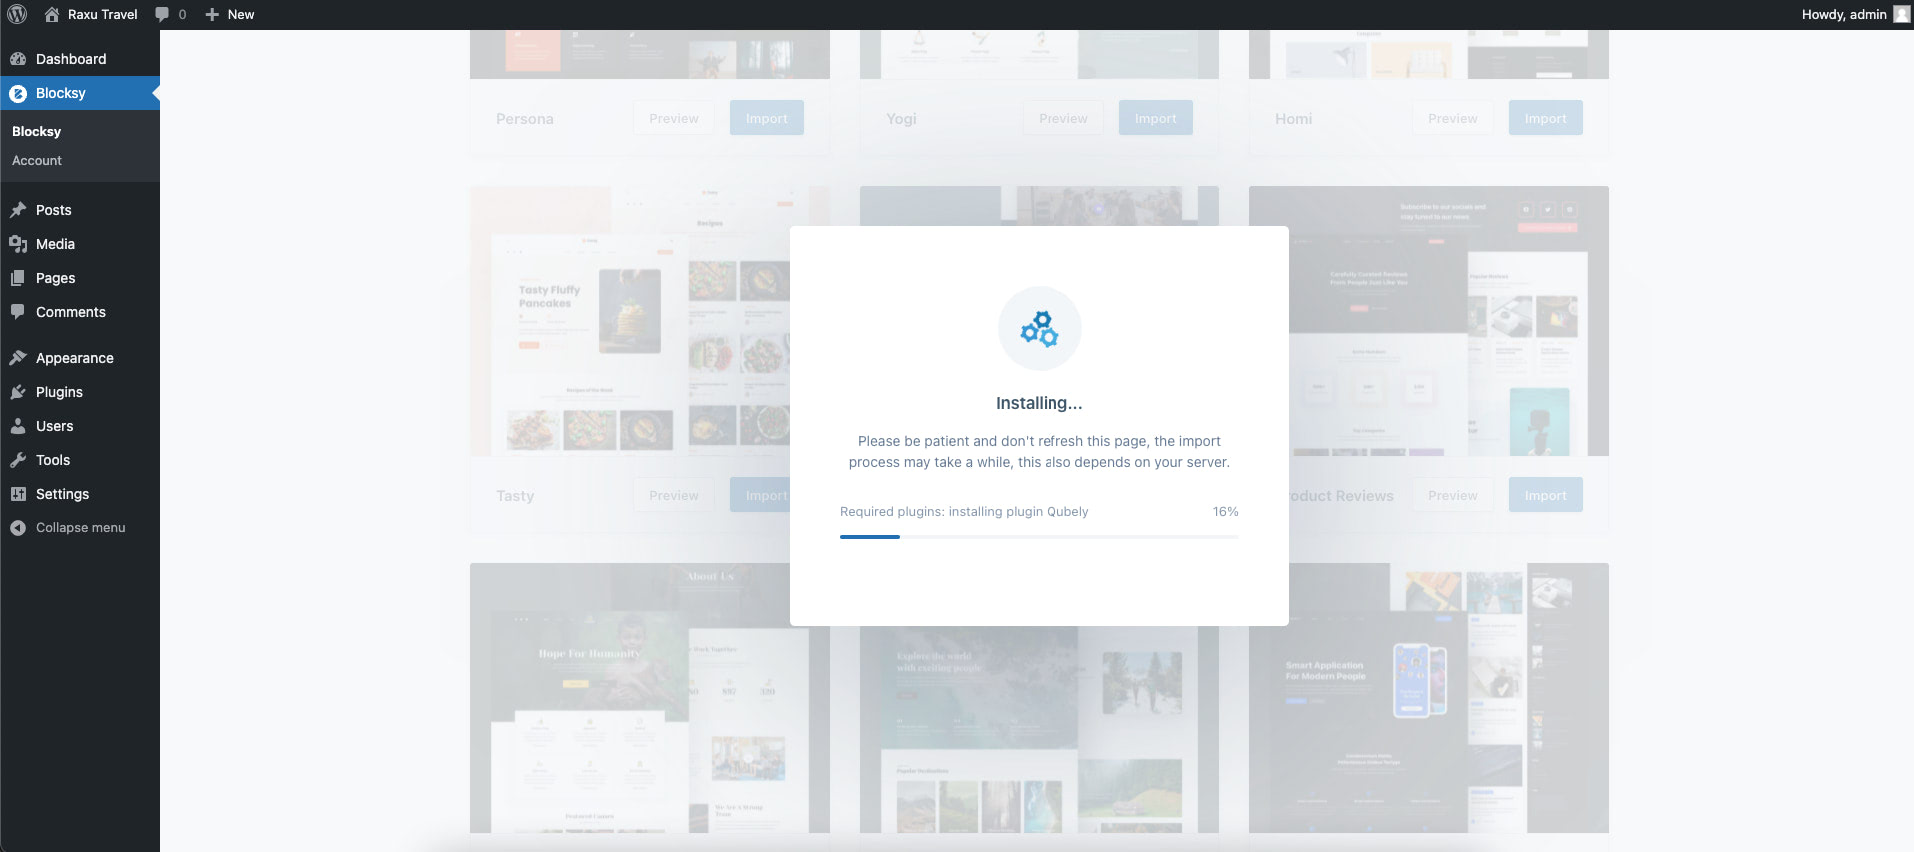
To install the “Business” theme, click on the “Import” button, and it will start prompting a few questions about the import process, such as if you wish to install it as a child theme or if you want to install the plugins and widgets that come with the theme we selected.
Note: Under the page, builder settings select “Gutenberg” as the page builder tool of our website.

At this point, our “Business” starter theme is finally installed. We can now visit our website URL, and it should look like the image below.

Feel free to change the content as you may like.
Step 2: Generate Your HTML Page (Using Tools like Slides)
Before uploading a static webpage on our WordPress website, we need to create a static webpage first. In this tutorial, we will use Slides to generate a static webpage.
Slides is a static website generator developed by the Designmodo team. It allows users to create beautiful and animated, quickly, static websites in a matter of minutes using its native components and modules that are easy to use and customizable to help you design your webpage idea in a few clicks.
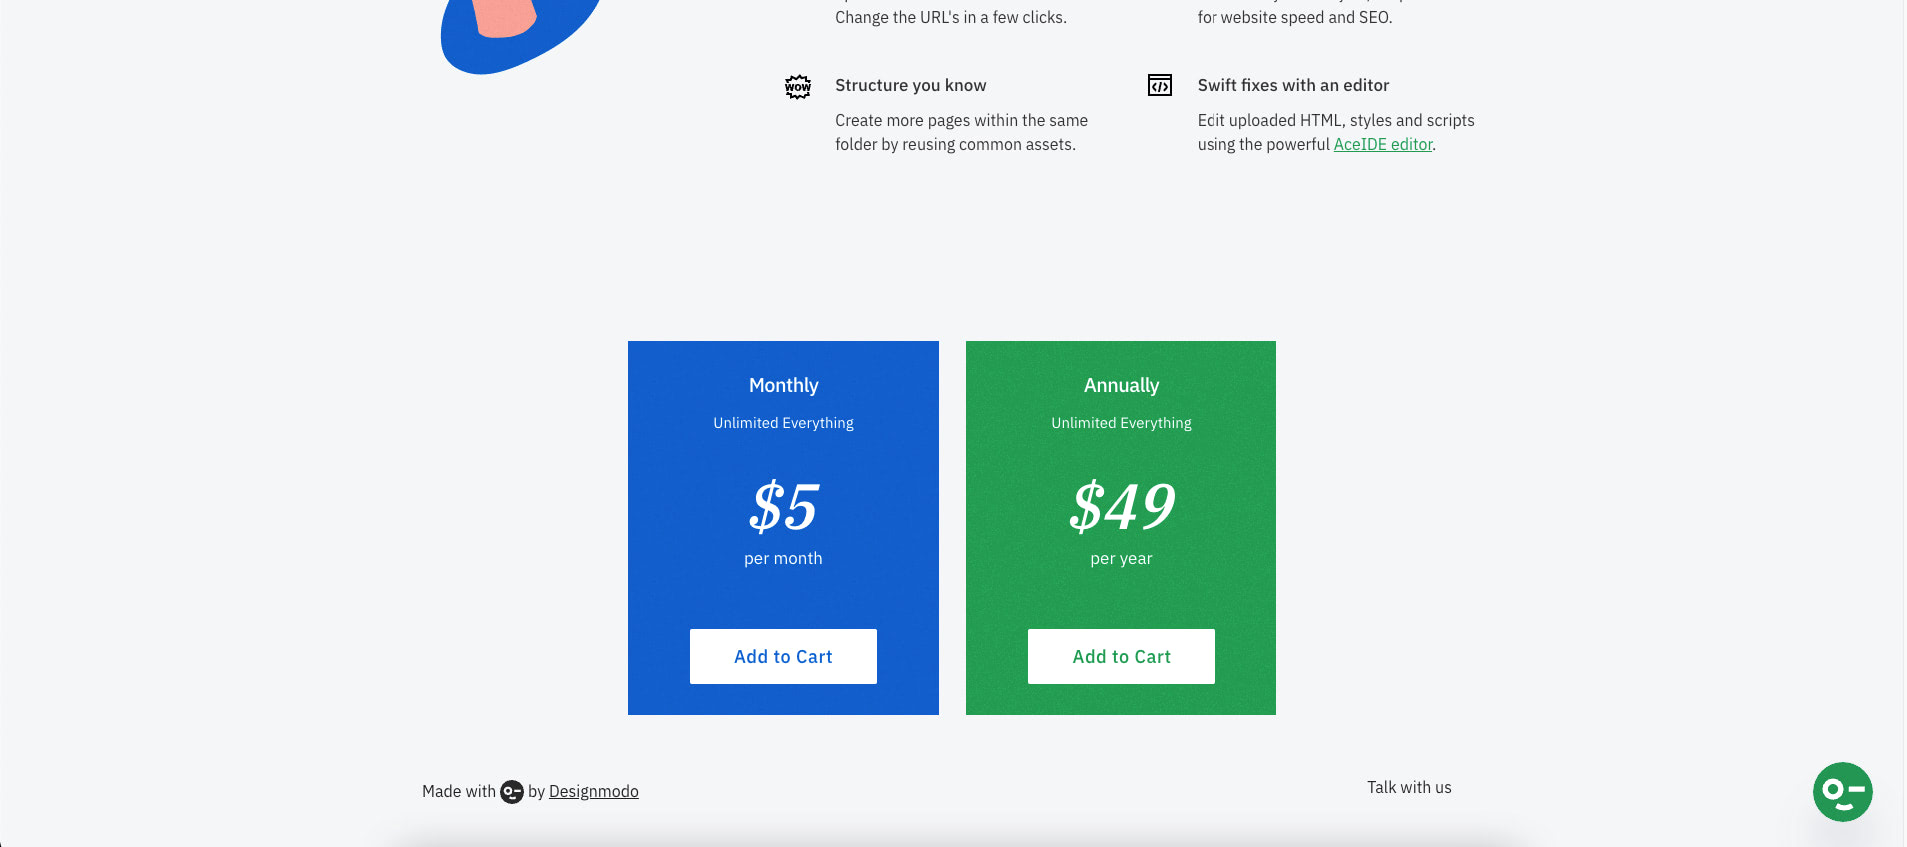
Slides come in three pricing plans: Free, Business, and Agency which can be purchased annually or monthly. Visit the pricing page to learn more about Slides pricing and what’s included on every plan.
Let’s create a Slides account first. Visit https://designmodo.com/slides/login/ and sign up for a free Designmodo account. Fill in the form with your information and click on the “Continue” button.
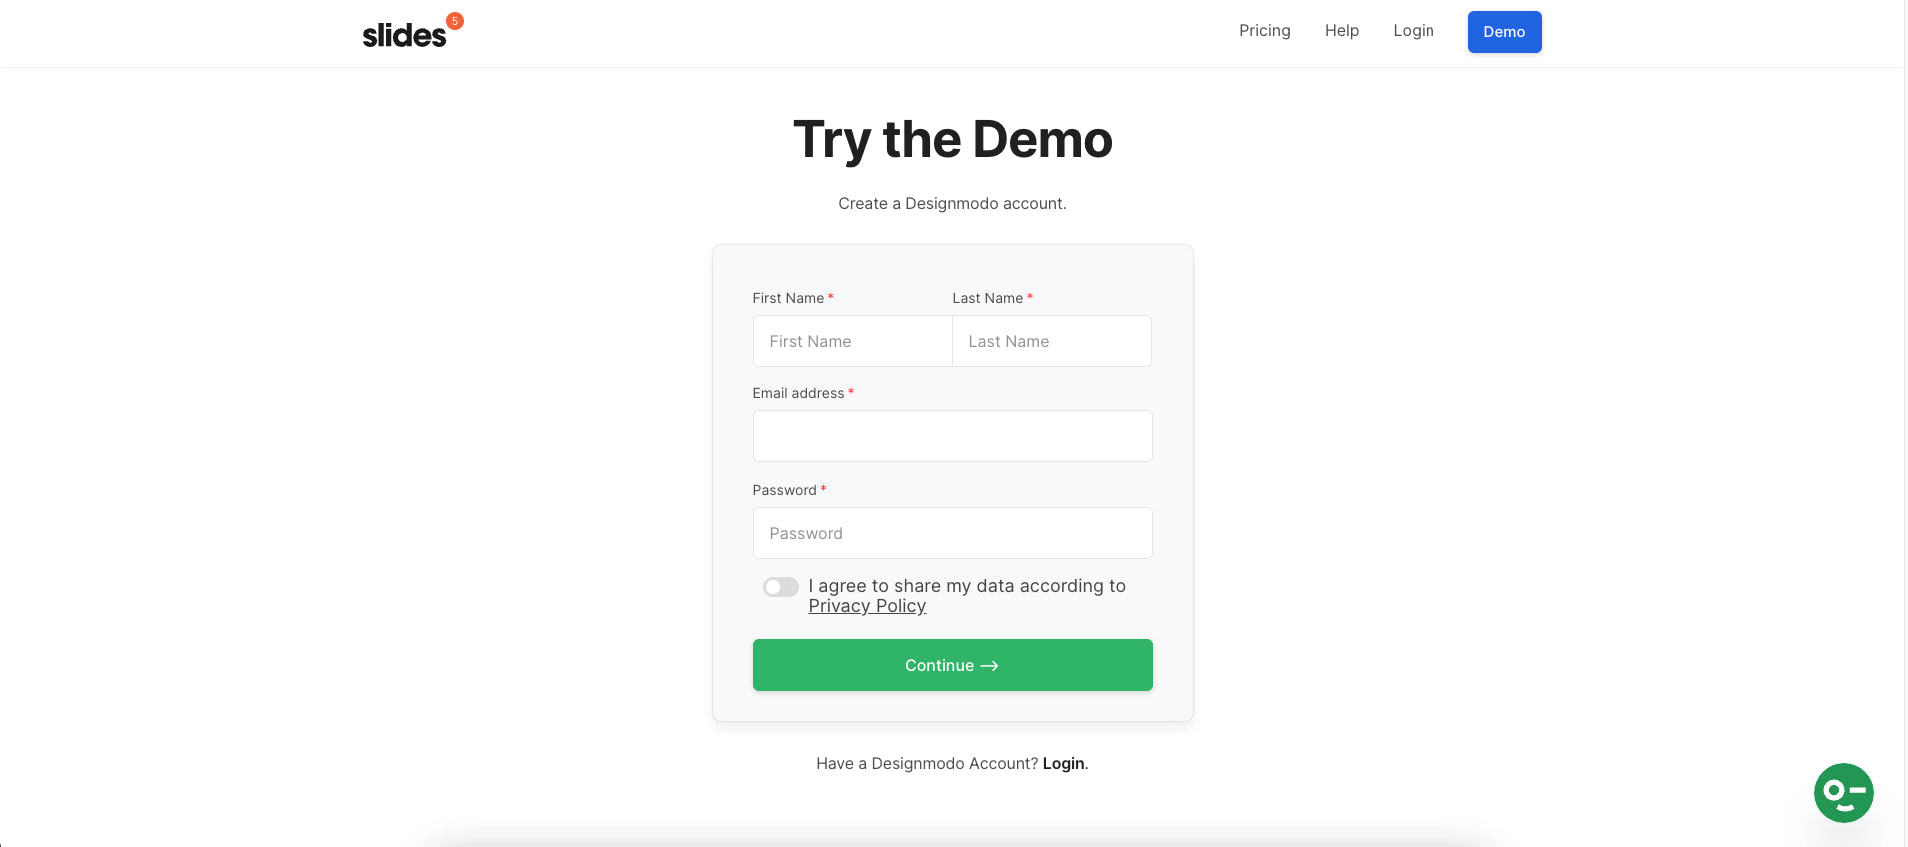
Since this is a new account, a prompt screen will appear next asking to either “Purchase Slides,” “Try the demo,” or “Go to Account.”
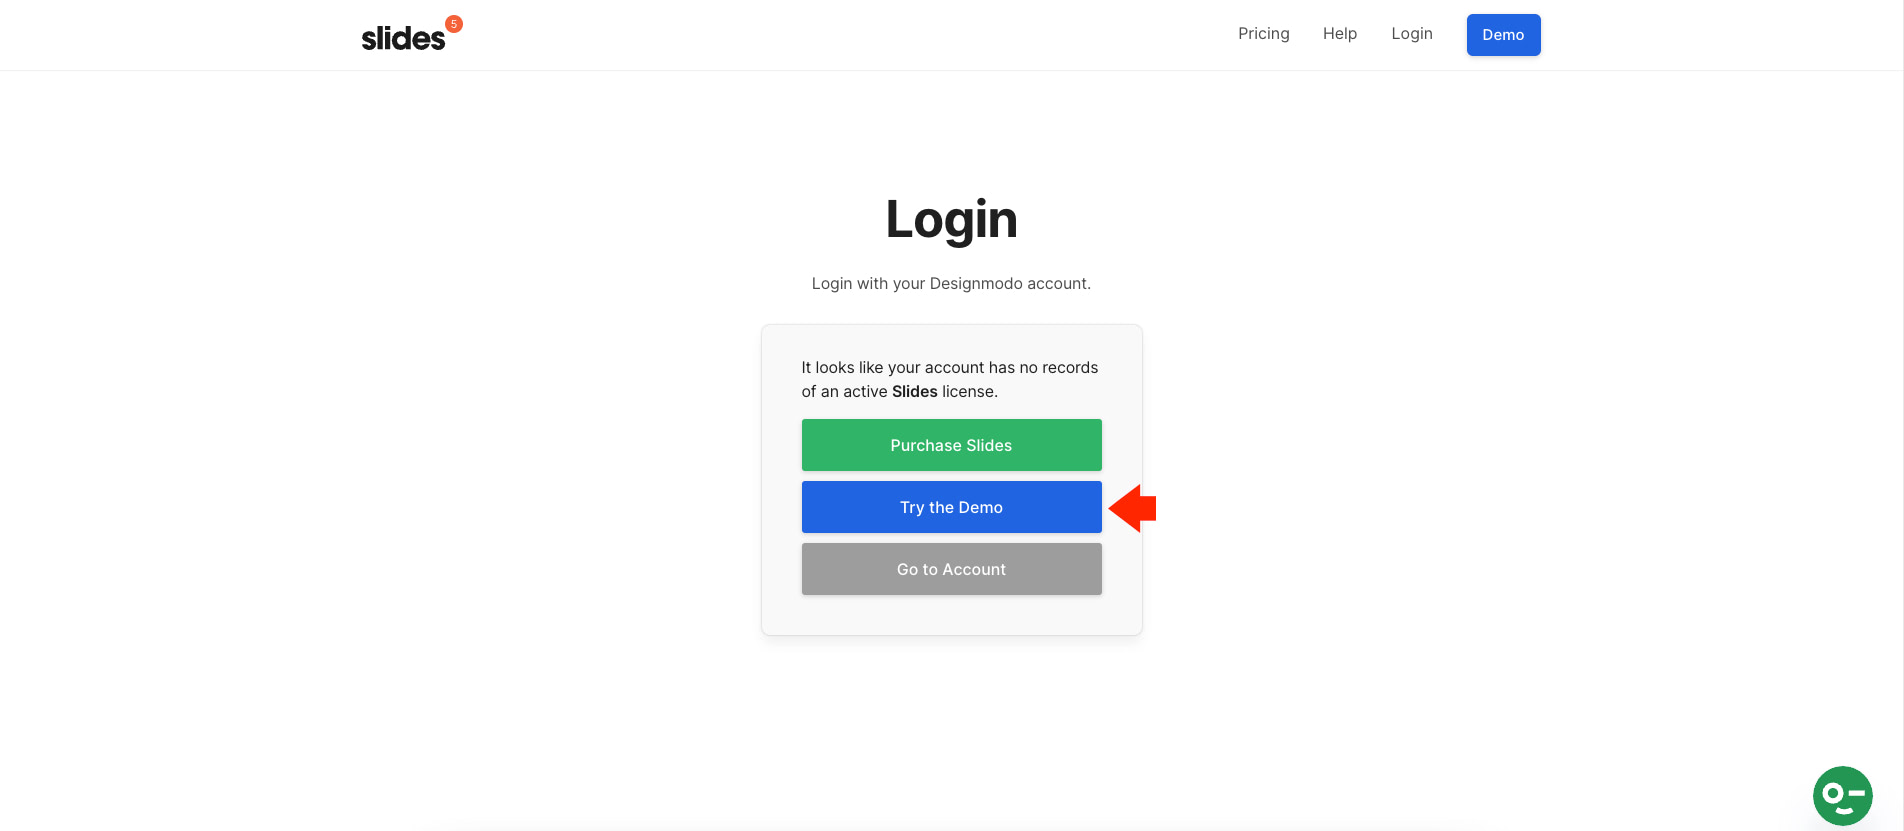
If you wish to purchase Slides, click on the “Purchase Slides” button. You can check the pricing page here to learn more about what’s included in each plan.
We will try the demo version for our demo, which is, by default, the free plan. Click on the “Try the demo” button to continue.
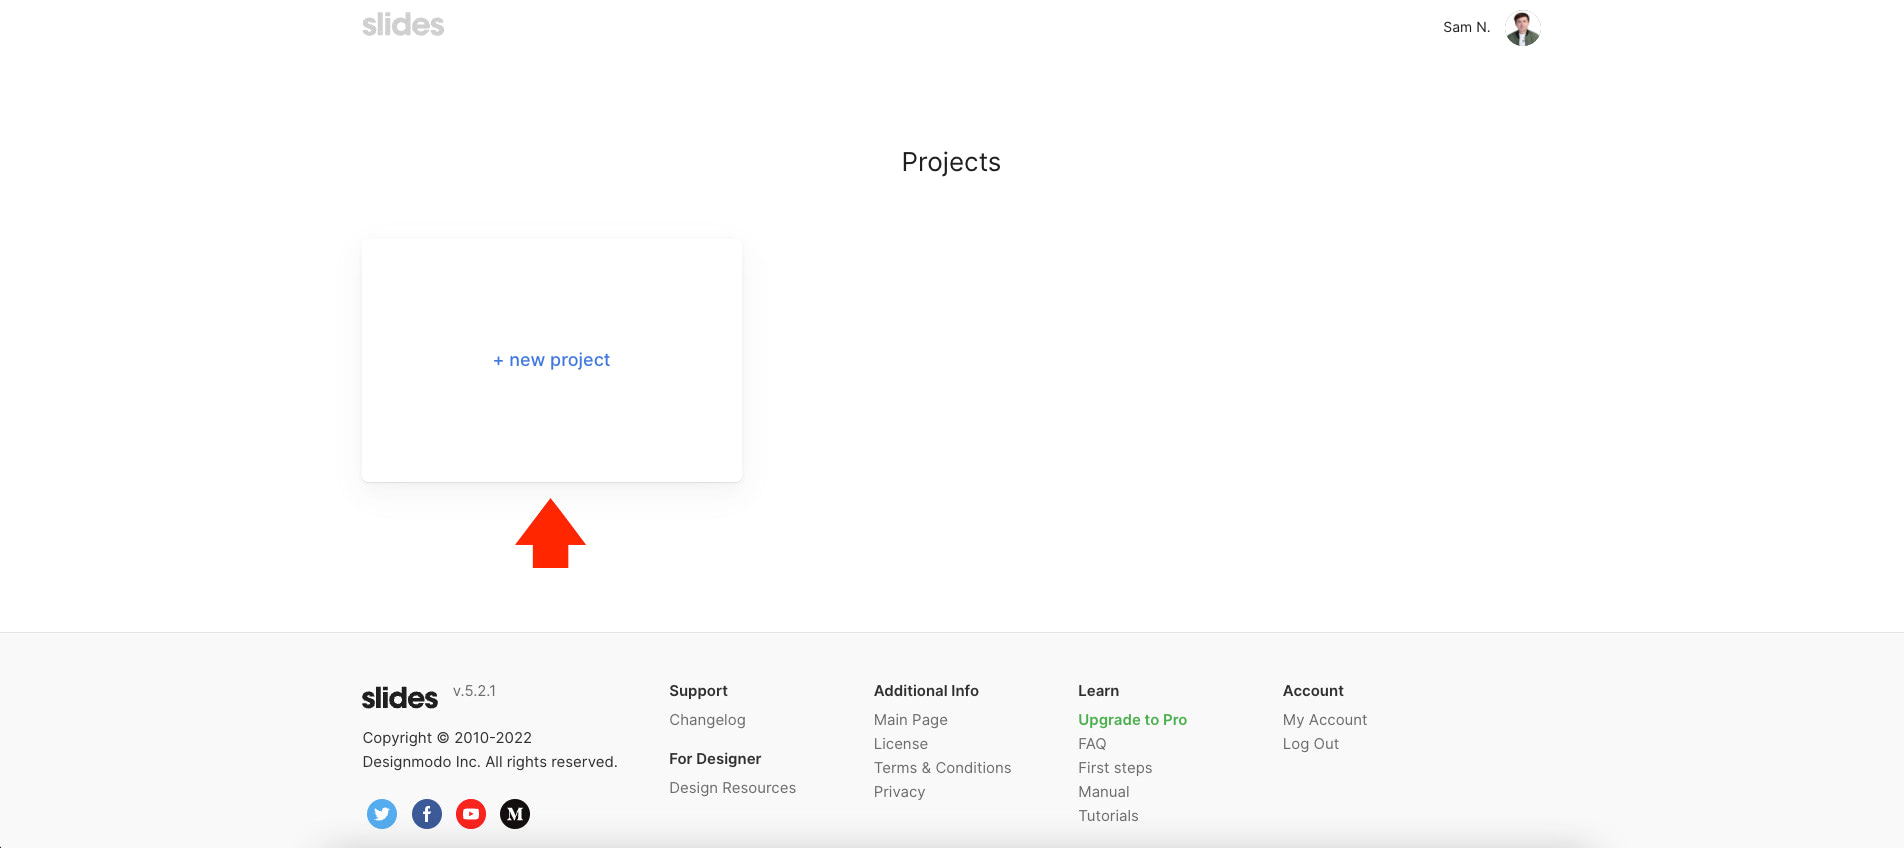
Next, we need to create a new project. Click on the “new project” box on the project’s page, as seen in the image below.
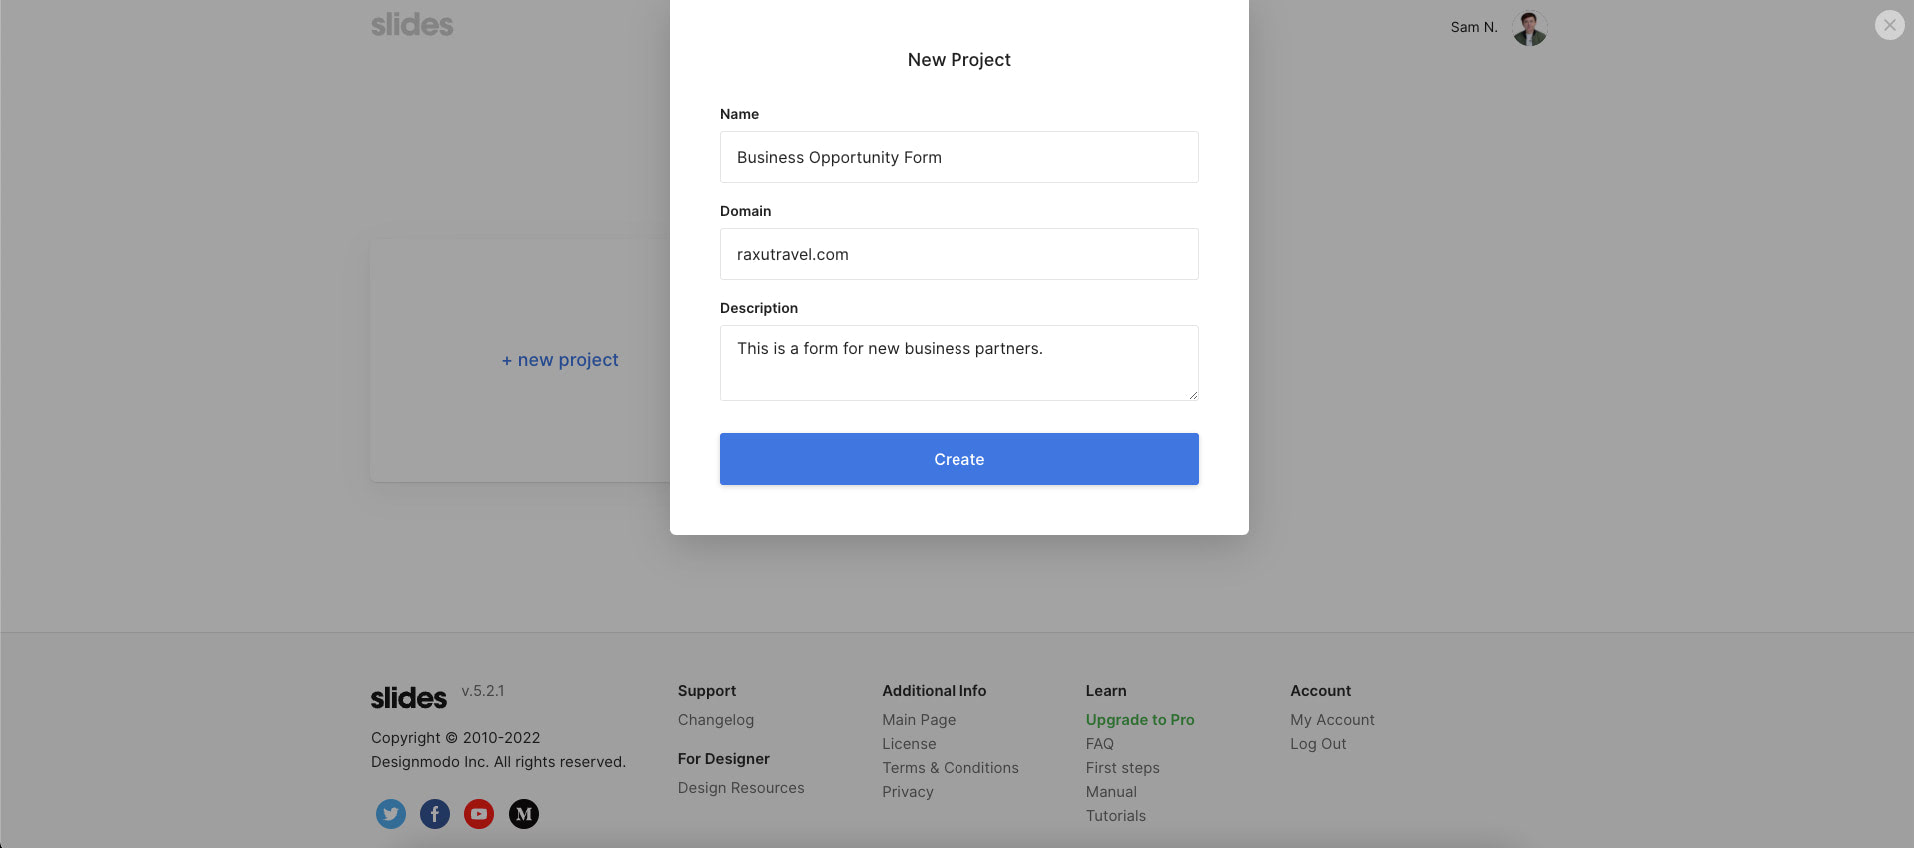
A new modal window will pop out containing a form about our new project. Fill in the form with correct information and click on the “Create” button. This will redirect us to the pages list.
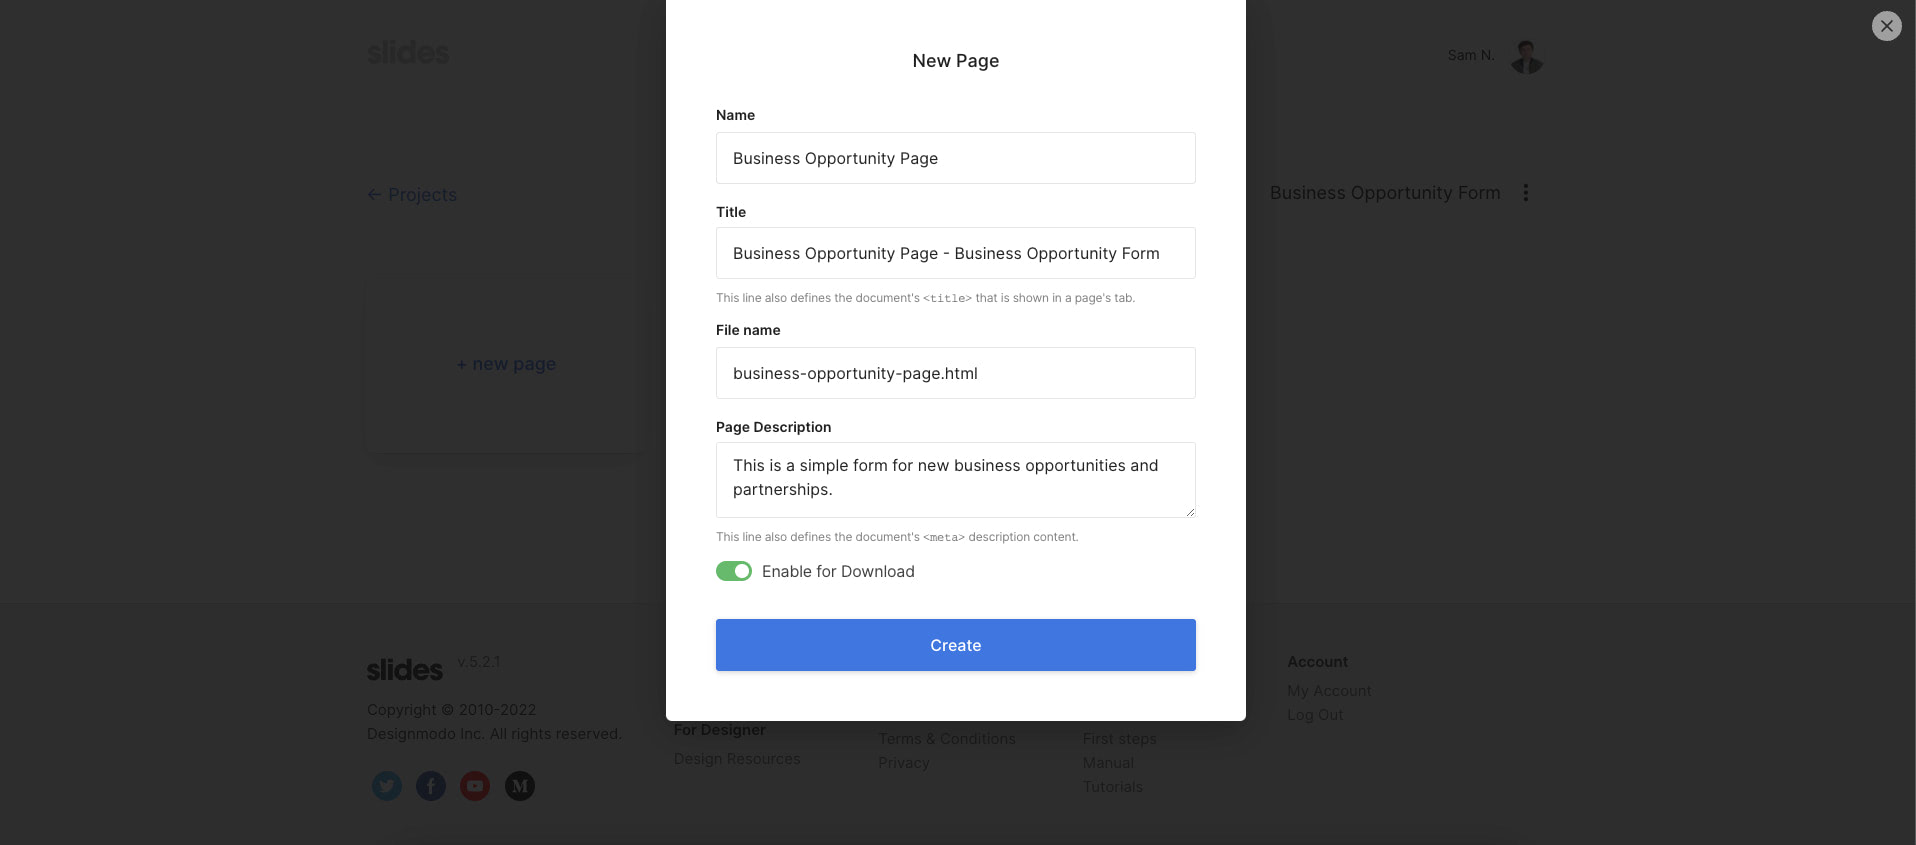
Now it’s time to create the static web page itself. Click on the “new page” box, and another modal window will pop out containing the form about our new page.
Feel free to put any name, title, file name, and description you like. Make sure to tick on the “Enable for download” option at the very bottom of the page to allow this page to be downloaded later.
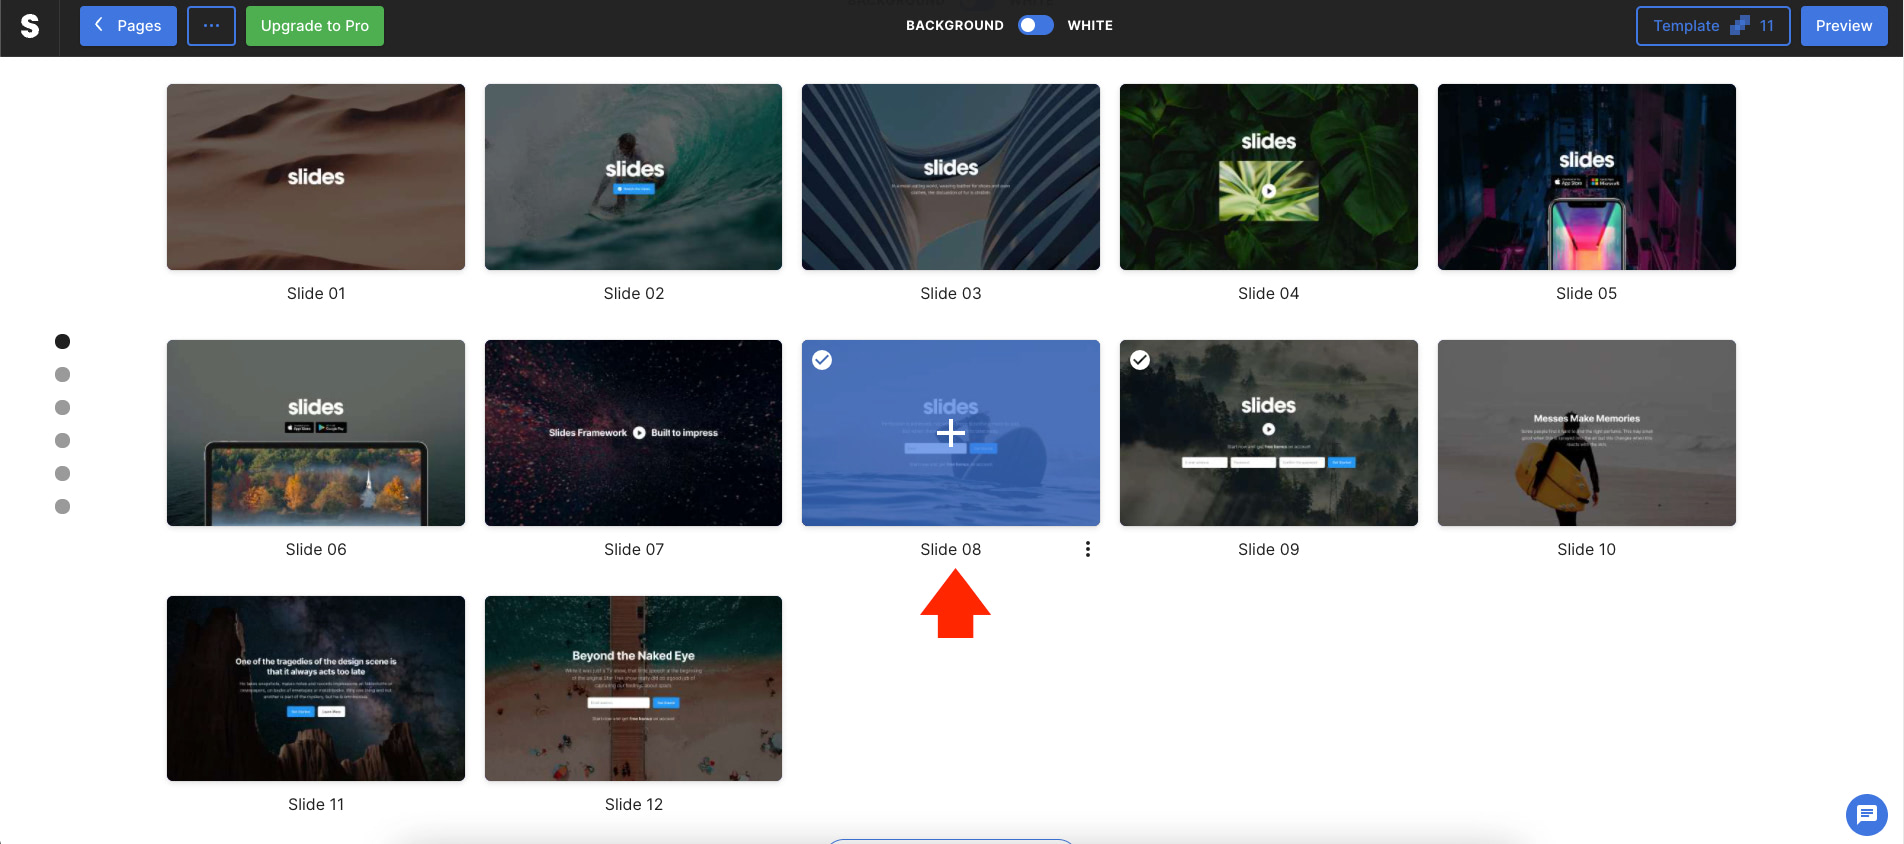
At this point, we need to choose a Slides template. In this article, we will use “Slide 08,” a simple email form where users can enter their email. To proceed, click on the “Slide 08” template.
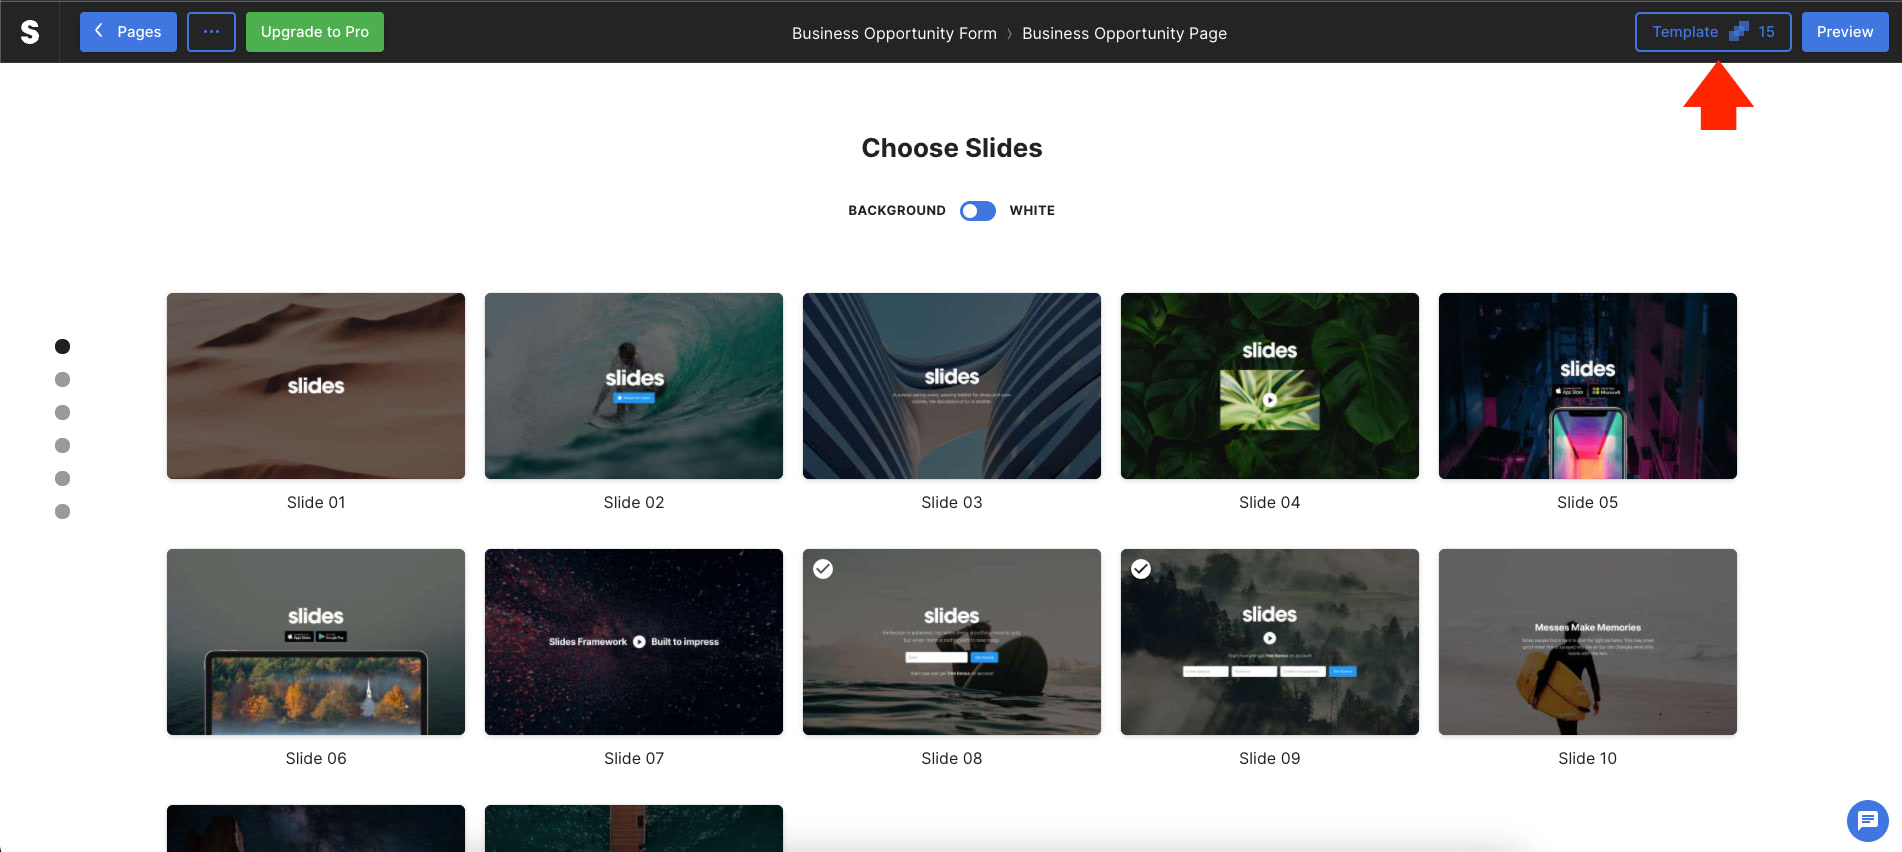
Next, click on the “Template” button located in the upper right corner of the screen. A sliding panel will appear on the right corner of the screen.
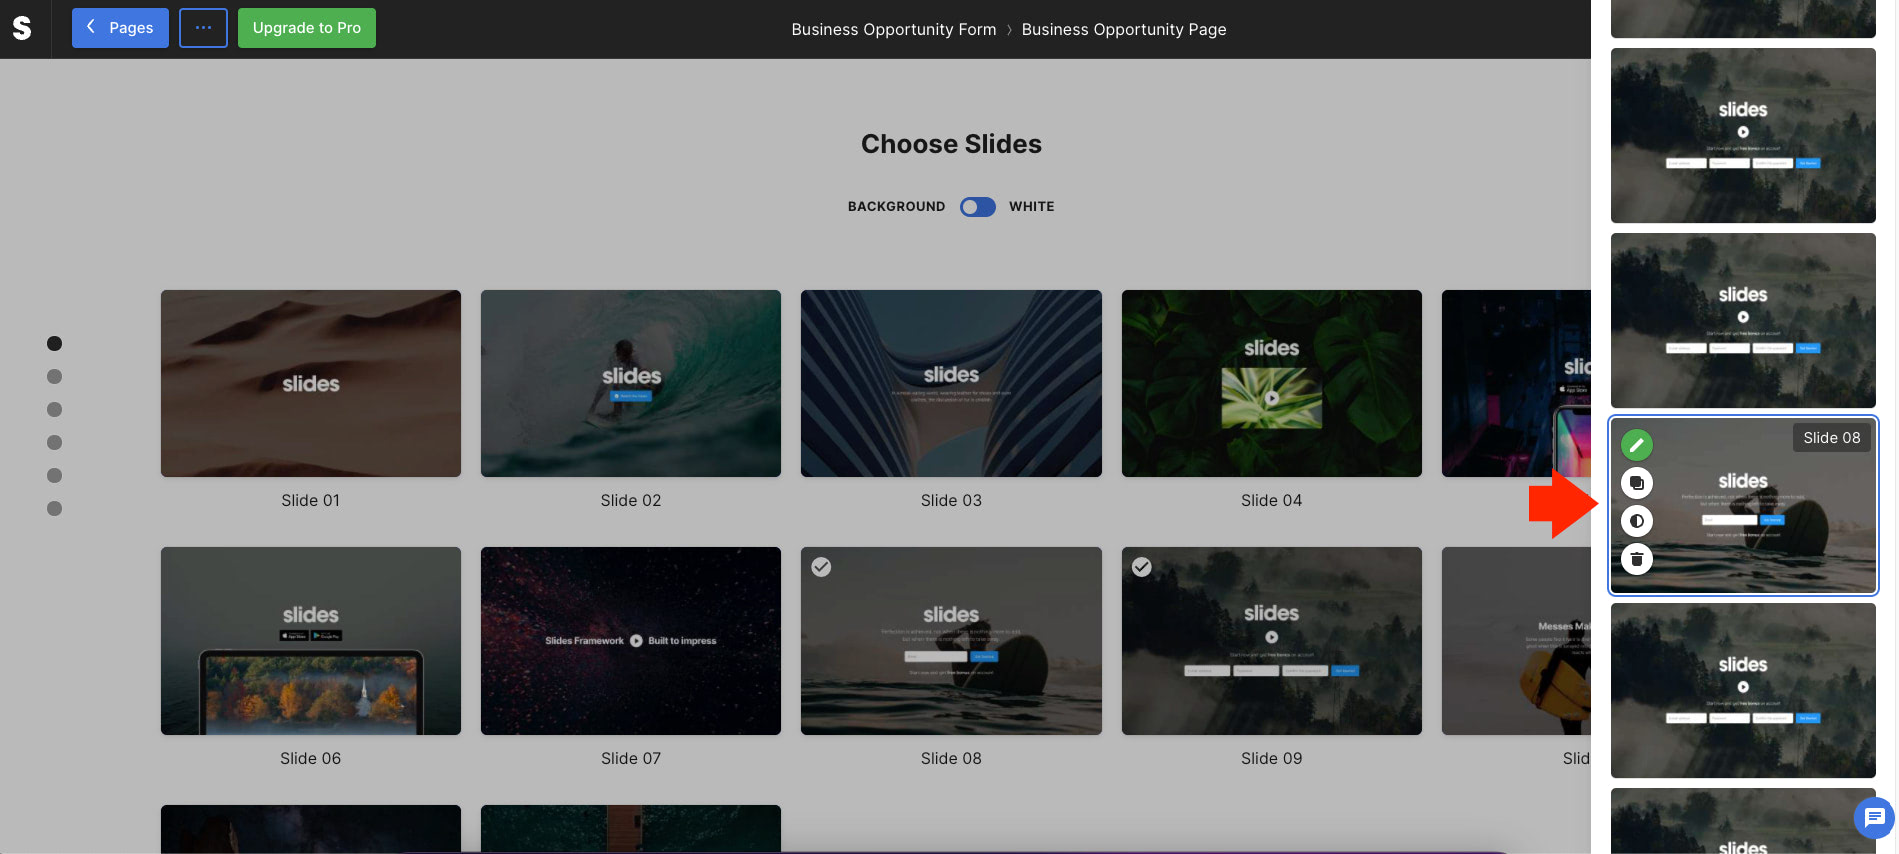
From here, look for “Slide 08” and click on the pencil or edit icon to edit the code of our chosen template.
Afterward, we will edit our template using the Slides code editor. I will edit the logo and the words to match the purpose of this template. We only need one slide in this example, so we can delete all of the other Slides that we don’t need.
Feel free to edit your chosen template. Don’t worry if you know how HTML works; this should be straightforward. Don’t forget to click on the “Save” button once you are done editing the codes.

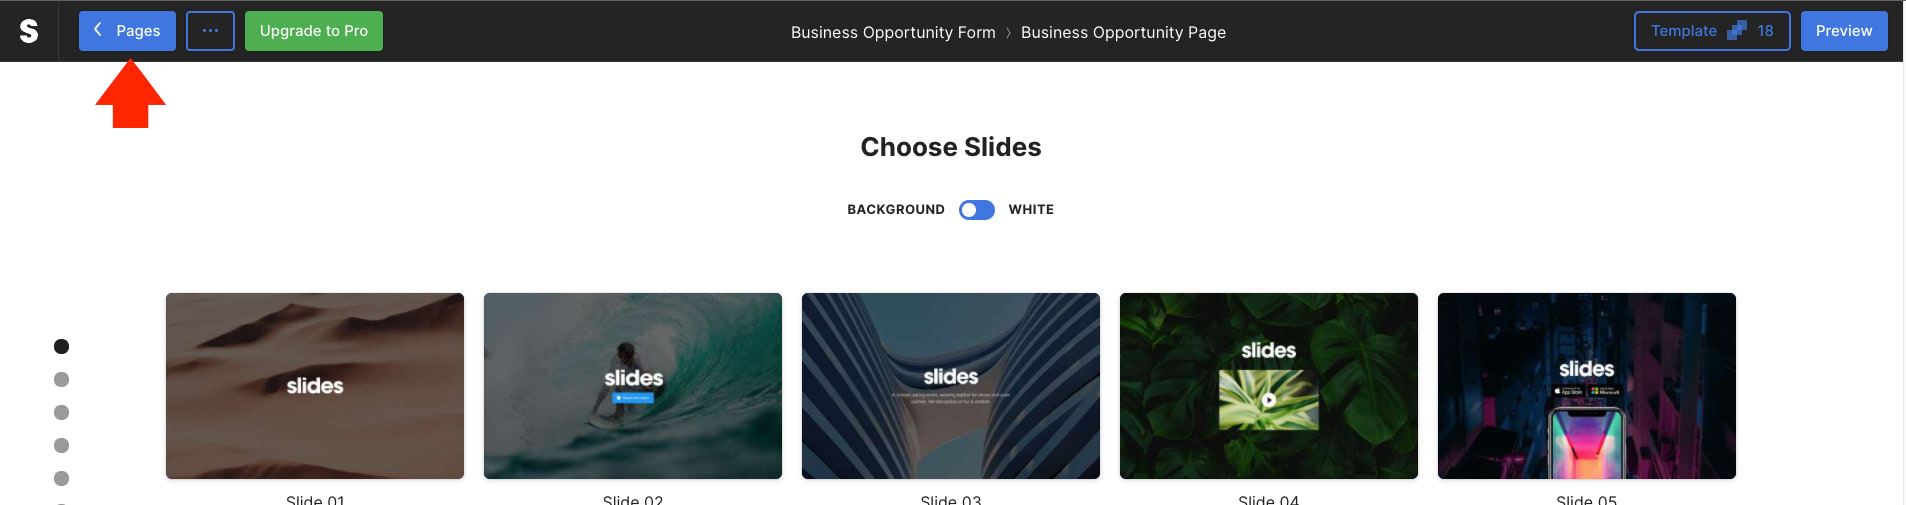
Now click on the “Close” button right beside the “Save” button and head on to the pages list by clicking on the “Pages” button located on the upper left corner of the Slides screen.
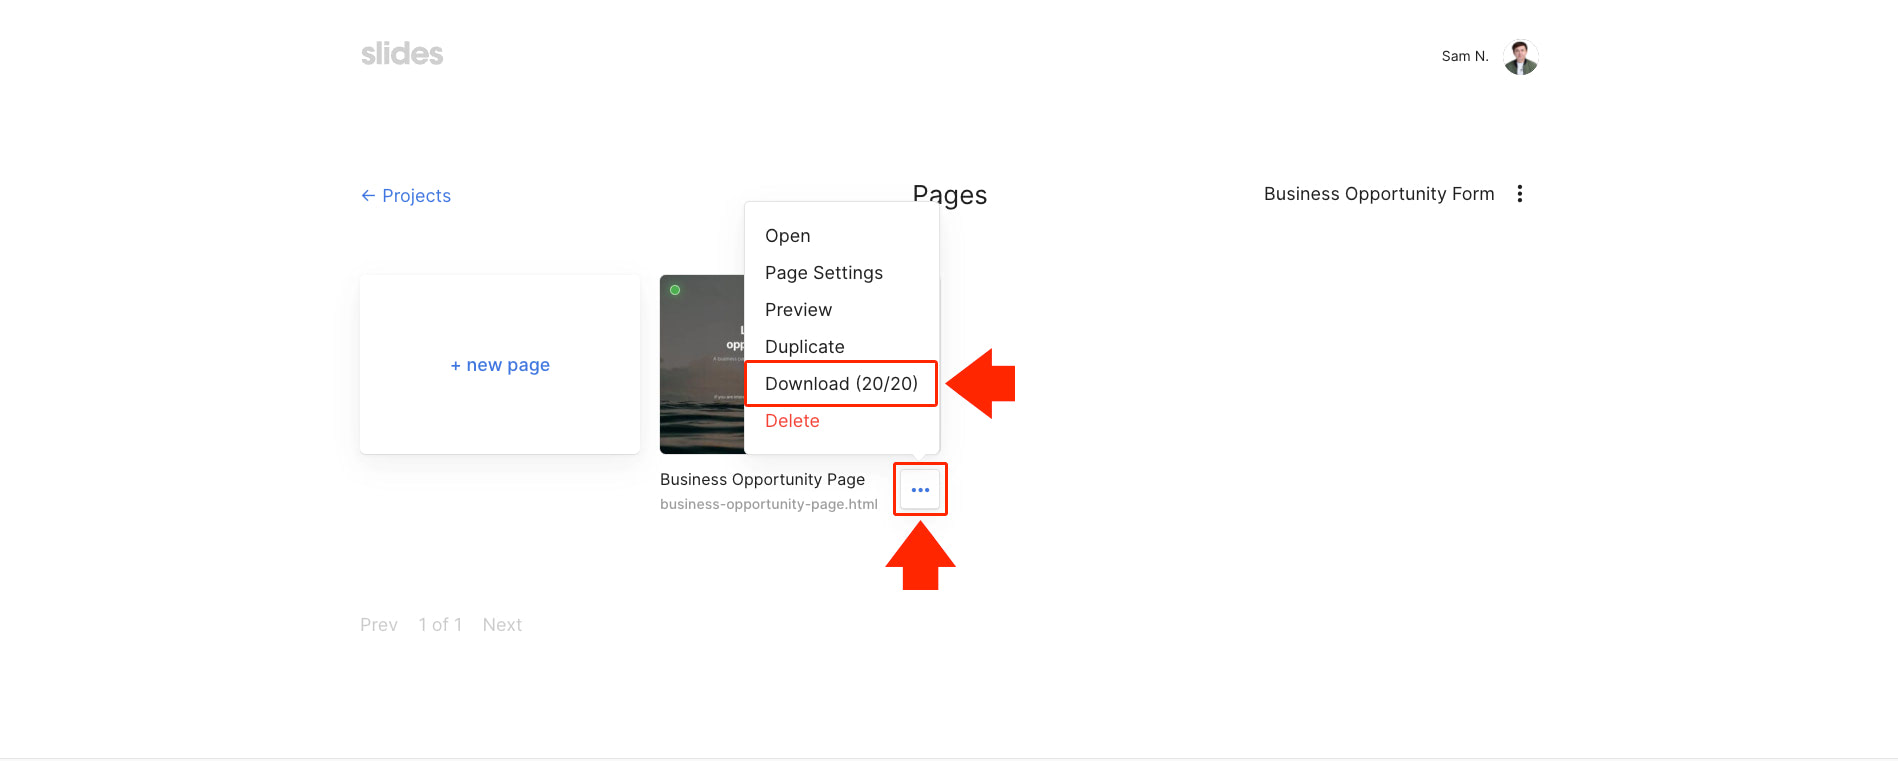
To download our generated static webpage with Slides, click on the three dots icon on the “Business Opportunity Page” box and click on the “Download” link followed by the “Download” button on the modal window, as seen in the images below.
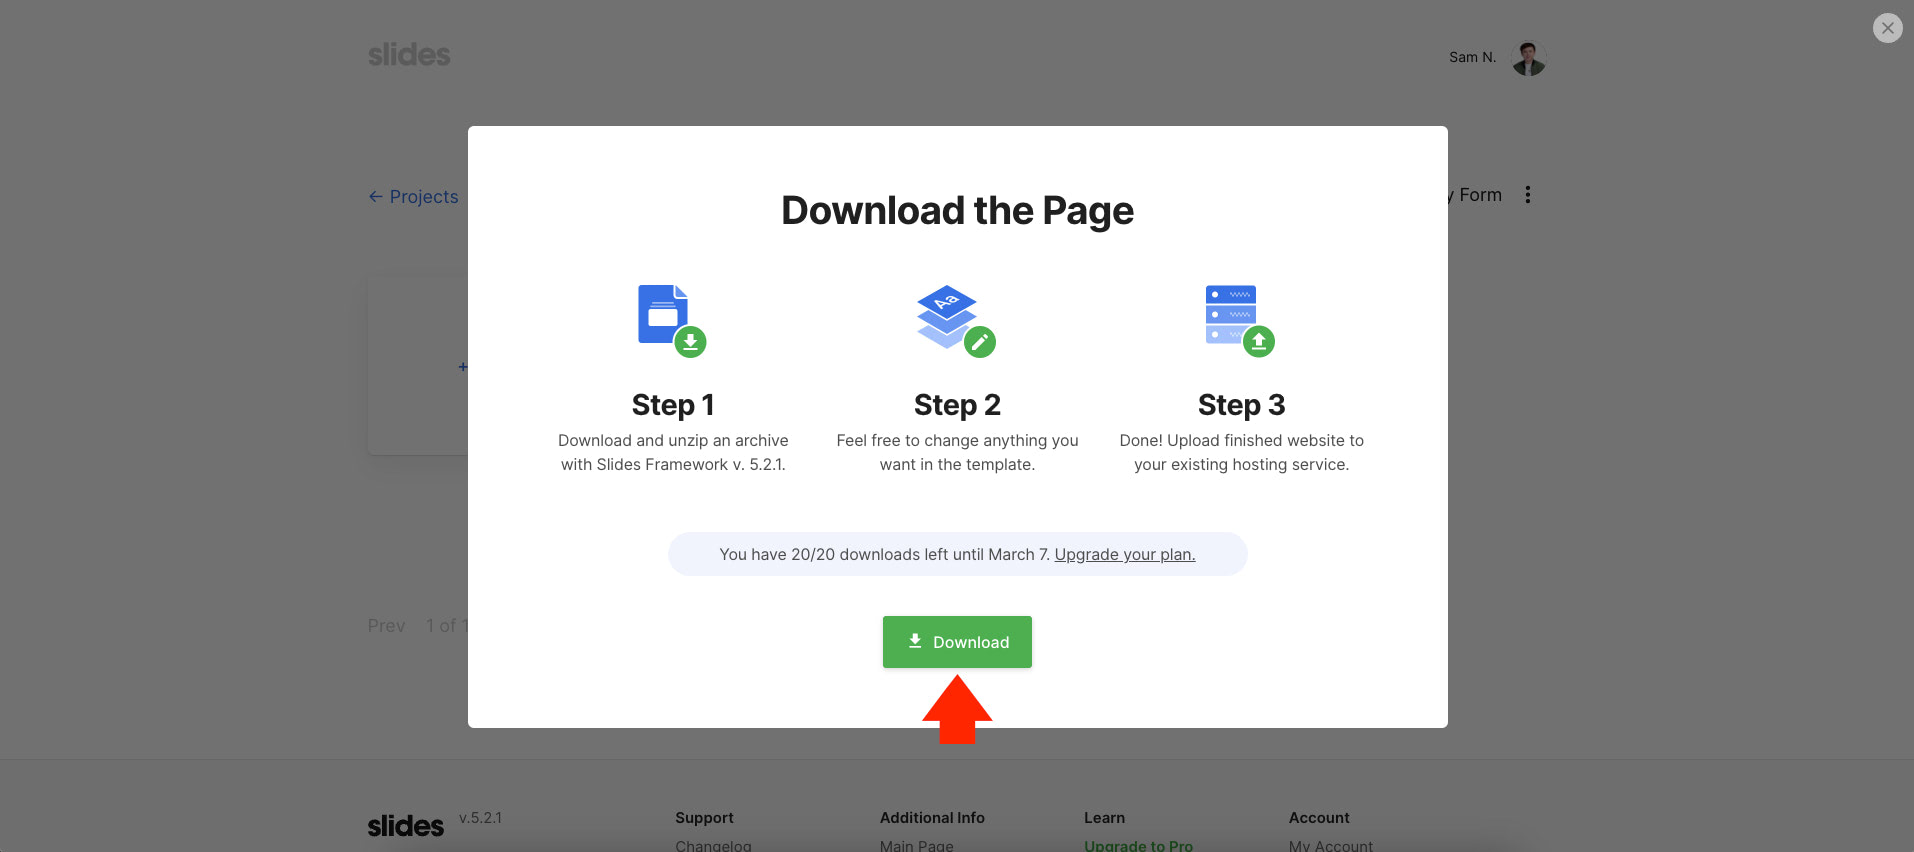
This will download our generated static webpage on our local computer.
Step 3: Install the Static Pages WordPress Plugin
Now it’s time to upload our generated static web page to our WordPress website. As mentioned above, we will use the “Static Pages” WordPress plugin.
To get started, head on to https://designmodo.com/static-pages/ and sign up for either the monthly or annual plan so we can download the plugin.
I already signed up for the monthly plan, so I won’t detail how to purchase the monthly or annual plan. Keep in mind that you will have access to the Static Pages WordPress plugin at the end of the sign-up process and you will be able to download it on your computer.
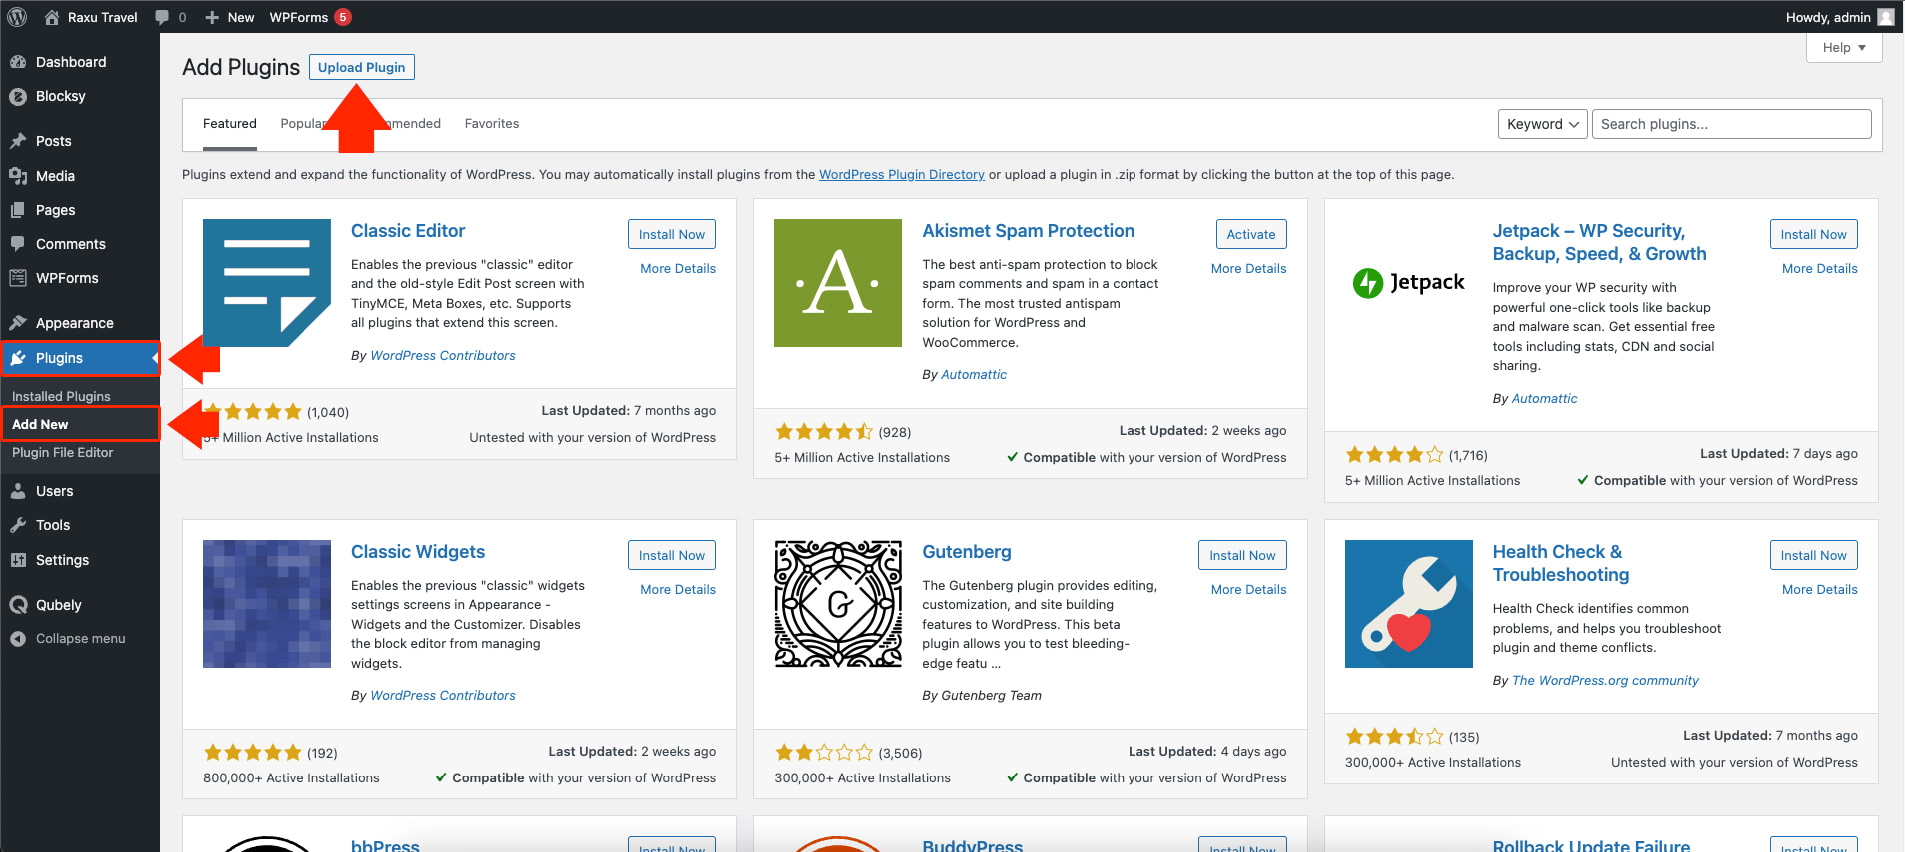
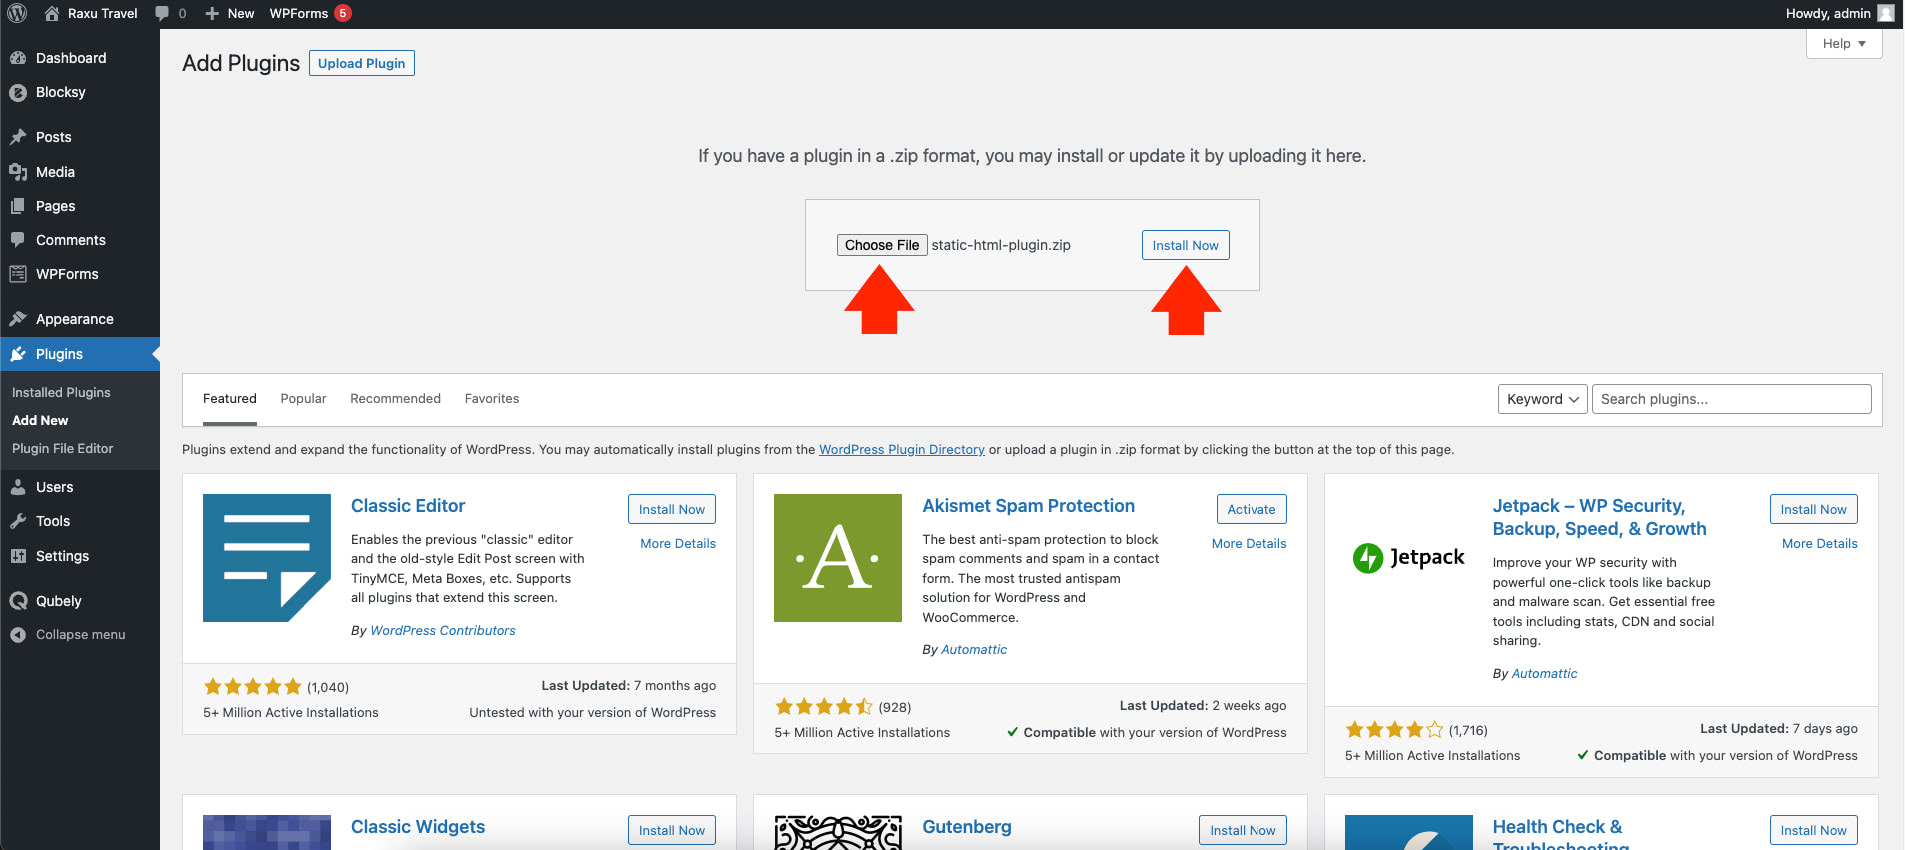
Once you have the Static Pages WordPress plugin downloaded on your computer, head on to your WordPress website and click on “Plugins” > “Add New” on the left menu panel. Then, click on the “Upload Plugin” button, as seen in the image below.
Next, we need to upload the Static Pages WordPress plugin by clicking on the file button and clicking the “Install Now” button.
Lastly, click on the “Activate Plugin” to activate the Static Pages WordPress plugin.
Step 4: Upload and Customize Your HTML Page in WordPress
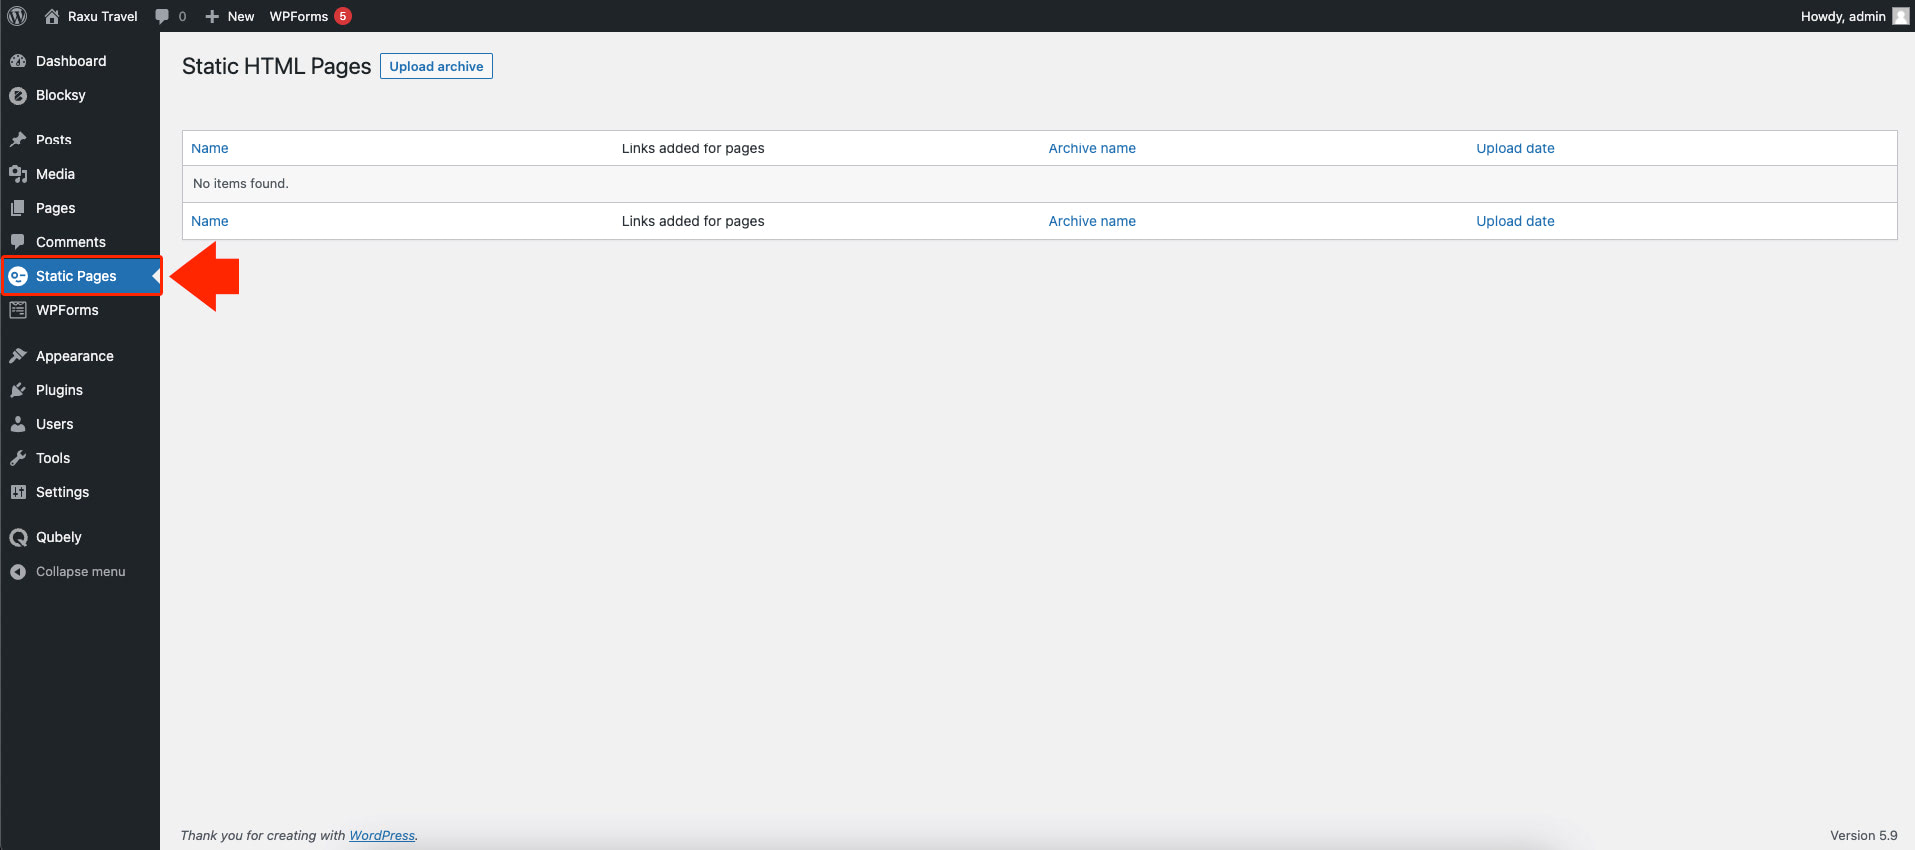
Great! We already have the perfect tool for uploading HTML files at our disposal. To upload our downloaded static web page from Slides, click on the “Static Pages” on the left menu panel.
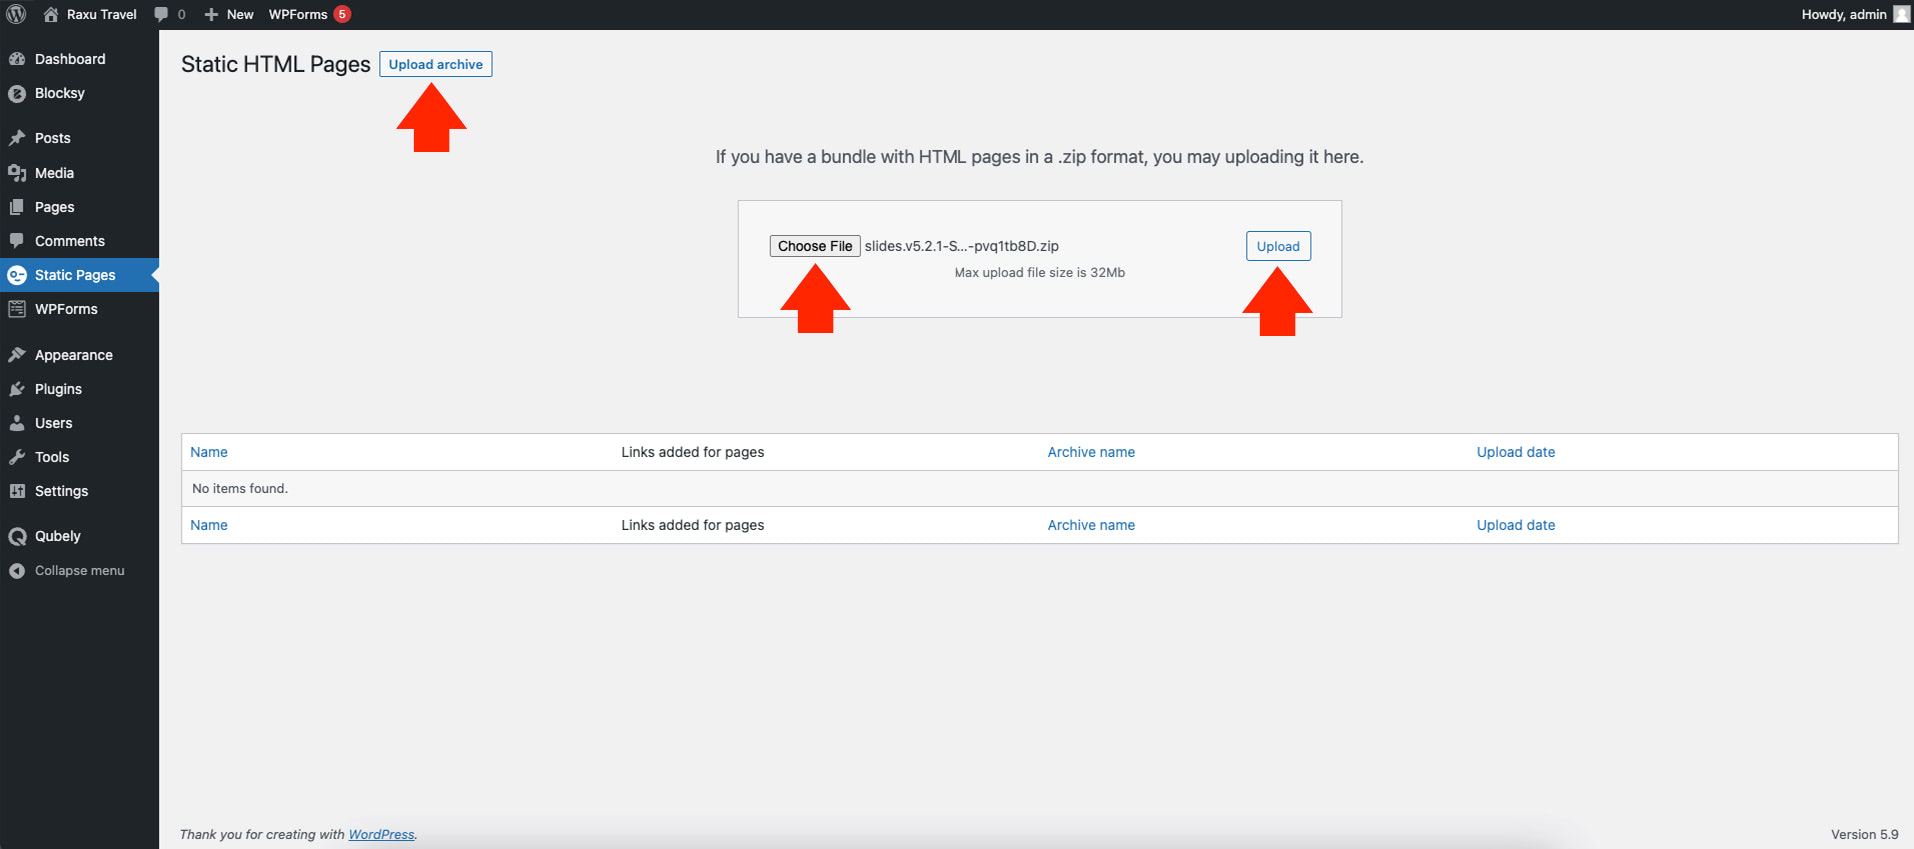
Then, click on the “Upload Archive” button and select the downloaded static webpage archive file from Slides. Lastly, click on the “Upload” button to upload the file.
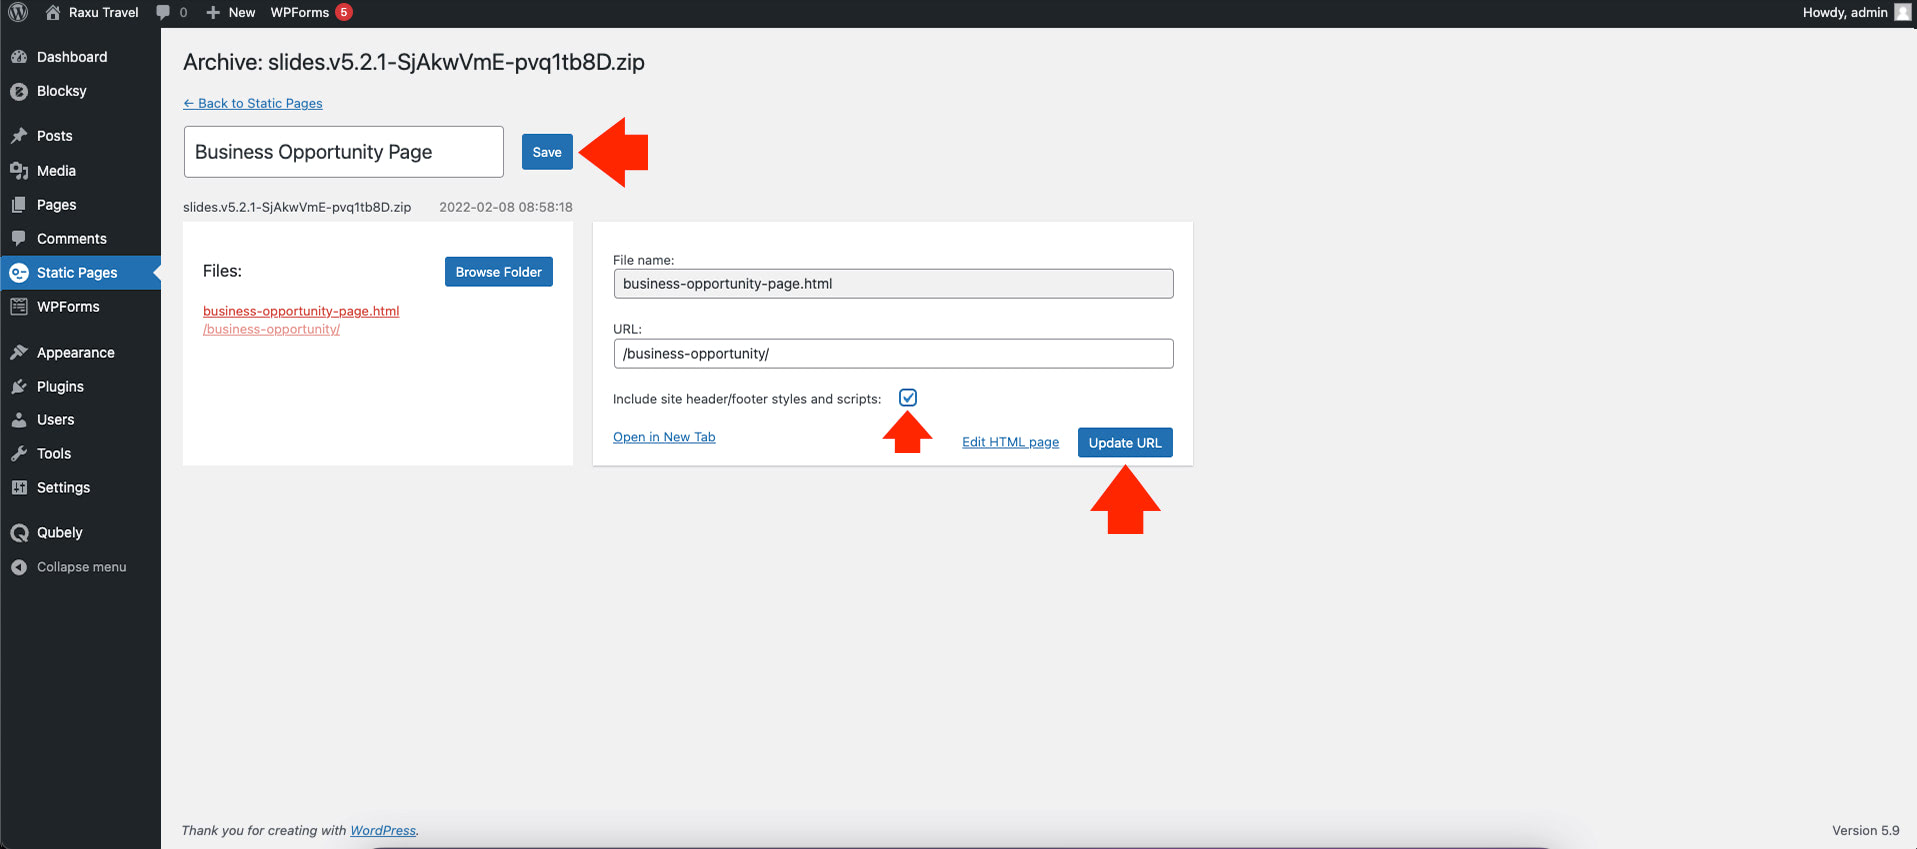
Finally, we need to name our page with a corresponding custom URL where we want our static web page to appear whenever a user or visitor visits the URL on our website.
For simplicity purposes, I will name this page “Business Opportunity Page” and put on the custom URL “business-opportunity.” Make sure not to put space in between words on your custom URL. URLs can only be sent through the ASCII character set. URL encoding replaces non-ASCII characters with “%” followed by hexadecimal digits, which is not recommended, especially for search engine optimization.
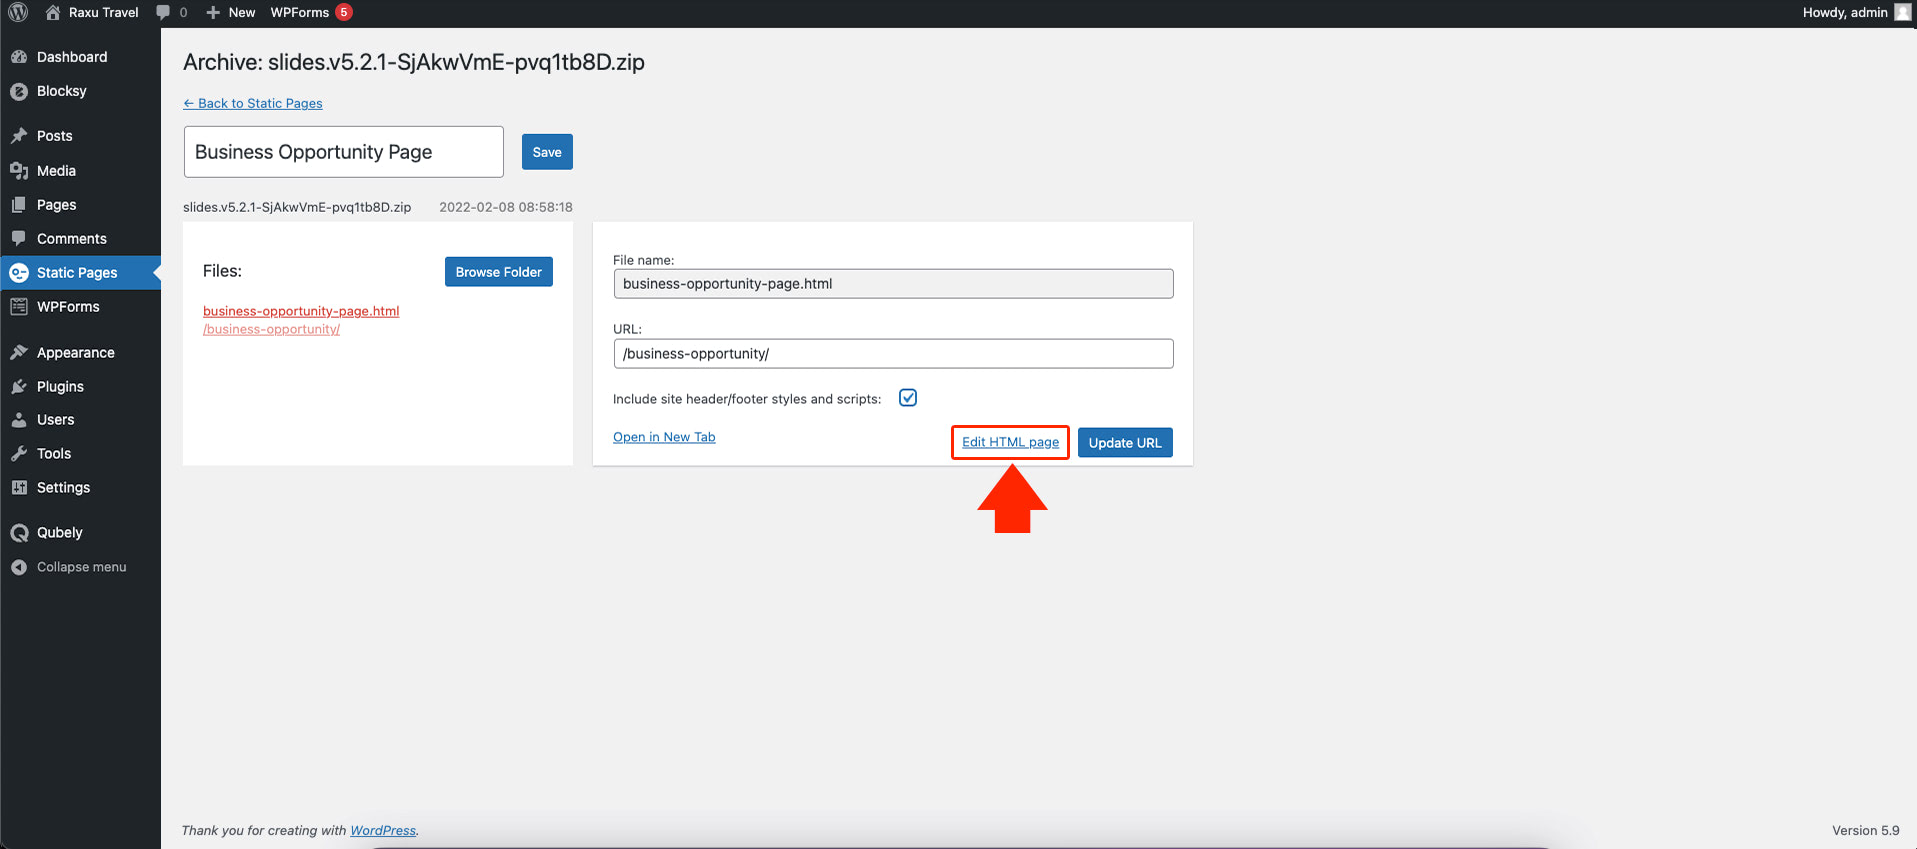
Once you are done editing the fields about your static web page, click on the “Save” button and the “Update URL” button, as seen in the image below.
If we visit our website’s domain followed by a slash and the custom URL we set up (e.g. www.websitedomain.com/business-opportunity/) on the form above, we can see our static web page similar to the image below.

Congratulations! We have uploaded our HTML page safely!
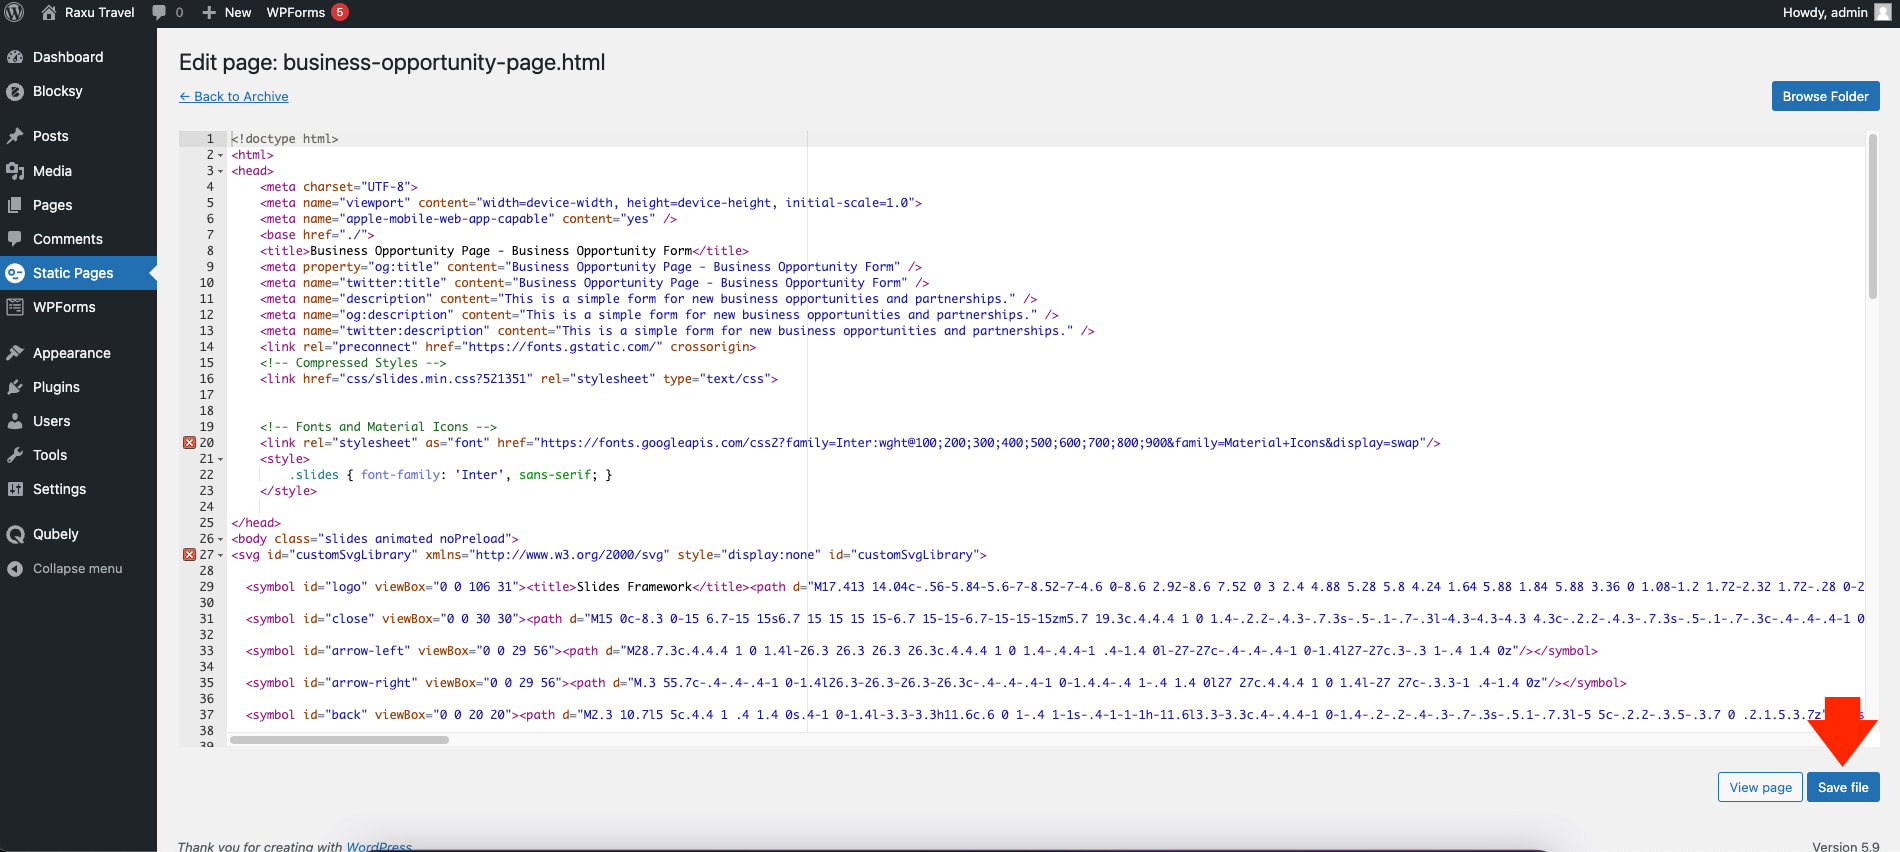
If you wish to edit the HTML of your static web page, you do so by clicking on the “Edit HTML page” link right beside the “Update URL” button.
You will then be redirected to the Static Pages code editor, where you can edit the actual code of your static web page or HTML file. Once you are done modifying your HTML code, don’t forget to click on the “Save file” button to save your changes.
Alternatives to Tools
For Creating HTML Pages
There are other tools that can provide flexibility and cater to varying skill levels:
- Adobe Dreamweaver
- A powerful tool for designing and coding HTML pages with a visual editor and code view.
- Ideal for users who want a blend of drag-and-drop design and coding flexibility.
- Best for: Intermediate to advanced users needing a robust HTML creation platform.
- CodePen
- An online editor focused on front-end development.
- Great for testing and creating HTML, CSS, and JavaScript snippets in real-time.
- Best for: Beginners and developers who prefer a browser-based tool.
- Visual Studio Code (VS Code)
- A free, lightweight code editor with extensions for HTML, CSS, and JavaScript.
- Offers live server capabilities for previewing HTML pages during development.
- Best for: Developers comfortable with coding environments.
For Uploading HTML Pages
Consider these alternatives for uploading and managing HTML files:
- WP File Manager
- Allows direct file management within the WordPress dashboard.
- Easily upload HTML files, create folders, and manage directories.
- Best for: Advanced users needing full control over files.
- FileBird
- Simplifies file organization with drag-and-drop functionality for media and HTML files.
- Ideal for users managing multiple static files or complex websites.
- Best for: Beginners or anyone needing an intuitive file management tool.
- Custom HTML Block (Built-in WordPress Feature)
- Embed HTML directly into WordPress pages or posts using the block editor.
- No plugins required, making it lightweight and straightforward.
- Best for: Simple integrations without the need for external plugins.
- HTML Import 2 Plugin
- Designed for bulk uploading and importing static HTML pages into WordPress.
- Automates linking and page creation for large-scale static site migrations.
- Best for: Migrating old static sites to WordPress efficiently.
When to Choose Each Tool
- For Beginners: Use CodePen to design simple HTML pages and WP File Manager for uploads.
- For Advanced Users: Leverage Visual Studio Code for coding and HTML Import 2 for migrating entire websites.
- For Quick Edits: Embed HTML directly using the Custom HTML block in WordPress.
| Plugin | Key Features | Best For | Pricing |
|---|---|---|---|
| Static Pages | Multi-page support, SEO-friendly URLs | Beginners uploading static pages | Paid |
| WP File Manager | File uploads, directory management | Advanced users needing full control | Free/Paid |
| Custom HTML Block | Embed HTML directly into pages/posts | Simple one-off HTML integrations | Free |
| HTML Import 2 | Bulk upload HTML pages | Migrating static sites to WordPress | Free |
Wrapping Up
WordPress is the best and most innovative content management system for beginners and developers alike. With all of the built-in features that can help you create unique websites and stand out from the competition, you need to use supporting plugins to do essential tasks outside the default features.
Sometimes its needed to put a custom HTML page or use a static web page from an older website and put it on your existing website, which by default won’t work without any workaround. Always verify if a website is down or up before publishing it online. While there are several ways to get this done, using the Static Pages WordPress plugin can simplify the process for you.
In the end, the website owners want the freedom to customize their websites without worrying about the complicated errors such as 404 errors and doing the dirty coding aspect or even touching the host management, which makes Static Pages WordPress plugin a perfect solution for this problem.


As a newcomer to WooCommerce, could you please guide me on how to add a “Buy Now” button to my product shop that will take the customer directly to the shopping cart? Thank you for providing such an excellent theme.
Hi
I have a question about the method described in the article.
I have some html5 pages that I would like to add to my WordPress site. The pages are created in Indesign (plus an extension called in5). They contain images, text and buttons that navigates the user through a given number of Indesign pages.
So far, I have only been able to upload it to my WP website by copy pasting the exported index file and assets folder (from Indesign) into the public_html folder of my website using FileZilla.
But this method does not allow me to protect the pages with a membership plugin (like Memberpress for example) since the imported pages are not visible in my WordPress dashboard.
Will they be visible if I import them using the described method? I am using the Blocksy theme.
Thanks 🙏
Hi Duong,
Unfortunately this method won’t work with membership plugins.
It is created more for simple uses cases where you need to display some simple content.
I would recommend to create those pages that you want to protect directly from WordPress maybe with the help of a page builder if the structure/design is complicated.
Hope this helps.