After setting up your WordPress website and doing all the necessary security and maintenance measures, it is crucial to know how your website performs. Understanding the status of your websites, such as the daily visits, conversion rates, and analytics, will help you strengthen your marketing efforts and improve your future business decisions.
As a business owner, you need to know what’s working and what is not, and having privacy-friendly analytics will help you understand this information. Knowing what your users want and their habits when browsing your website is essential for your business’s success. With the analysis of traffic status pages, you can strategically improve traffic, user retention, and other key metrics of your website.
While Google Analytics can provide you with lots of information about your visitor’s or users’ behavior while they visit your website, there is a lot of data to analyze in this software. You might feel overwhelmed by the amount of information presented in your Google Analytics profile.
In this article, we’re going to take a look at a free, lightweight, privacy-focused alternative to Google Analytics online platform that can help you achieve almost the same features but with a steep learning curve.
Microanalytics is a user-friendly and straightforward website analytics tool compliant with GDPR, PECR, and CCPA. It was created and hosted in the EU, powered by renewable energy.

Some of its powerful features include:
- User-friendly website analytics tool. It provides you with the stats data you need all in one place. In minutes, it can be integrated with WordPress, Squarespace, Ghost, Wix, and Weebly.
- Privacy-focused. It doesn’t track you or your visitors with IP addresses, fingerprints, or cookies. Nobody can be identified.
- Complete control over everything. Your data is just yours, and will not be shared with anyone else.
- Sustainable technology. It is powered by green energy and is consists of a lightweight tracking code. Microanalytics make your website run faster and reduce your carbon emissions.
- Compliance with the strongest privacy laws. Microanalytics meets all GDPR, PECR, and CCPA regulations, so you can be confident your data is in safe hands.
- Indie developers created it. Consist of a tight-knit community with a shared mission to keep your data in your hands.
Note: If you are receiving more than 10,000 monthly page views on your website, you have to upgrade your account via the Monthy or Yearly Plan. Check out the pricing page to learn more.
Before we proceed with setting up our Microanalytics account, let’s first install our WordPress website with the latest version of the software.
There are multiple ways to install a WordPress website. Many web hosts now offer tools such as Fantastico or Softaculous to install WordPress for you automatically. However, if you wish to manually install WordPress on your hosting, this guide should help you.
In this tutorial, I will use Cpanel’s WordPress Softaculous to install a fresh installation of the latest WordPress software version. If you are following along, on your Cpanel, click on the “Install” button located at the upper left corner of the Softaculous dashboard similar to the image below.
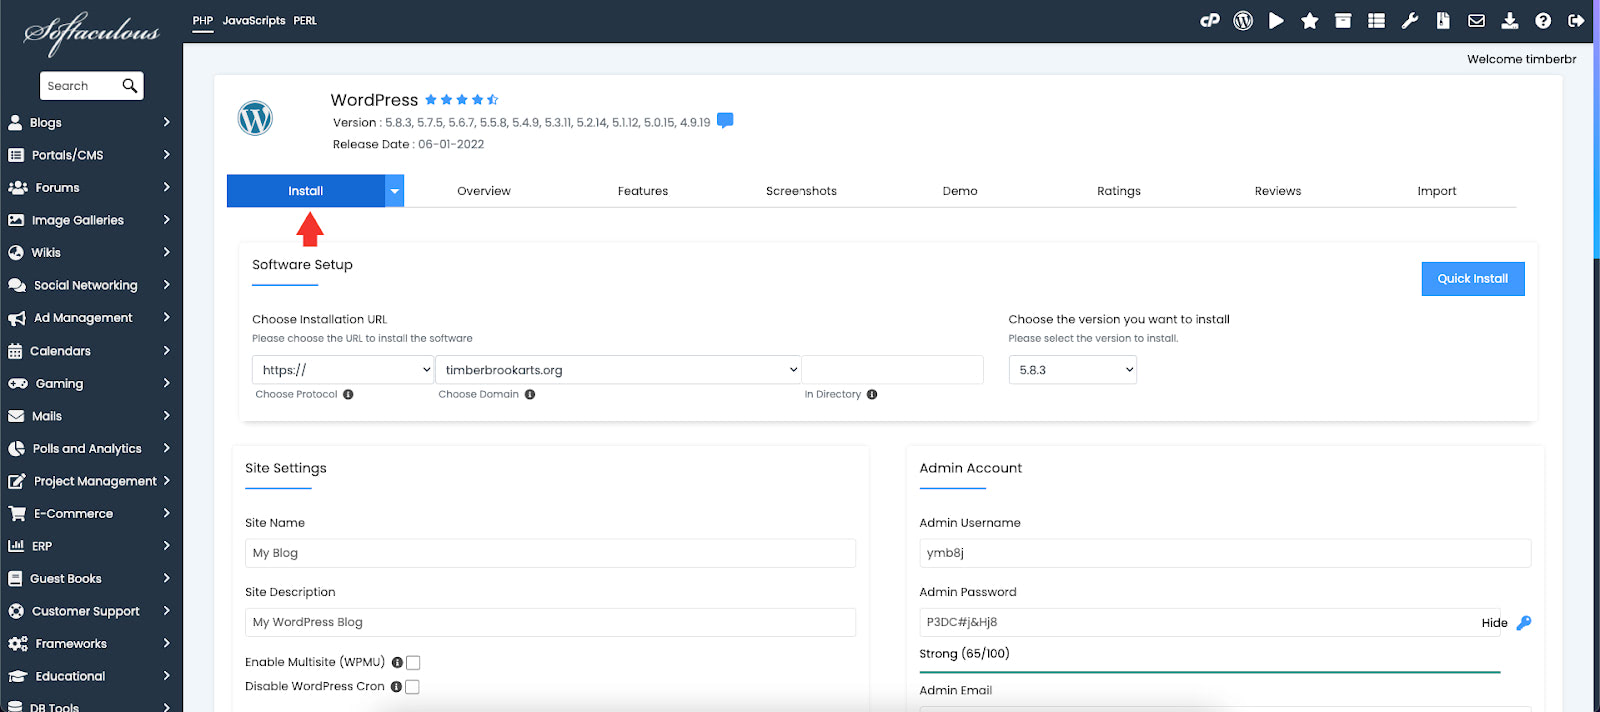
Next, we need to fill up the following details about our WordPress installation:
- Installation URL
- WordPress version
- Site name
- Site tagline
- Admin username
- Admin password
- Language
- Starting theme
- And some more advanced options
Most of these settings are uncomplicated to fill up. To save some time, we won’t go into details about the settings we’ve set up.
Once the installation process is complete, log in to your WordPress Dashboard and enter your admin user account details. If you are already logged in, you can see the WordPress Dashboard of your website, similar to the image below.
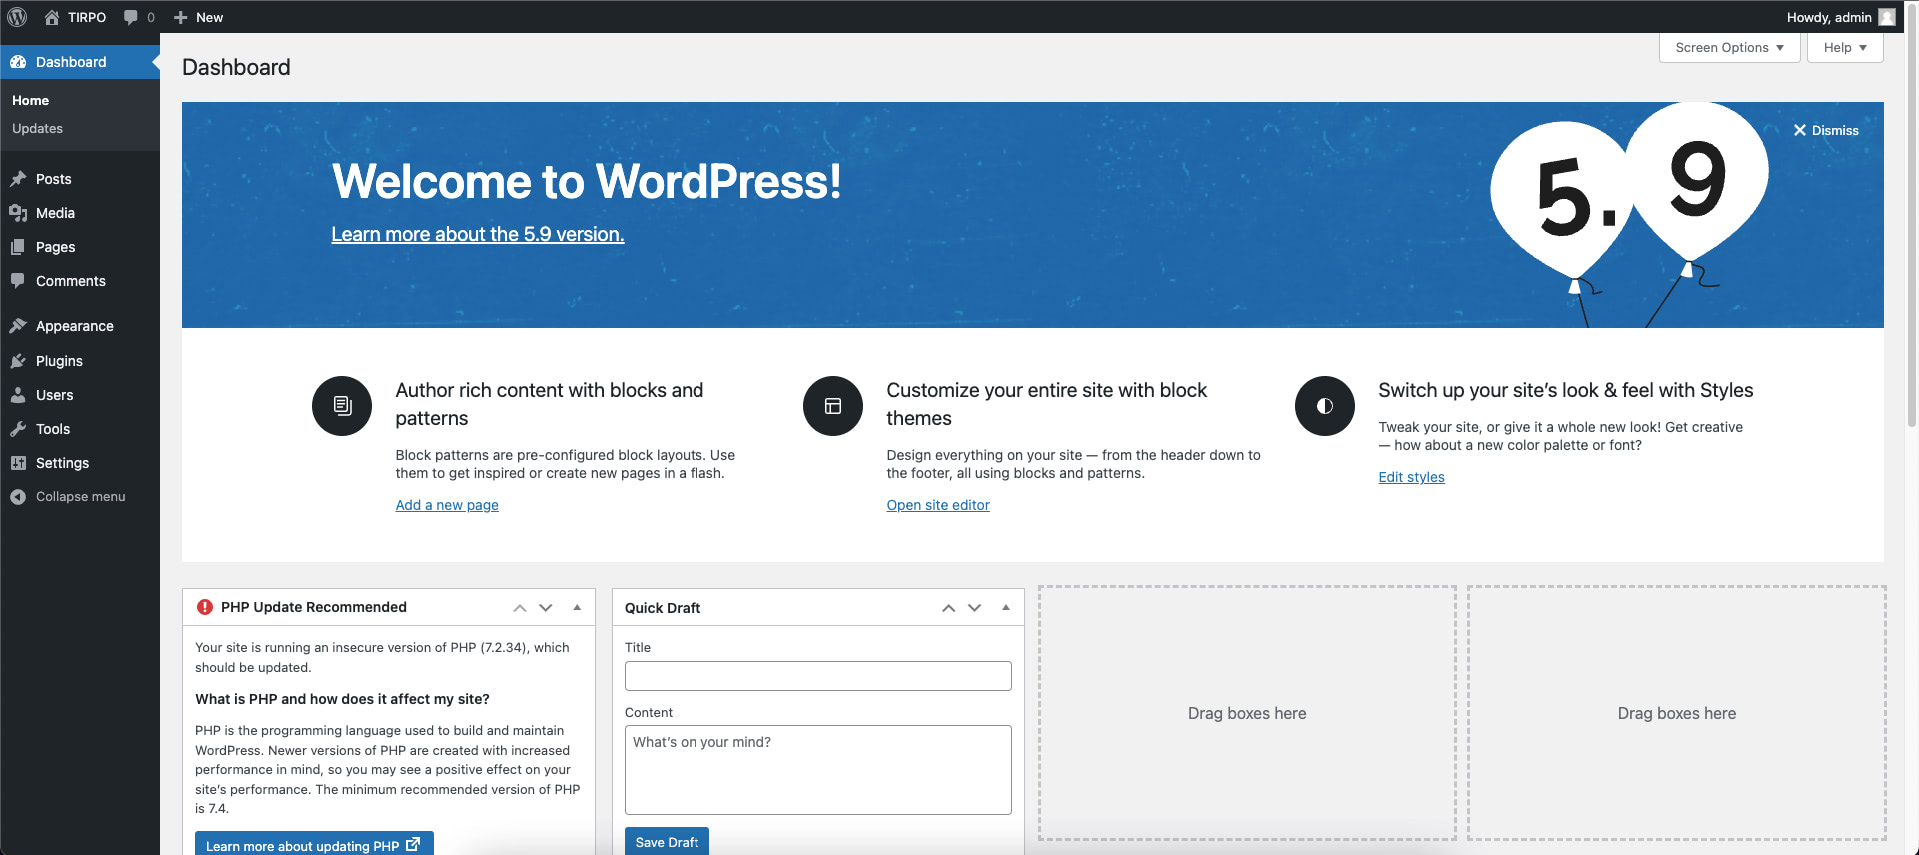
Table of Contents
Prepare Your WordPress Site for Privacy-Friendly Analytics
Gutenberg is the new WordPress editor introduced in WordPress 5.0, which brought a wide variety of block editor improvements with any WordPress theme out of the box. It is now the default editor to any new WordPress installation and has changed the user editing experience, but not how content is stored and rendered on the theme.
By choosing a Gutenberg-ready WordPress theme like Blocksy WordPress Theme, you can make sure that you can create complex layouts even if you don’t have coding experience. Since Gutenberg is a visual-powered, reusable block editor, you can choose the layout options, colors, typography, and other options you used to get with different custom themes. Finally, blocks in Gutenberg are very similar to the concept of page builders, so you won’t need to pay extra for these plugins to achieve the same features.
In this tutorial, we will use Blocksy WordPress Theme for our demo. This WordPress theme is an innovative, lightning-fast free WordPress Theme that is Gutenberg ready and some of its helpful features include translation and responsive web design ready with clean code.

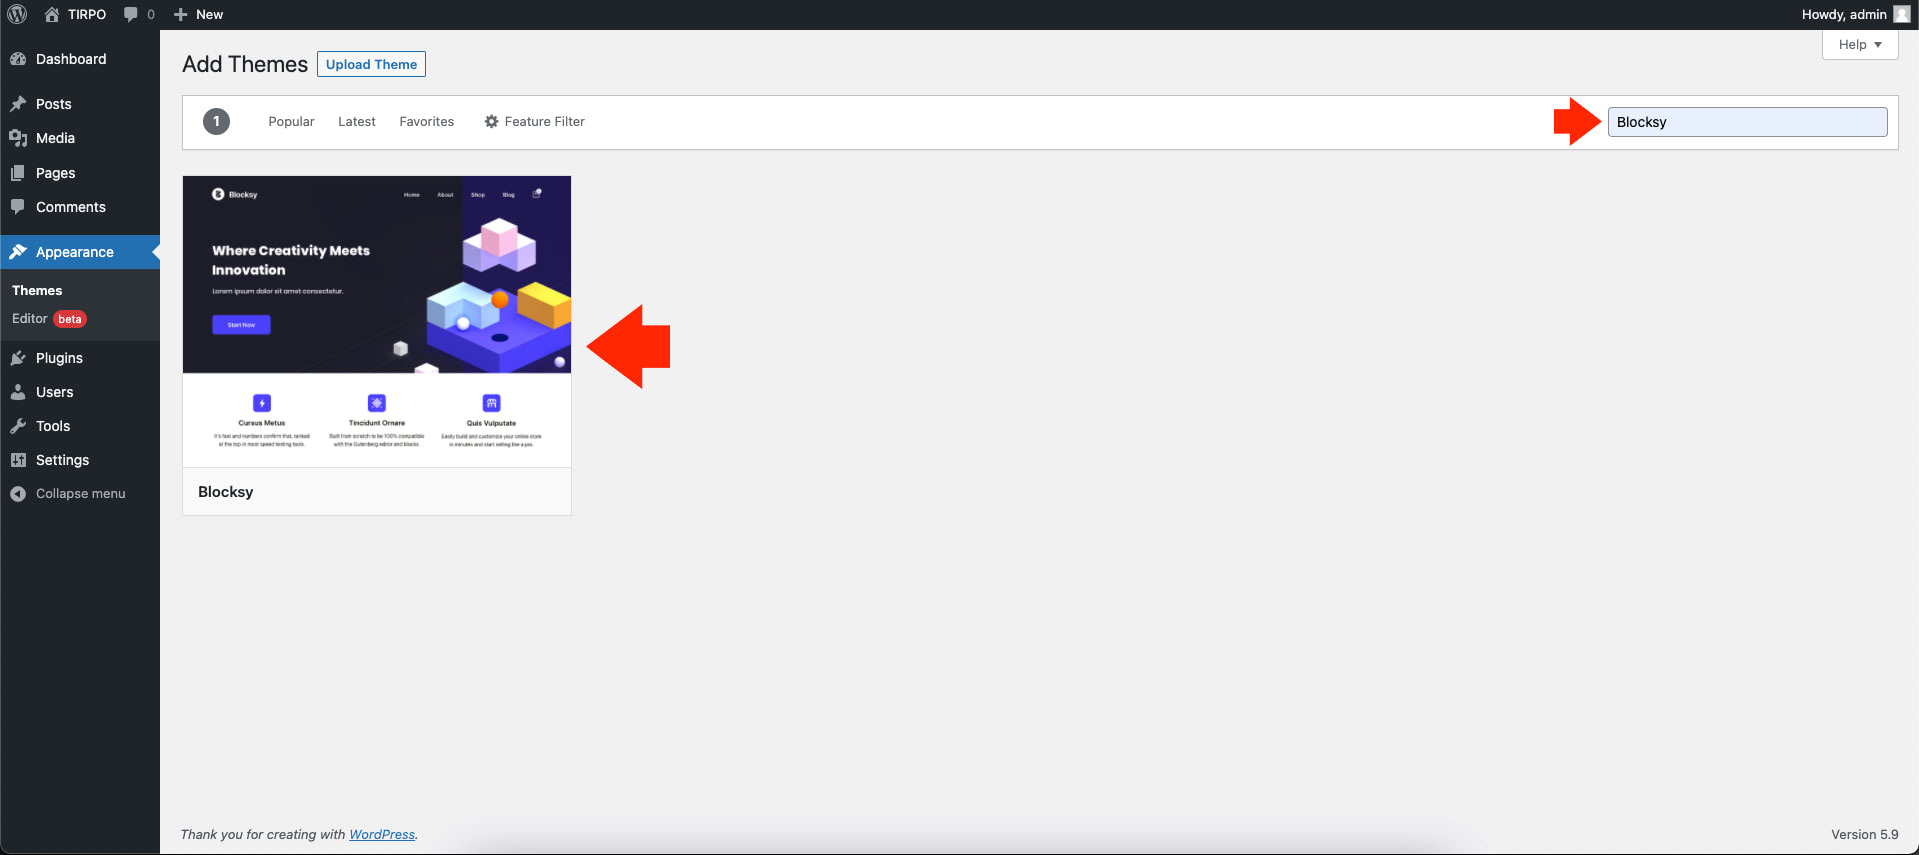
Let’s install Blocksy WordPress Theme. First, go to “Appearance” -> “Themes” and click on the “Add New” button similar to the image below.
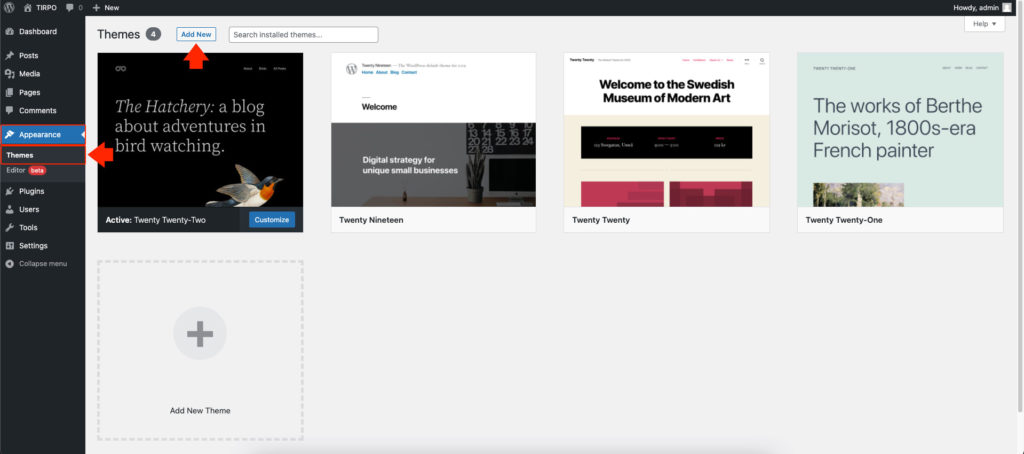
On the search bar, located on the upper right corner of the screen, search for “Blocksy” as seen below.
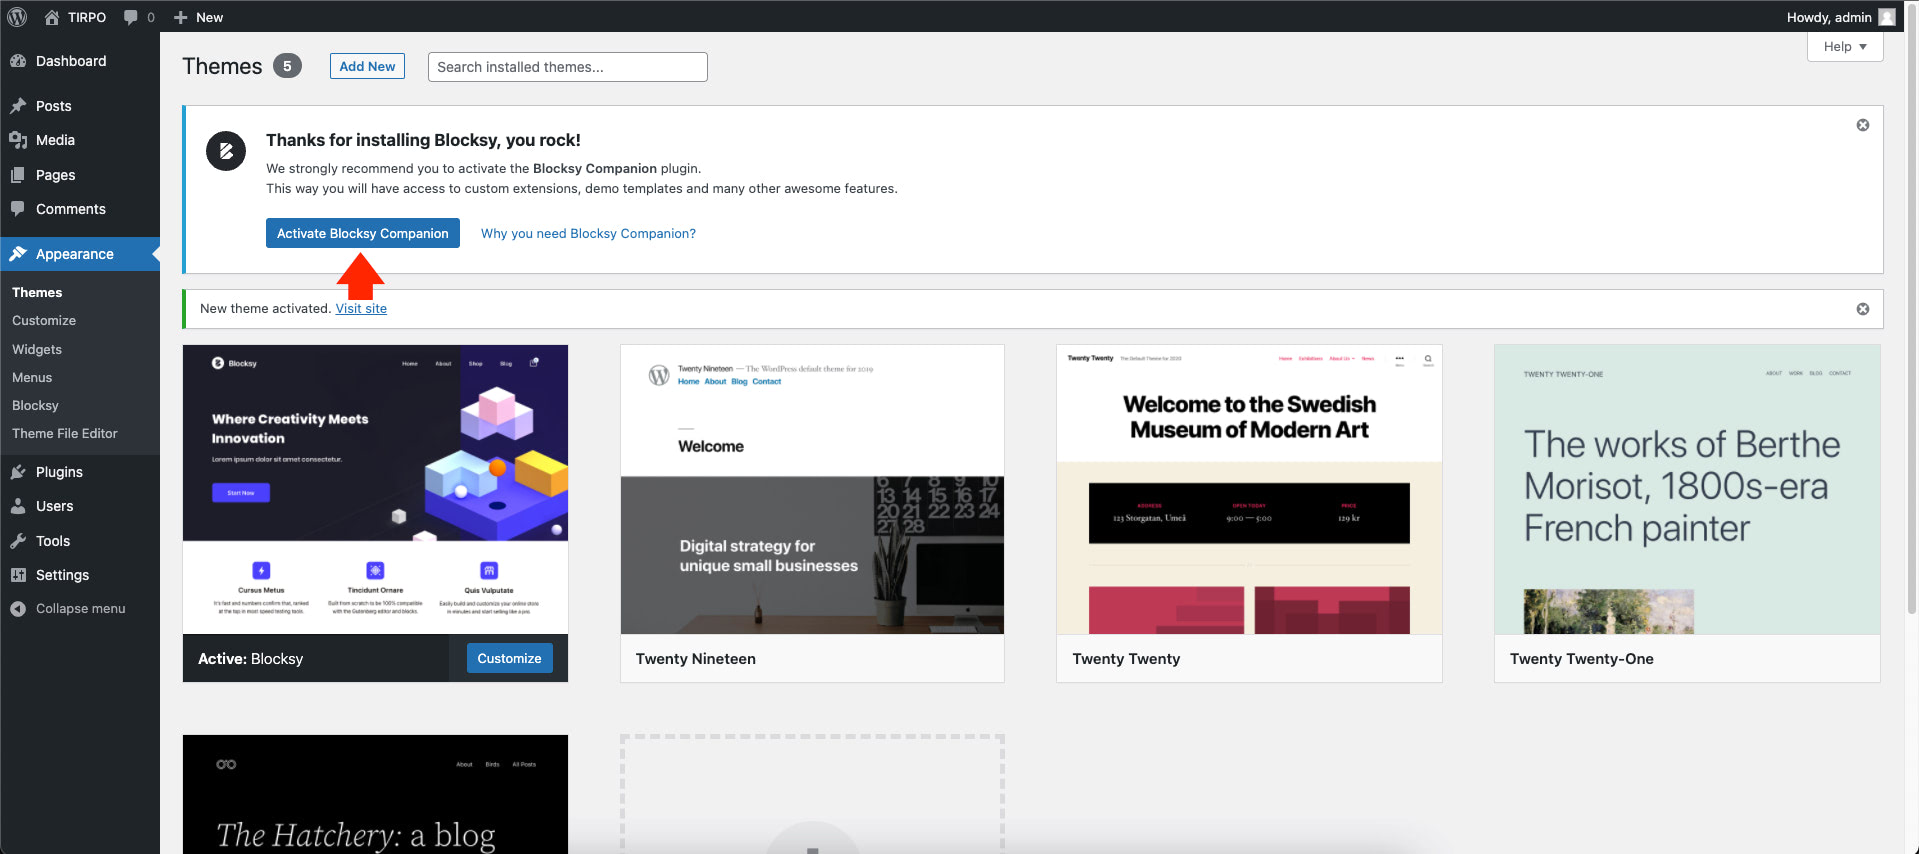
Afterward, we need to install and activate the Blocksy WordPress Theme. To do this, click on the “Install” button and click on the “Activate” button.
After activating the Blocksy WordPress Theme, we need to activate Blocksy Companion to select our preferred theme design for our WordPress website. To do that, click on the “Activate Blocksy Companion” button.
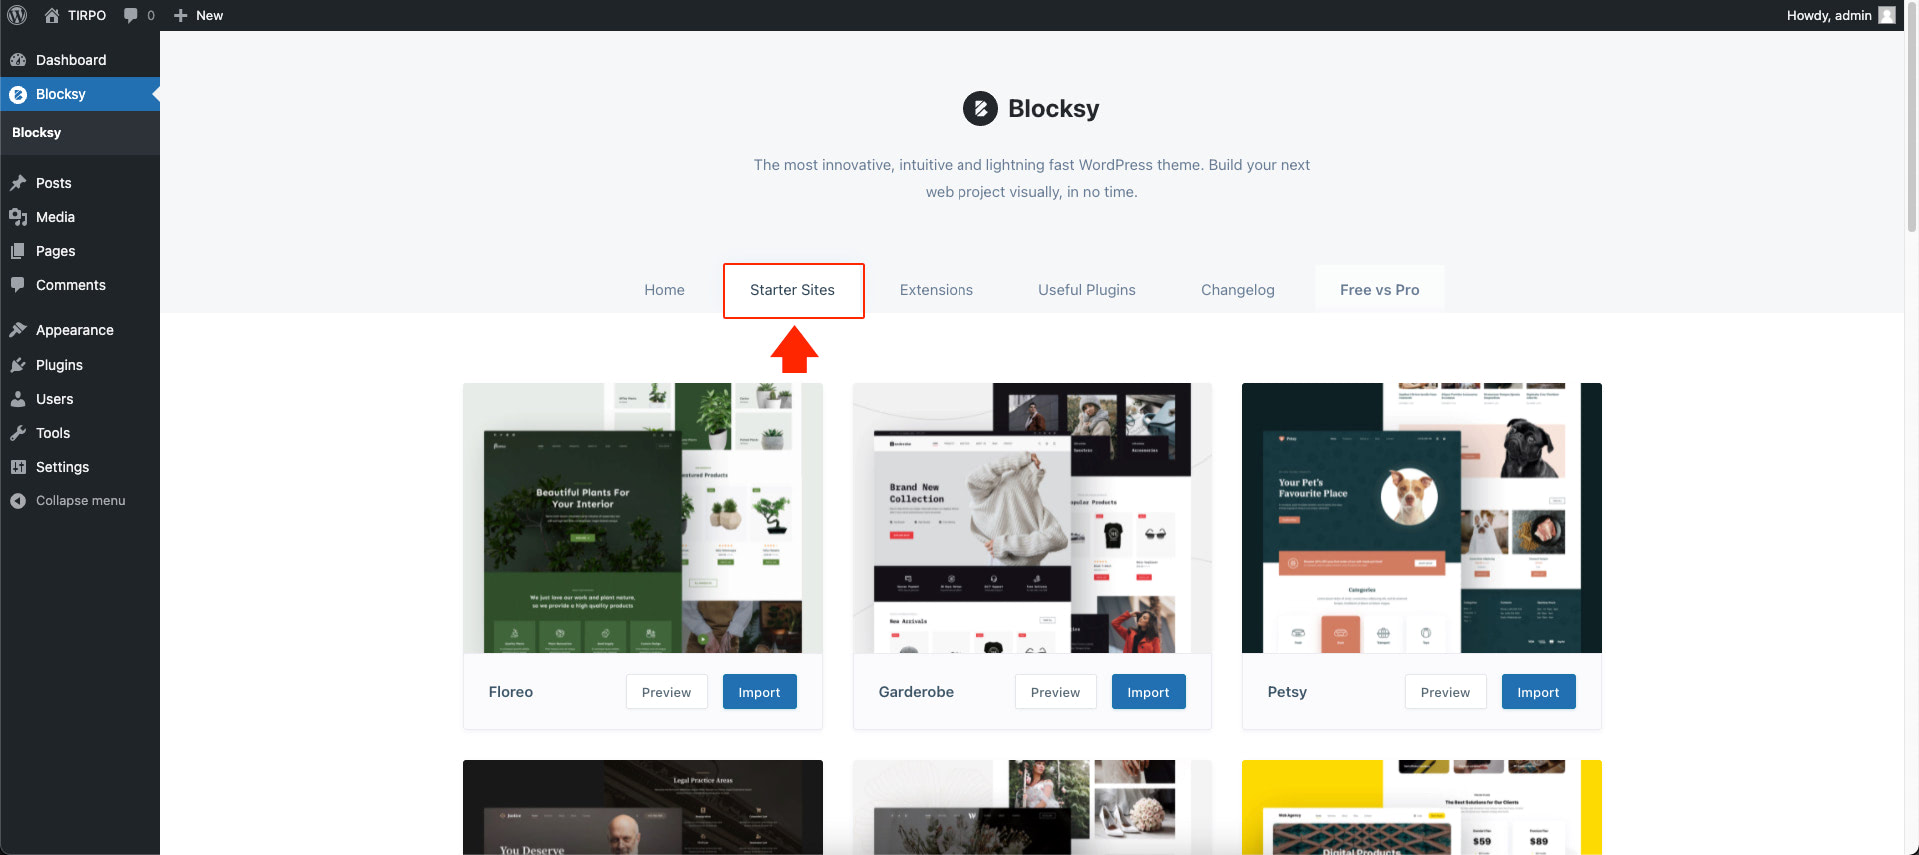
At this point, the Blocksy Companion was installed. The next thing we need to do is to select our preferred Blocksy WordPress Theme. From the Blocksy WordPress Theme Dashboard, click on the “Starter Sites” tab.
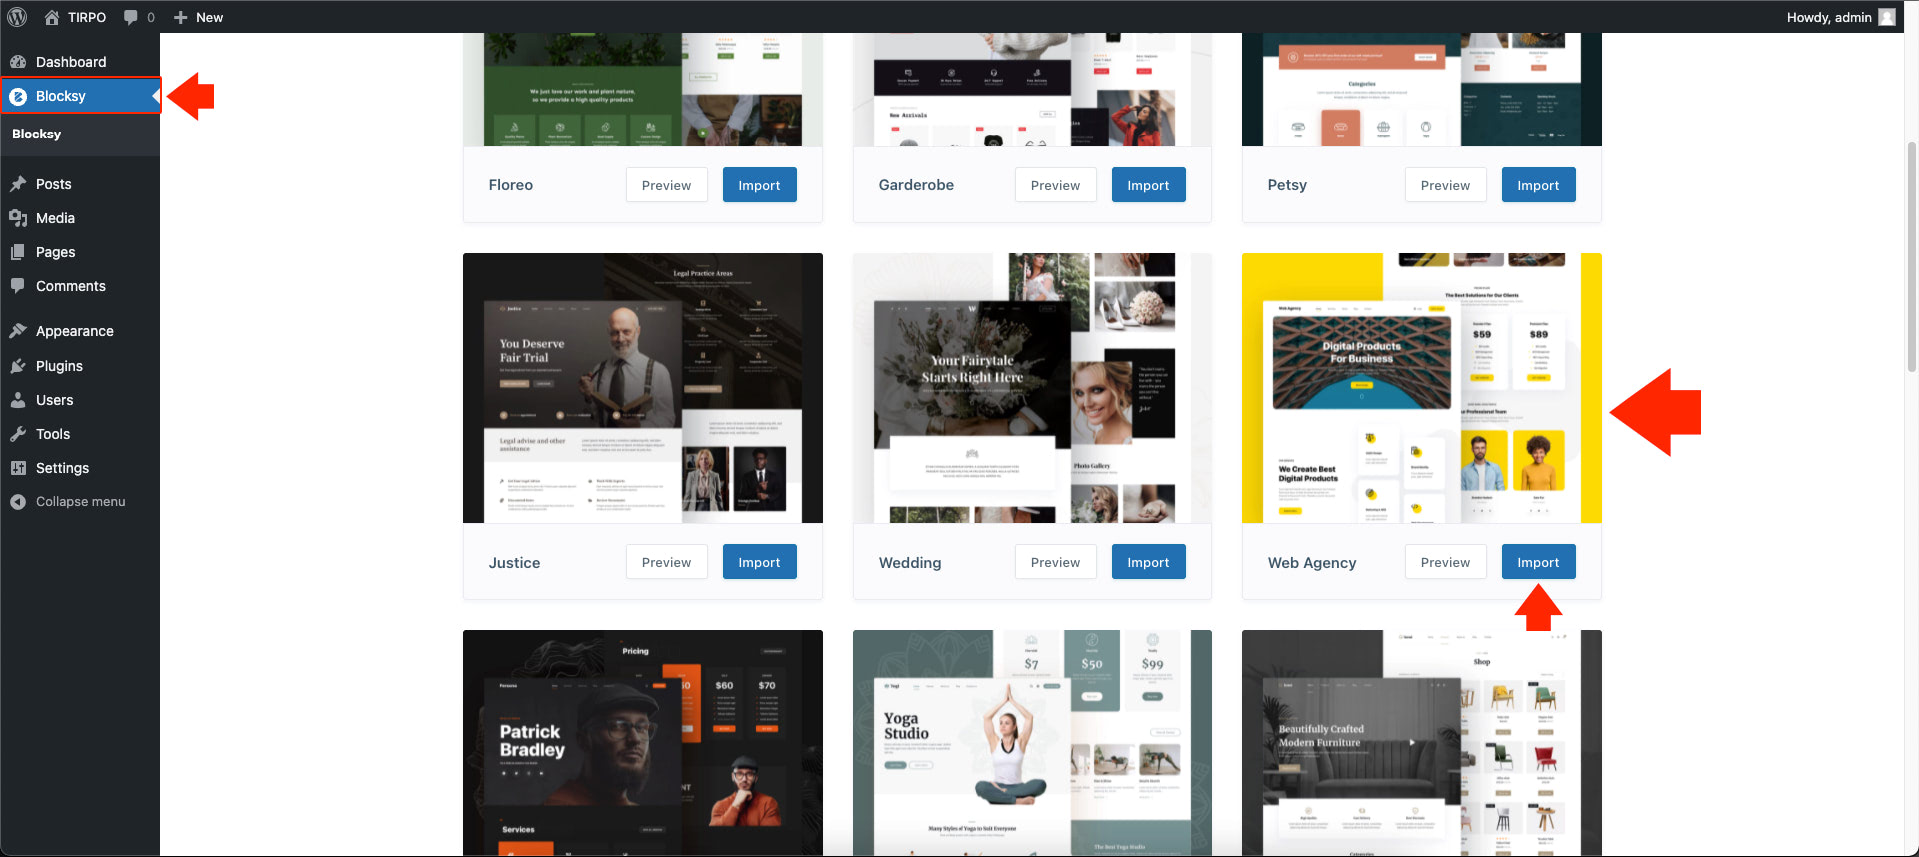
In this tutorial, let’s use the “Web Agency” theme, which is a theme for Web Design and Digital Marketing companies. This can be found in the middle section of the third row on the theme’s list, as seen below.
To install this theme, click on the “Import” button, and it will start prompting a few questions about the import, such as if you want to install it as a child theme, including the plugins and widgets that you want to install that comes with the theme design.
A new modal window will then pop up on the screen. Click on the “Next” button until the “Install” button appears, and we are good to go.
Note: If you wish not to install a particular content such as the Contact Form, Widgets, or Options, uncheck the item from the list.
At this point, the installation of the theme is complete. We can visit our homepage to see the look and feel of our chosen theme. You can customize the content as you may like, but this should be sufficient for our demo.

Set Up Your Microanalytics Account
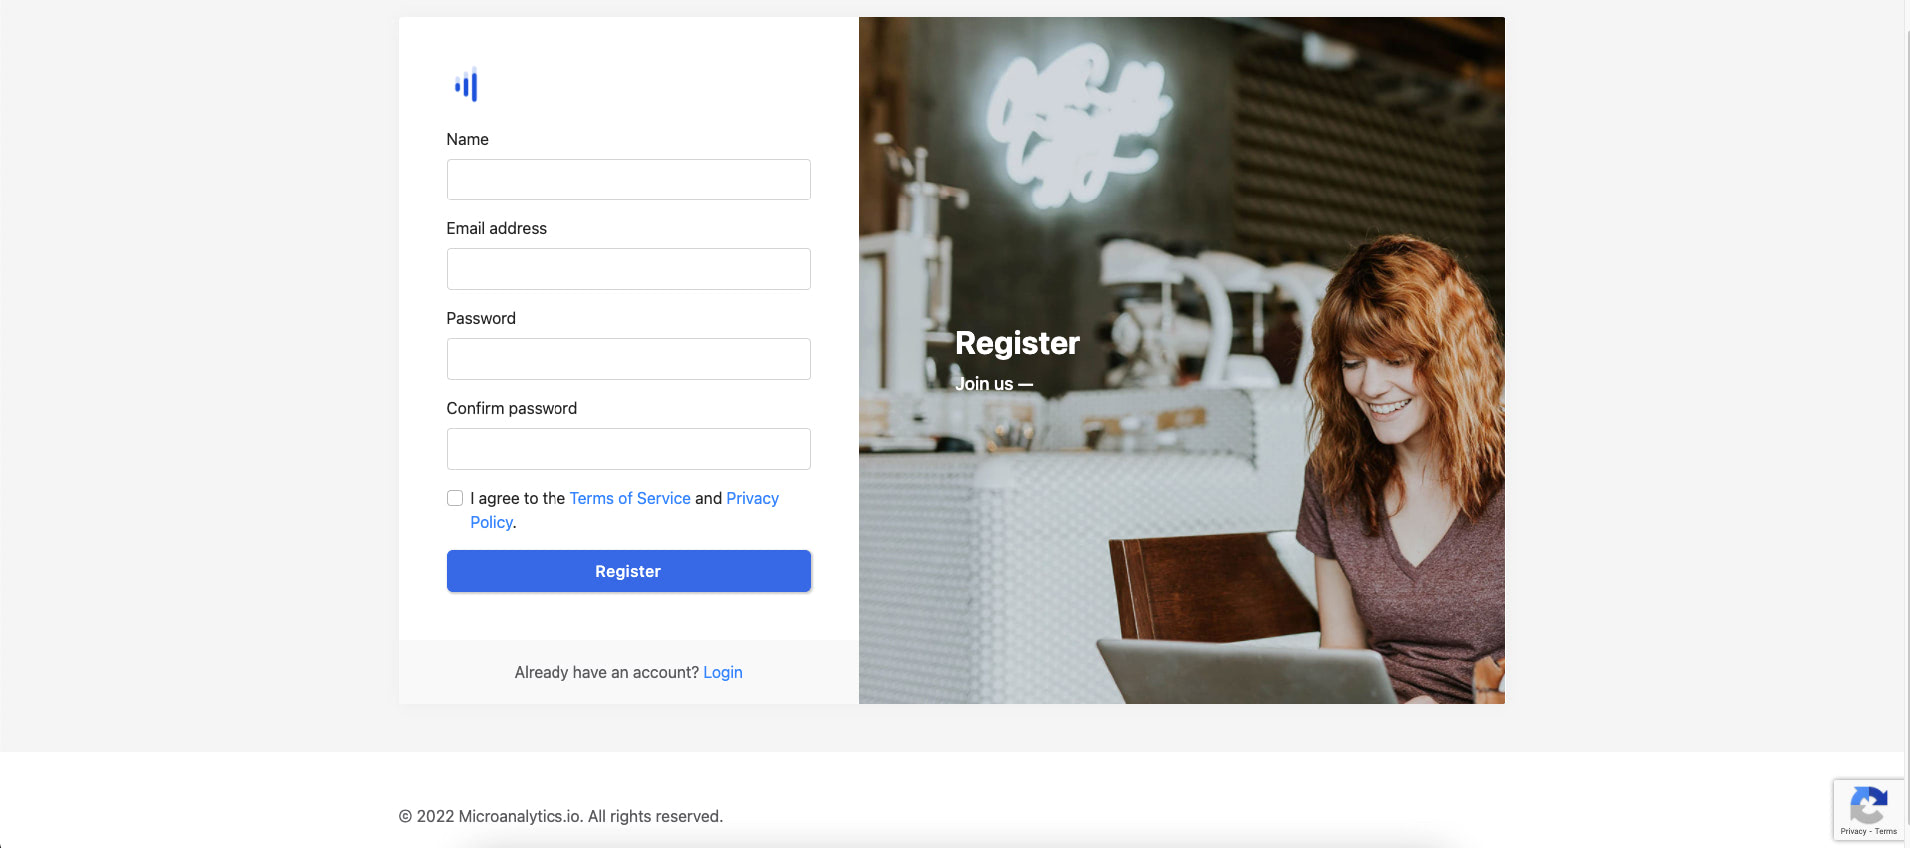
To create free website analytics for our created WordPress website, we need to create our free account first. Head on to https://microanalytics.io/ and click on the “Register” button on the upper right corner of the homepage, and you will be redirected to the registration page.
Next, we need to verify our account by clicking on the email confirmation link provided by Microanalytics. If you did not receive any confirmation link, try checking your spam folder.
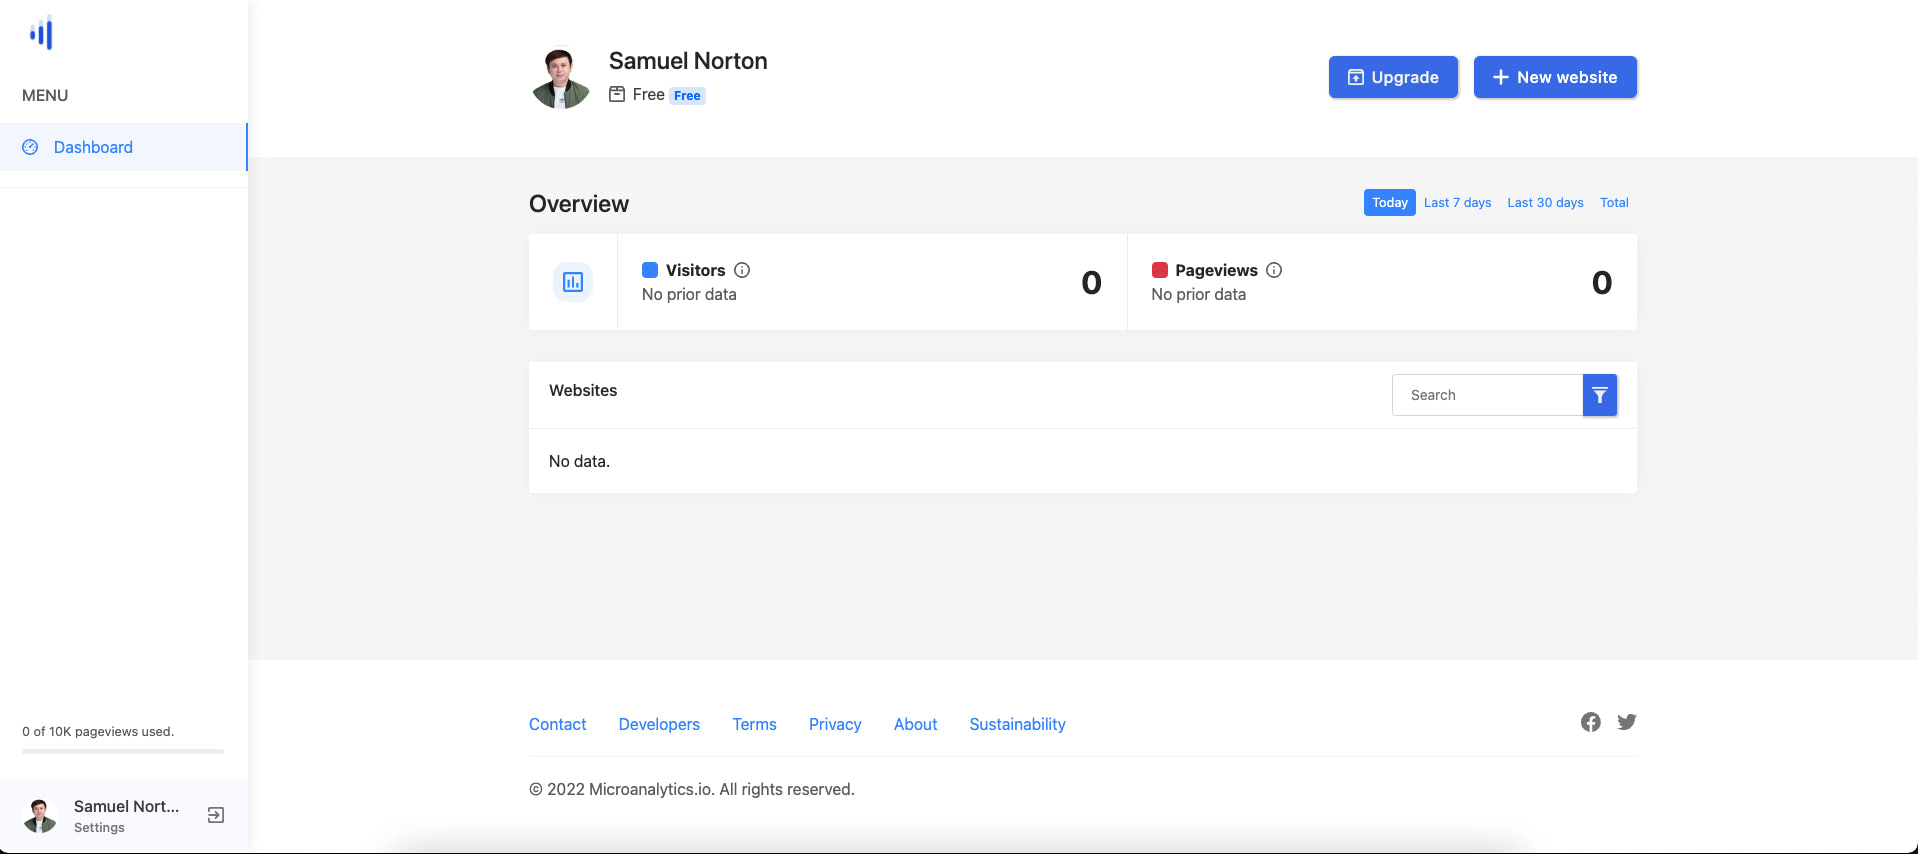
Once your email gets verified, you will see a dashboard similar to the image below.
Adding WordPress Website to Microanalytics
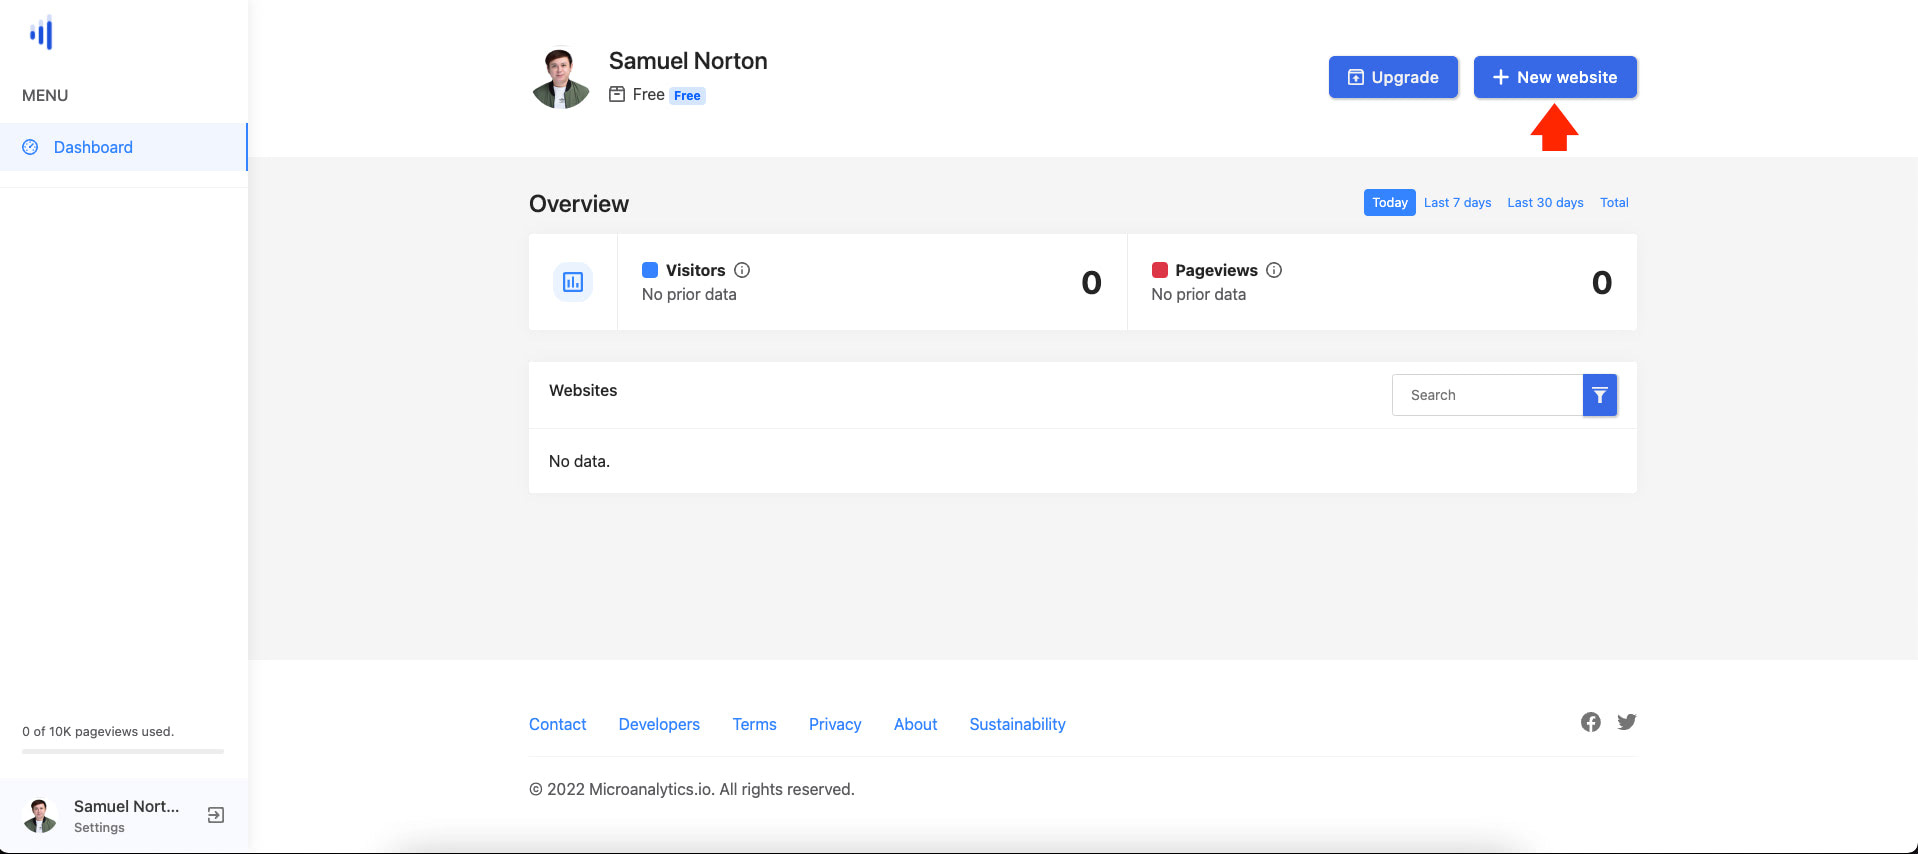
To add our created WordPress website to Microanalytics, click on the “New Website” button located in the upper right corner of the screen.
Next, we need to fill up the new website form, which includes the following fields:
- URL – the uniform resource locator (URL) of your website.
- Privacy type – the stats accessibility of your website analytics. You can choose either Private, Public, or Password.
- Notifications – allows you to send periodic email reports about your website analytics.
- Exclude IPs – list of internet protocol (IP) addresses you wish to exclude from tracking.
- Exclude bots – this allows you to exclude common bots from being tracked.
As seen in the image above, we put our website’s domain under the URL field. We chose “Private” for the privacy type because we want our stats to be accessible exclusively. We also enabled the email notifications for us to receive periodic email reports.
We’ve placed a couple of specific IP addresses since we want to exclude certain internet protocols or IPs from accessing our website analytics. Lastly, we enabled the exclude bots option to exclude common bots from being tracked.
One last thing we need to do before we click on the “Save” button is to copy the Microanalytics tracking code located at the very bottom of the new website screen. This will track our WordPress website’s analytics and measure how users interact with our website.
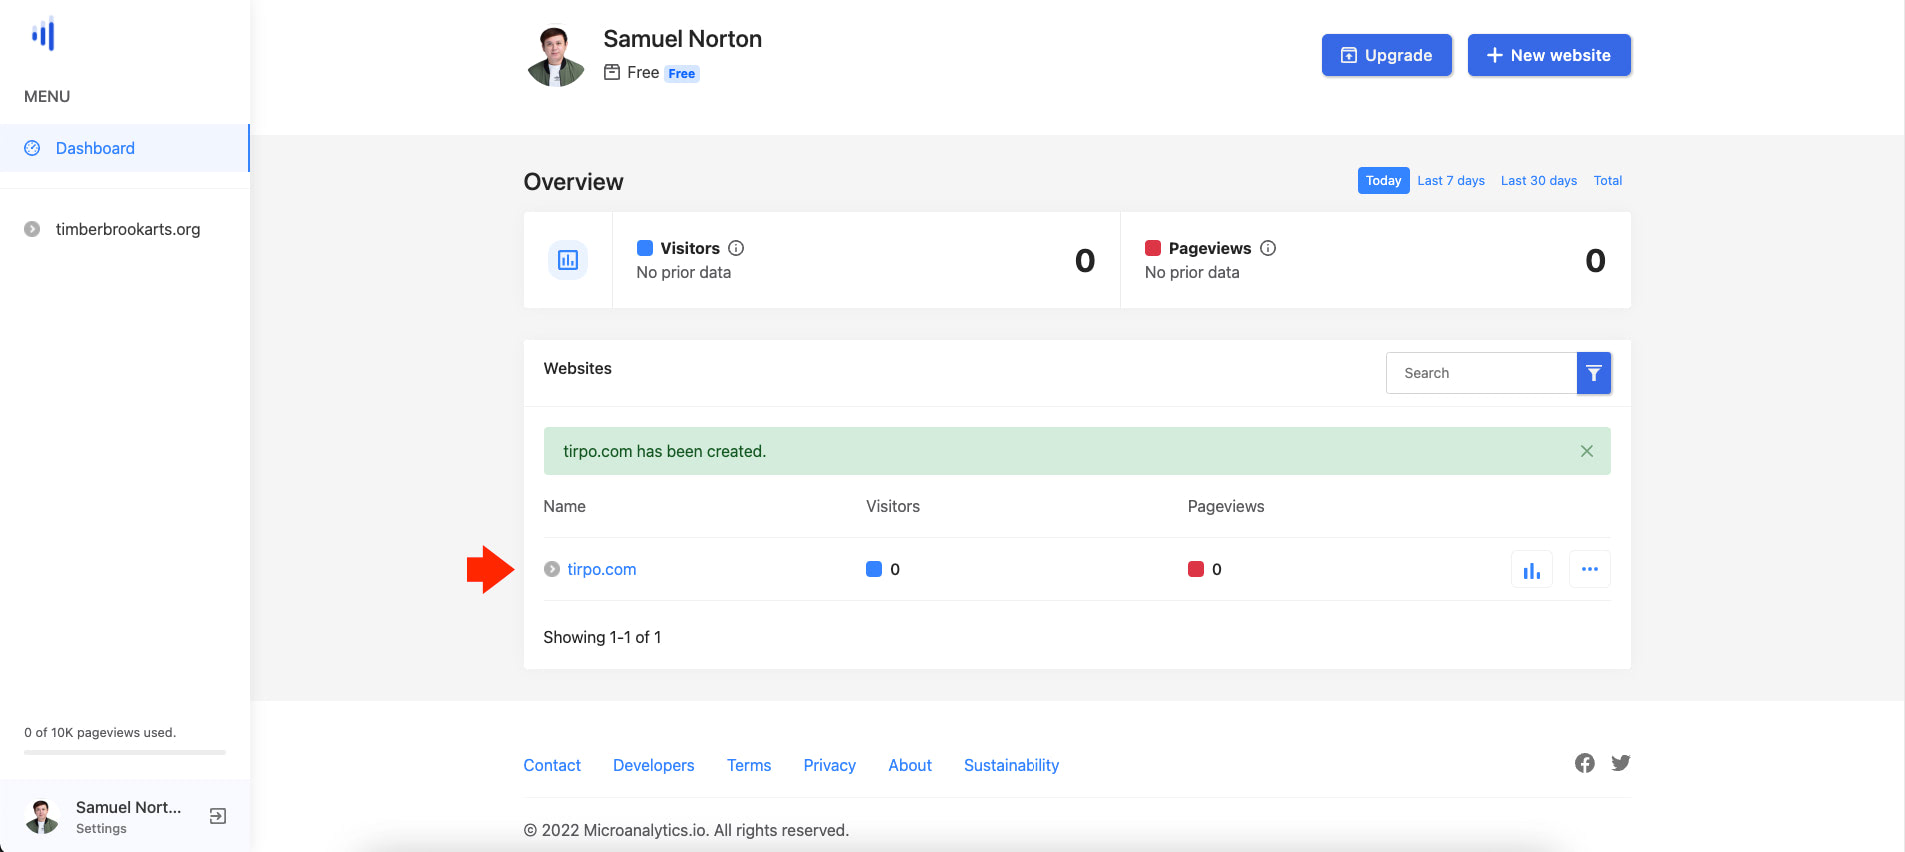
After copying the Microanalytics tracking code, we can now click on the “Save” button and proceed next. At this point, our WordPress website was successfully added to Microanalytics, as seen in the image below.
Add the Microanalytics Tracking Code
We have already added and configured our WordPress website inside the Microanalytics Dashboard. The next thing we need to do is add the Microanalytics tracking code we’ve recently copied to our WordPress website.
We don’t want to risk manually adding Microanalytics tracking code to our WordPress website. In this tutorial, we will utilize a plugin called “Insert Headers and Footers” to get it done safely efficiently.
Insert Headers and Footers is a useful WordPress plugin that allows users to insert code like Google Analytics, custom script code, Facebook Pixel, and more to the WordPress website’s header and footer without editing the theme files directly.
First, let’s install the Insert Headers and Footers WordPress plugin. From our WordPress website dashboard, click on “Plugins” -> “Add New”, and type in “Insert Headers and Footers” on the search bar, as seen in the image below.
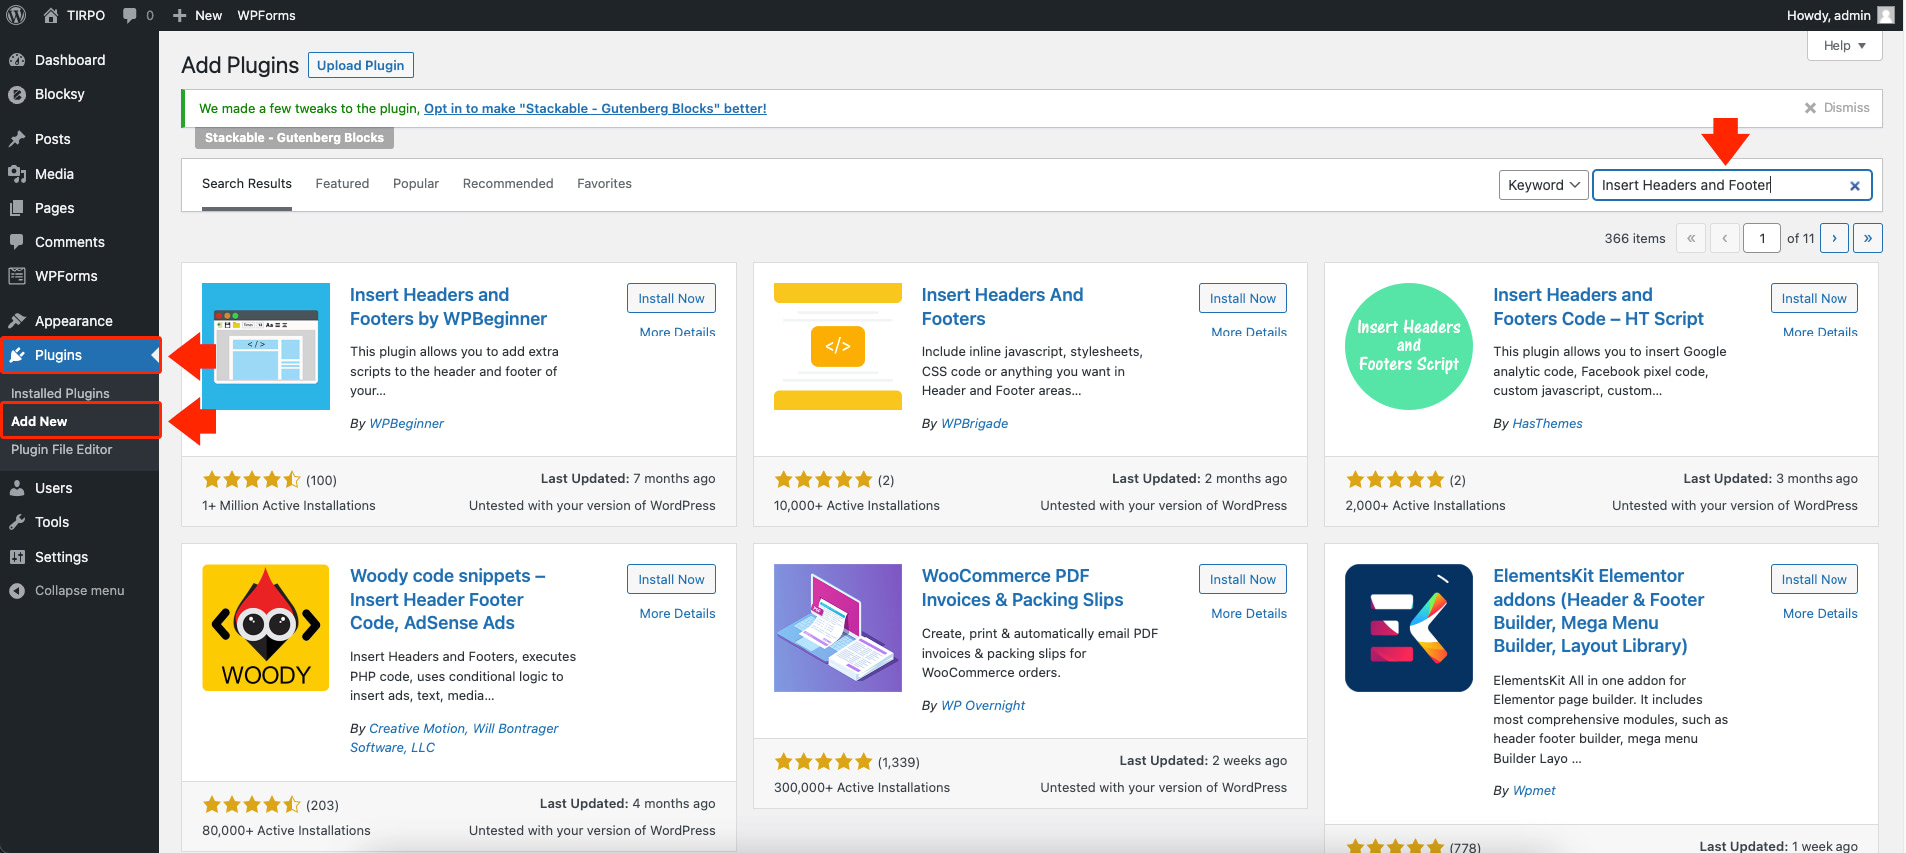
Next, click on the “Install Now” button followed by the “Activate” button to activate the Insert Headers and Footers WordPress plugin.
We have to copy the Microanalytics tracking code to the Insert Headers and Footers WordPress plugin. To do that, click on “Settings” on the WordPress menu and then click on “Insert Headers and Footers,” as seen in the image below.
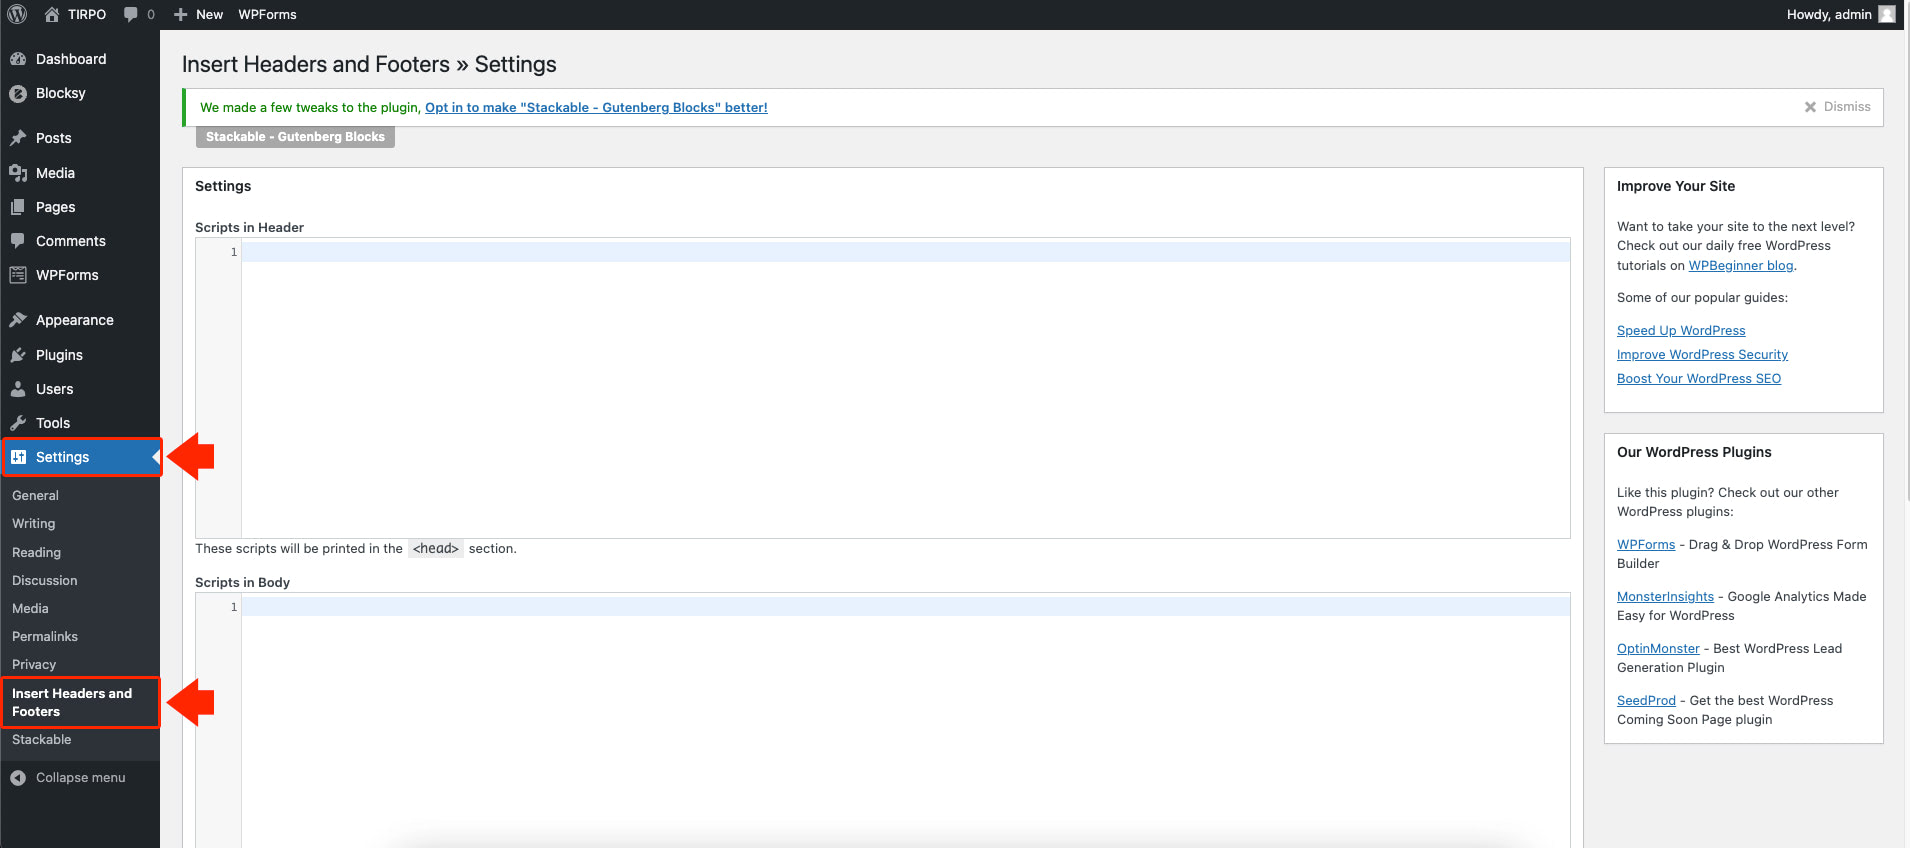
From here, we need to paste the Microanalytics tracking code inside the “Scripts in Header” textarea box.
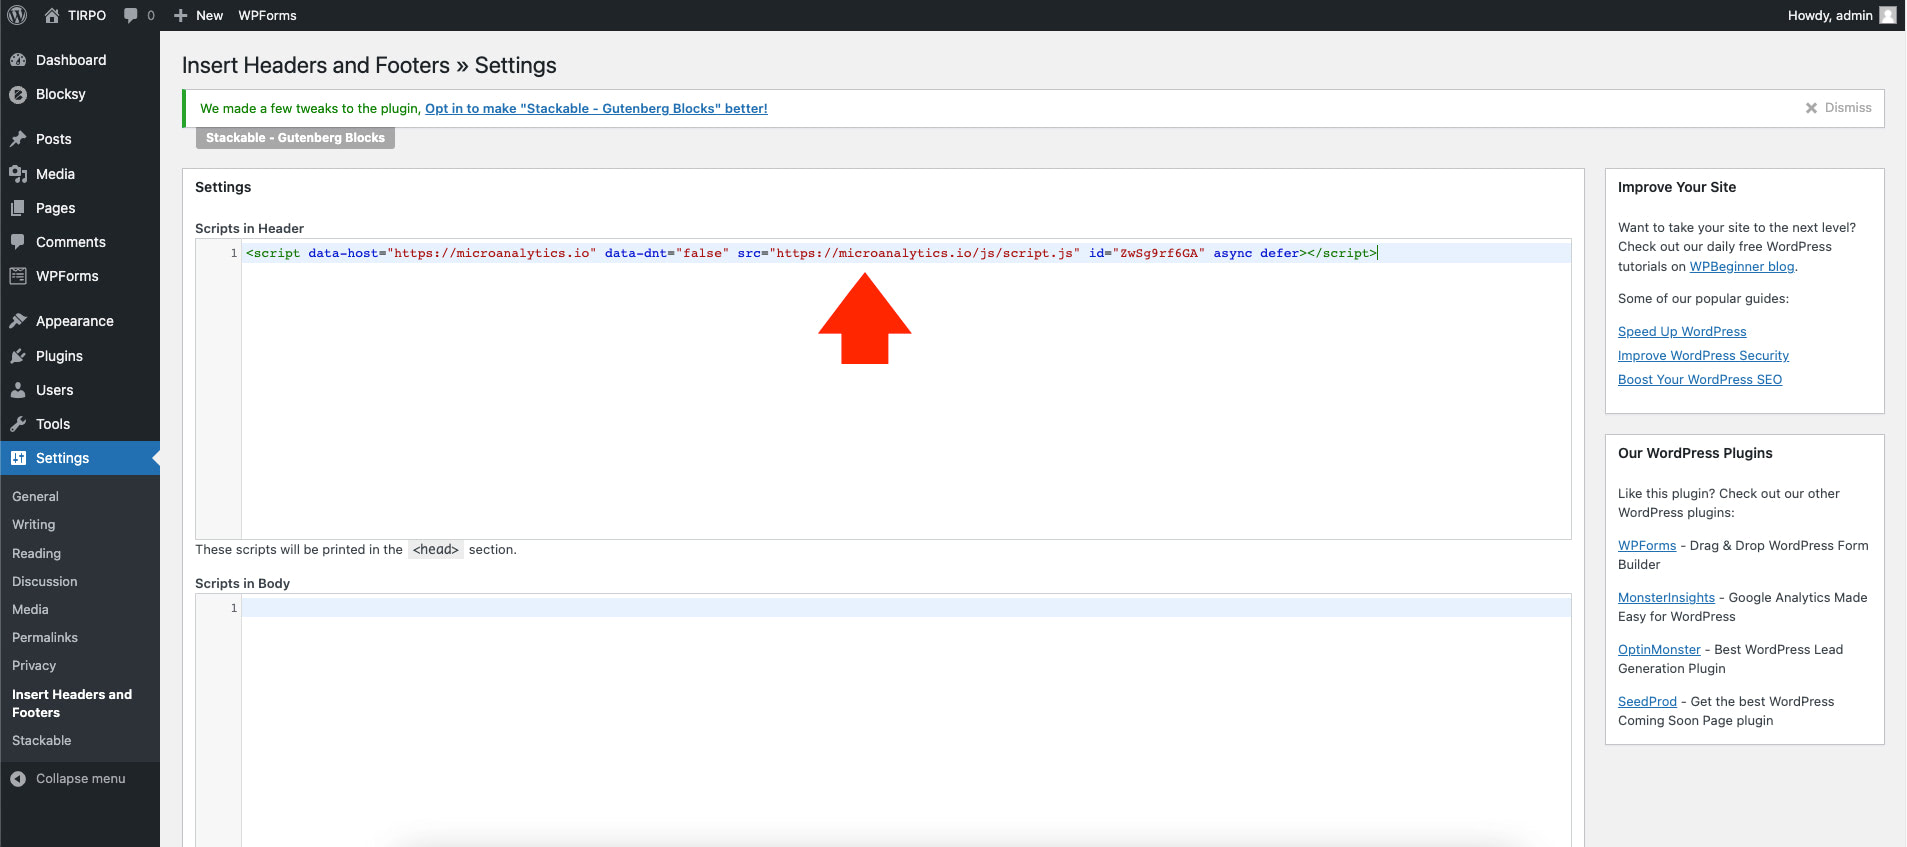
Congratulations! We just completed the necessary steps to add our WordPress website to Microanalytics.
Explore the Microanalytics Dashboard
By default, Microanalytics provides an overview of visitors and pageviews to all of your added websites within its dashboard. These data can be filtered by Today, Last 7 days, Last 30 Days, and Total.
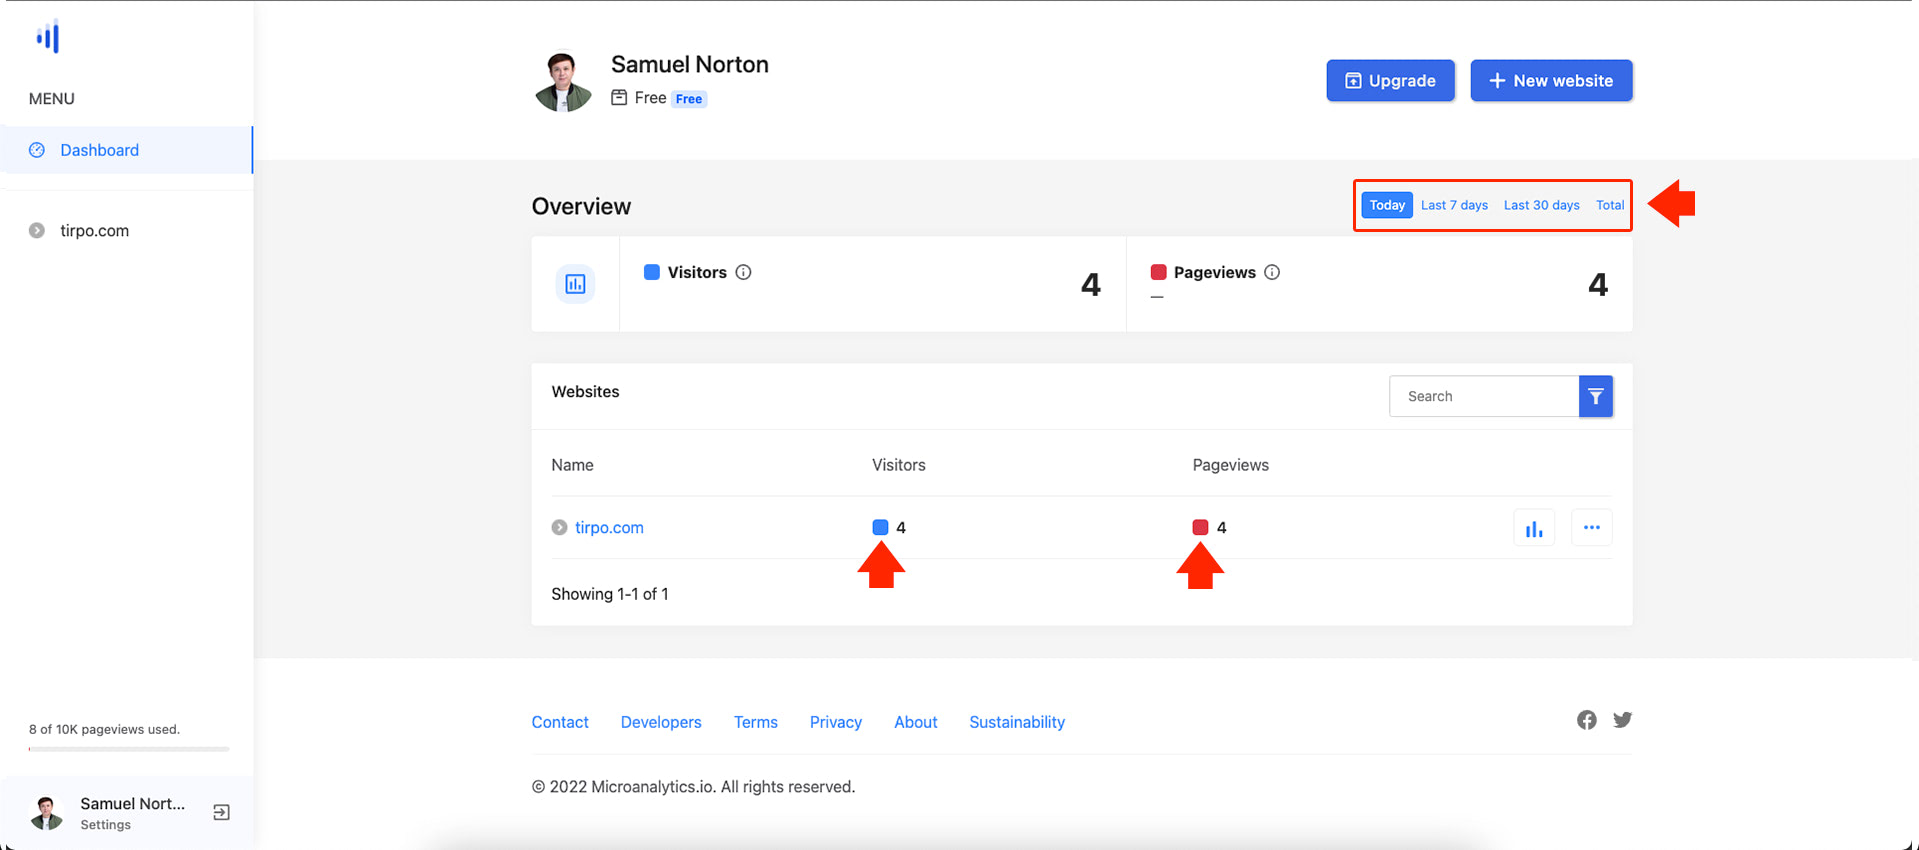
You can filter the presented data by clicking on each tab located in the upper right corner of the dashboard. The blue box icon represents the number of visitors, while the red box icon represents the number of pageviews.
If you wish to search for a specific website that you’ve added within the Microanalytics platform, put your keyword on the search box, which can be filtered and sorted alphabetically, least or best performing.
Website Stats Overview
To check on the stats of a specific website that was added within the Microanalytics dashboard you can either click on the metrics bar icon or on the three dots icon followed by clicking on the “Stats” link beside the website you wish to edit.
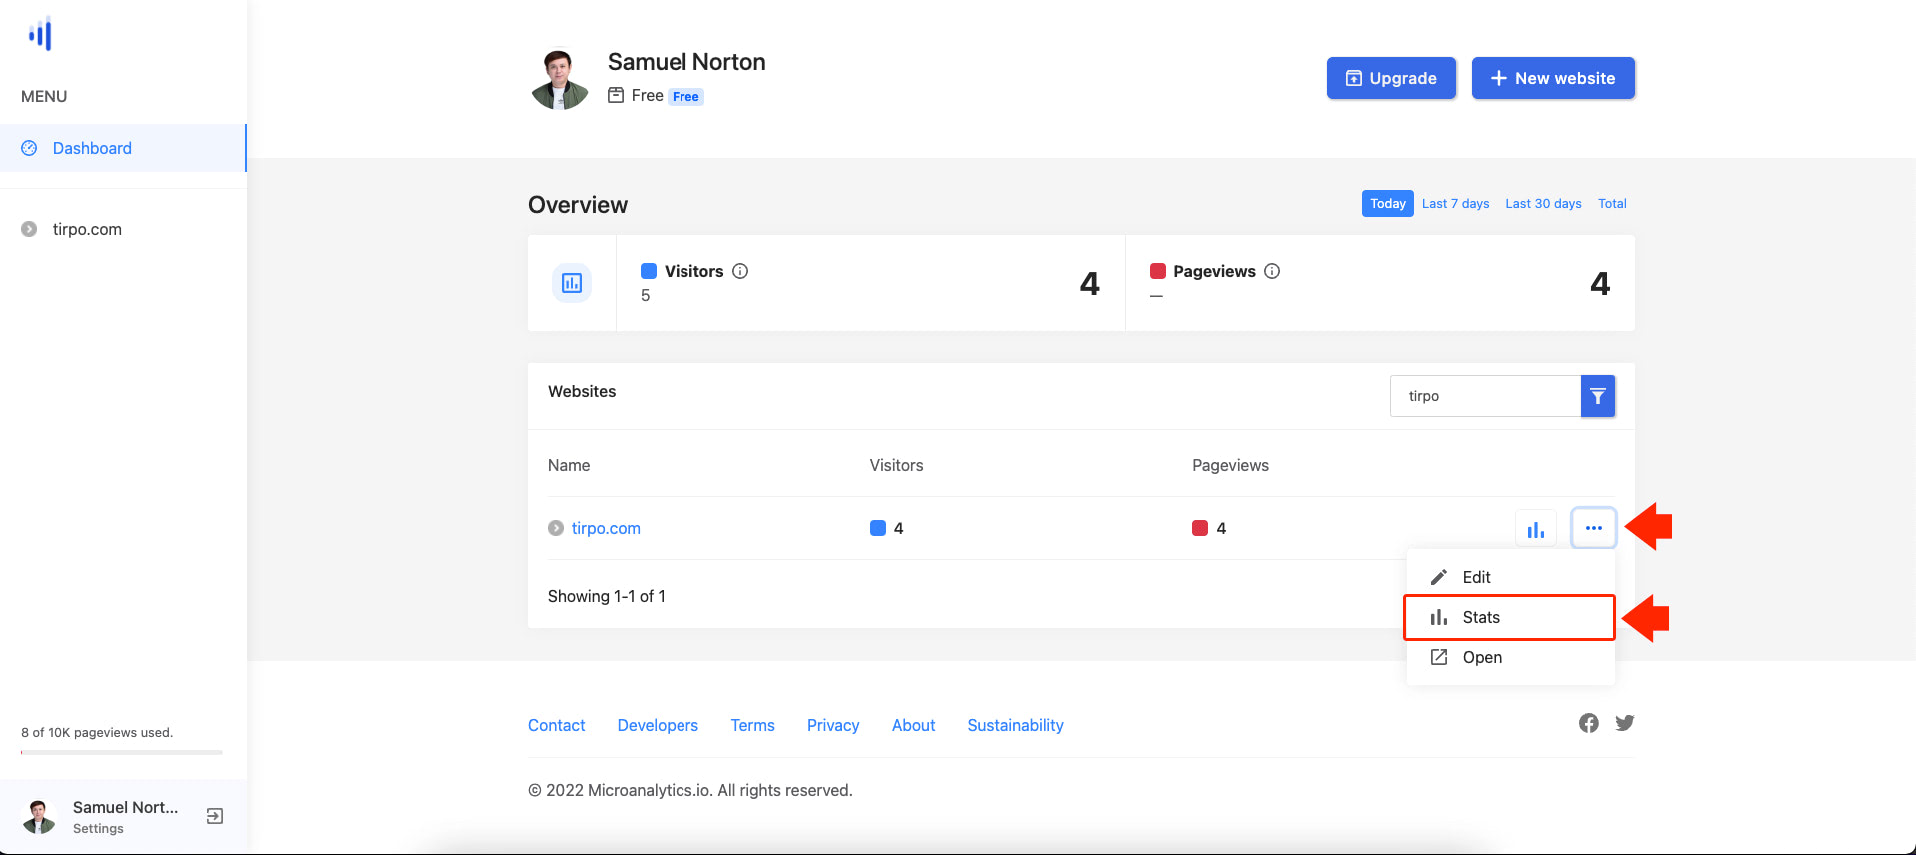
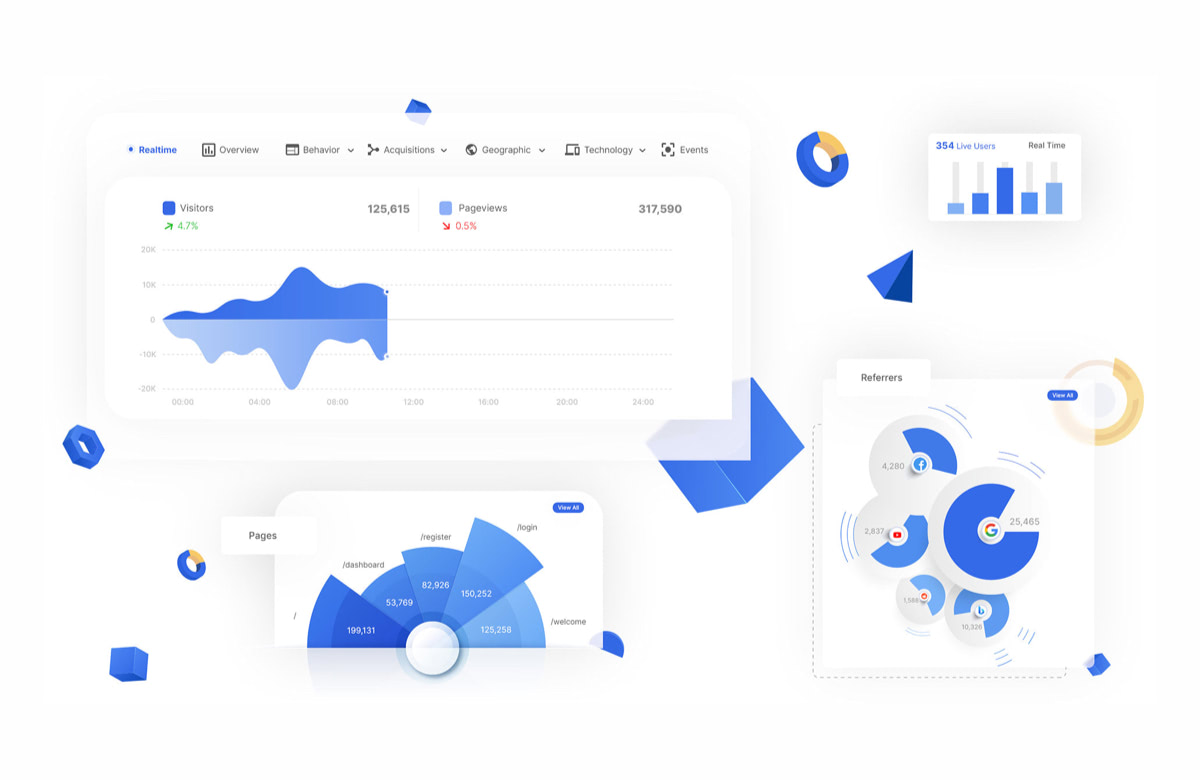
This will redirect you to the detailed website stats page to see the real-time stats overview, page or landing page behavior, acquisitions, geographic information, visitor’s technology used, and events.
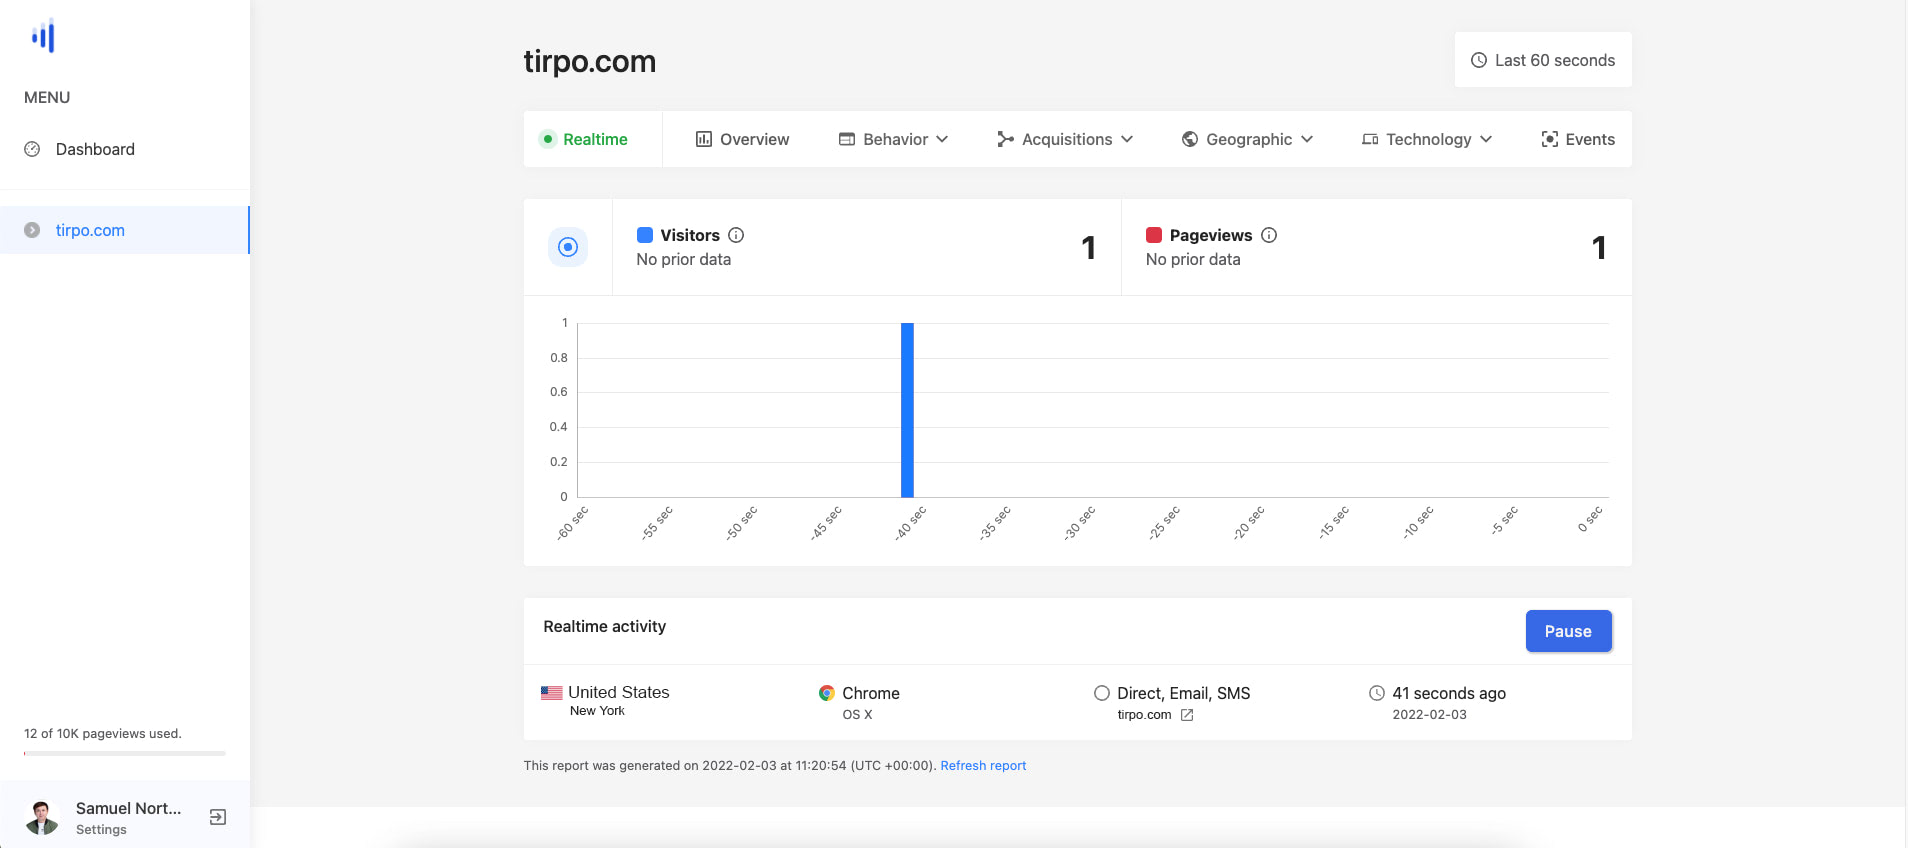
Real-Time Insights
The real-time tab provides immediate and near-instant insight stats. This information about your website’s visitors and pageviews is continuously updated, and each hit is reported every second.
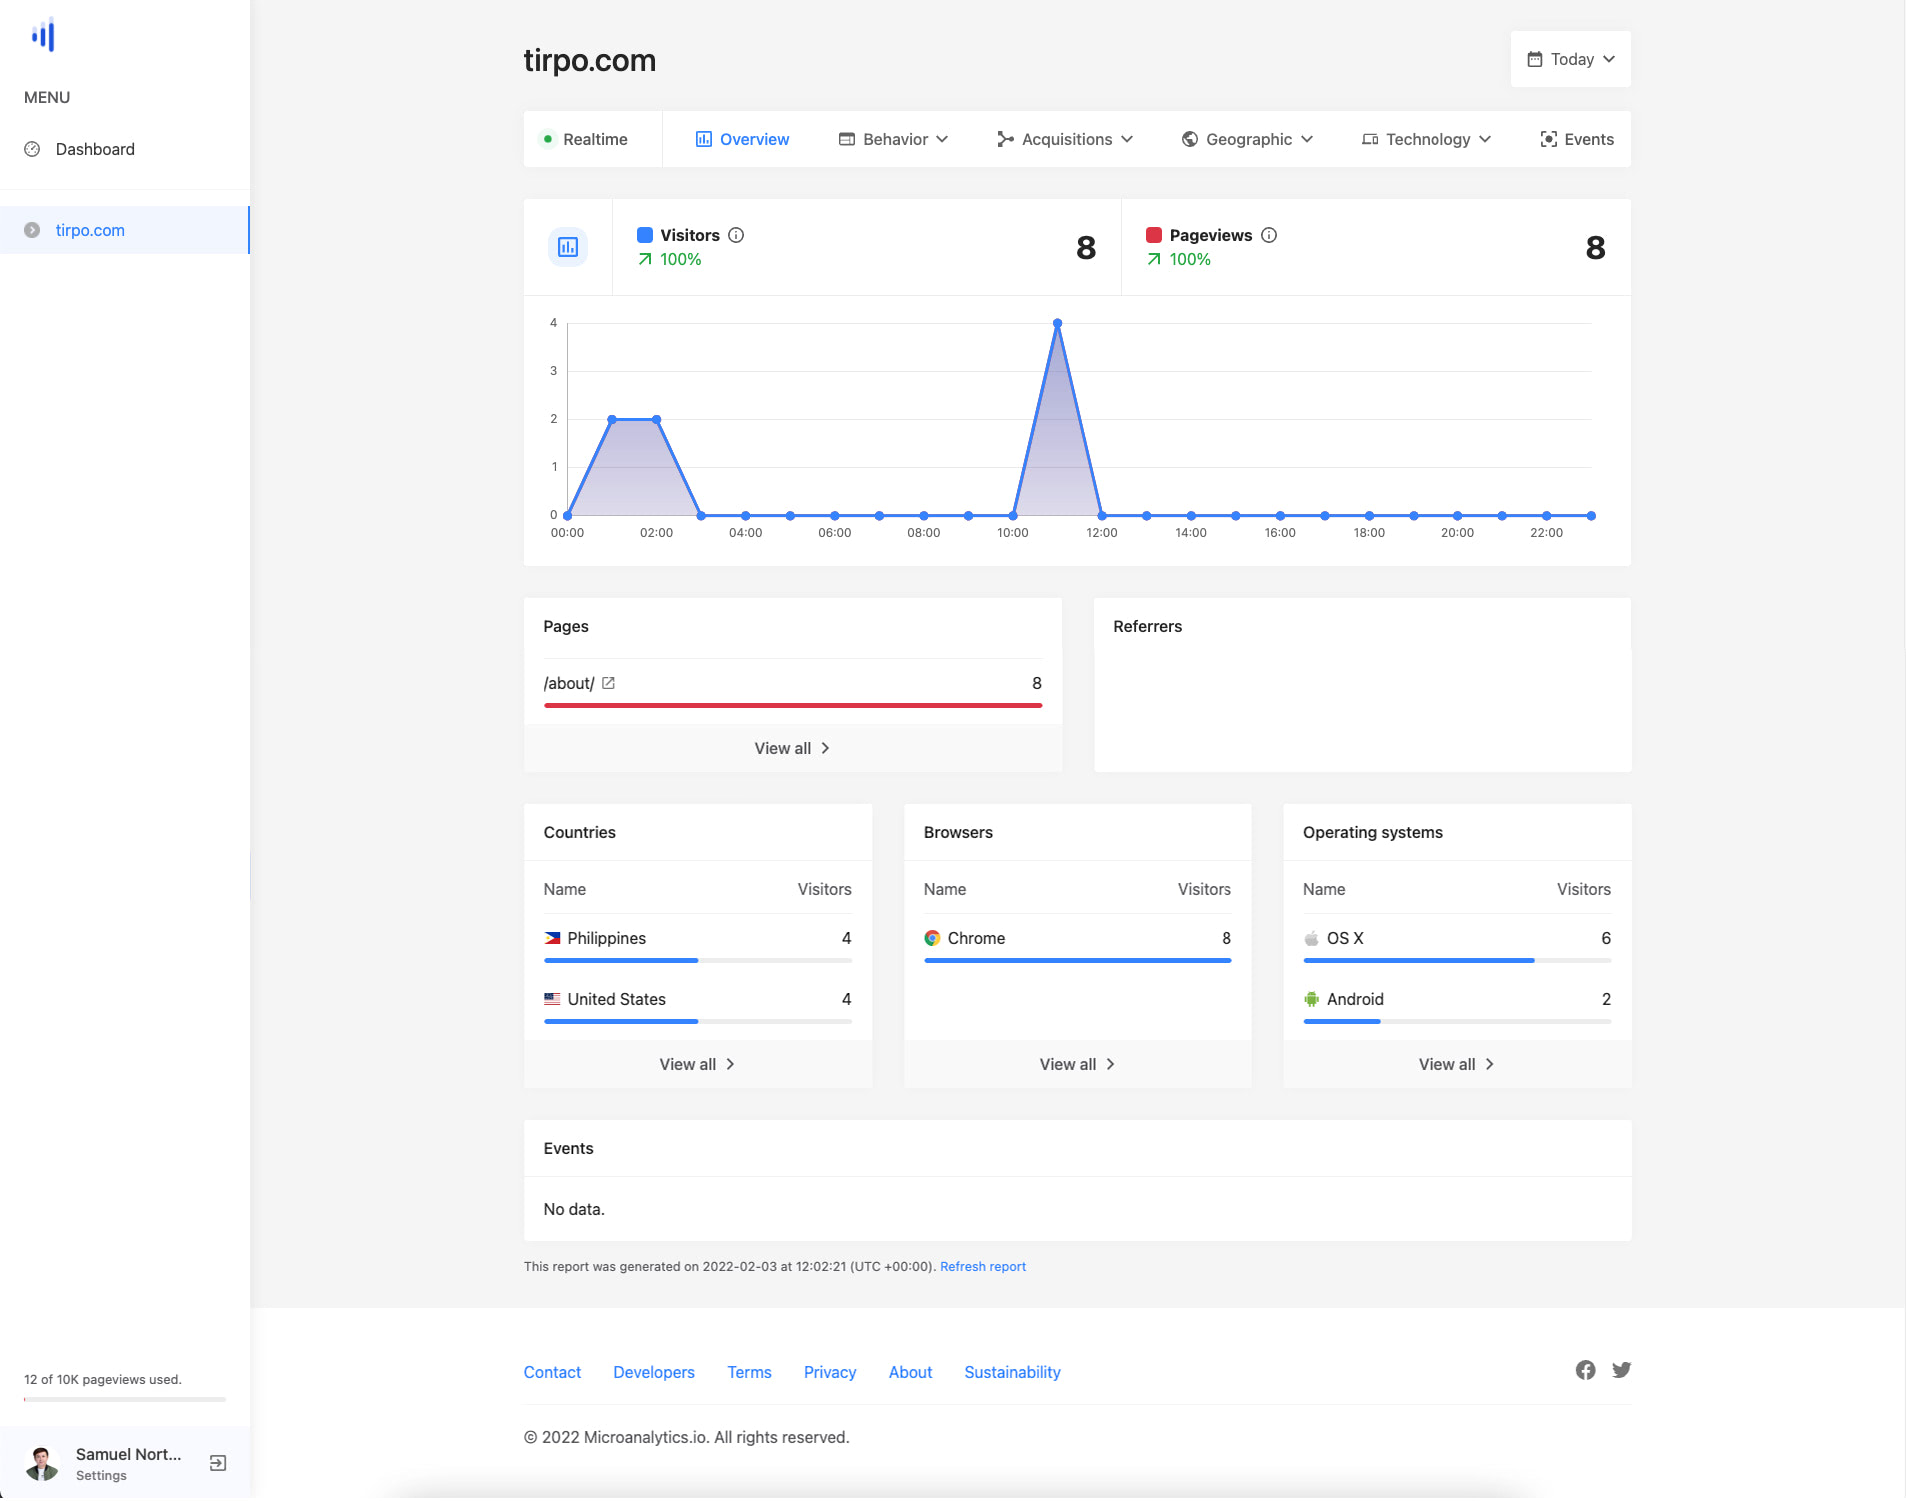
Traffic Overview
The overview tab provides detailed stats information with a dynamic chart that includes visitors’ numbers, page views, referrers, countries, browsers, operating systems, and events data in a period.
User Behavior Analysis
The behavior tab provides you with the popular and least popular pages or landing page stats information with their respective visit numbers. Under the “Behavior” tab’s dropdown, you can choose which stats information to show, either “Pages” or “Landing Pages” as seen in the image below.

Traffic Acquisition Sources
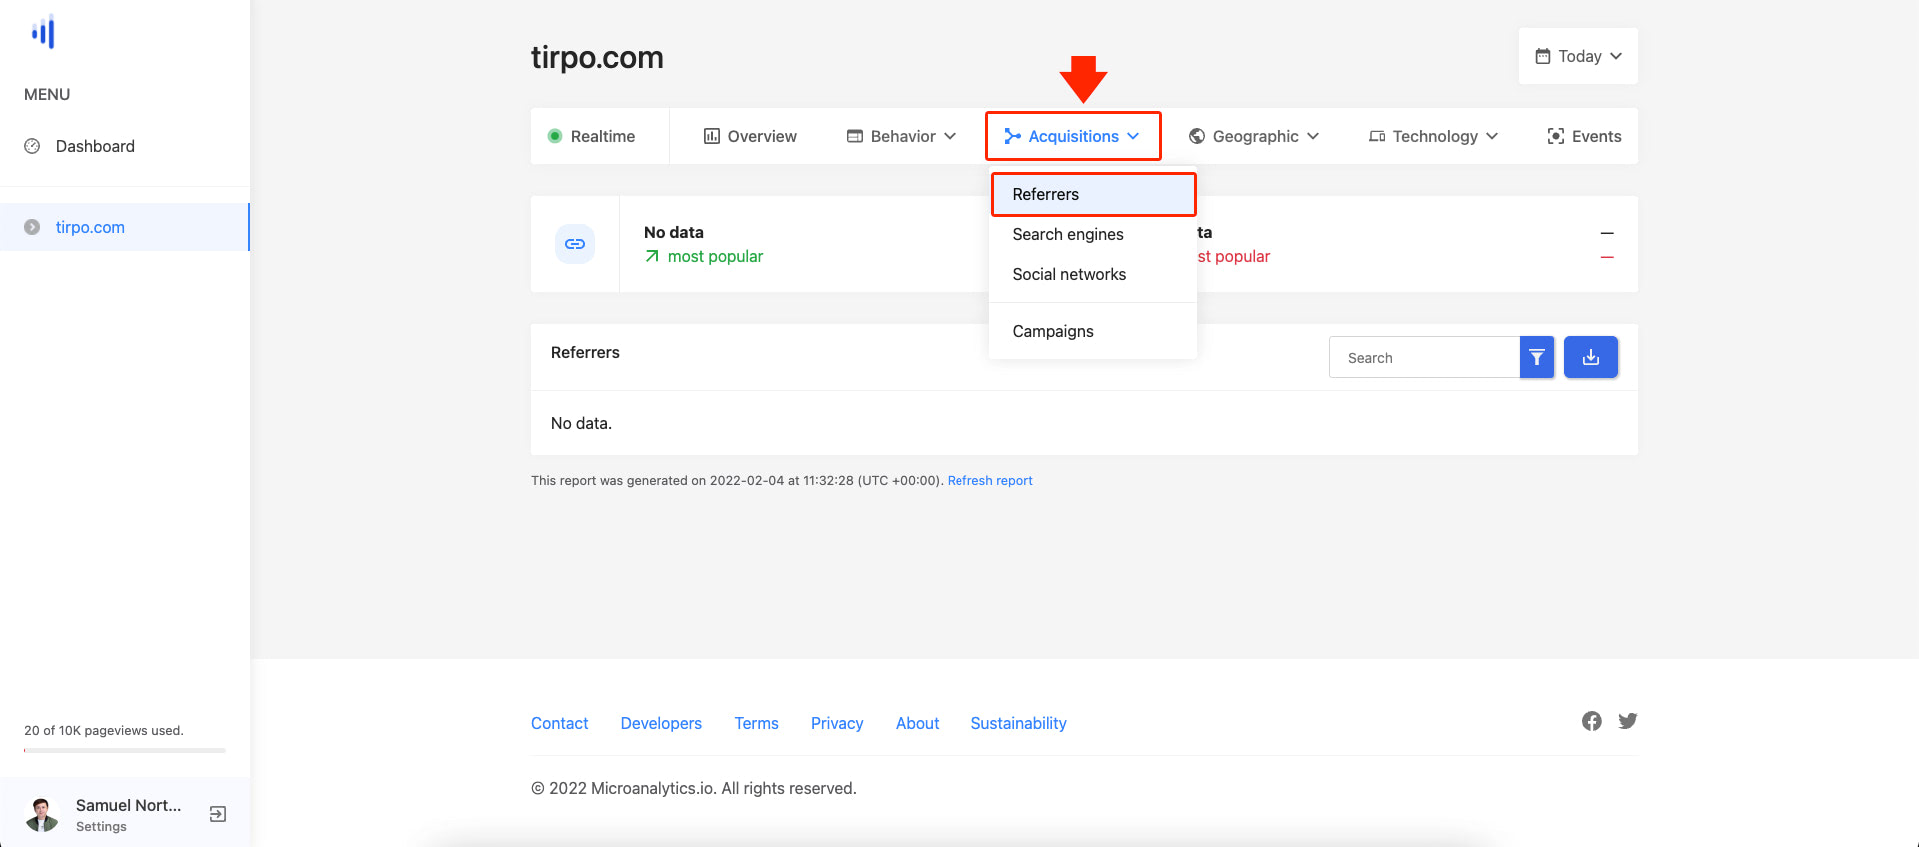
The acquisitions tab provides information on how users arrive at your website. These reports are used to determine the traffic source, such as if they come directly to your website or use a search engine or through external referrers, which can determine if your marketing campaigns are successful and attract visitors.
Under the “Acquisitions” tab’s dropdown, you can choose which stats information to show either “Referrers,” “Search engines,” “Social networks,” or “Campaigns,” as seen in the image below.
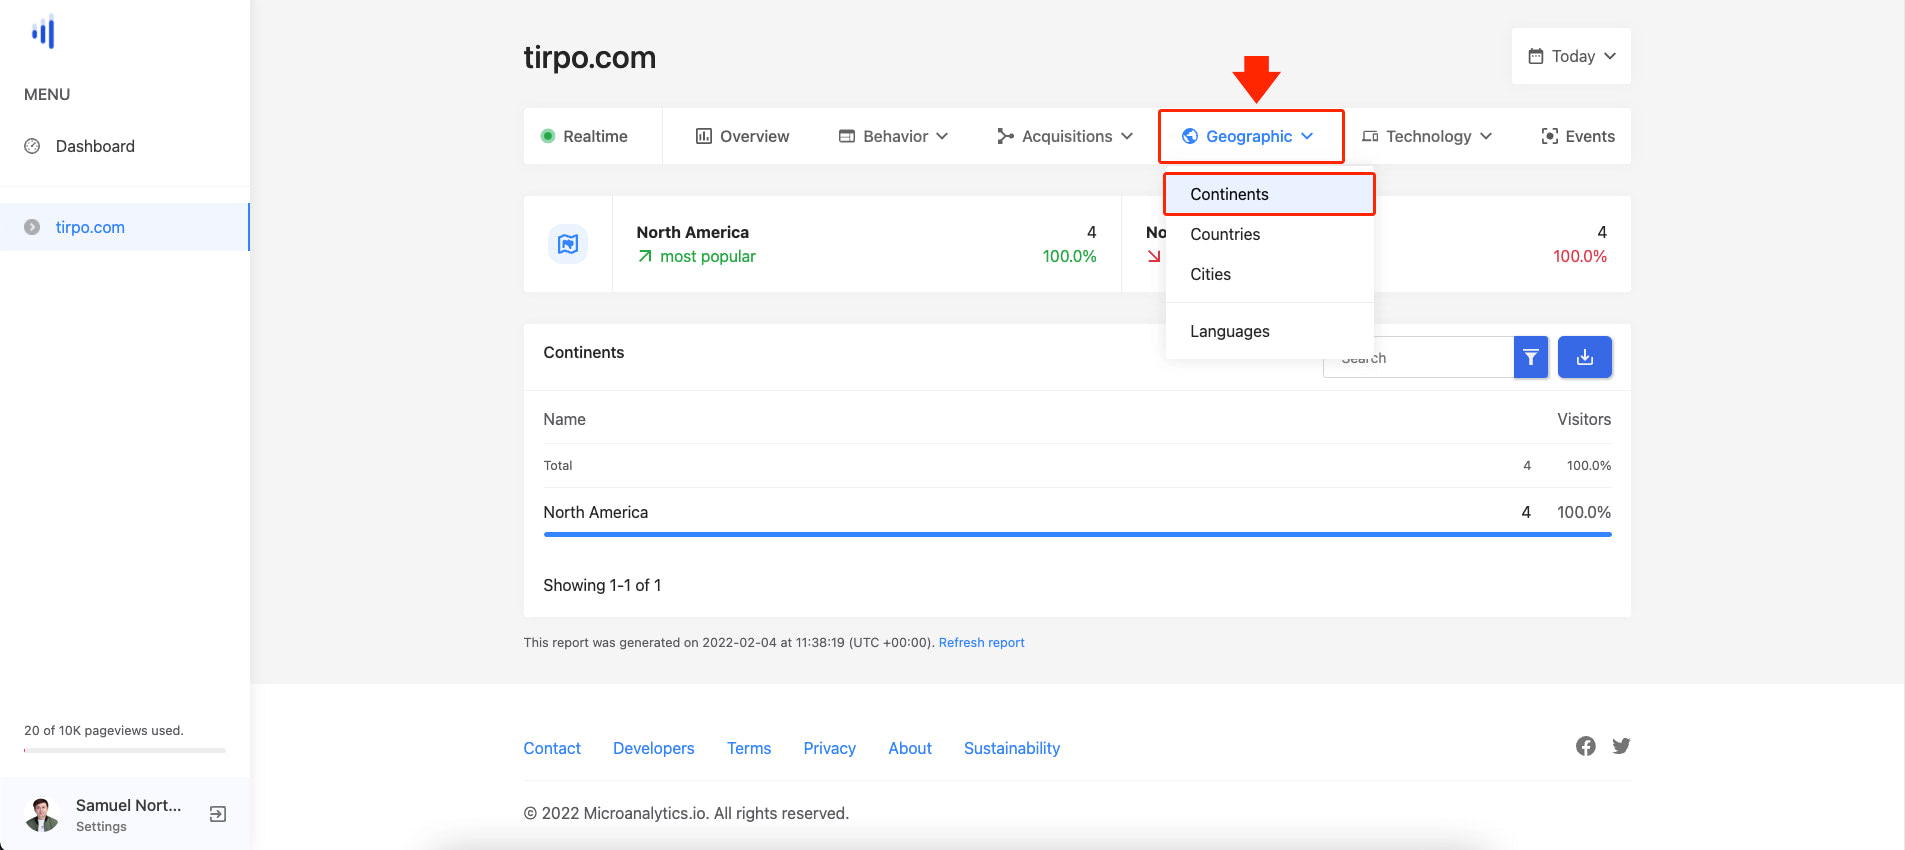
Geographic Data
The geographic tab provides you with visitors’ language and geographic location information, including visitors’ continents, cities, and country information.
Under the “Geographic” tab’s dropdown, you can choose which visitor’s geographic information to show either “Continents,” “Countries,” “Cities,” or “Languages,” as seen in the image below.
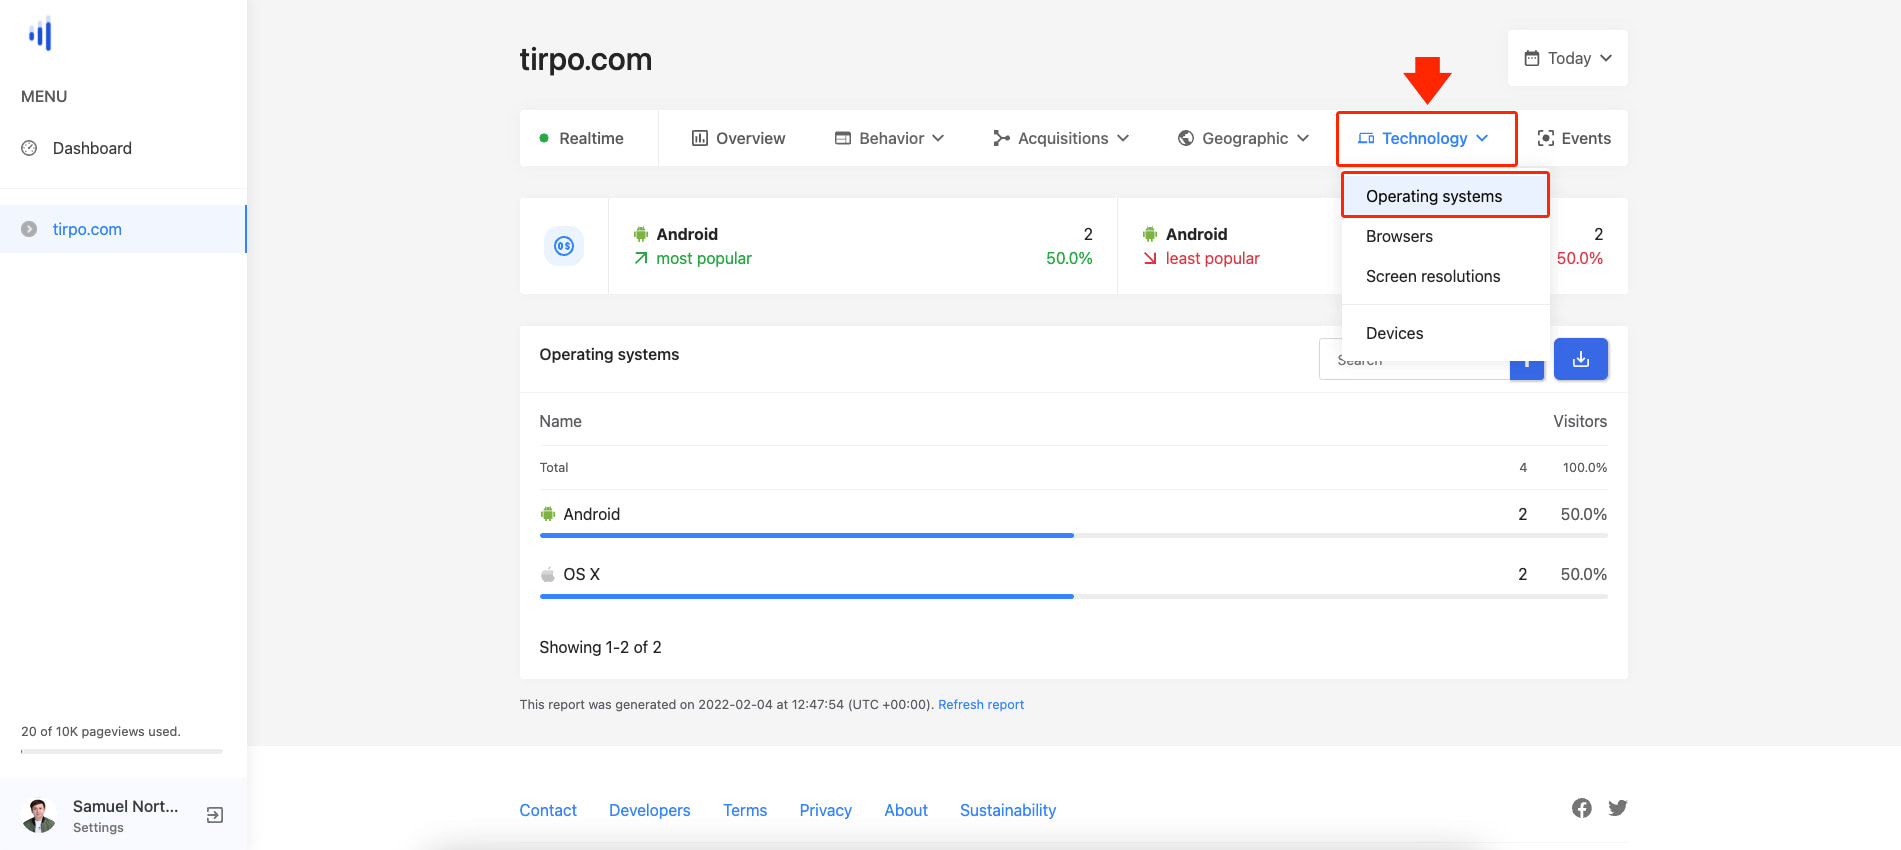
Visitor Technology Stats
The technology tab provides stats information related to how and which platform your visitors use when viewing your site. It analyzes the traffic by browser, operating system, screen resolution, and devices.
Under the “Technology” tab’s dropdown, you can choose which technology stats information to show either the “Operating Systems”, “Browsers,” “Screen resolutions,” or “Devices,” as seen in the image below.
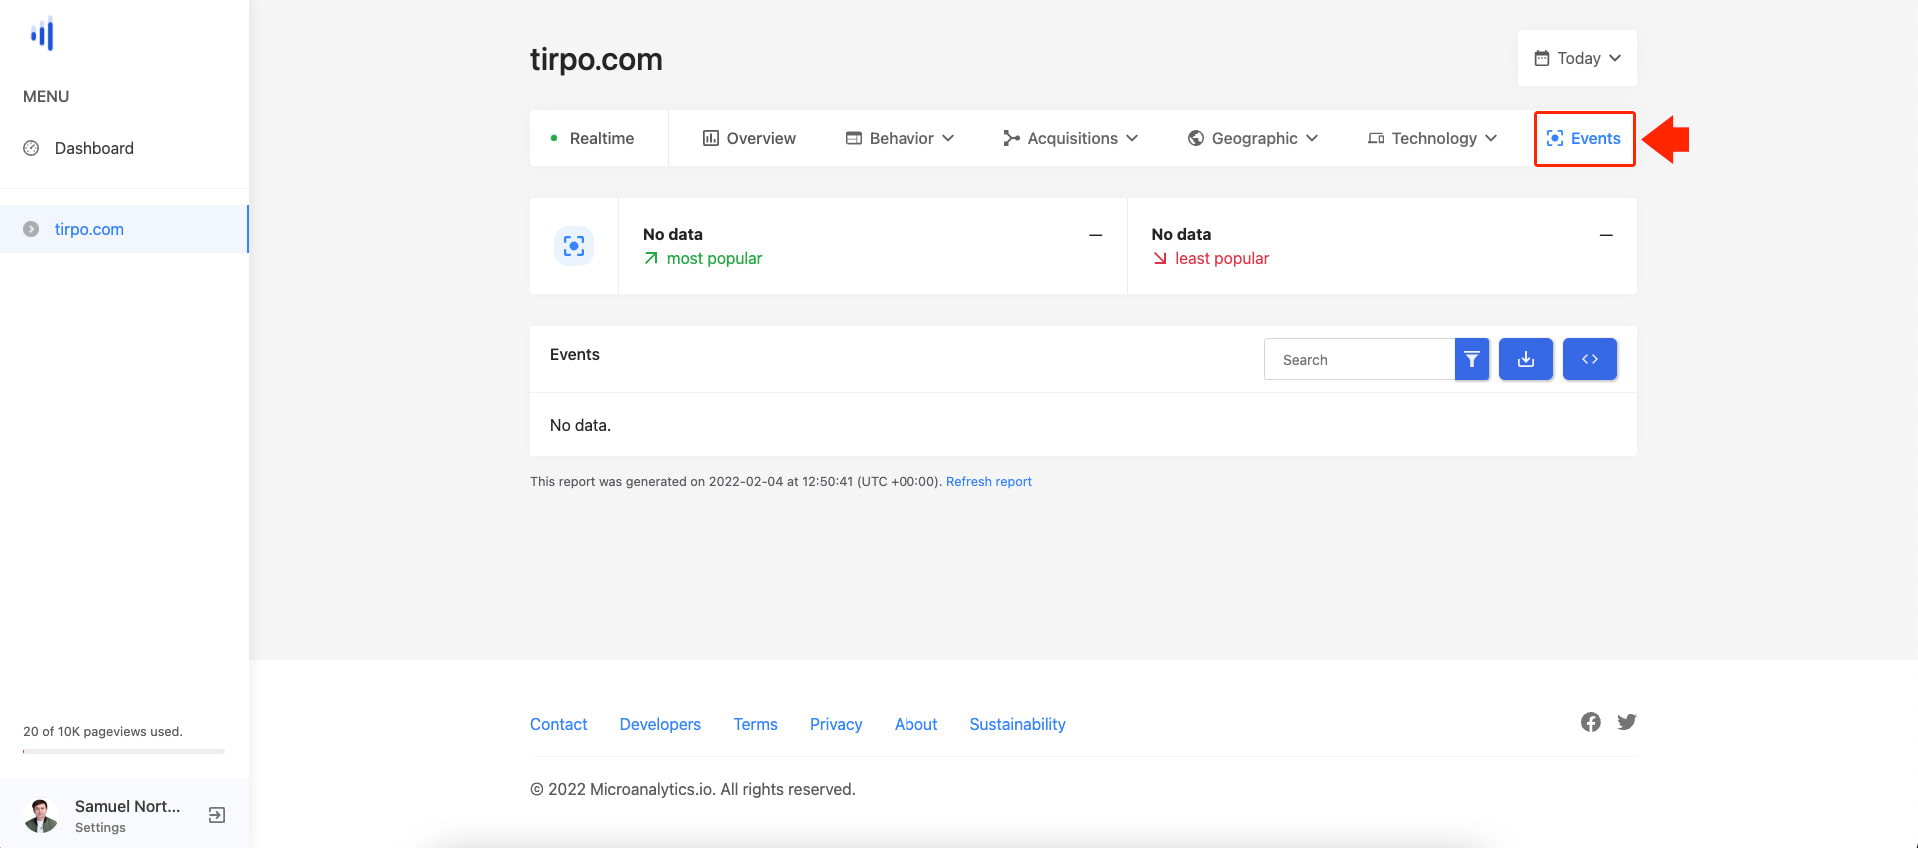
Event Tracking
The events tab provides stats information related to visitors’ interactions with your website, which cannot be tracked as page views within a session. Every activity visitors to your website’s pages have made considered an ‘event’ or ‘event hit.’
Filtering and Customizing Data
Suppose you wish to filter the information being presented within the detailed website stats page. In that case, you can do so by clicking on the dropdown menu icon with the calendar icon and “Today” text located on the upper right corner of the page.
You can choose either of the following periods and click on the “Apply” button:
- Today
- Yesterday
- Last 7 days
- This month
- All time
- Custom
Updating Website Information
If you wish to edit the information you’ve filled up when you’ve added your website on the Microanalytics dashboard, click on the three dots icon and click on the “Edit” link. This will redirect you to the edit page, where you can modify the information.
Once you are done editing the form, click on the “Save” button to update your website’s stats settings.
Use Cases and Examples: How Microanalytics Can Help Your Website
Microanalytics is a versatile analytics tool that caters to various types of websites. Below are some practical examples of how different businesses and site owners can benefit from its features.
1. E-Commerce Websites
- Use Case: An online store wants to track which products generate the most traffic and identify referral sources driving sales.
- Example:
- A clothing retailer uses the Acquisitions Tab to see that a large portion of traffic comes from Instagram ads. This insight allows them to allocate more budget to Instagram campaigns.
- The Behavior Tab helps the retailer identify which product pages have the highest bounce rates, prompting them to optimize these pages with better descriptions or photos.
2. Content Blogs
- Use Case: A food blogger wants to understand which articles attract the most readers and identify trends over time.
- Example:
- The Overview Tab reveals that dessert recipes are consistently the most popular content. The blogger uses this data to create more dessert-related posts, increasing traffic.
- The Geographic Tab shows a surge in visitors from France, leading the blogger to add translations and French recipes to appeal to this audience.
3. Portfolio Websites
- Use Case: A freelance designer wants to analyze how potential clients interact with their portfolio.
- Example:
- Using the Behavior Tab, the designer identifies which portfolio pieces are viewed most often and updates their homepage to feature these prominently.
- The Technology Tab shows that most visitors use mobile devices, prompting the designer to optimize the portfolio for smaller screens.
4. Local Businesses
- Use Case: A restaurant’s website aims to track traffic and visitor engagement with their online menu and booking page.
- Example:
- The Events Tab tracks clicks on the reservation button, showing which times of day visitors are most likely to book.
- The Geographic Tab identifies that many visitors are from nearby cities, helping the restaurant tailor its marketing to these locations.
5. Non-Profit Organizations
- Use Case: A non-profit wants to track donation page visits and user engagement with informational resources.
- Example:
- The Acquisitions Tab reveals that email campaigns generate the highest traffic to the donation page, encouraging the organization to send more targeted newsletters.
- The Real-Time Tab helps track spikes in traffic during fundraising events, allowing the organization to measure campaign effectiveness in real time.
6. Educational Websites
- Use Case: An online course platform wants to track student engagement and identify popular courses.
- Example:
- The Overview Tab shows a high number of repeat visitors to a specific course page, prompting the platform to offer additional resources for that topic.
- The Events Tab tracks quiz submissions and video plays, providing insights into how students interact with course content.
7. SaaS Platforms
- Use Case: A software-as-a-service provider wants to understand user behavior on their product features page.
- Example:
- The Technology Tab reveals that most visitors use Chrome on desktop devices, helping the company prioritize testing and optimization for that browser.
- The Acquisitions Tab shows that a significant portion of traffic comes from industry forums, prompting the team to increase engagement on those platforms.
Conclusion: Make Data Privacy a Priority
Microanalytics presents users with many different metrics and stats on a WordPress website, from visitors and pageviews to unique events that cannot be tracked within a session. Depending on what type of WordPress website you have, Microanalytics will defer its content and stats information. Microanalytics can help you understand all of this information and more.
In this guide, I walked you through how to install Microanalytics in WordPress in a handful of steps. Within the Microanalytics platform, we can uncover insights about our demo website visitors, which can help to improve the user experience, increase conversions, and learn more about our website’s audience.


For Blocksy pro users, there is no need to install the additional plugin Insert Headers and Footers.
Just activate the Code Snippets Extension and put the Analytics Snippet to Customizer > Extensions > Custom Code Snippet > Header Scripts 😉
https://creativethemes.com/blocksy/docs/extensions/custom-code-snippets/