Looking for a way to add a contact form to WordPress is among the very first customizations that people do on their brand new WordPress websites.
Why? The reasons are plenty, but chief among them is that WordPress doesn’t come with any built-in contact forms. 🤷♂️
Therefore, in this post, we’ll show you – step-by-step – how to add a contact form to your WordPress site without the need for coding.
Table of Contents
But first, let’s have a word on why contact forms are useful:
Why add a contact form to WordPress?
Okay, so since WordPress doesn’t offer any contact form functionality by default, some users resort to publishing their email addresses on their sites in plain sight.
Just one problem:
This exposes your contact information to scrapers and spammers. Ever wondered how your email made its way onto some b*coin newsletter that you didn’t opt into? This is how.
So how does a contact form make your life better in this regard?
We can consider three key benefits of using contact forms on WordPress:
Make communication easier
Once you have a functional contact form on your site, visitors can shoot you a quick message right after engaging with your content – without the need to head to their inbox. This encourages faster interactions between you and your audience/customers.
Ward off spammers
If you don’t want to add a contact form to WordPress, you basically have only three alternative options:
- (a) display your email address in plain sight,
- (b) use social media channels for communication,
- (c) eliminate visitor contacts entirely.
None are ideal. Scenario (b) is generally not reliable; (c) is probably not something you want to do since you’re reading this post; and (a) puts you in front of spammers and content scrapers, as we’ve already discussed.
Contact forms help you avoid spam emails and safely engage real people.
Control the flow of information
Unlike regular emails, you can request specific tidbits of information that you require your visitors to submit along with their message. Using a contact form helps you avoid irrelevant communications.
For instance, you can mark some fields as required (like a telephone number or a reason for communication). You can even force the person trying to connect with you to first tick the “terms agreement” box.
In the end, you save time and get straight to the point. 🎯
Now that we understand why adding a contact form to WordPress can be so useful, let’s go over the steps to how to actually do it:
How to Add Contact Form in WordPress
The method we’re presenting below works with every WordPress theme – and it works exceptionally well with Blocksy 😉.
1. Pick a contact form plugin
For convenience, we’ve selected WPForms to be our contact form plugin of choice, since it’s both beginner-friendly and simple. In addition, this plugin is SEO-friendly and supports integration with various third-party tools.
WPForms’ drag-and-drop feature makes it easy to create contact forms in a few clicks. It also has free and paid versions with multiple options for your business needs.
2. Install and activate the plugin
Head over to your WordPress dashboard and into Plugins → Add New. Enter “WPForms” into the search bar on the right to bring up the plugin.
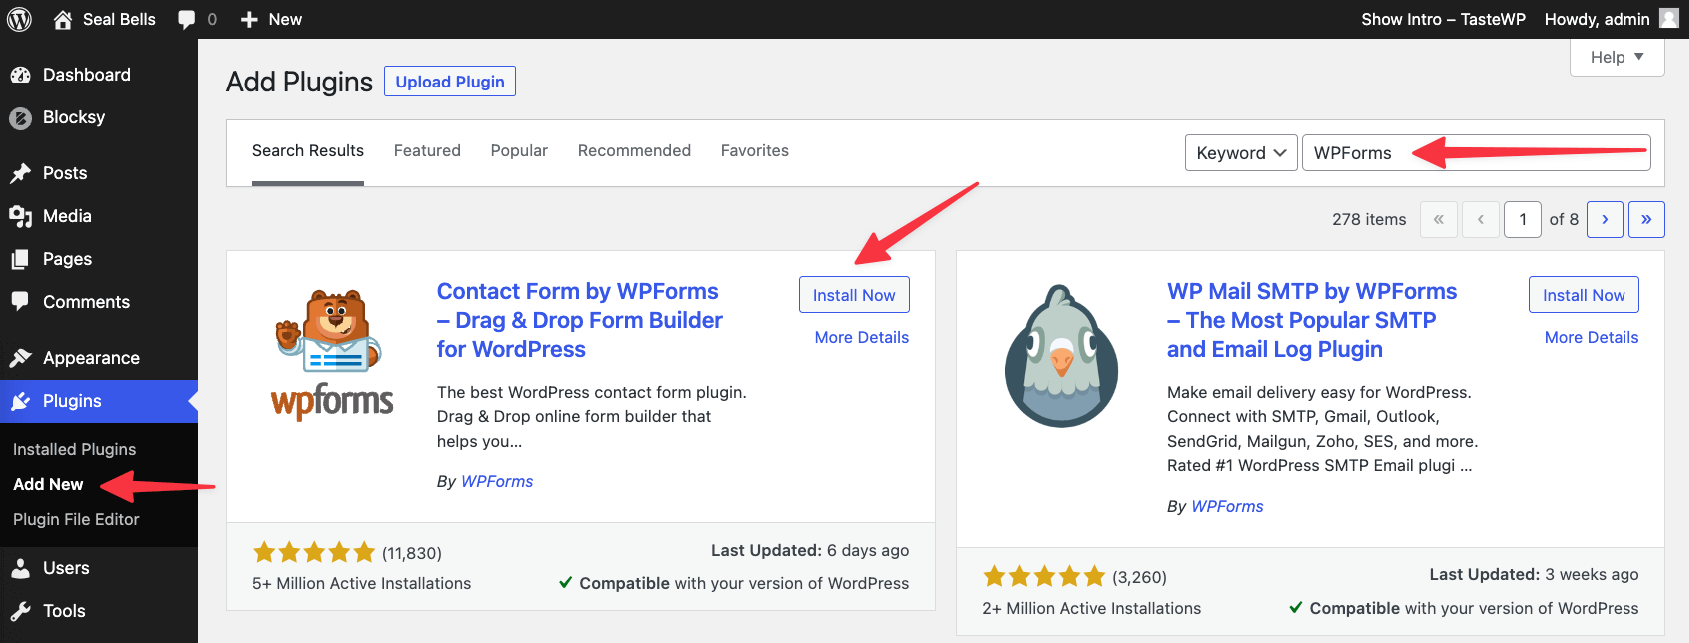
Once you find it, select the Install Now button to install WPForms and then activate it to complete the process (the Activate button will appear in place of the Install Now button).
💡 Note; if your site runs on Blocksy and you’ve imported one of our starter designs, then you most likely have WPForms already installed on the site. Blocksy fetches WPForms automatically when importing a starter design.
3. Create a new contact form
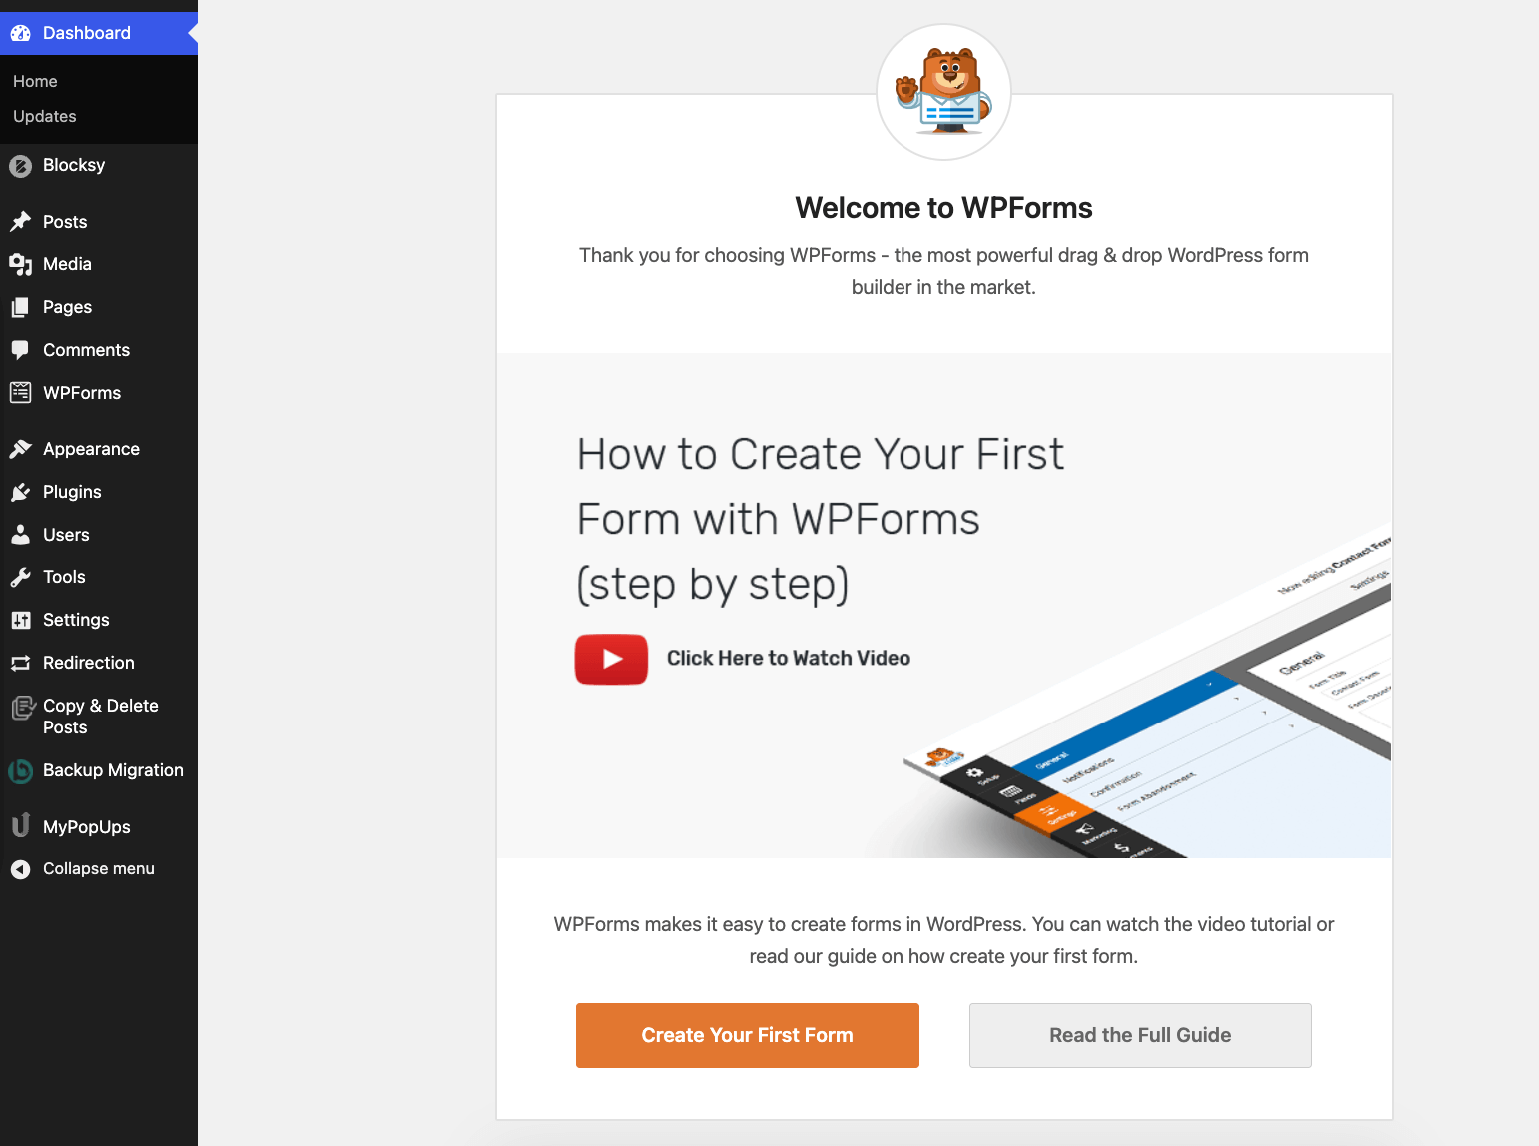
As soon as the installation is complete, WPForms will show you a quick-start wizard to fast-track your form creation.
If you can’t see any such wizard, check if the installation and activation process worked. For that, go back to the Plugins area of the WordPress dashboard and search for WPForms on your list of installed plugins:
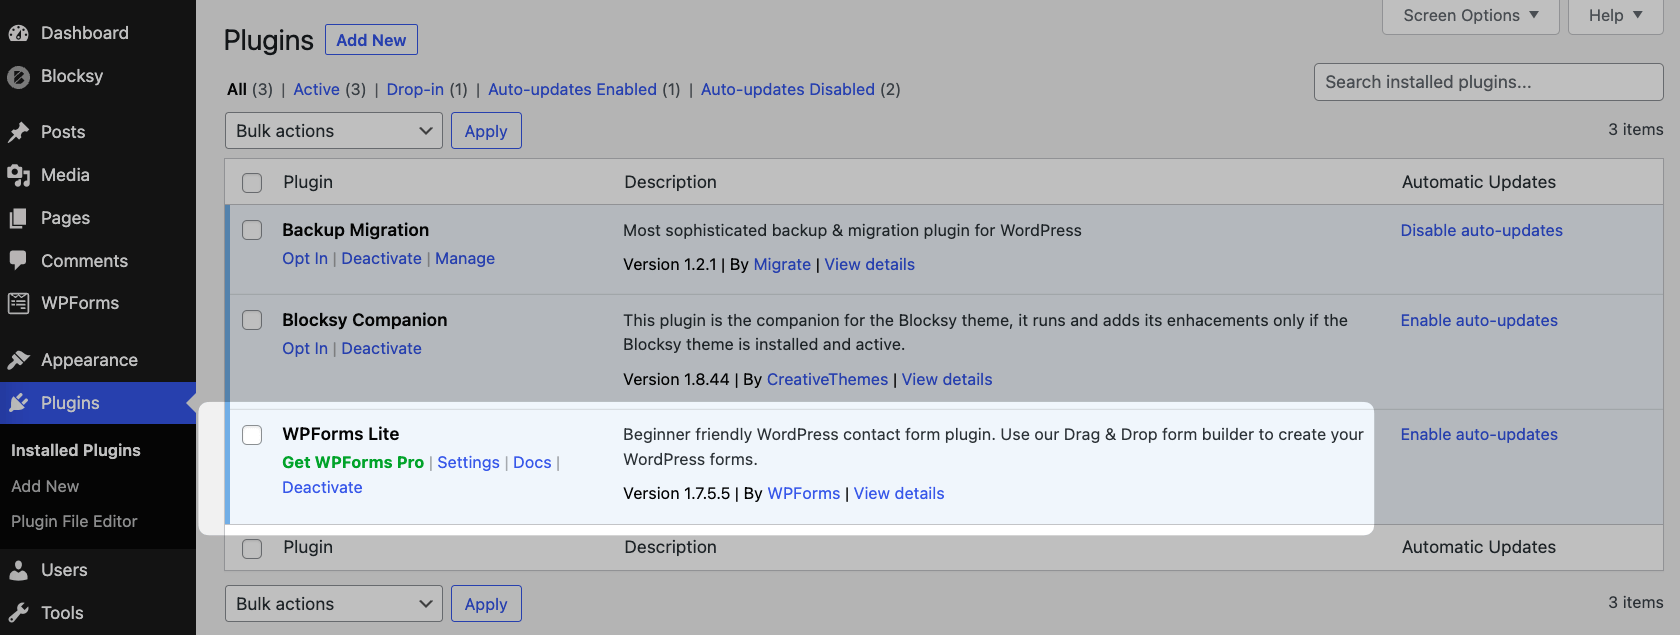
From here, you can also view more details, enable auto-updates, or deactivate WPForms. Clicking on the Get WPForms Pro button gives you access to more add-ons and custom settings.
Back to how to add a contact form to WordPress:
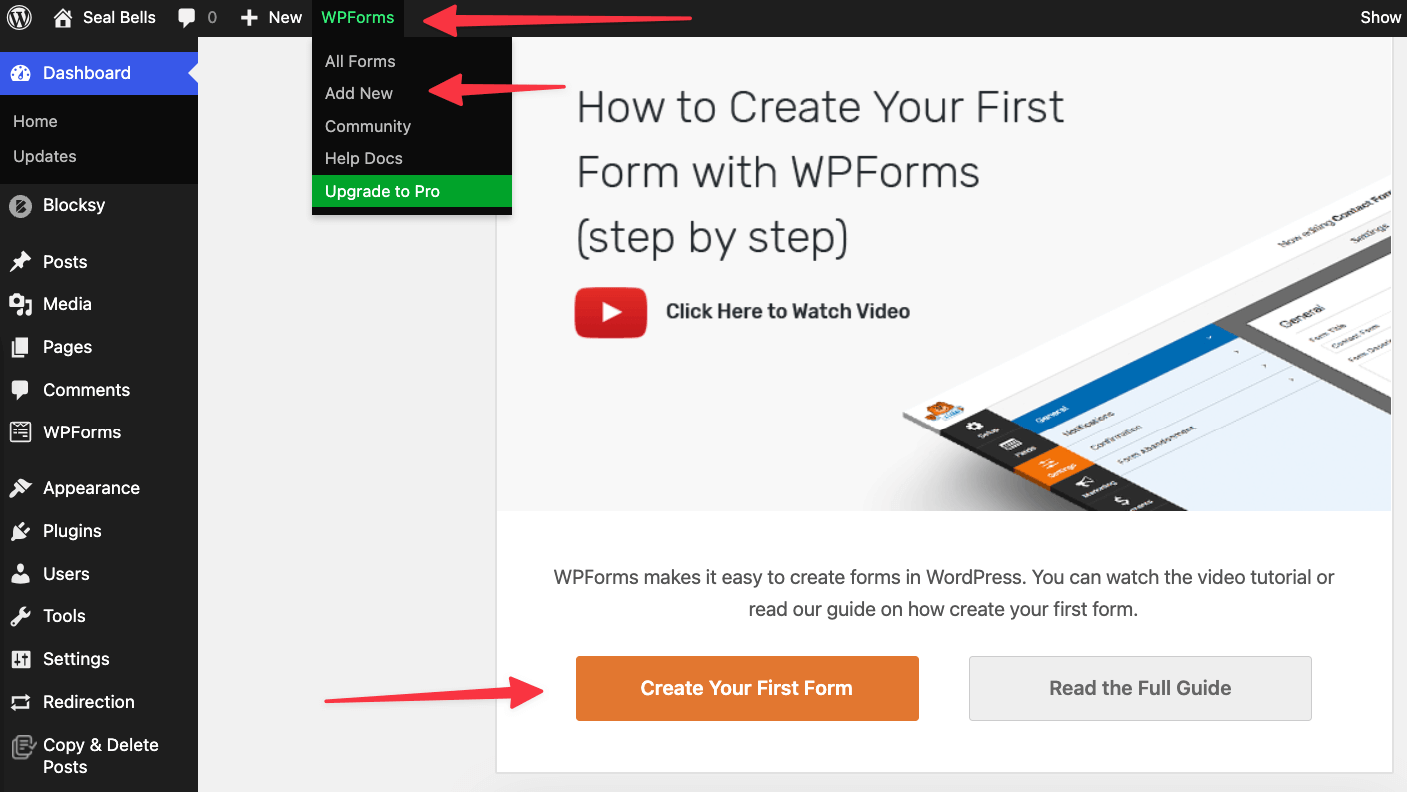
To begin, you can click the Create Your First Form button that’s shown by the wizard, or you can use a new button in the menu tray at the top or sidebar of your WordPress dashboard:
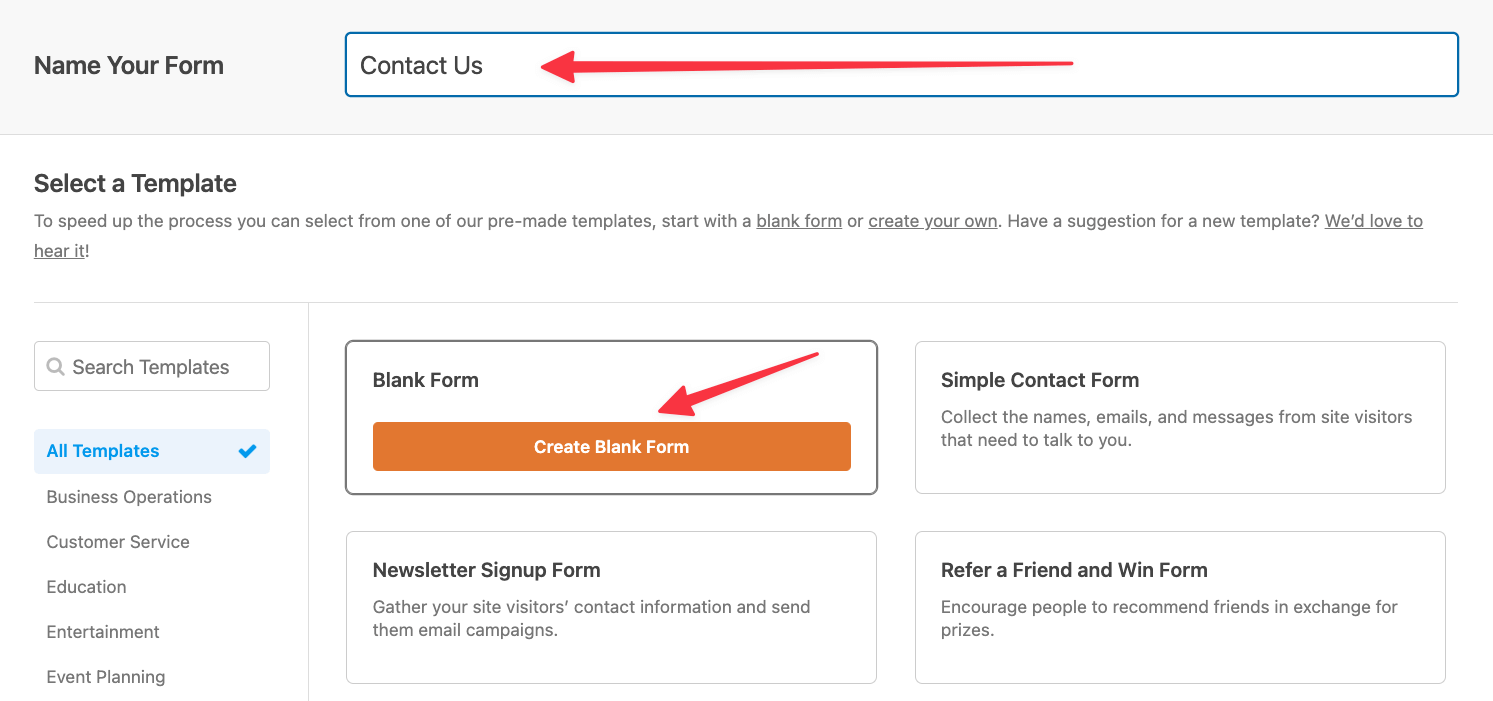
4. Name your WordPress contact form form
Clicking on either of the Add new [form] buttons sends you to the form setup page. From here, you have two options:
- Create a blank form.
- Use any of the pre-filled templates.
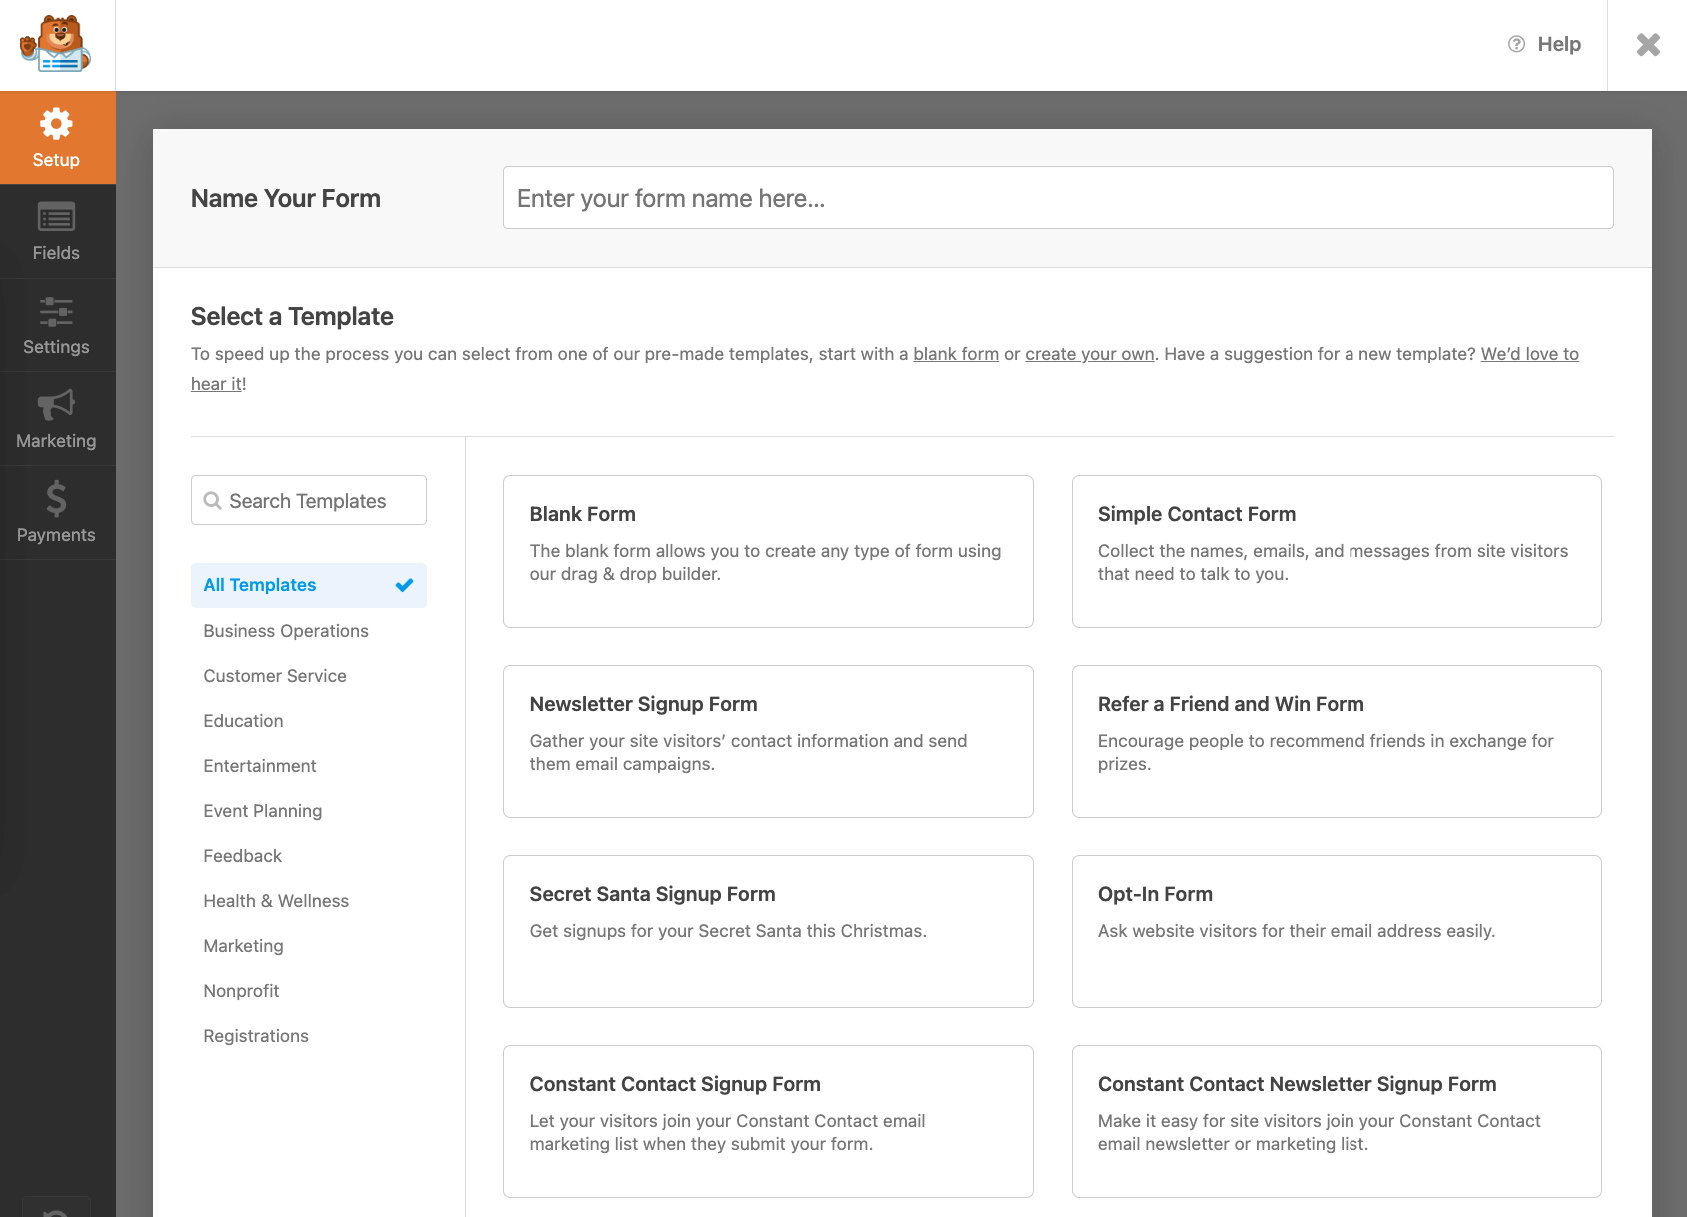
If you choose the blank form template, you can add the necessary fields with the drag-and-drop toolbar.
But first, let’s name our form. We’ll use “Contact Us” as our form title. We’ll also choose Blank Form for the purpose of this demonstration:
Getting fields added to the form is really straightforward. Just grab a field from the sidebar and drag it onto the canvas in the center:
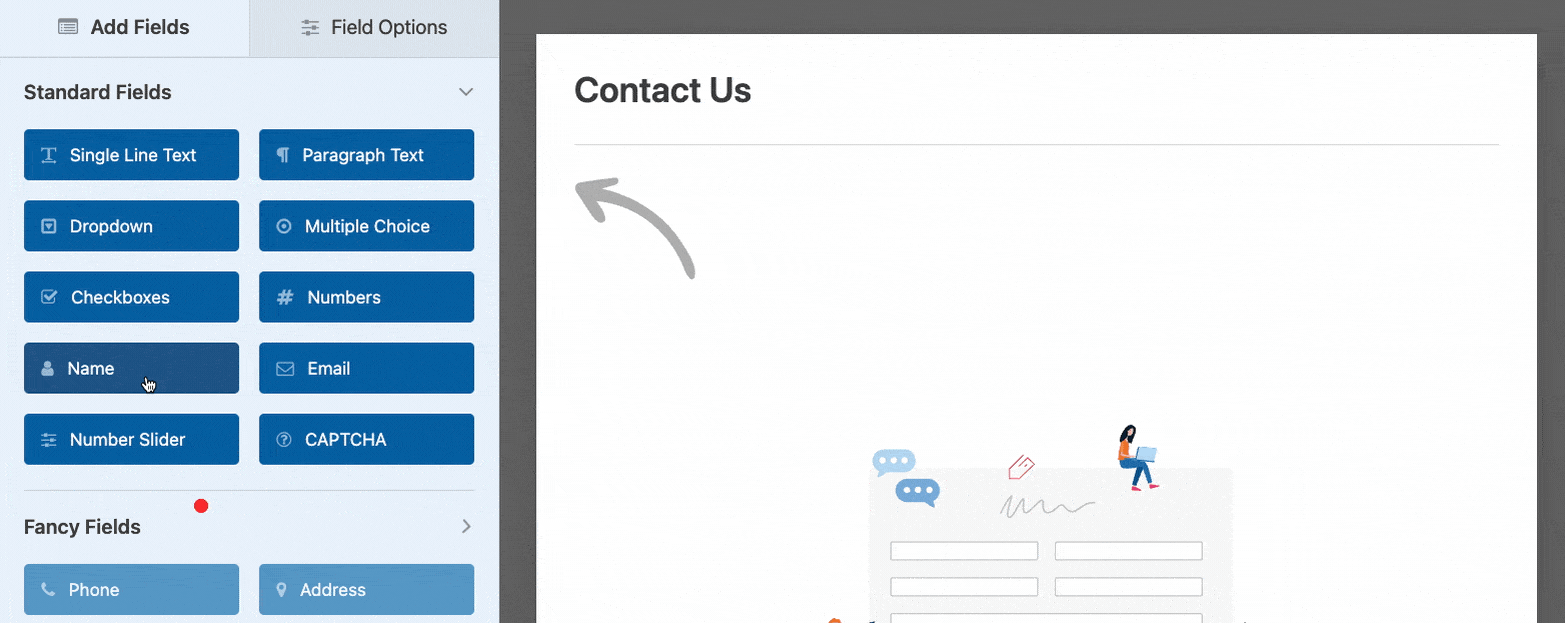
Just like that, one by one, you can add fields like name, email, message content, and whatever else you wish.
Here’s an example of a pre-filled template:

Most contact forms need basic fields like Name, Email, and the Paragraph Text – this one will contain the message your user wants to send.
There’s a lot of other fields we could have added – things like payment forms, phone numbers, drop-downs, checkboxes, and much more. To use any of those, just drag the field from the panel on the left and arrange it accordingly.
However, you can only access the Standard Fields feature in the free version. Updating to WPForms Pro allows you to access the Fancy Fields and Payment Fields.
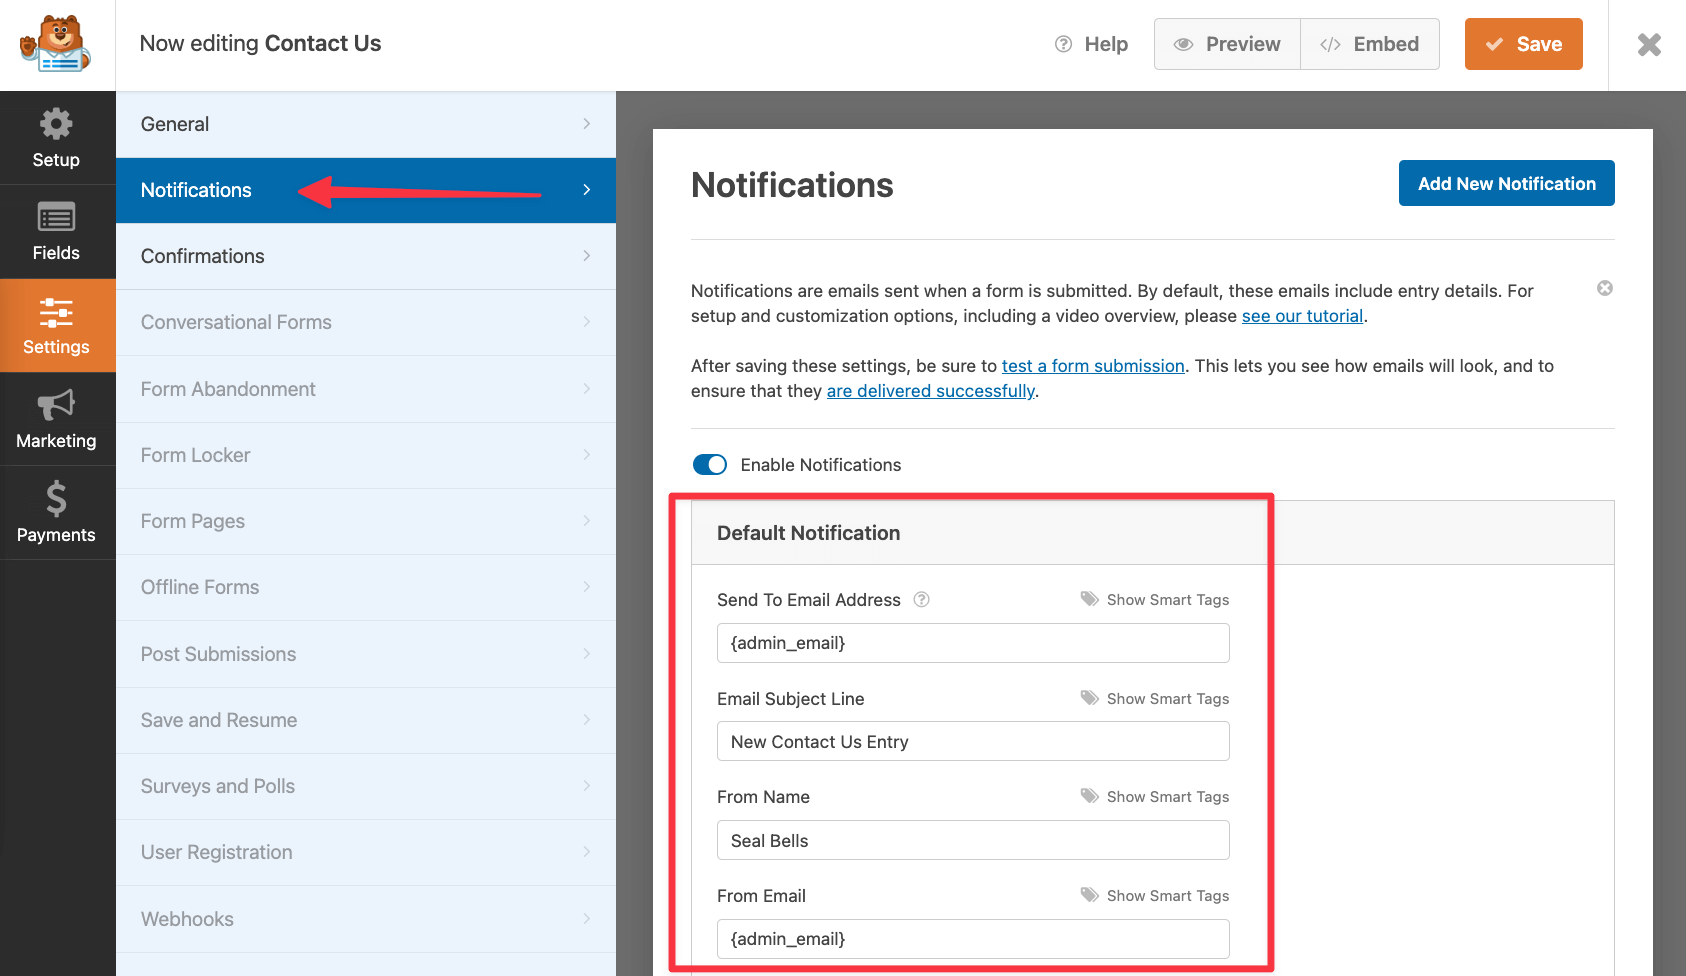
5. Customize your notifications and confirmations
Once you’ve named and added features to your form, you can save your progress and move to the next phase.
Move to Settings and select the Notifications tab to configure how and where you receive emails from your users. If you want to use a different email address, you can also change it at this point.
When you’ve configured the notifications, move to the Confirmations section to set up what your users will see after submitting the form.
Change it from the default “Thank you” message to anything you like.
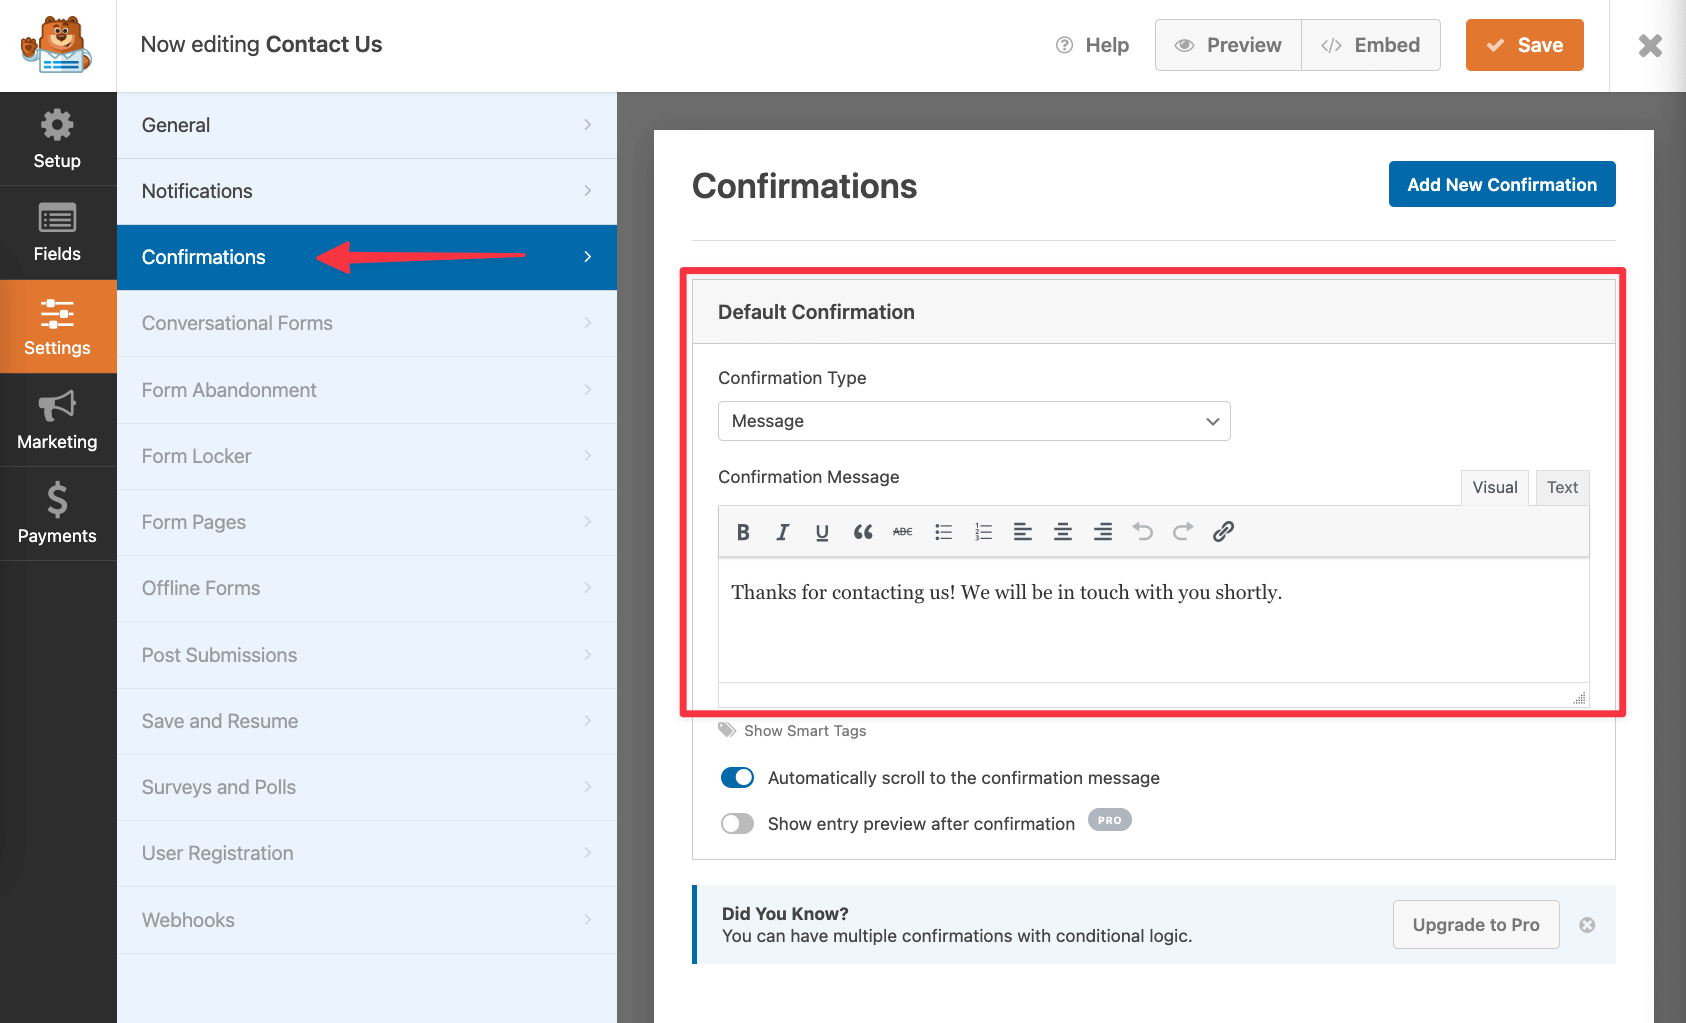
You can also redirect your users to another page or URL if you want them to land on a particular page or a different website. Click on the Confirmation Type drop-down menu and select either Show Page or Go to URL.
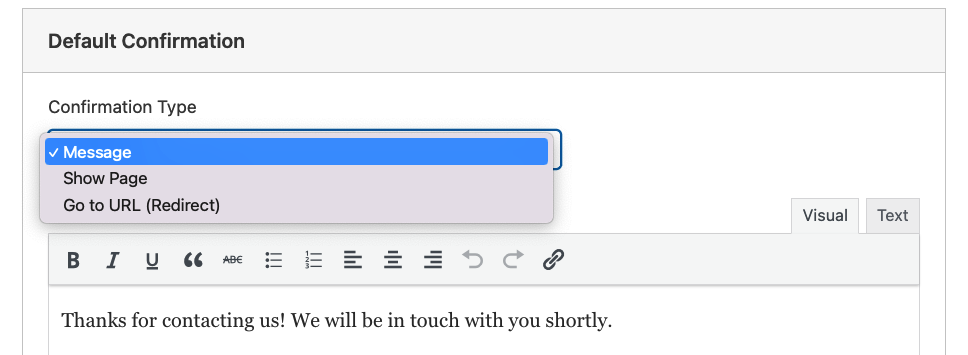
Just type the URL link in the field below and save it.
After making the necessary changes, you can save your contact form!
6. Add your form to a WordPress page
Once you’ve customized your contact form, it’s time to add it to a WordPress page.
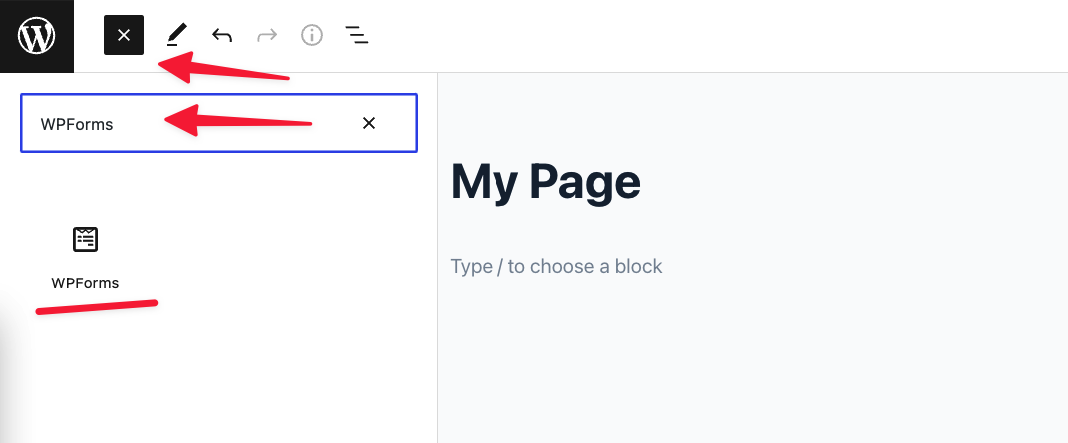
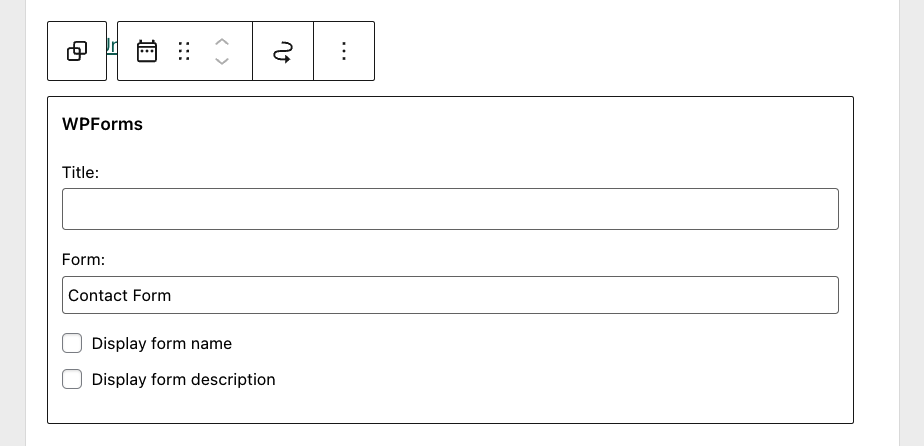
When editing a page, click on the “+” button in the top left and then look for a “WPForms” block on the list. Click on it to add it to your page.
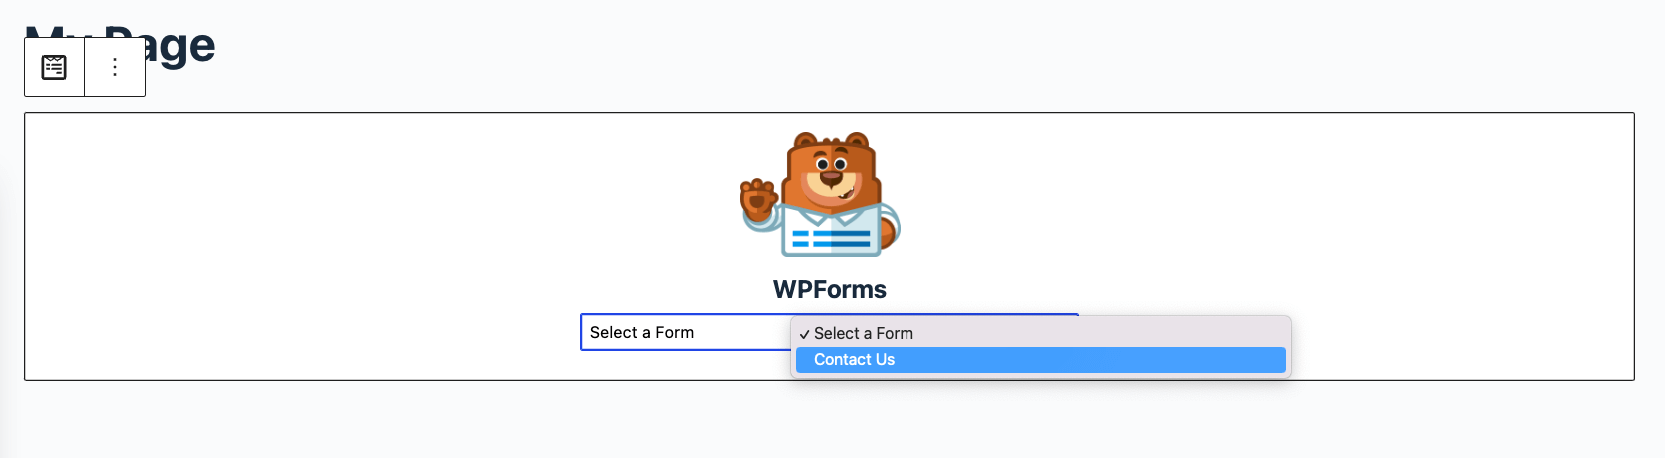
Select your contact form (Contact Us) and click Add Form.
Shortly after doing so, a live form is inserted into your text space.
Hit the Publish button and save your page.
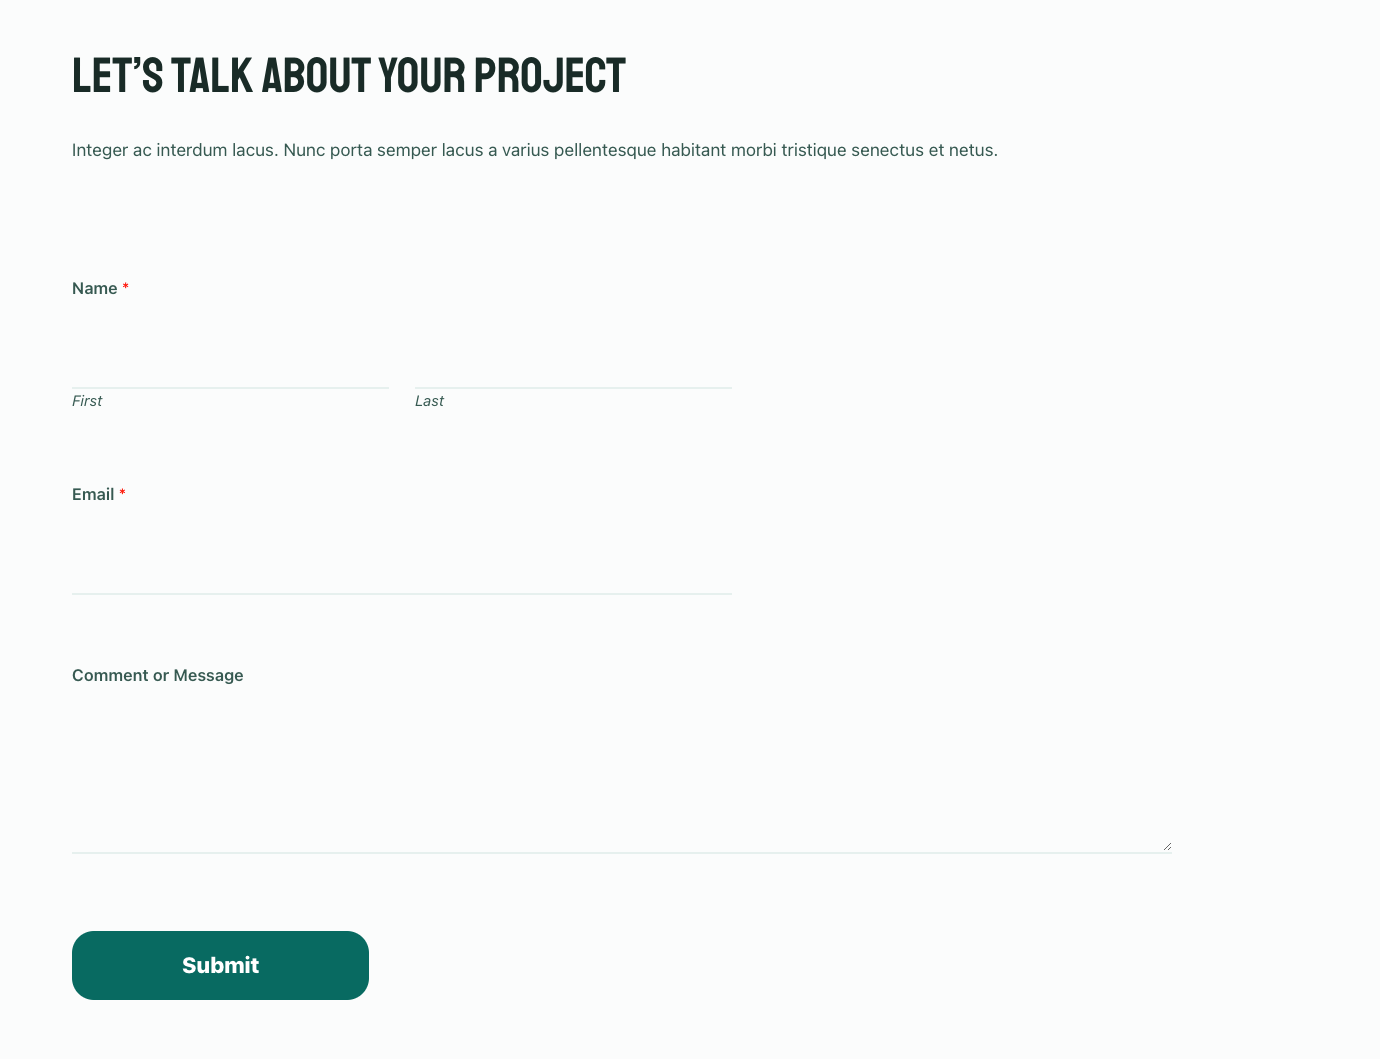
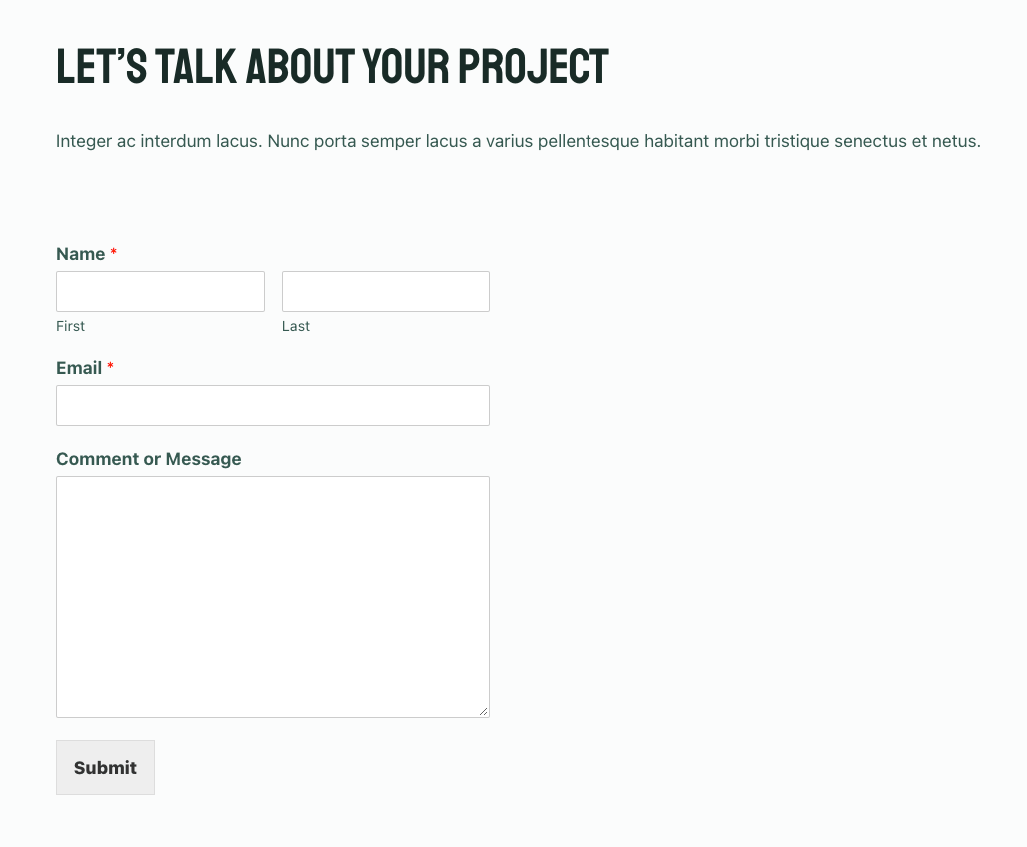
Once that’s done, you can open that page to view your new form in all its glory:
If you’re looking for some further customization, you can set whether you’d like the form to inherit the current theme’s styles or rely on it own styles. To adjust that, go into WPForms → Settings and into the Include Form Styles drop-down:
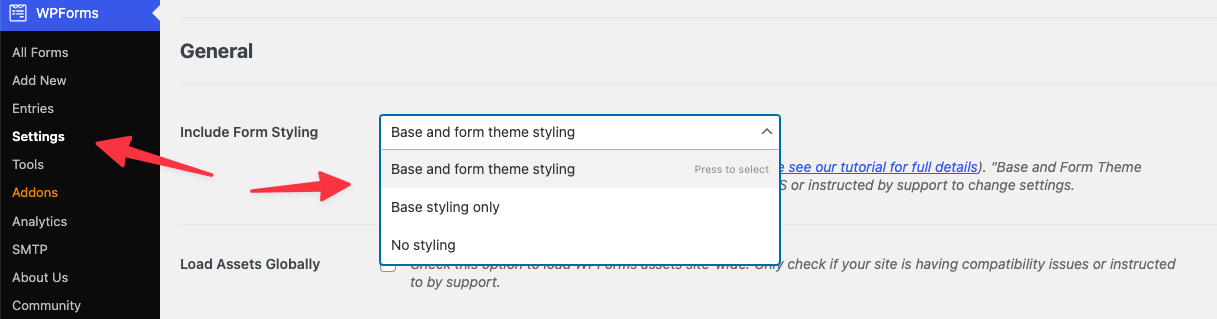
For example, if you select “Base and form theme styling,” you’ll see your form displayed like so:
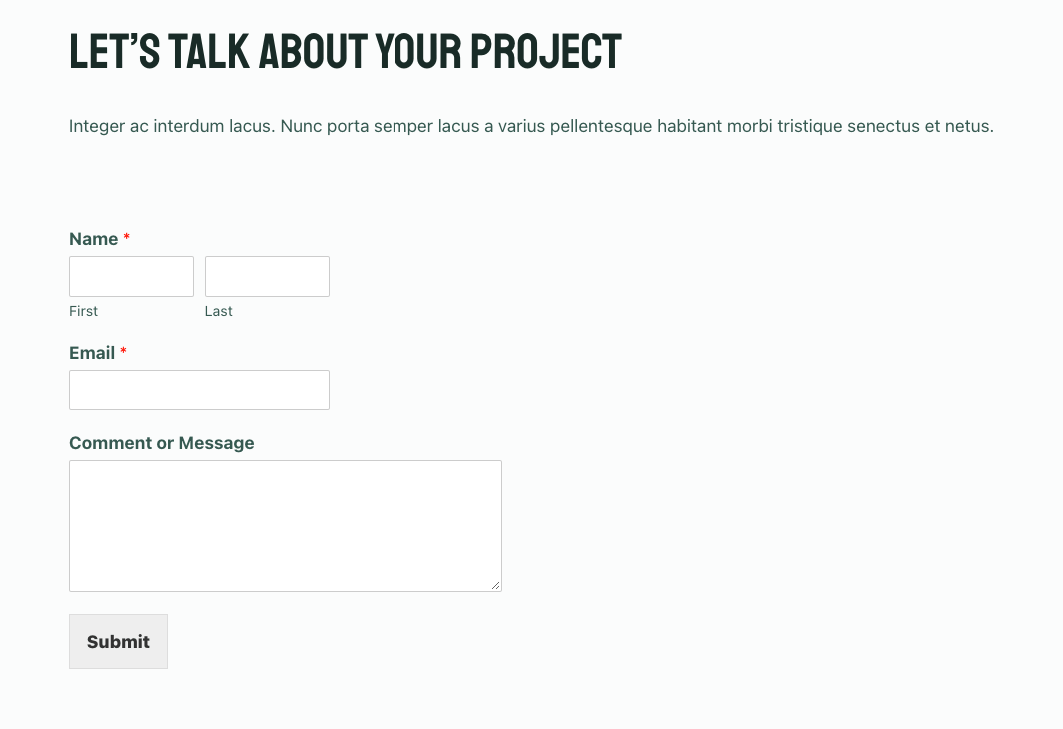
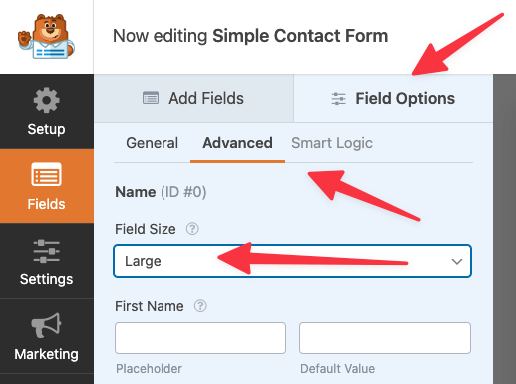
Further, if you don’t like that space next to the Name and Email fields, you can go into the form settings and tweak those fields to span across the whole available width. You can do that in the Fields tab of the form settings, in Field Options → Advanced. Just select the “Large” option to have the form fields stretch some more.
And here’s the effect:
7. Add a contact form to your sidebar (optional)
You can use WPForms to add a contact form to WordPress not only to your posts and pages but also to your sidebar (as a widget).
Go into Appearance → Widgets. Pick the sidebar you want to add the form to (if you have more than one sidebar), and click on the “+” button at the bottom of the sidebar.

Look for the “WPForms” block on the list. Once you’ve found it, choose your contact form from the drop-down menu. You can also set the title of the whole section.
Check the preview for any errors before selecting the Update button to save your changes.
You can view your contact form from the widgets section or in your sidebar when you visit your website.

8. Send a test email
The last order of business before we can call the whole operation a success is to test if our form is actually working. To do that, you can go back to your contact form page and try sending yourself a message.
Add your name, email, and a quick message before submitting the form. If all goes well, you should see a confirmation on the page itself and also an email containing the message in your inbox.

(By default, the email address that WPForms will send this message to is the same email address you have set as the admin email on your WordPress site.)
Read Next: How to Create a Transparent Header in WordPress
Choosing the Right Contact Form Plugin for WordPress
While WPForms is a top choice for its ease of use and robust features, several alternatives are available. Here’s a quick comparison of WPForms and other popular contact form plugins:
| Plugin | Ease of Use | Key Features | Pricing | Best For |
|---|---|---|---|---|
| WPForms | Drag-and-drop interface; very beginner-friendly | Pre-designed templates, conditional logic, file uploads, spam protection | Free version available; Pro starts at $49.50/year | Beginners, small businesses, advanced users needing integrations |
| Contact Form 7 | Minimal UI; requires shortcodes | Simple form creation, CAPTCHA support | Free | Developers comfortable with manual configurations |
| Ninja Forms | Drag-and-drop interface | Conditional logic, multi-step forms, email marketing integrations | Free; Premium starts at $49/year | Bloggers, marketers, small business owners |
| Formidable Forms | More advanced; steeper learning curve | Advanced calculation fields, form-to-post options, visual form builder | Free; Premium starts at $39.50/year | Developers and advanced users building complex forms |
Why WPForms Stands Out
- WPForms offers an intuitive drag-and-drop interface, making it accessible even for beginners. Pre-built templates allow you to create functional forms quickly.
- WPForms Pro includes conditional logic, spam protection, payment integration, and multi-page forms, catering to both simple and complex needs.
- Whether you’re creating basic contact forms, surveys, or payment forms, WPForms scales to fit a wide range of requirements.
- WPForms integrates seamlessly with popular email marketing platforms (e.g., Mailchimp, Constant Contact) and tools like Google Analytics.
- With an active development team and dedicated support, WPForms ensures reliability and continuous improvement.
You’ve just learned how to add a contact form to WordPress
At this stage, we’ve gone over all the steps to add a contact form to WordPress. With a contact form, you can finally forget about dealing with email spam resulting from sharing your email address openly on the site.
Most importantly of all, we did all that without touching a line of code! How to track website visitors with Google Analytics 4 in WordPress and track your contact form – read in our new article. Set up Facebook Pixel in your WordPress site as an alternative.
If you have any questions about the process as we’ve shown it here, feel free to ask them in the comments section below.