The Product Waitlist module, part of the Shop Extra extension, is a valuable addition to your toolkit. It allows visitors to subscribe via email for stock notifications, ensuring they are promptly informed when a product becomes available again.
The module supports both registered and unregistered users. Logged-in users are automatically added to the waitlist, while logged-out users receive an email to confirm their subscription. Both groups will automatically receive notifications as soon as the product is back in stock.
Activate the Product Waitlist Module
- Navigate to your WordPress dashboard.
- In the left-hand menu, select Blocksy.
- Click on the Extensions tab.
- Locate the Shop Extra extension.
- Scroll down to find the Waitlist module.
- Toggle the switch to activate the module.
Granular Controls

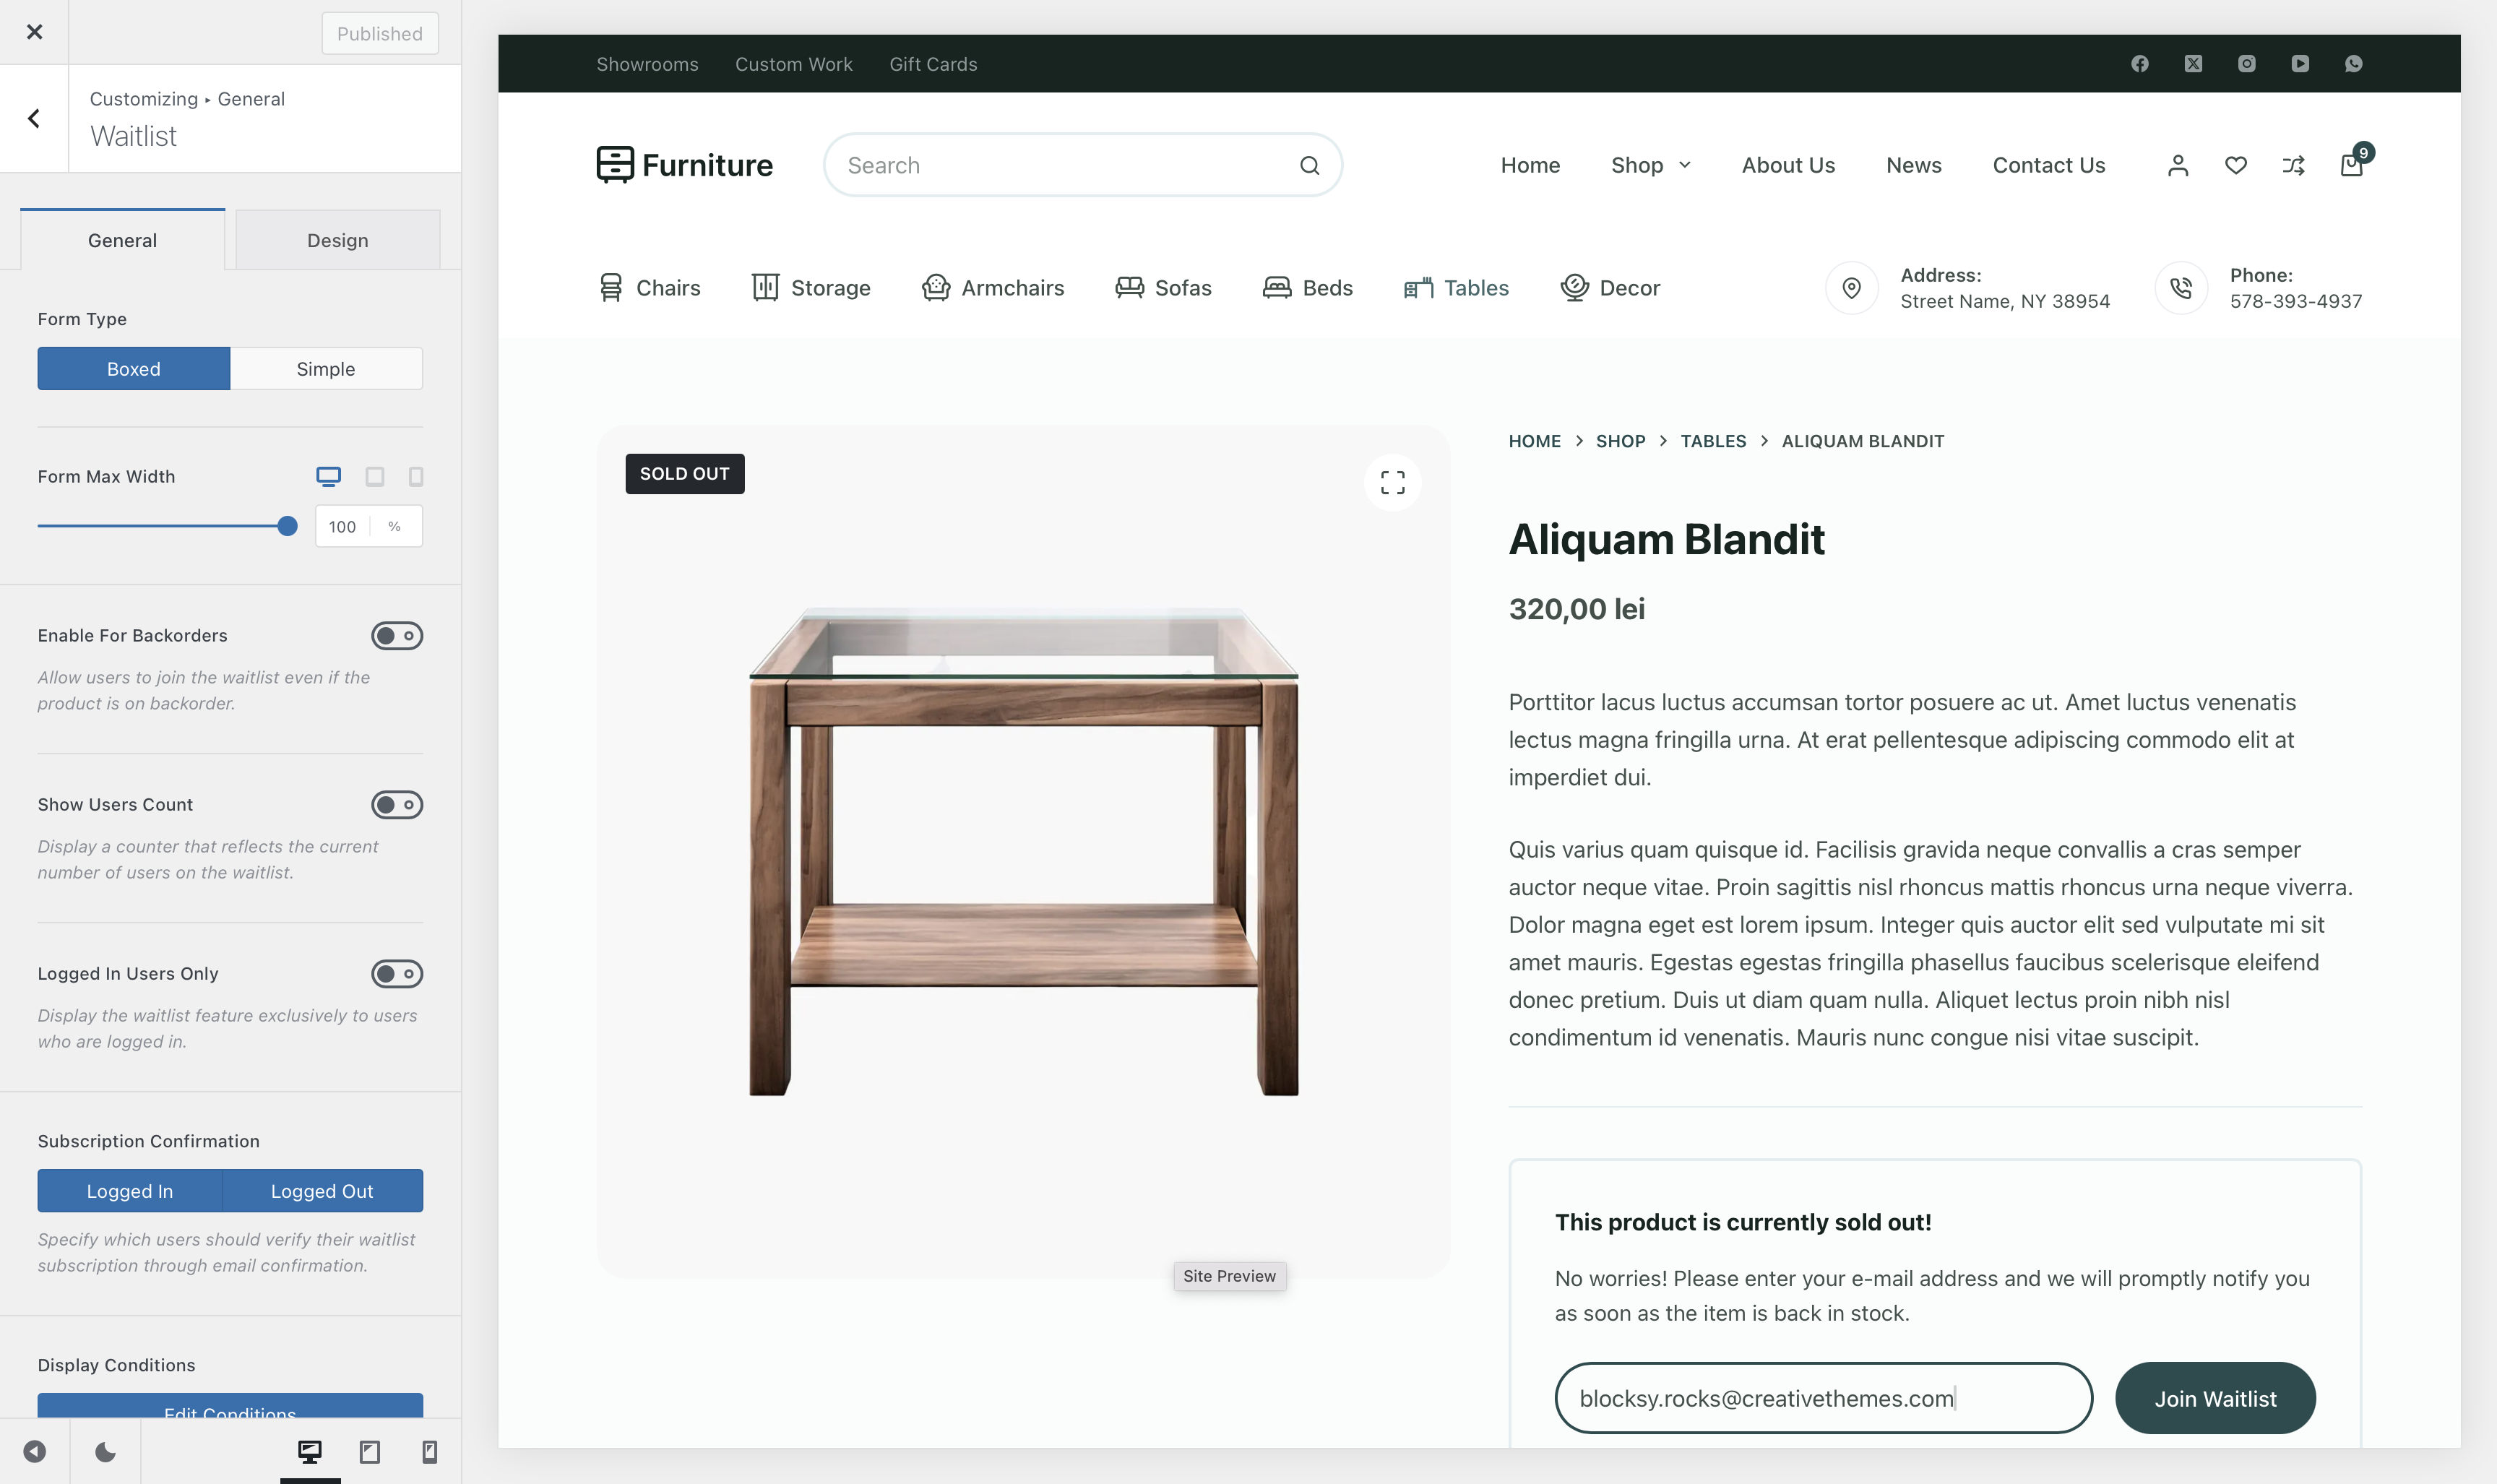
The Waitlist module is easy to configure directly from the WordPress Customizer. To access its settings, navigate to Customiser → WooCommerce → General → Waitlist.

Form Type & Width
This setting allows you to select the design style for the Waitlist signup form. Boxed provides a bordered design, while Simple displays a more minimalist, borderless layout.
You can also adjust the form’s width from this section.
Enable for Backorders
This option allows you to activate the Waitlist module for products that are currently on backorder. By enabling this, users can join the waitlist and will be notified as soon as the product is fully back in stock.
Show Users Count
Enable this option to display a counter that shows how many users have already signed up for the product’s waitlist, creating a sense of demand and urgency.
Logged In Users Only
This option lets you restrict the Waitlist signup form to only registered and logged-in users, offering a more personalised experience.
Subscription Confirmation
This setting lets you decide which users will receive a subscription email when they join the waitlist. You can choose to send the confirmation email to both registered users and guests, or automatically confirm their subscription without requiring any additional steps.
Display Conditions
This option allows you to control where the Waitlist module appears, using display conditions. For instance, you can set it to show only for products within specific categories or under certain conditions, giving you flexibility in how and where the waitlist is displayed.
Displaying the Form
To display the Product Waitlist form on the single product page, navigate to Customiser → Single Product → Product Elements. From there, you can enable the form and adjust its position on the page, allowing you to place it exactly where you want.
Managing Waitlists
Both customers and site administrators have full control over managing product waitlists.
Customers

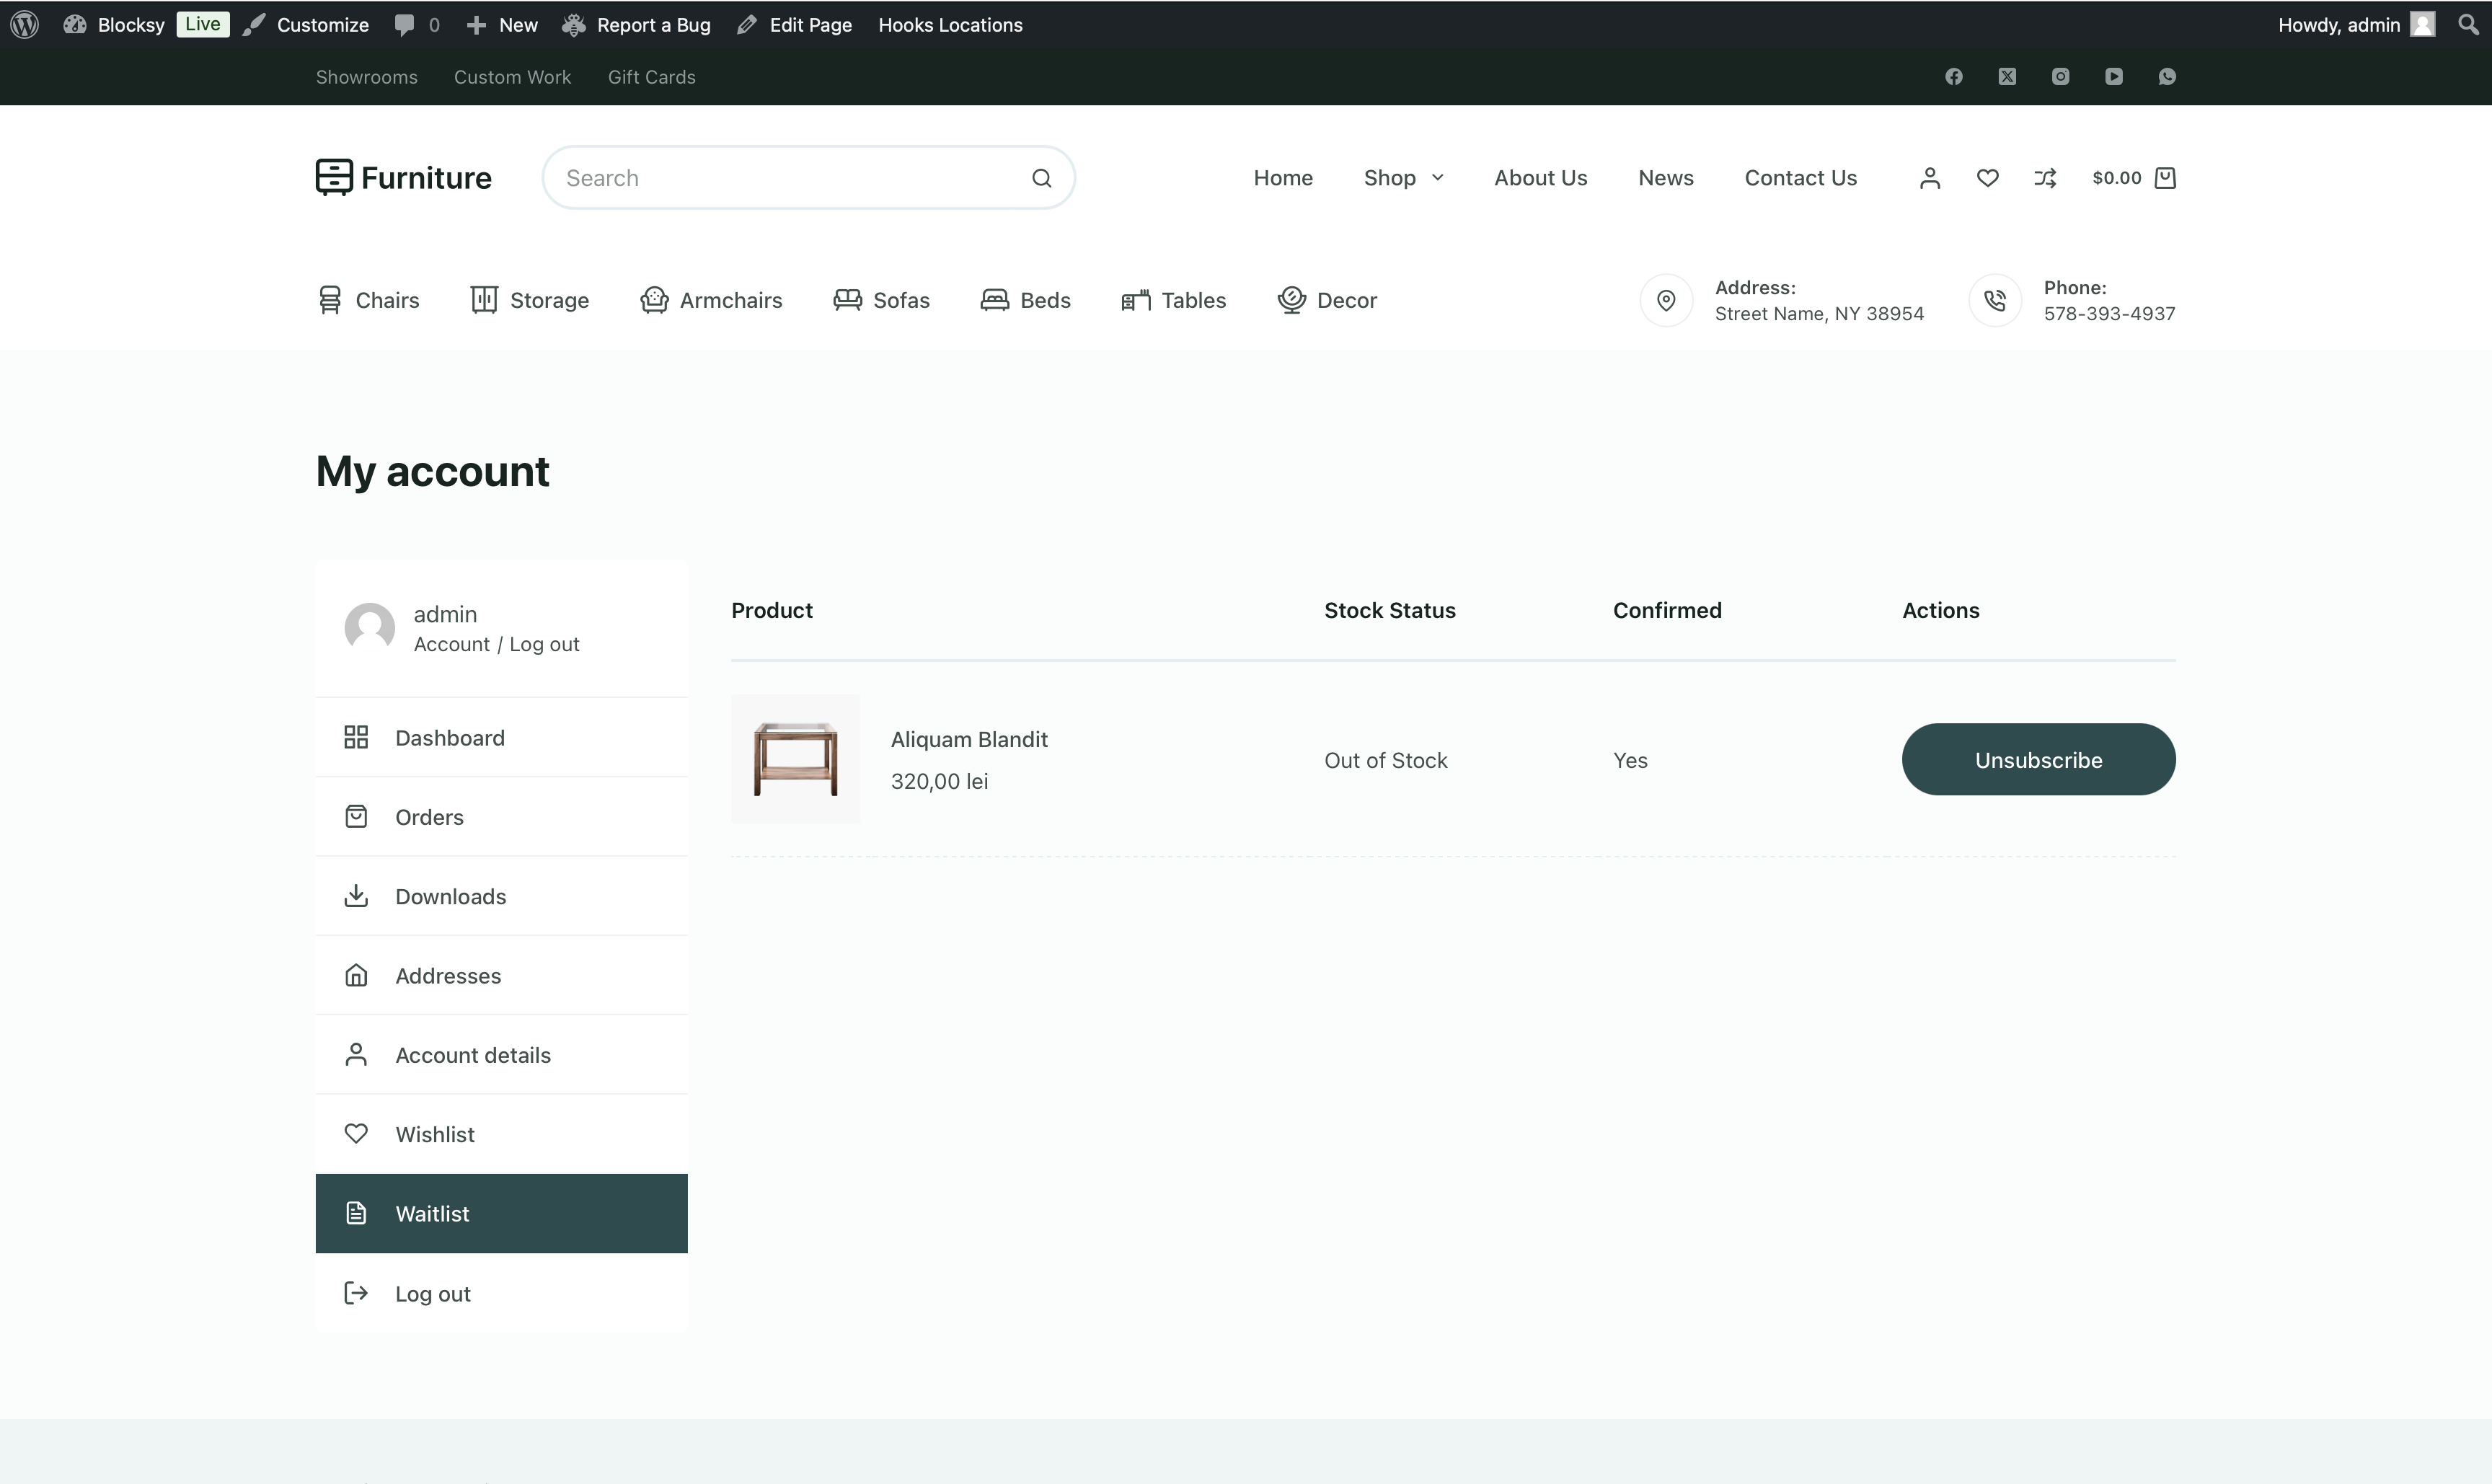
Customers can easily manage their subscriptions from the My Account page, where they can view and modify the products they are waiting for.
Administrators
On the administrative side, site managers can monitor and manage waitlist activity directly through the WordPress Dashboard by navigating to Products → Waitlists. This allows administrators to track interest, adjust settings, and ensure that stock notifications are sent promptly when products become available.
Customer E-mails
Since the Product Waitlist module sends out emails to your customers, you may want to customise them. The module integrates with WooCommerce’s built-in email templating system, making it simple to get started.
To locate and edit these email templates, go to WordPress Dashboard → WooCommerce → Settings → Emails tab, where you can modify the templates to fit your needs. Use the Copy File button to copy the template (ideally to your child theme) and make any modifications you need.
Shortcode Insertion
If you’d like to include the waitlist feature inside a custom single product loop, you can do so effortlessly using the following shortcode: [blocksy_waitlist]