

Blocksy has full support for the popular WooCommerce product in order to transform your website into an amazing online shop, elevating the experience for your shoppers and providing neat features that add that cherry on top.
To get started with creating your very first e-Commerce website, simply install the WooCommerce plugin from the WordPress repository. Once installed and set up, a brand new section will appear under Blocksy’s customiser.

Granular Controls
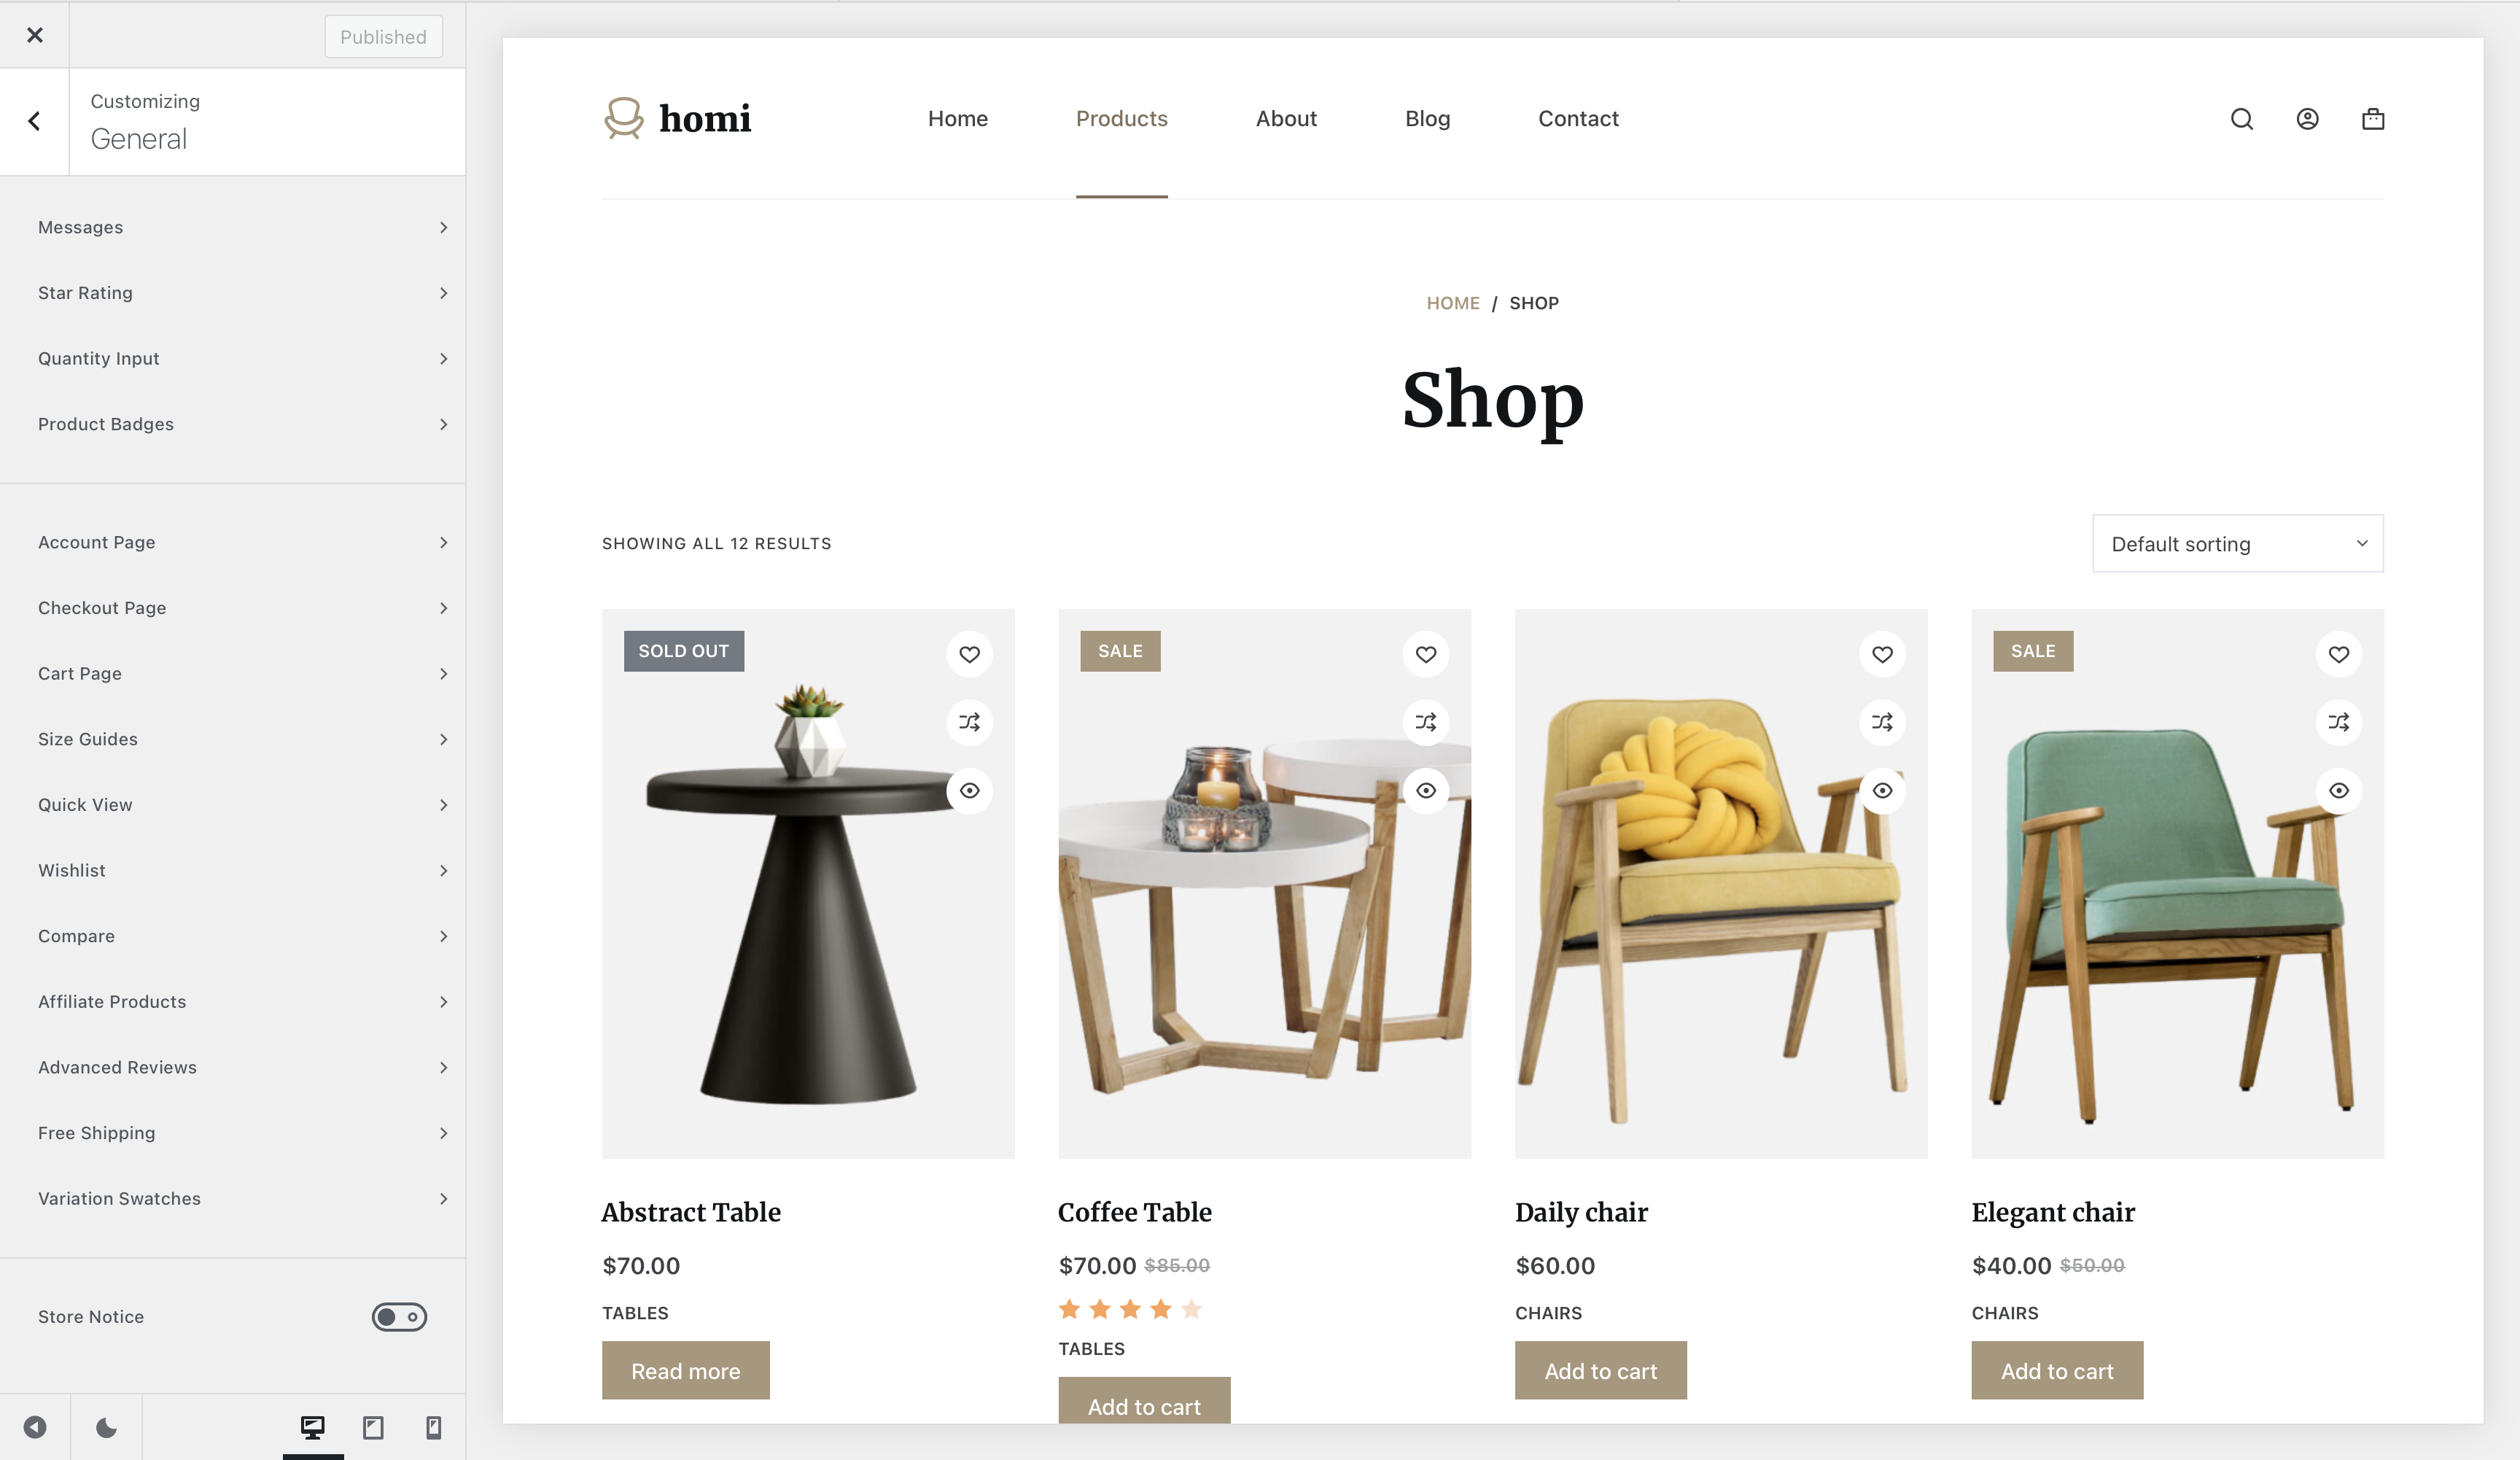
In WooCommerce’s general menu you will be able to find options for customising the various messages generated by the plugin, how the star ratings look like for products, the quantity input look and feel, as well as the overall options for product badges.
There are also options for customising the account, checkout and cart pages with a few features. And of course, separate options for all of our Shop Extra sub-extensions.
Messages
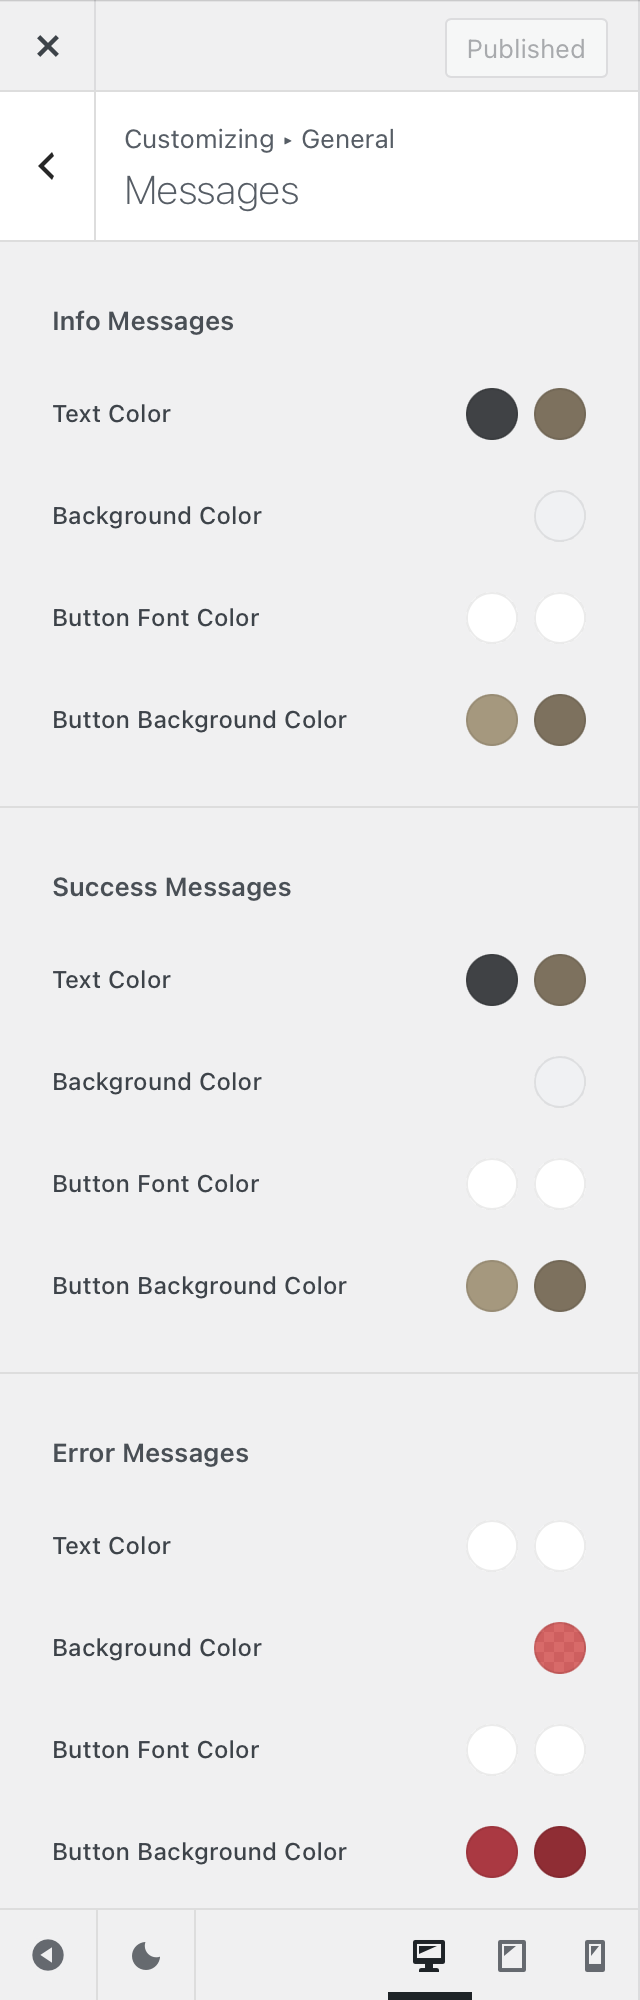
Info Messages
These selections let you customise the way the informational messages – i.e. when something notable is generated by WooCommerce – look like. There are customisation options for the information box itself, fonts and buttons.
Success Messages
These selections let you customise the way the success messages – i.e. an operation has been completed successfully in WooCommerce – look like. There are customisation options for the information box itself, fonts and buttons.
Error Messages
These selections let you customise the way the error messages – i.e. when something went bad in WooCommerce and requires your attention – look like. There are customisation options for the information box itself, fonts and buttons.
Star Rating
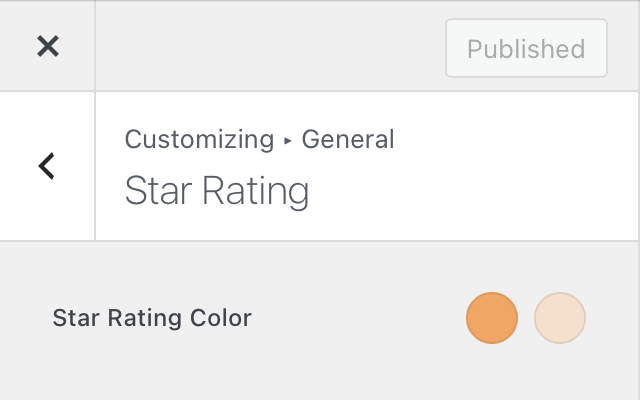
Here you can find the options for customising how the star rating system for products looks like.
Quantity Input
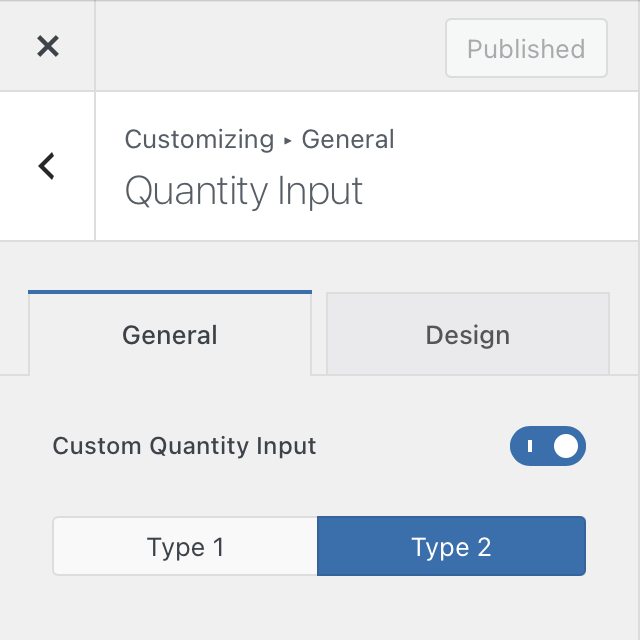
Custom Quantity Input
This toggle lets you display a nicely designed quantity input for your products. It replaces the default WooCommerce quantity input box with something generated by Blocksy, and you have two designs available.
Product Badges
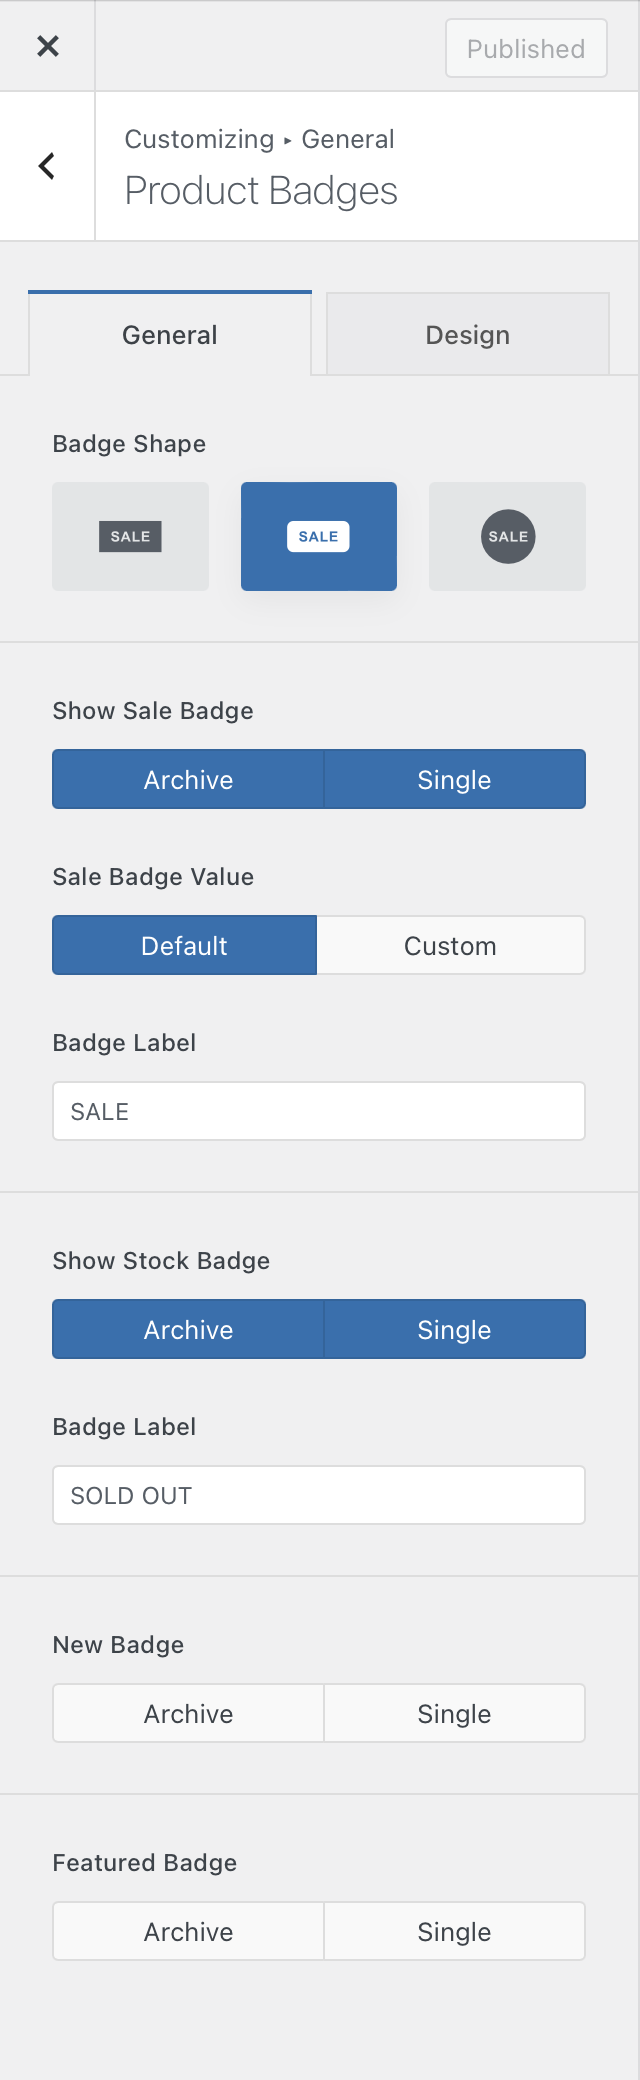
Badge Shape
Options that let you specify how the product badges appear on top of the product image thumbnail. A classic rectangle, a rounded rectangle and a circle option is available to choose from.
Show Sale Badge
Specify where you’d like the “sale” badge to be shown – the archive page or the singular page.
Sale Badge Value
Here you can specify a custom value that shows up in place of the default sale badge text. You can use a percentage value instead.
Badge Label
If the “Default” option is chosen, you can choose to display a customised label for the badge.
Show Stock Badge
Choose where to show the “out of stock” badge – the archive page or the singular page.
Badge Label
Choose the label that’s shown when the product is “out of stock”.
New Badge
Choose where to show the “new product” badge – the archive page or the singular page.
Featured Badge
Choose where to show the “featured product” badge – the archive page or the singular page.
Account Page
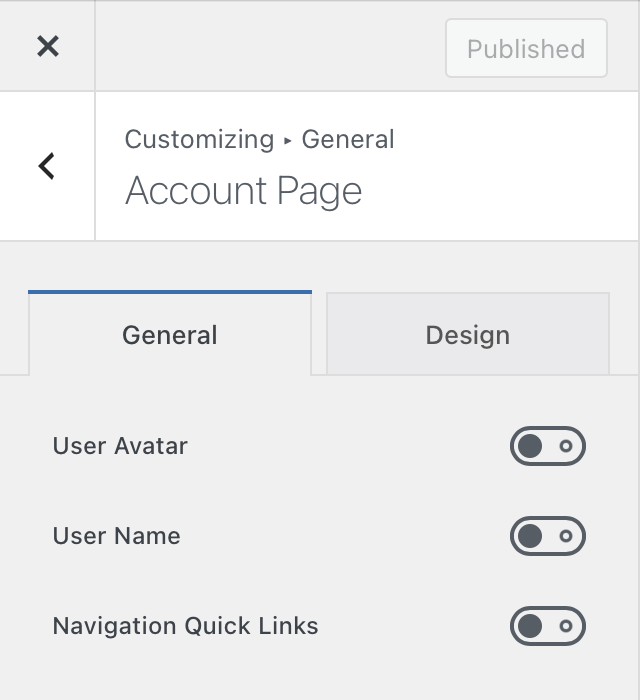
Here you can add a few elements to the “my account” page from WooCommerce. You can show the user’s avatar, the user’s name (not username) and a few quick links for navigation, such as logout.
Checkout Page
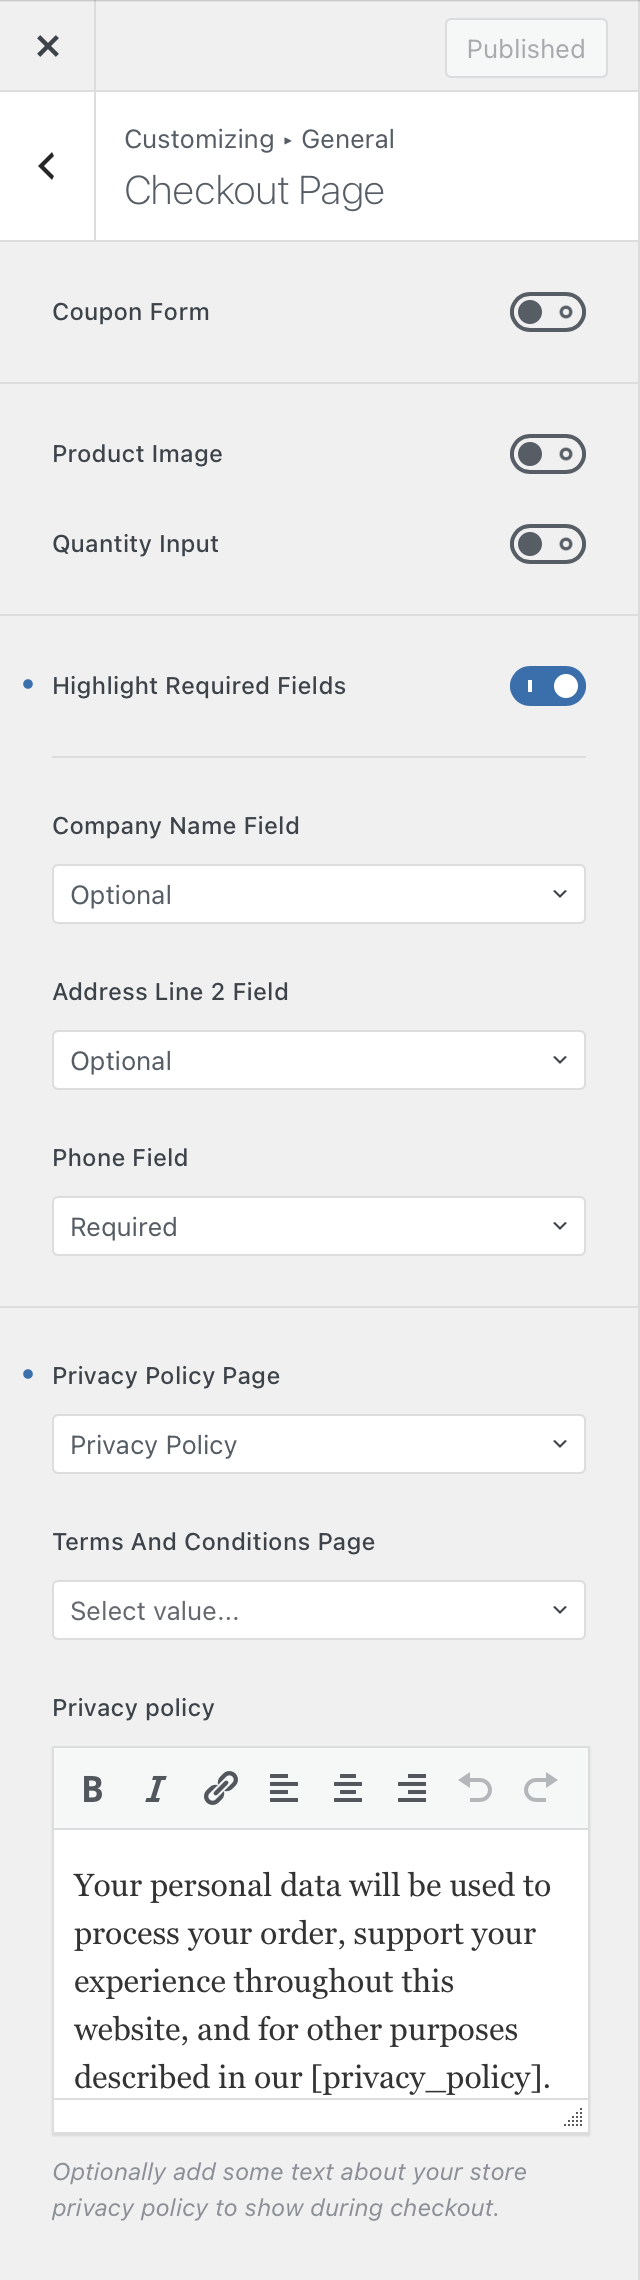
Coupon Form
Here you can choose to show the WooCommerce coupons form on the checkout page directly at the top.
Product Image
This option lets you show the little product thumbnail inside the “order summary” table on the checkout page.
Quantity Input
This option lets you show the quantity input field inside the “order summary” table on the checkout page.
Highlight Required Fields
This option automatically highlights the required fields on the checkout page with a little red asterisk.
Optional Fields
Here you can specify if some optional fields are required for visitors to successfully checkout.
Privacy and Terms & Conditions options
Here you can specify the pages that are designated as the “privacy policy” and “terms & conditions”. You can also show a simple privacy message besides the final checkout button, so your customers know what terms they’re agreeing upon.
Cart Page
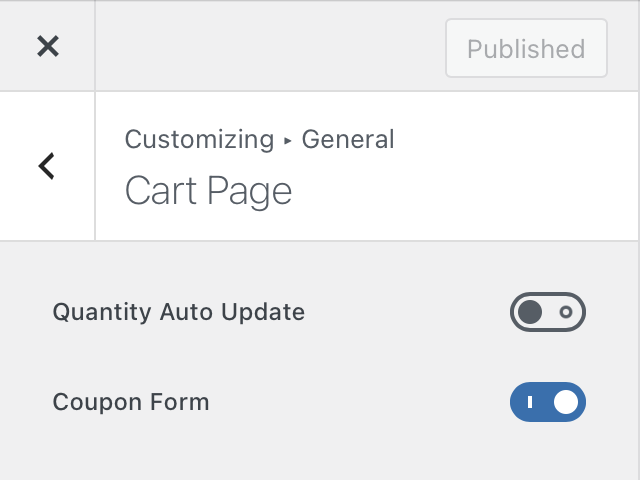
Here you can add a few niceties to the cart page, such as auto-updating the quantity as soon as it changes or showing the coupon form.