



The Advanced Menu extension expands WordPress menus with additional layout and presentation controls. It lets you create Mega Menus, add icons and badges, turn menu items into headings, insert Content Blocks, and customise individual menu items beyond the standard WordPress options.
These controls are added directly to the regular WordPress menu editor, allowing you to enhance an existing navigation structure without replacing WordPress’ native menu system.
Blocksy Pro required
The Advanced Menu extension is available with Blocksy Pro and requires Blocksy Companion Pro to be active.
Getting Started
To activate Advanced Menu:
- Navigate to WordPress Dashboard → Blocksy → Extensions.
- Locate the Advanced Menu extension.
- Enable the extension.
- Open WordPress Dashboard → Appearance → Menus and select the menu you want to customise.
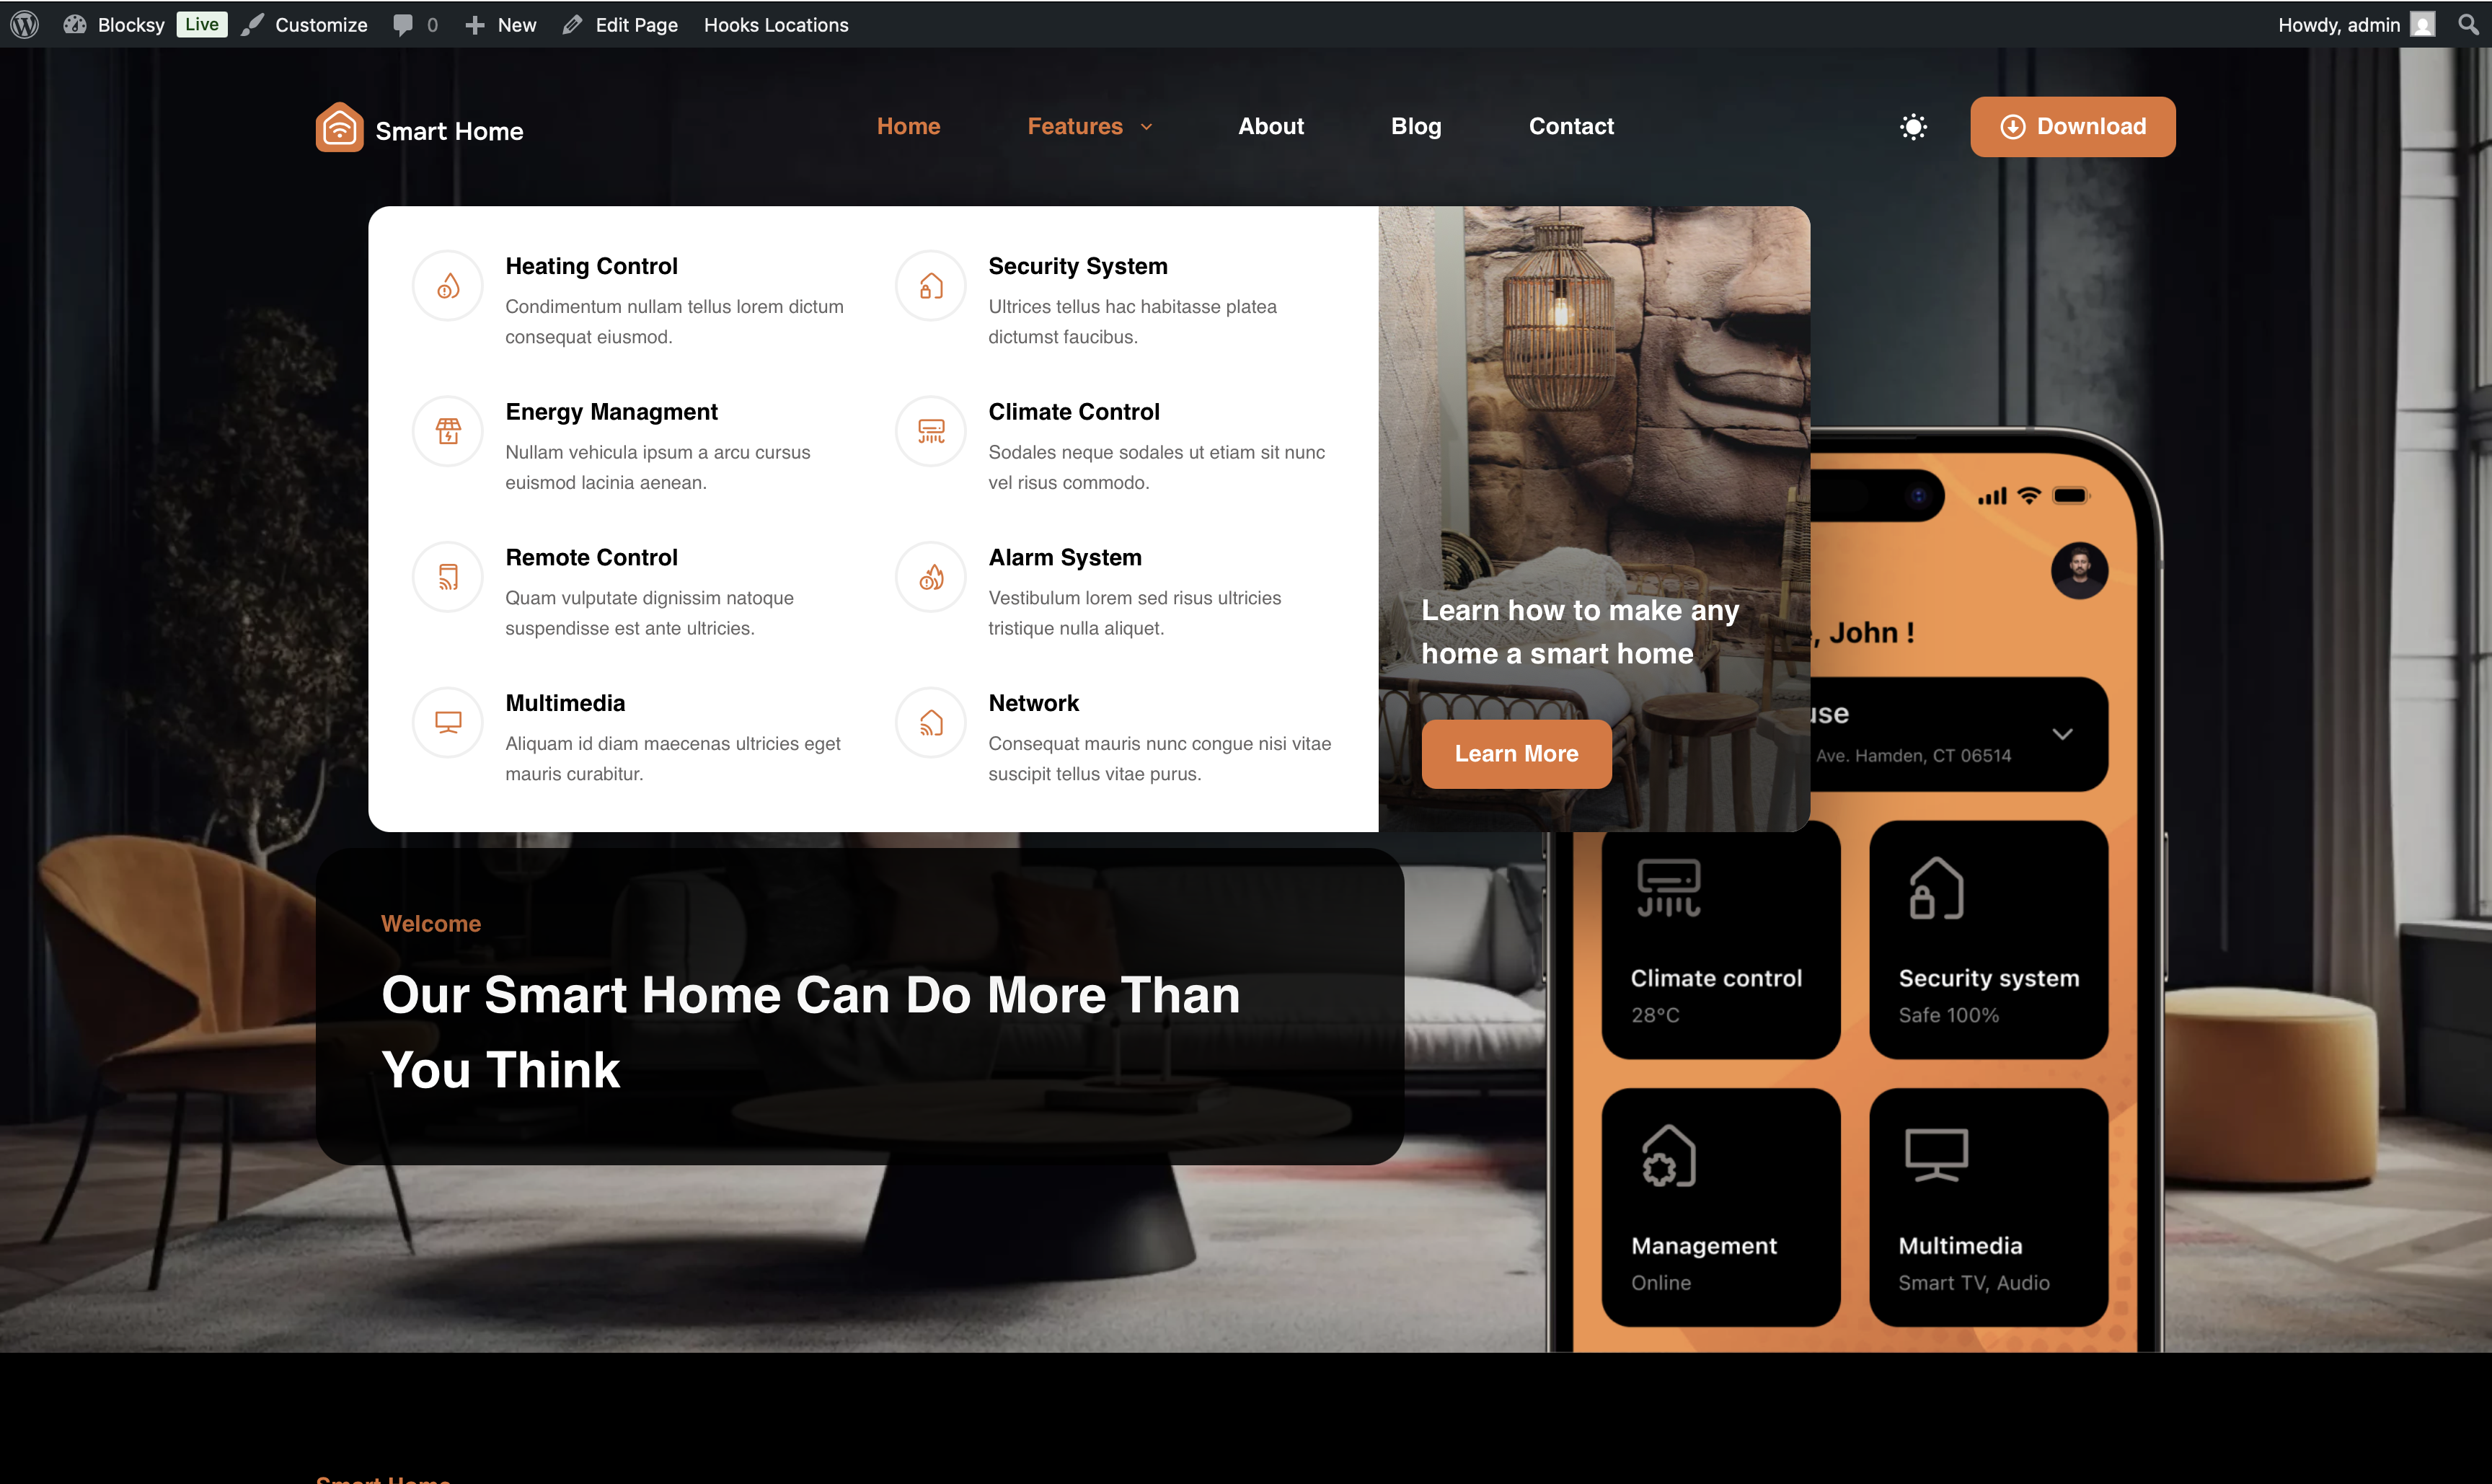
After activation, each menu entry gains a Menu Item Settings button. Select it to open the additional Blocksy controls available for that individual item.
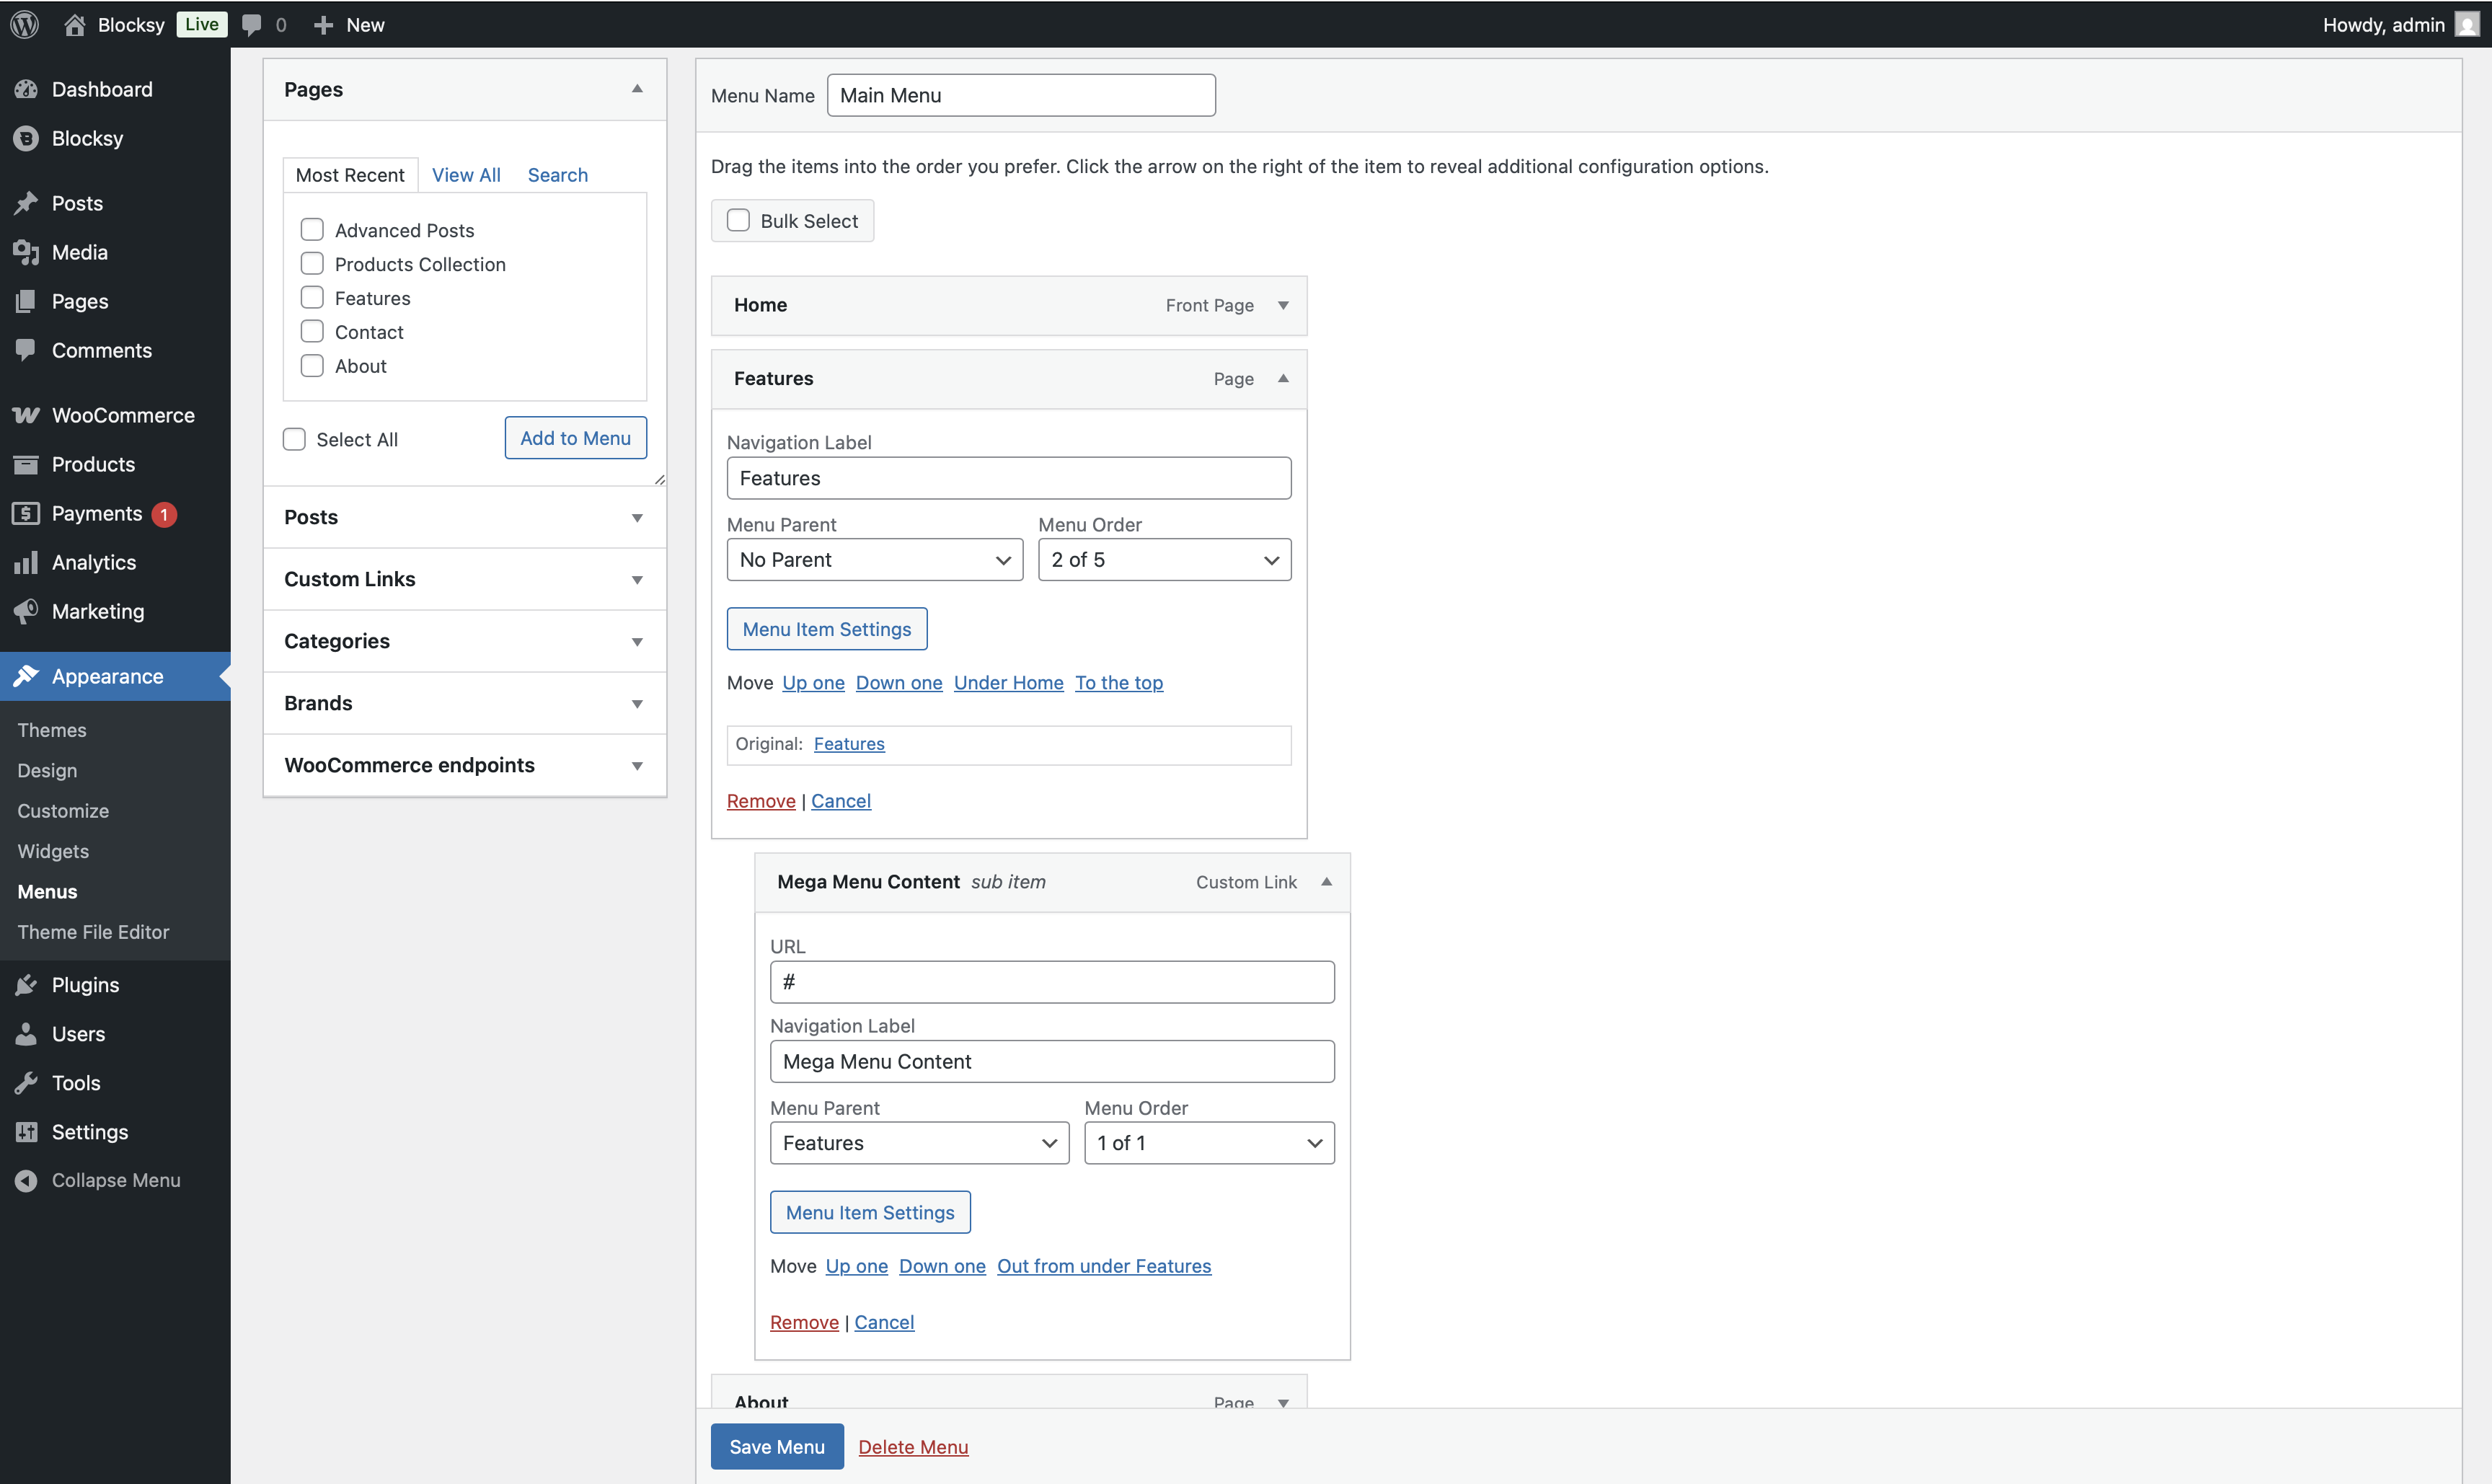
Top-Level Menu Options
Top-level entries can control the structure and behaviour of the dropdown that appears underneath them. These options are particularly important when building a Mega Menu.
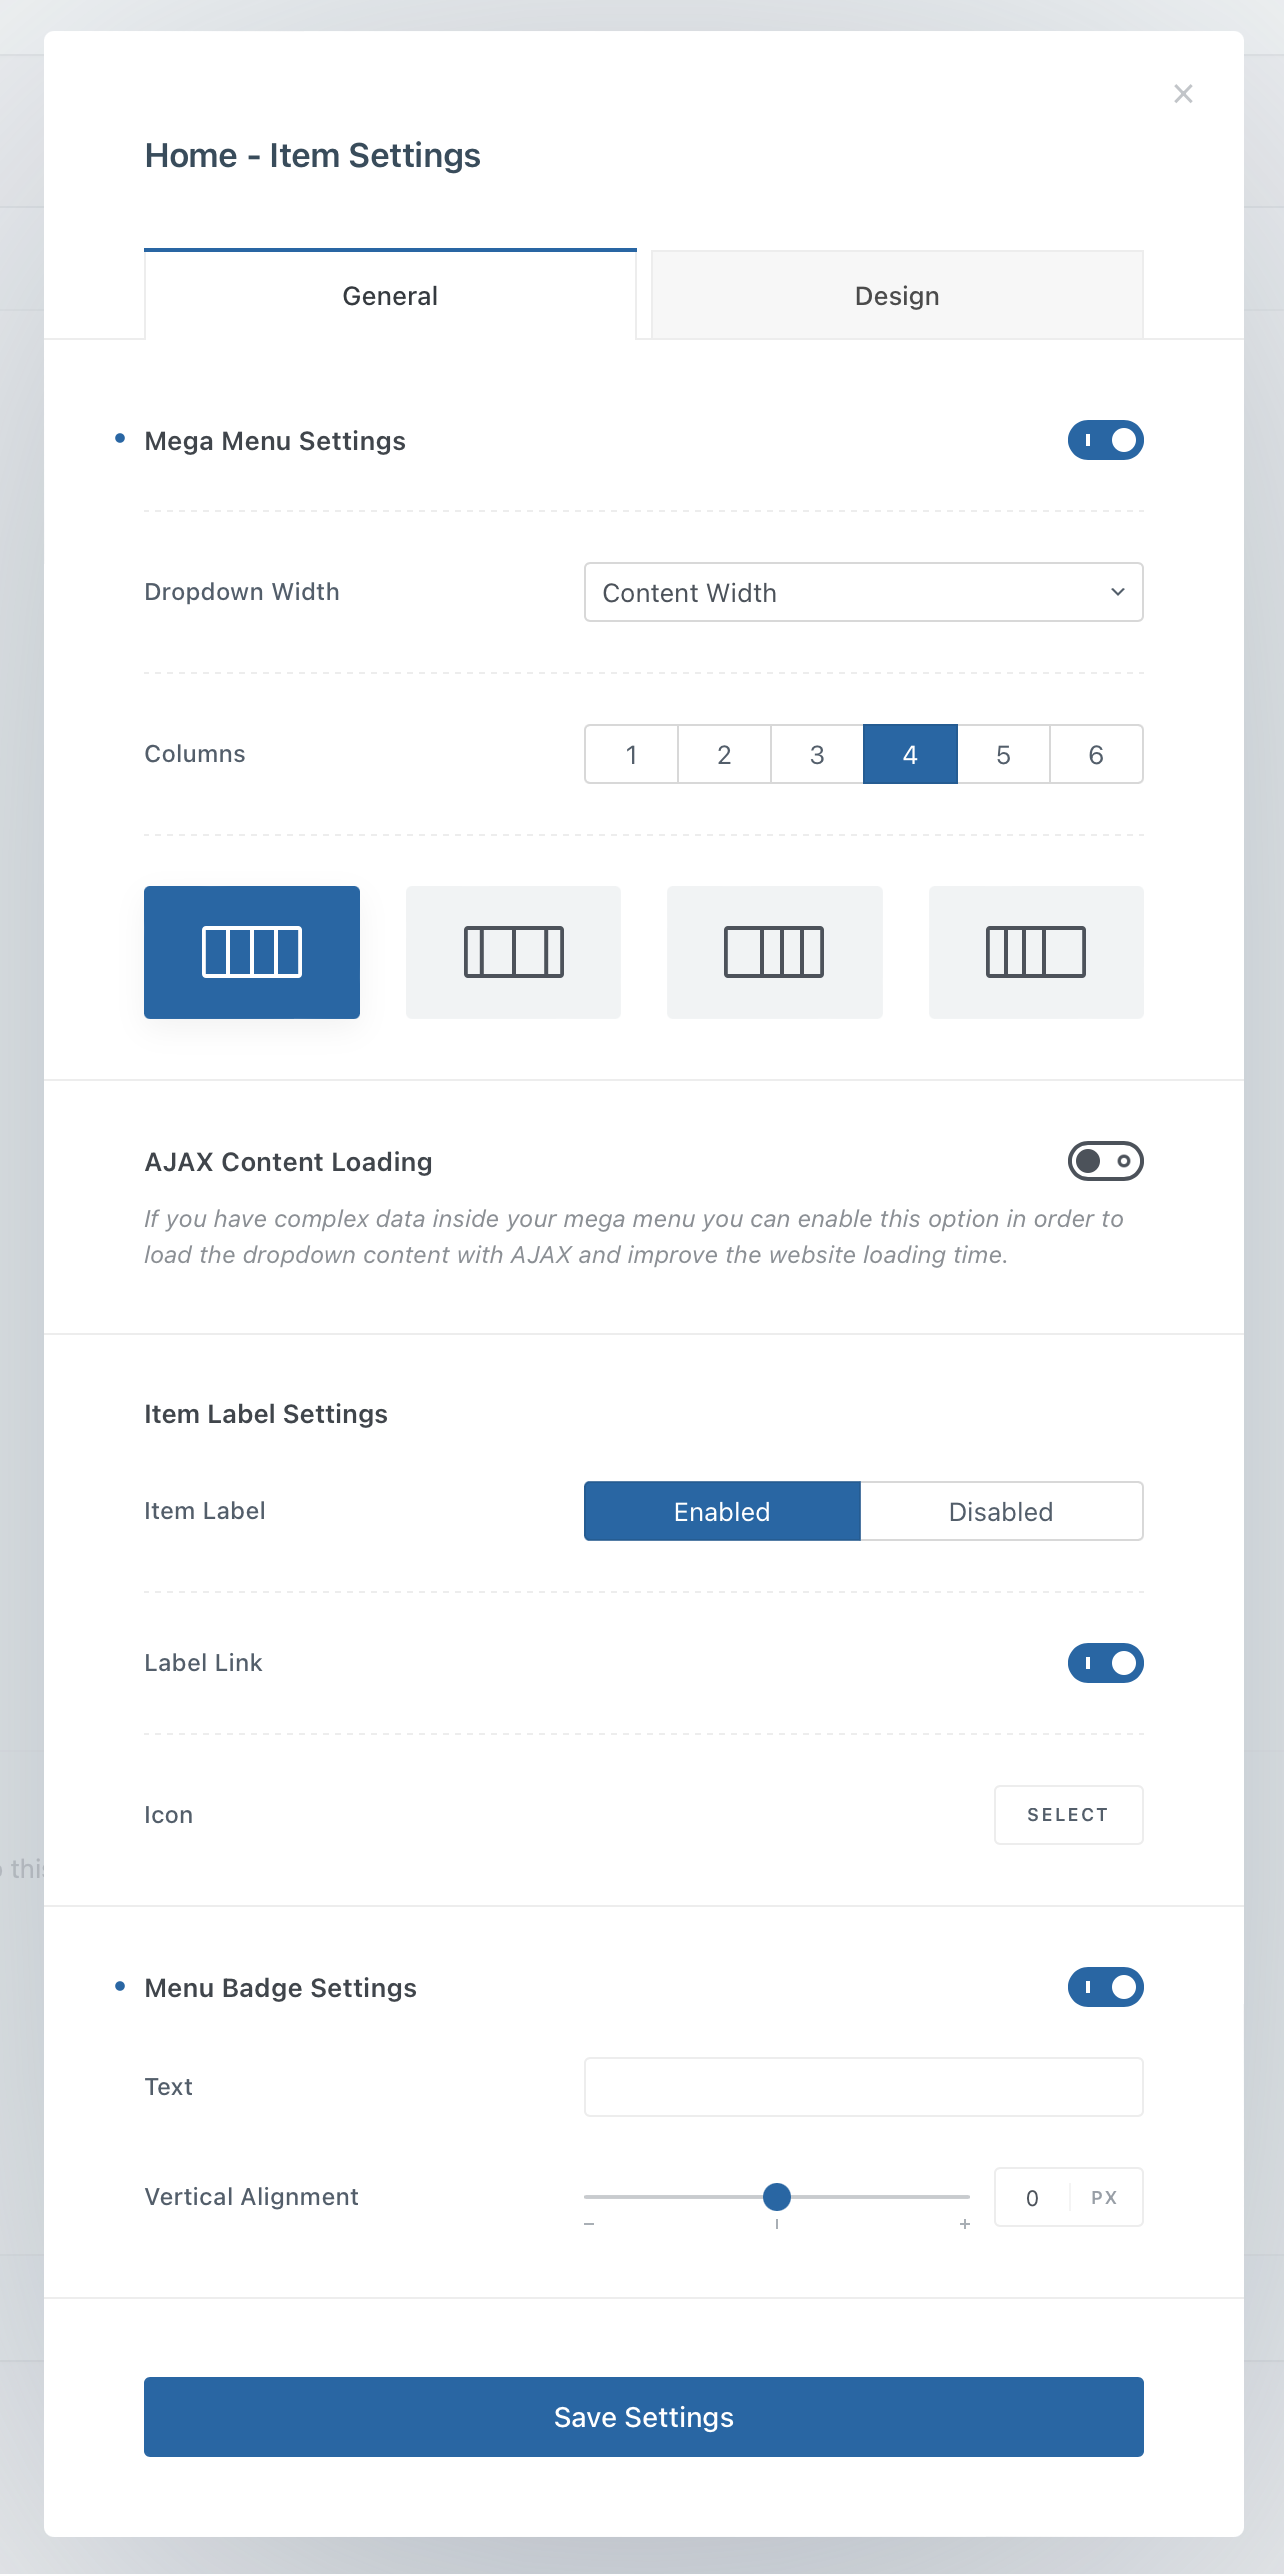
Mega Menu Settings
Enable Mega Menu Settings on a top-level item to turn its regular dropdown into a more flexible multi-column layout.
Columns
Choose how many columns are used to organise the child items inside the Mega Menu. Individual columns can then be populated and arranged according to the structure of your WordPress menu.
Drop Down Width
Control the horizontal size of the Mega Menu dropdown. This allows you to create anything from a compact dropdown to a much wider navigation panel when the content requires additional space.
AJAX Content Loading
Enable AJAX Content Loading to defer loading the Mega Menu’s more complex content until the visitor interacts with it. This is especially useful when the dropdown contains Content Blocks or other elements that would otherwise add unnecessary assets and markup to the initial page load.
When enabled, Blocksy retrieves the required menu content and its front-end assets when the Mega Menu is opened.
Item Label Settings
Control how the top-level menu entry itself behaves and appears. You can hide its text label when the item is represented by an icon or another visual element, and you can disable the item’s link when it should act only as a trigger or structural label.
Menu Badge Settings
Add a small badge alongside the menu item to highlight important navigation entries. Badges can be useful for indicating new content, promotions, featured sections or other items that need additional emphasis.
Child Menu Options
Child items gain additional controls for changing the type of content displayed inside the dropdown and for structuring individual Mega Menu columns.
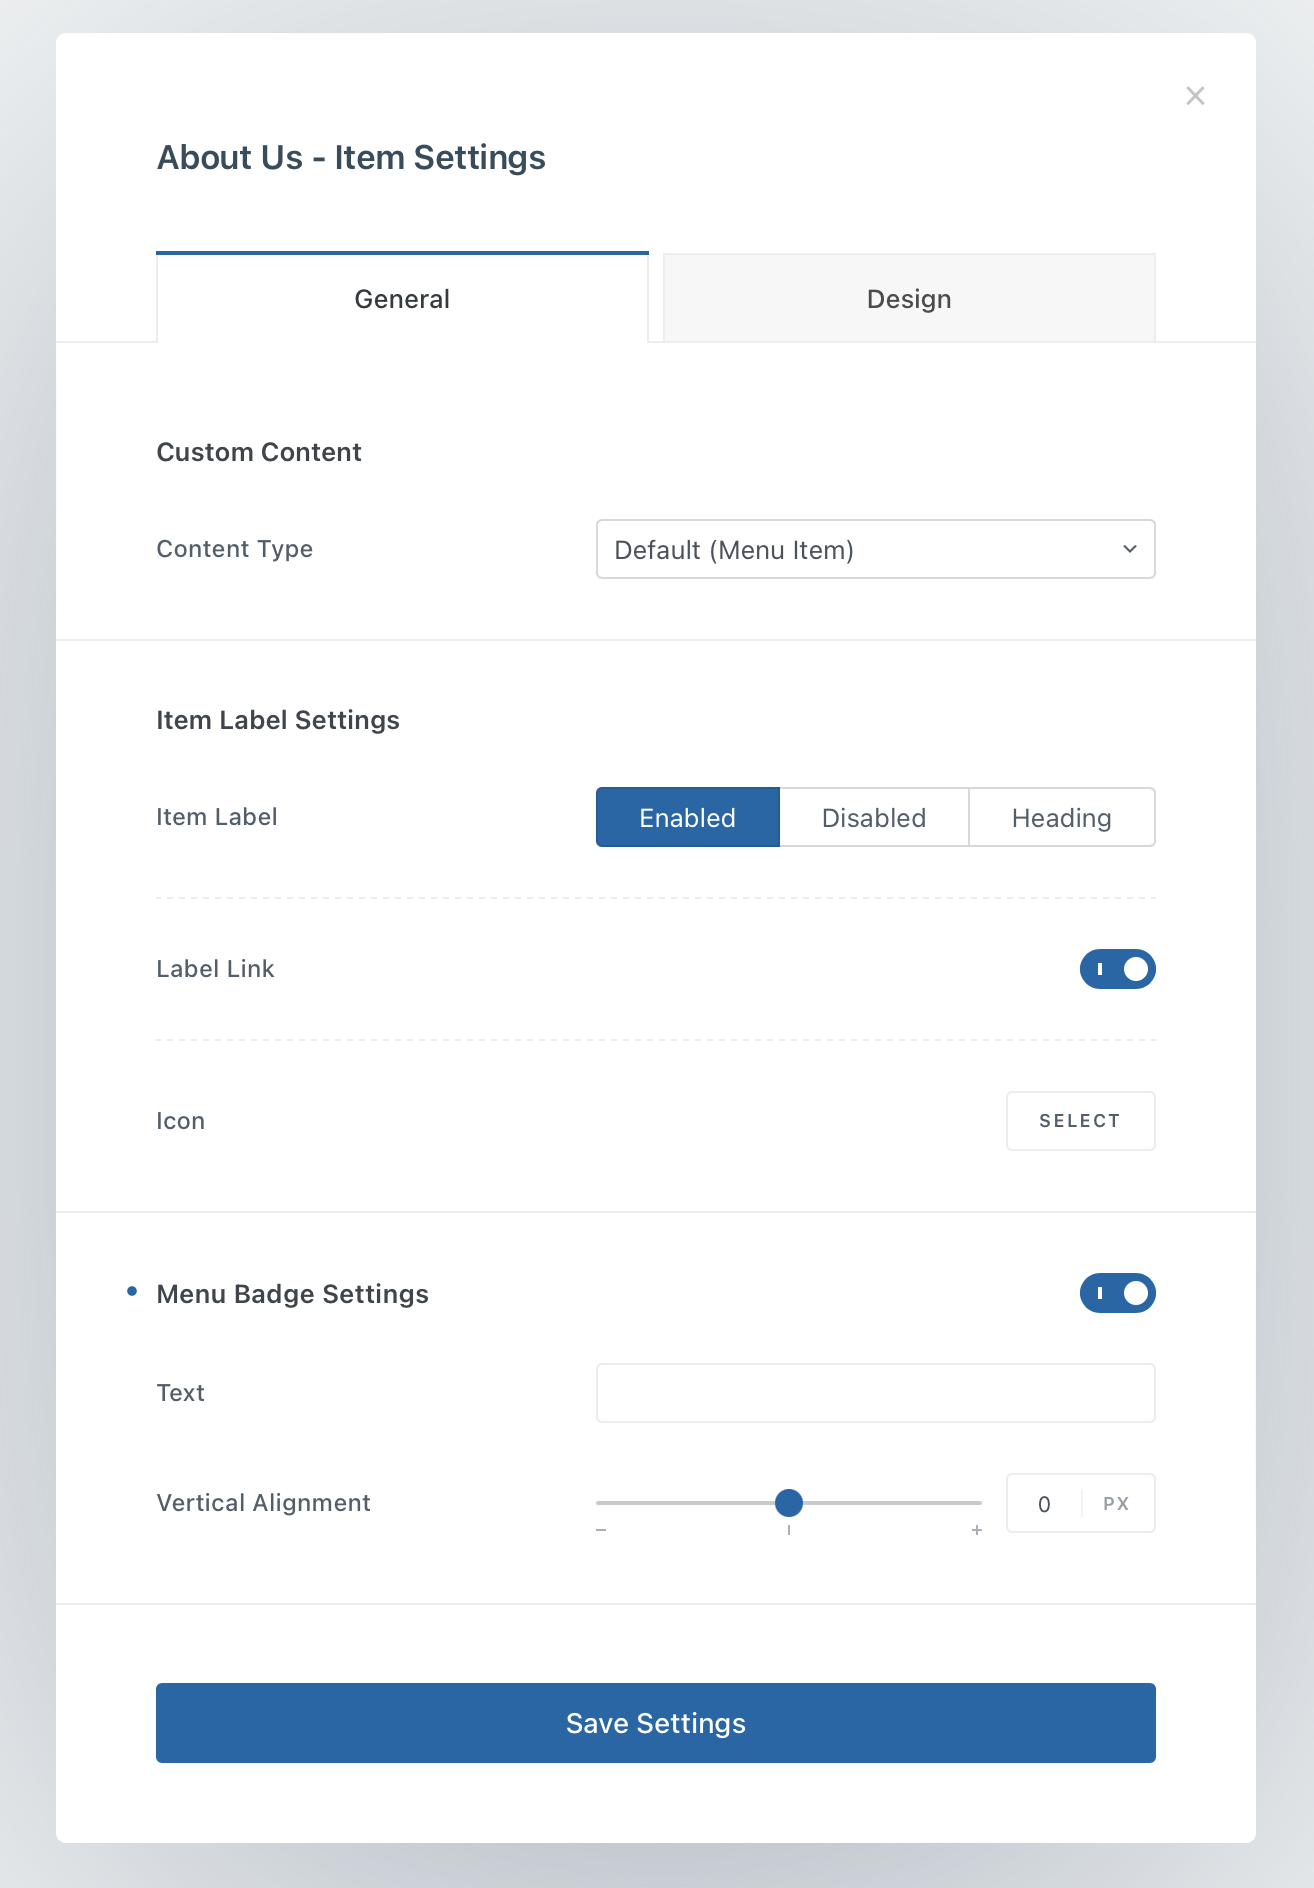
Content Type
Choose what the child menu item should display. It can remain a regular WordPress menu link, or it can be replaced with a Content Block.
Using a Content Block lets you build the contents of that part of the Mega Menu with the WordPress block editor. This makes it possible to include more complex layouts, images, buttons, dynamic content and other supported blocks instead of being limited to standard navigation links.
Content Blocks
Create the required Content Block under Blocksy → Content Blocks before assigning it to a menu item.
Item Label Settings
Control how the child item is represented inside the dropdown. Depending on the intended structure, you can show or hide its regular label, turn the item into a heading, add an icon, or disable its link entirely.
Headings are particularly useful for dividing a Mega Menu into clearly labelled groups without making every structural item clickable.
Menu Badge Settings
Add a badge to an individual child item when you want to draw attention to a particular destination, promotion or piece of content inside the Mega Menu.
Importing & Exporting Advanced Menus
Advanced Menu configurations can be transferred between WordPress installations using the native WordPress import and export tools. This is useful when reusing complex navigation structures across multiple websites.
Before importing an Advanced Menu, make sure that:
- The source website is publicly accessible so the required menu data can be retrieved during the import process.
- The Advanced Menu extension is active on the destination website.
- Any Content Blocks referenced by the menu are transferred separately, since they are independent content entries rather than part of the menu itself.
To transfer a menu, use WordPress Dashboard → Tools → Export on the source website and Tools → Import on the destination website, following the regular WordPress content transfer workflow.